Table of Contents
Advertisement
Quick Links
Advertisement
Table of Contents
Troubleshooting

Subscribe to Our Youtube Channel
Related Manuals for Thermo Scientific BF51634BC-1


Summary of Contents for Thermo Scientific BF51634BC-1
- Page 2 This document is not part of any sales contract between Thermo Fisher Scientific Inc. and a purchaser. This document shall in no way govern or modify any Terms and Conditions of Sale, which Terms and Conditions of Sale shall govern all conflicting information between the two documents. Thermo Scientific...
-
Page 3: Table Of Contents
Chapter 6 UP150 Control Overview UP550 Controller..........................6-1 Program Mode Operation......................... 6-2 Local Mode Operation ........................6-4 Chapter 7 Communication Cable Installation..........................7-1 Communication Setup Parameter....................7-1 Software Installation......................... 7-2 Communication test.......................... 7-3 Troubleshooting..........................7-4 Decimal Point Adjustment ........................ 7-4 Thermo Scientific... - Page 4 Chapter 10 Troubleshooting ......................10-1 Chapter 11 Replacement Parts ....................... 11-1 Chapter 12 Error Codes ........................12-1 Chapter 13 WEEE Compliance......................13-1 Chapter 14 Spare Parts and Accessories ..................14-1 Chapter 15 Device Log........................15-1 Chapter 16 Contact .......................... 16-1 Thermo Scientific...
- Page 5 Power Connections Figure 4 UP150 Control Panel Figure 5 Heating Element Repalcement Figure 6 Door Insulation Replacement Figure 7 Thermocouple Replacement Figure 8 Wiring Diagram (Sheet 1 of 2) 11-3 Figure 8 Wiring Diagram (Sheet 2 of 2) 11-4 Thermo Scientific...
- Page 6 List of Figures Thermo Scientific...
-
Page 7: Chapter 1 Safety Notes
• Keep these operating instructions close to the incubator so that safety instruc- tions and important information are always accessible. • Should you encounter problems that are not detailed adequately in these operating instructions, please contact Thermo Fisher Scientific immediately for your own safety. Thermo Scientific... -
Page 8: Safety Consideration
For proper and safe use of this equipment. the user must follow the safety precautions in this manual including those set forth below. Failure to do so could result in death or serious injury to the user or bystanders and damage to the equipment and any load inside or property nearby. Thermo Scientific... - Page 9 Processing those workloads could result In a fire or explosion which could cause personal injury or death, product, and property damage. If there is any question about the safety of the workload, consult your safety engineering staff or Thermo Fisher customer service department. Thermo Scientific...
- Page 10 • Launder work clothing separate from other clothes and thoroughly clean laundering equipment after use. If clothing contains a large amount of dust and/or fiber, dispose of rather than clean. • Promptly place used ceramic fiber parts and dust in plastic bags and dispose of properly. Thermo Scientific...
-
Page 11: Warranty
• The Laboratory Box is not modified, • Only original spare parts and accessories that have been approved by Thermo Scientific are used (third-party spares without Thermo Scientific approval void the limited warranty), • Inspections and maintenance are performed at the specified intervals, •... - Page 12 Pre-existing medical conditions may be aggravated by expo- sure: e.g. bronchitis, emphysema, and asthma. IV. HEALTH HAZARDS B. FIRST AID Ingestion: Do not induce vomiting. Get medical attention if irritation persists. Thermo Scientific...
- Page 13 IARC has also classified respirable crystalline silica, which may be found in after- service RCF exposed to temperatures above 1800 °F, as a known carcinogen to humans (Group 1). See Section IX for additional information concerning after service RCF. Thermo Scientific...
- Page 14 (Example: 3M 7800 with W9435 hose and W3195 regulator) f/cc = Fibers per cubic centimeter HEPA = High-efficiency particulate air filter. VII. PHYSICAL CHARACTERISTICS Appearance/Odor: White board or Specific Gravity: -(H O-l.): .2 -.6 shape/No odor Boiling Point: Thermo Scientific...
- Page 15 Federal, State and Local regulations. Toxic Substances Con- All substances in this product are listed, as required, on the trol Act (TSCA): TSCA inventory. These products contain RCF which may be subject to Section 12 (b) Export Notification Require- ments. Thermo Scientific...
- Page 16 EXPOSURE LIMITS Refractory Ceramic Fiber 142844-00-6 40-95 .5 Fiber/cc Guideline-RRC* 3-Nuisance 5 mg/M Respire – 3- Nuisance Total – OSHA 10 mg/M ACGIH* Amorphous Silica 7631-86-9 0-60 6 mg/M' (total) PEL Inert Fillers and Organic Bi n ders** 1-10 Thermo Scientific...
- Page 17 • May cause temporary irritation to eyes, skin, and respiratory tract PRECAUTIONARY MEASURES: • Minimize airborne fibers with engineering controls. • Use NIOSH/MSHA approved respiratory as required (see MSDS). • Wear long sleeved, loose-fitting clothing, eye protection, and gloves FIRST AID MEASURES: Thermo Scientific 1-11...
-
Page 18: Explanation Of Safety Information And Symbols
Indicates a hazardous situation which, if not avoided, could result in death or serious injuries. Indicates a situation which, if not avoided, could result in damage to equipment or property. Is used for useful hints and information regarding the application. 1-12 Thermo Scientific... -
Page 19: Additional Symbols For Safety Information
Wear safety goggles! Harmful liquids! Electrical shock! Hot surfaces! Fire hazard! Explosion hazard! Suffocation hazard! Biological hazard! Contamination hazard! Standards and Directives The Box Furnaces complies with the following standards and guidelines: • Current/Approved Agency standards (Underwriters Laboratory/CSA/CE). Thermo Scientific 1-13... - Page 20 Safety Notes Standards and Directives 1-14 Thermo Scientific...
-
Page 21: Chapter 2 Introduction
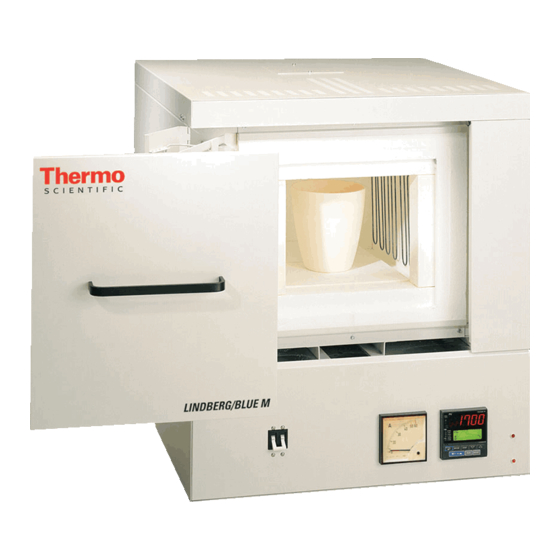
Refer to T able 1 for specific furnace specifications. Features and Benefits • Temperature range of 500 - 1700 °C. • Available in two chamber sizes, approximately 0.6 and 0.9 cubic foot capacities. • Double shell construction provides low external shell temperatures and energy-efficient operation. Thermo Scientific... -
Page 22: Specifications
UP550 10.5 (71x79x6 (94x114x 208/240 95 min. 125 min. (28x23X27 (147) (125) BF51634P(B) COMC BF51664(B)C 11 x 9 x 28x31x29 42x45x48 UT350 15.5 (71x79x7 (107x114 BF51664P(B) (28x23X39 x122) 7100 UP550 105 min. 240 min. (168) (145) BF51664P(B) COMC Thermo Scientific... -
Page 23: Temperature Control System
The resistance of these elements does not change with use, which allows replacement of individual elements at any time without matching the resistance values of the new elements to the old elements. Refer to Section “ Heating Element Replacement” for additional information. Thermo Scientific... -
Page 24: Furnace Construction
The controller provides: • Control precision within 2% of maximum voltage • Linearity better than within 2% of full scale • Automatic compensation for variations in supply voltage rover a range from ·10% to +10% of the nominal voltage. Thermo Scientific... -
Page 25: Chapter 3 Pre-Installation
(refer to Figure “Laboratory Box Furnaces” and Figure “Thermocouple Replacement”). Tighten if necessary. The red thermocouple extension lead is always negative. Failure to check thermocouple wiring connections before initial start up could result In damage to the furnace. Thermo Scientific... - Page 26 Apply even pressure on each terminal to push the element through the holes in the insulation. 6. Inspect the three cooling fans (refer to Figure “Furnace Rear Access”). Make sure the fans are undamaged and turn freely. Thermo Scientific...
-
Page 27: Chapter 4 Installation
Power wires, ground wires, and main disconnect or circuit breakers are not provided with the 1700 °C Box Furnaces. Two holes located at the bottom rear of the furnace (refer to Figure “Power Connections”), provide access for the power connection wires. Thermo Scientific... -
Page 28: Figure 2 Furnace Rear Access
3. Thread the Ground, L1 and L2 wires through the power wire access ports in the panel before making any connections. - 4. Use a screwdriver to connect the two lead wires from the power source to Terminal Block 1TB: Thermo Scientific... -
Page 29: Figure 3 Power Connections
Make sure that the furnace is 100% grounded. Do not ground the furnace to a painted surface. The ground Connection must be to a clean, bare metal surface to assure proper furnace operation. 6. Install the rear access panel with the screws removed in Step 1. Thermo Scientific... -
Page 30: Final Inspection
This plug is designed to reduce heat loss. 3. Inspect all three rear cooling fans for damage. Make sure they rotate and rum freely (refer to Figure “Furnace Rear Access”). 4. Visually inspect all electrical connections and make sure all access panels are replaced. Thermo Scientific... -
Page 31: Initial Start Up Procedure
This furnace should not be left unattended during the Initial break-in period as the temperature could ramp out of control. Failure to check thermocouple wiring connectors before start up could result in damage to the furnace.Observe the following precautions when operating the furnace. Thermo Scientific... - Page 32 Do not shut off power until the fans cool the furnace back to ambient (room) temperature. Damage to the fans or furnace could result If power is shut off while the furnace is very hot. Thermo Scientific...
-
Page 33: Furnace Operation
The 1700 °C Box Furnace is tested for 1700 °C continuous-duty operation. However, we recommend that continuous-duty operation is less than 1700 °C to prolong the life of the fun ace components, heating elements, thermocouple, and insulation. 1. Adjust the alarm and furnace temperature setpoints. Thermo Scientific... -
Page 34: Furnace Shutdown
2. Turn the control circuit breaker off. 3. When the furnace is cool, shut of power at the main power disconnect switch. The furnace can be shut off at the circuit breaker but do not disconnect power until the furnace shell is cool. Thermo Scientific... -
Page 35: Up550 Controller
LOCAL mode. First, you will need to be informed about the various modes of operation that are available. The green LED next to the lower display shows the mode the control is in at any given time. Thermo Scientific... -
Page 36: Program Mode Operation
Also an infrared interface device that snaps onto the front panel of the control, known as a "light loader", is avail- able which uploads and downloads information to the UP550. The light loader will function whether or not the controller has the digital communications option. Thermo Scientific... - Page 37 13. Continue entering segment information until the pattern is complete. When the segment time is left as a dash (-), it informs the control that the pattern is complete. Use the DISP (Display) key to back out to the main menu. Thermo Scientific...
-
Page 38: Local Mode Operation
Press the SET/ENT key once then enter the alarm value using the up/down arrow keys. Press the SET/ENT key to register the alarm value. The shut off the control's output, place the unit in RESET mode by holding down the RESET key for 2 seconds. Thermo Scientific... -
Page 39: Cable Installation
Assure lower value at "ø". Press the down arrow to show "-1" in the lower display and press SET/ENT to acknowledge and enter the Setup Parameters menu. 2. Press and release the SET/ENT button to access the six parameters specific to the communications option. Thermo Scientific... -
Page 40: Communication Setup Parameter
7. Select the pulldown menu from the Baud Rate column. Highlight "9600" Click on the "Start Scan" button. 8. The SpecView program scans all 99 possible controller addresses and places a representative "Instrument view" of the temperature controller on the PC Thermo Scientific... -
Page 41: Communication Test
"PAR" button. A window opens that lists the controller parameters. Each parameter can be changed by selecting it and clicking on the "Alter" button. Select the "Close" button. Make no changes at this time. This concludes the initial software diagnostics. Thermo Scientific... -
Page 42: Troubleshooting
UT350 manual provided with your furnace. The temperature controller is configured and tuned at the factory to function well for most applications. Occasionally, it may be advisable to configure the temperature controller differently to suit a particular working environment or process. Thermo Scientific... -
Page 43: Normal Controller Operation
Use the Down Arrow button to decrease the temperature setpoint dis- play and to change parameter values in the Operation and Setup Parameter menus. Whenever you change the value of a setpoint or parameter, the decimal point flashes to remind you to register the changed value with SET/ENT. Thermo Scientific... -
Page 44: Setting Thetemperature
5 to 35. After making this adjustment (and all following parameter adjustments) be sure to press and release SET/ENT again to register the change. 5. Press and release SET/ENT to advance to the SPH parameter and change its value. Thermo Scientific... -
Page 45: Setting The Ramp To Setpoint Rate
5. Press the arrow buttons to select the new Up Ramp Rate value, in °C per minute or °F per minute, or “oFF”. Press and release SET/ENT to register the value change. 6. Press and release SET/ENT until the dnr parameter is on the upper display. Thermo Scientific... -
Page 46: Auto Tuning The Controller
14. Press and release SET/ENT to show the At parameter. 15. Press and release the arrow buttons to show on in the lower display. 16. Press SET/ENT once to enter the auto tune mode and exit the Operating Parameters menu. Thermo Scientific... - Page 47 If the process temperature or load changes significantly, another auto tune session may be necessary to optimize the chamber performance. Thermo Scientific...
- Page 48 Communication Option Auto Tuning the Controller 7-10 Thermo Scientific...
-
Page 49: Chapter 8 Excess Temperature Option ("B" Model)
This time indicates when the chamber temperature exceeded the Excess Temperature setpoint. 2. Peak Exceeded Temperature The Peak Exceeded Temperature is the highest temperature measured by the Excess Temperature Controller. Thermo Scientific... -
Page 50: Operating Parameters
SET/ENT button is pressed and released, with the “tIn” or “HI” in the top display. These values will be erased from the display and memory when the “up arrow/reset” button is pressed during their respective display (add the “EXCEEDED” indicator is off). Thermo Scientific... - Page 51 A source failure (indicated with “0.0” in the upper display) will cause “OUT” illuminated. A power failure, in some instances causes “OUT” to be illuminated. As lost as the “EXCEEDED” indicator is extinguished, the UT150L can be reset with press and hold of “UP ARROW/RESET” button. Thermo Scientific...
- Page 52 Excess Temperature Option (“B” Models) Excess Temperature Controller Operation Thermo Scientific...
- Page 53 If clothing contains a large amount of dust and/or ceramic fiber, dispose of rather than clean. • Promptly place used ceramic fiber parts and dust in plastic bags and dispose of properly. Thermo Scientific...
-
Page 54: Chapter 9 Maintenance Circuit Breakers
• One control circuit breaker is located in front of the furnace (bottom left side). Press the switch off, then on to reset the circuit breaker. Heating Element Replacement Disconnect furnace from main power before attempting any maintenance to furnace or its controls. Thermo Scientific... -
Page 55: Removing The Heating Element
The screws do not need to be removed. 5. Remove the side access panel. Figure 5. Heating Element Replacement 6. Carefully remove the stainless winged M clamps holding the braided aluminum interconnecting straps to the aluminized terminal extensions (lead sections) of Thermo Scientific... -
Page 56: Installing The Heating Elements
3. Carefully remove the wood support block from the element terminal ends. Do not touch the section of the heating element which is smallest in diameter. Touching this section could contaminate the element and result in impaired furnace performance. Thermo Scientific... - Page 57 8. Replace the side access panel. 9. Tighten the three side access panel screws located on the back of the furnace. 10. Replace the side access panel screws located on the side access panel. Thermo Scientific...
-
Page 58: Door Insulation Replacement
2. Loosen the top and bottom screws and the bracket holding the top of the insulation. 3. Carefully remove the old door plug. 4. Install the new door insulation plug. 5. Replace the top bracket and screws. The door insulation plug should mate properly with the furnace vestibule opening. Thermo Scientific... -
Page 59: Thermocouple Replacement
The maul disconnect power does not need to be turned off to replace the thermocouple To replace the thermocouple, complete the following steps (refer to Figure “Thermocouple Replacement”): 1. Remove the two top access panel screws and remove the top access panel. Thermo Scientific... -
Page 60: Figure 7 Thermocouple Replacement
4. Replace the thermocouple and connect the new wires. Red is always negative. (If the extension leads are black and white, white is negative), 5. Replace the furnace top access panel and replace the screws. Figure 7. Thermocouple Replacement Thermo Scientific... -
Page 61: Chapter 10 Troubleshooting
Heating element curls towards wall 2. After the furnace cools, relocate the element farther from wall. Controller actual furnace temperature display Check thermocouple polarity. Red is always decreases when furnace is heating negative (Refer to Section Troubleshoot- ing). Thermo Scientific 10-1... - Page 62 Check the reductions of diameter in the wire immediately behind the welded junction. If there is reduction, replace thermocouple. e. Check for reduction of diameter in the wires immediately behind the welded junction. if there is reduction, replace thermocouple. 10-2 Thermo Scientific...
- Page 63 3. If wire connections are secure and the fan(s) is receiving power. replace the fan(s). 1. Check that the light is working. Replace if necessary. Amber light is off. The fans are working. 2. Check the light wire connections. Thermo Scientific 10-3...
- Page 64 Troubleshooting 10-4 Thermo Scientific...
-
Page 67: Chapter 11 Replacement Parts
CONNECTIONS TO EACH FAN APPROX. 45AMPS FUSE BLOCKS. SIX WIRES TOTAL, FOR 5400W LOAD (1) PAIR PER FAN. (TYP) POWER & CONTROL WIRING DIAGRAM FOR MODEL 51634 W/UT350/UP550 CONTROLLER WIRE DIAGRAM PART#38339I02 Figure 8. Wiring Diagram (Sheet 1 of 2) Thermo Scientific 11-3... -
Page 68: Figure 8 Wiring Diagram (Sheet 2 Of 2)
CONNECTIONS TO EACH FAN FUSE BLOCKS SIX WIRES TOTAL, (1) PAIR PER FAN. (TYP) APPROX. 47AMPS FOR 7068W LOAD POWER & CONTROL WIRING FOR MODEL 51664 W/UP550/UT350 CONTROLLER WIRE DIAGRAM PART#38239I03 Figure 8. Wiring Diagram (Sheet 2 of 2) 11-4 Thermo Scientific... -
Page 69: Chapter 12 Error Codes
Error Codes This chapter is not applicable. Thermo Scientific 12-1... - Page 70 Error Codes 12-2 Thermo Scientific...
-
Page 71: Chapter 13 Weee Compliance
Ce pmduit doit &re conforme 1 la directive europtenne (2002/96EC) des Dkchets d'Equipements Electriques et Electroniques (DEEE). I1 est merqui par le symbole suivant. Thermo Scientific s'est associi avec une ou plusieurs compagnies de recyclage dans chaque ttat membre de l'union europtenne et ce produit devrait &re collect6 ou recyclt par celles-ci. - Page 72 WEEE Compliance 13-2 Thermo Scientific...
-
Page 73: Chapter 14 Spare Parts And Accessories
14 14 Spare Parts and Accessories This chapter is not applicable. Thermo Scientific 14-1... - Page 74 Spare Parts and Accessories 14-2 Thermo Scientific...
-
Page 75: Chapter 15 Device Log
Device Log 1700 °C Box Furnaces Part number: Serial number: Service number: Location Operator’s note: Work carried out Notes Date Signed: Thermo Scientific 15-1... - Page 76 Device Log 15-2 Thermo Scientific...
-
Page 77: Chapter 16 Contact
Enquiries from Europe, Middle East and Africa: Phone. + 49 (0) 6184 / 90-6940 + 49 (0) 6184 / 90-6772 E-Mail info.labequipment.de@thermofisher.com Postal address USA: Thermo Scientific 275 Aiken Road Asheville, NC 28804 Enquiries from North America: Phone +1 866-984-3766 +1 888-618-2676 E-Mail info.labequipment@thermofisher.com... - Page 78 Contact Enquiries from Asia Pacific: Phone +852-2711 3910 +852-2711 3858 E-Mail info.labequipment@thermofisher.com 16-2 Thermo Scientific...
Need help?
Do you have a question about the BF51634BC-1 and is the answer not in the manual?
Questions and answers