
Related Manuals for Thermo Scientific 47900


Summary of Contents for Thermo Scientific 47900
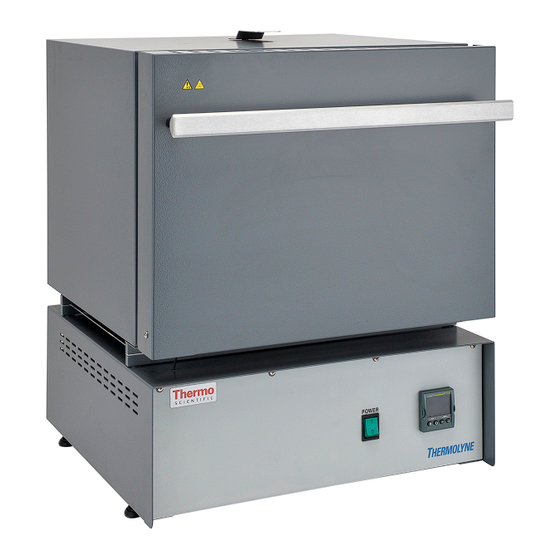
- Page 1 Thermo Scientific Thermolyne Furnace Benchtop Muffle/ Type 47900 and 48000 Installation and Operation Manual LT1284X1 Revision. K August, 2022...
- Page 2 © 2022 Thermo Fisher Scientific Inc. All rights reserved. Thermo Fisher Scientific Inc. provides this document to its customers with a product purchase to use in the product operation. This document is copyright protected and any reproduction of the whole or any part of this document is strictly prohibited, except with the written authorization of Thermo Fisher Scientific Inc.
-
Page 3: Table Of Contents
47900 and 48400 Models ........ - Page 4 To Replace the Controller ........67 Benchtop Muffle Thermo Scientific...
- Page 5 WEEE Compliance ..........90 Thermo Scientific...
- Page 6 Contents Benchtop Muffle Thermo Scientific...
-
Page 7: Safety Information
Safety Information Contents • “Alert Signals” on page 6 • “Important Information” on page 6 • “Warnings” on page 6 • “Warning” on page 7 Thermo Scientific Benchtop Muffle... -
Page 8: Alert Signals
Important Information Your Thermo Scientific Thermolyne Type 47900 Model 48000 Model Furnace has been designed with function, reliability and safety in mind. It is your responsibility to install it in conformance with local electrical codes. -
Page 9: Warning
Refer to the appropriate Material Safety Data Sheets (MSDS) for information regarding proper handling and recommended protective equipment. For additional MSDS copies, or additional information concerning the handling of refractory ceramic products, please contact the Customer Service Department at 1-800-438-4851. Thermo Scientific Benchtop Muffle... - Page 10 Safety Information Warning Benchtop Muffle Thermo Scientific...
-
Page 11: Introduction
Introduction Contents • “Intended Use” on page 10 • “General Usage” on page 10 • “Principles of Operation” on page 10 Thermo Scientific Benchtop Muffle... -
Page 12: Intended Use
The controller is located under the furnace chamber and is well insulated from the heat generated in the furnace chamber. A door safety switch removes power to the heating elements whenever the furnace door is opened. The temperature is controlled by one of three types of controllers Benchtop Muffle Thermo Scientific... -
Page 13: Chapter 3 General Specification
Chamber: 7 (17.8) W x 5 (12.7) H x 10 (25.4) D Overall: 13.25 (33.7) W x 19 (48.3) H x 19.5 (49.5) D Chamber volume: 350 cu. in. (5.8 liters) Weight: 56 lb. (25.4 kg) (all models except -33) 58 lb. (26.3 kg) (-33 models only) Thermo Scientific Benchtop Muffle... -
Page 14: Environmental Conditions
17°C to 27°C; 20% to 80% relative humidity, non-condensing. Installation Category II (overvoltage) in accordance with IEC 664. Pollution degree 2 in accordance with IEC 664. Altitude Limit: 2,000 meters. Storage: -25°C to 65°C; 20% to 80% relative humidity. Voltage 240VAC +/- 10% Tolerance Benchtop Muffle Thermo Scientific... -
Page 15: Unpacking
3. Open the furnace door and remove the packing material from inside the furnace chamber. 4. Vacuum the chamber prior to use to remove the insulation dust due to shipment. 5. Retain the original packaging material if reshipment is foreseen or required. Thermo Scientific Benchtop Muffle... - Page 16 Unpacking Benchtop Muffle Thermo Scientific...
-
Page 17: Installation
Installation Contents • “Site Selection” on page 16 • “Electrical Connections” on page 16 • “47900 and 48400 Models” on page 16 Thermo Scientific Benchtop Muffle... -
Page 18: Site Selection
OFF position before connecting the furnace to your electrical supply. 47900 and 48400 Models Electrical Conditions for operating the furnaces in the EU: The furnaces are intended for use at a network supply with a maximum system impedance of Zmax at the point of connection, according to EN 61000-3-11 clause 6.2.2. - Page 19 Installation 47900 and 48400 Models Unit Zmax Unit Zmax F47920--33-80 0.31 F48020-33-80 F47920--33-80CN 0.31 F48020-33-80CN F47920--33-80CH 0.31 F48020-33-80CH F47920--33-80UK 0.31 F48020-33-80UK F47950-33 0.31 F48050-33 F47950-33CN 0.31 F48050-33CN F47950-33CH 0.31 F48050-33CH F47950-33UK 0.31 F48050-33UK Thermo Scientific Benchtop Muffle...
- Page 20 Installation 47900 and 48400 Models Benchtop Muffle Thermo Scientific...
-
Page 21: Operation, All Models
Operation, All Models Contents • “Power Switch” on page 20 • “Cycle Light shown on the display” on page 20 • “Door Safety Switch” on page 20 Thermo Scientific Benchtop Muffle... -
Page 22: Power Switch
Note an acoustic click of the switch during opening and closing of the door. If this condition is not true, consult the Troubleshooting section before proceeding. This check must be done when the furnace is heating and the cycle light on the display is illuminated. Benchtop Muffle Thermo Scientific... -
Page 23: Single Setpoint Models & Single Setpoint Models W/Otp
• “Running the Program” on page 28 • “Holding the Program” on page 28 • “Stopping the Program” on page 28 • “Clearing the Flashing End” on page 28 • “Verifying a Running Program” on page 29 Thermo Scientific Benchtop Muffle... -
Page 24: Eurotherm 3216 Controller Operation
Alarm Beacon Value (PV) Display SetPoint (SP) PAGE Button Display and Scolling Text Messages UP ARROW Button SCROLL Button DOWN ARROW Button If at any time you want to return to the HOME DISPLAY, press PAGE button. Benchtop Muffle Thermo Scientific... -
Page 25: Buttons And Indicators
SP.RAT: Ramp Rate Setpoint (default units is minutes). RAMPU: Ramp Unit of measure (seconds, minutes and hours). DWELL: Time for dwell or delay (default units is minutes). T.STAT: Timer Status. Active only when timer is active. Thermo Scientific Benchtop Muffle... -
Page 26: Alarms
OTP value you desire. We recommend a value of 20° above your working temperature to provide protection for your workload. In addition to over-temperature protection, units containing a single setpoint controller w/OTP feature a mechanical OTP relay device, which disconnects power from the elements in an alarm condition. Benchtop Muffle Thermo Scientific... -
Page 27: Tuning
8. Normal control function will resume after the controller calculates tuning parameters. Furnace must be at ambient temperature before starting a tune. “Stat” and “Sp.rr” must be set to OFF or “tunE” will not initiate. Tune has completed when “tunE” stops flashing on display. Thermo Scientific Benchtop Muffle... -
Page 28: Functions
Mode 3 (SF.ST) Starts automatically on power up. This is a soft-start function. If the PV is below the Soft Start Threshold, then the power is limited to the Soft Start Limit until the threshold is met. Benchtop Muffle Thermo Scientific... -
Page 29: Program Overview
SP2 - When the timer completes the target setpoint will switch to setpoint 2. The setpoint 2 may be a lower or a higher temperature. ► Reset (rES) - The timer or program will reset on completion, reverting to the setpoint used at the point it was started. Thermo Scientific Benchtop Muffle... -
Page 30: Setpoint Rate Limit Setup
Press the PAGE and SCROLL buttons at the same time. It can also be cleared by pressing and holding the UP and DOWN arrows simultaneously until A-M (Auto/Manual) is displayed. Then select “Auto” and unit will clear program and revert to normal operation. Benchtop Muffle Thermo Scientific... -
Page 31: Verifying A Running Program
Press the SCROLL button until “T.SAT” is displayed. The display will show “run” if the program is running, “hold” if it is paused or “res” if it is not running. Press the PAGE button to display Actual temperature. Thermo Scientific Benchtop Muffle... - Page 32 Single Setpoint Models & Single Setpoint Models w/OTP Verifying a Running Program Benchtop Muffle Thermo Scientific...
-
Page 33: Segment & 5X16 Segment Programmable Models W/Otp
“Sensor Break & Loop Break Protection” page 42 • “Over-Temperature Protection (OTP)” page 42 • “1-Program 8-Segment Controller Operation” page 44 • “Soft Start Timer” page 46 • “Delayed Switch On Timer” page 47 • “5-Program 16-Segment Controller Operation” page 52 Thermo Scientific Benchtop Muffle... -
Page 34: Eurotherm 3216 Controller
The furnace temperature controller is configured and tuned at the factory to function well for most applications. Occasionally, it may be advisable to configure the temperature controller differently to suit a particular working environment or process. Benchtop Muffle Thermo Scientific... -
Page 35: Operator Interface & Home Display
Illuminates when the output is ON (Over-temperature alarm). Alternative set point in use (SP2) Alarm active (Red) Remote set point or communication active Timer running for 3216c or Program running for 3216p RUN (flashing) Timer hold for 3216c or Program hold for 3216p Thermo Scientific Benchtop Muffle... -
Page 36: Operator Buttons
A few seconds after the button is released, the controller will accept the new value and is indicated by a brief flash of the display. 3. Press PAGE button to return to the HOME display. Benchtop Muffle Thermo Scientific... -
Page 37: Alternate Set Point Selection (Sp2)
4. The new ramp rate unit is applied when the button is released and is indicated by a brief flash of the display. 5. Press PAGE button to return to HOME display. Thermo Scientific Benchtop Muffle... -
Page 38: View Or Change The Display Units
“UNITS” is shown in the lower display. The current unit is shown in the upper display. 2. Press UP or DOWN button to change the display unit. a. (°C): Degrees Celsius b. (°F): Degrees Fahrenheit c. (°K): Kelvin Benchtop Muffle Thermo Scientific... -
Page 39: Auto Tuning
2. Set the temperature as per requirement; refer to section “Single Set Point Operation” on setting SP1 or SP2. 3. Press SCROLL button to scroll through the list of parameters until A.TUNE is displayed. 4. To enable the auto-tune, set the A.TUNE parameter to ON by using DOWN or UP button. Thermo Scientific Benchtop Muffle... -
Page 40: Parameter List
The scrolling text can be interrupted at any time by a single press of any of the buttons, but will not scroll again until the parameter is returned to. Benchtop Muffle Thermo Scientific... - Page 41 4. Press the UP or DOWN button to choose LEv2 (Level 2). 5. Press UP or DOWN button to enter the password. The default code is ‘25’. If an incorrect code is entered the display reverts to Level 1. Thermo Scientific Benchtop Muffle...
-
Page 42: Offset Procedure
PV Offset applies a single offset to the temperature or process value over the full display range of the controller and can be adjusted in Level 2. It has the effect of moving the curve up or down about a central point as shown in the example below:- Benchtop Muffle Thermo Scientific... -
Page 43: Alarms & Diagnostics
• ALM beacon on continuously = alarm has been acknowledged. • Press PAGE button and SCROLL button together to acknowledge an alarm. If the alarm is still present the ALM beacon lights continuously. The action which takes place depends on the type of alarm configured: Thermo Scientific Benchtop Muffle... -
Page 44: Sensor Break & Loop Break Protection
To Configure Deviation High Alarm 1. Press SCROLL button until “A1.DHi” appears on the display. 2. Press UP or DOWN button to select the OTP value you desire. We recommend a value of 50. Benchtop Muffle Thermo Scientific... - Page 45 The set point changes instantaneously from its current value of the measured temperature to a new value at the beginning of a segment. Step can be achieved by turning off Ramp rate. A Step segment has a minimum duration of 1 second. Thermo Scientific Benchtop Muffle...
-
Page 46: 1-Program 8-Segment Controller Operation
• Soft Start timer. Starts automatically on power up. It applies a power limit until the temperature reaches a threshold value or the timer times-out after the dwell period. • 8-Segment programmable controller (4 ramps & 4 soaks). Benchtop Muffle Thermo Scientific... - Page 47 Timer Ramp Rate 4 Level 2 Read/Write OFF (0) TIMER.TimerDwell4 Timer Dwell 4 Duration Level 2 Read/Write OFF (0) CTRL.ProportionalBand Proportional Band Level 2 Read/Write ENG (0) CTRL.DerivativeTime Intergral Time Level 2 Read/Write CTRL.LoopBreakTime Derivative Time Level 2 Read/Write Thermo Scientific Benchtop Muffle...
-
Page 48: Soft Start Timer
SS.SP is exceeded. If the PV is already greater than SS.SP the reduced power limit is not applied and the timer times out. When the timer status = reset, the control output is controlling at a level limited by the output high and low limits. Benchtop Muffle Thermo Scientific... -
Page 49: Delayed Switch On Timer
• Setting the parameter T.STAT to run; • A command through serial communications; • A logic input suitably configured. When the timer status = run, the control output is off. When the timer status = reset, the control output is controlling. Thermo Scientific Benchtop Muffle... - Page 50 Each ramp consists of a controlled rate of change of set point to a target level. Each ramp is followed by a dwell at that level. The ramp rate, target level and dwell time are set by the user. Benchtop Muffle Thermo Scientific...
- Page 51 ‘PROG’. 2. To set the resolution, press SCROLL button to select ‘TM.RES’. Press DOWN or UP button to set ‘Hour or ‘min’ (In this example, the ramp rate and dwell period are set in hours). Thermo Scientific Benchtop Muffle...
- Page 52 2:11. (In this example the set point will dwell at 45 for 2 hours 11 minutes). 8. Now repeat the above three steps (5, 6 & 7) to set remaining all segments. Benchtop Muffle Thermo Scientific...
- Page 53 SP2 is achieved. It is more usual to use a DWELL (default) or RESET end type. • The program will start from the measured temperature. On recovery from power failure, the program will automatically run at the last ramp rate from the current measured temperature. Thermo Scientific Benchtop Muffle...
-
Page 54: 5-Program 16-Segment Controller Operation
A program is stored as a series of segments and can be run once. This 16 segment digital model can enable 16 segments in each program. Some of the commonly used parameters in operator Level 1 and Level 2 of 3216p controller are: Benchtop Muffle Thermo Scientific... - Page 55 PROGRAMMER.SP7 Program Traget Setpoint 7 Level 2 Read/Write PROGRAMMER.Ramp7 Program Ramp Rate 7 Level 2 Read/Write OFF (0) PROGRAMMER.Dwell7 Program Dwell 7 Duration Level 2 Read/Write OFF (0) PROGRAMMER.SP8 Program Traget Setpoint 8 Level 2 Read/Write Thermo Scientific Benchtop Muffle...
- Page 56 3216p is a 16 segment programmer consisting of eight ramp/ dwell pairs. Each ramp consists of a controlled rate of change of set point to a target level. Each ramp is followed by a dwell at that level. The ramp rate, target level and dwell time are set by the user. Benchtop Muffle Thermo Scientific...
- Page 57 2. The setpoint 2 may be a lower or a higher temperature). rES : Reset on completion and reverts to SP1 or SP2, based on the Setpoint selection. Scroll through parameters in Level 2 and set the required ‘END.T’ by pressing Thermo Scientific Benchtop Muffle...
- Page 58 7. To set the first Ramp rate, press SCROLL button to select ‘RMP.1’. Press DOWN button to set the value. 8. To set the first Dwell, press SCROLL button to select ‘DWEL.1’. Press DOWN or UP button to set the value. Benchtop Muffle Thermo Scientific...
- Page 59 If program has ended then ‘PROGRAM END’ will be displayed at for more than 1 second the end of the program Programs can also be operated from the ‘P.STAT’ parameter found in the level 1 parameter list. Thermo Scientific Benchtop Muffle...
- Page 60 • END TYPE - when the end type is SP2, Timer END does not occur until the ramp is complete or SP2 is achieved. It is more usual to use a DWELL (default) or RESET end type. Benchtop Muffle Thermo Scientific...
-
Page 61: Communication Option
RS 485 adapter. The communication cable consists of DB9 connector at both ends. Use the accessory Cable # 7233 for serial communication. NOTE 7233 Twenty five feet RS 485 cable and RS 232 converter for connection of furnace/control console RS 485 port to personal computer serial port. Thermo Scientific Benchtop Muffle... -
Page 62: Host Computer & Software
Verify DB-9 pin connections as shown in wiring diagram, interchange 2 & 3 connections if communication is not working. d. Verify the configuration values in the controller, listed in the Table 6, “3504 Controller Parameters for Communication,” on page 62 and Table 7 “3216p Controller Parameters for Communication” Benchtop Muffle Thermo Scientific... -
Page 63: Chapter 10 Furnace Loading
This unit is equipped with a venting system on the top of the furnace. This is for the removal of fumes from the chamber of the unit. Contamination is a major cause of element failure, therefore, removes all fume forming material before heating. (e.g. clean cutting oil from tool steel). Thermocouple Thermocouple Sample Port Heating Elements Thermo Scientific Benchtop Muffle... - Page 64 Furnace Loading Benchtop Muffle Thermo Scientific...
-
Page 65: Chapter 11 Preventive Maintenance
Troubleshooting section is intended to aid in defining and correcting possible service problems. When using the chart, select the problem category that resembles the malfunction. Then proceed to the possible cause’s category and take necessary corrective action. Thermo Scientific Benchtop Muffle... - Page 66 Preventive Maintenance General Cleaning Instructions Benchtop Muffle Thermo Scientific...
-
Page 67: Chapter 12 Maintenance And Servicing
• “To Replace a Chromel/Alumel Thermocouple (All Furnaces)” on page 66 • “To Replace Door Switches (Micro-Switch)” on page 67 • “To Realign Door Switches (Micro-Switch):” on page 67 • “To Replace the Controller” on page 67 Thermo Scientific Benchtop Muffle... -
Page 68: To Replace A Heating Element
On a Chromel/Alumel thermocouple and lead wire, the non-magnetic wire is positive (+) and the magnetic wire is negative (-). 8. Replace both back covers. 9. Reconnect to the power supply. 10. Test the operation of the furnace. Benchtop Muffle Thermo Scientific... -
Page 69: To Replace Door Switches (Micro-Switch)
The controller plugs into a panel mounting sleeve which should be left permanently installed in the furnace housing. To remove the controller, release the side clips and slide the controller out. Do not attempt to dismantle this unit further; replace it with a Thermolyne loaner or a new unit. Thermo Scientific Benchtop Muffle... - Page 70 Maintenance and Servicing To Replace the Controller Benchtop Muffle Thermo Scientific...
-
Page 71: Chapter 13 Troubleshooting
Realign or replace door safety switch. cut power to heating elements. Alarm output device malfunction. Replace controller. Controller over-temp. does not cut power to OTP relay malfunction. Replace relay. furnace chamber. Elements shorted to ground. Replace faulty element. Thermo Scientific Benchtop Muffle... - Page 72 One of two circuit breakers is tripped. If you find the breaker tripped first try to reset it by pressing the button in. If the breaker is not tripped and will not reset it should be replaced. Ensure both breakers are reset. Benchtop Muffle Thermo Scientific...
-
Page 73: Chapter 14 Replacement Parts List
120 volt F48000 models only. FZX30 Line Fuse 208 & 240 volt models only. PLX76 (Optional) Pilot Light 100 &120 volt models only. PLX82 (Optional) Pilot Light 208 & 240 volt models only. RYX34 S.S. Relay All Models Thermo Scientific Benchtop Muffle... -
Page 74: Single Setpoint Models With Otp
208 & 240 volt models only. PLX76 (Optional) Pilot Light 100 &120 volt models only. PLX82 (Optional) Pilot Light 208 & 240 volt models only. RYX34 S.S. Relay All Models RYX56 Mechanical Relay 100 &120 volt models only. Benchtop Muffle Thermo Scientific... -
Page 75: Segment Programmable Models With Otp
RYX56 Mechanical Relay 100 &120 volt models only. RYX57 Mechanical Relay 208 & 240 volt models only. SWX163 Door Switch All Models SWX143 Power Switch All Models TRX136 Terminal Block All Models TC1165X1 Thermocouple All Models Thermo Scientific Benchtop Muffle... -
Page 76: 5 X 16 Segment Programmable Models With Otp
RYX56 Mechanical Relay 100 &120 volt models only. RYX57 Mechanical Relay 208 & 240 volt models only. SWX163 Door Switch All Models SWX143 Power Switch All Models TRX136 Terminal Block All Models TC1165X1 Thermocouple All Models Benchtop Muffle Thermo Scientific... -
Page 77: Chapter 15 Ordering Procedures
All parts listed herein may be ordered from the Thermo Scientific dealer from whom you purchased this unit or can be obtained promptly from the factory. When service or replacement parts are needed we ask that you check first with your dealer. - Page 78 Ordering Procedures Benchtop Muffle Thermo Scientific...
-
Page 79: Chapter 16 Wiring Diagrams
• “SINGLE SETPOINT CONTROL” on page 78 • “SINGLE SETPOINT CONTROL W/OTP” on page 79 • “8 SETPOINT PROGRAMMABLE CONTROL W/OTP” on page 80 • “8 SEGMENT PROGRAMMABLE CONTROL” on page 84 • “5 X 16 SEGMENT PROGRAMMABLE CONTROL” on page 85 Thermo Scientific Benchtop Muffle... -
Page 80: Single Setpoint Control
Wiring Diagrams SINGLE SETPOINT CONTROL SINGLE SETPOINT CONTROL Benchtop Muffle Thermo Scientific... -
Page 81: Single Setpoint Control W/Otp
Wiring Diagrams SINGLE SETPOINT CONTROL W/OTP SINGLE SETPOINT CONTROL W/OTP Thermo Scientific Benchtop Muffle... -
Page 82: 8 Setpoint Programmable Controlw/Otp
Wiring Diagrams 8 SETPOINT PROGRAMMABLE CONTROL 8 SETPOINT PROGRAMMABLE CONTROLW/OTP Benchtop Muffle Thermo Scientific... - Page 83 Wiring Diagrams 5 X 16 SEGMENT PROGRAMMABLE CONTROL Thermo Scientific Benchtop Muffle...
- Page 84 Wiring Diagrams SINGLE SETPOINT CONTROL Benchtop Muffle Thermo Scientific...
- Page 85 Wiring Diagrams SINGLE SETPOINT CONTROL W/OTP Thermo Scientific Benchtop Muffle...
- Page 86 Wiring Diagrams 8 SEGMENT PROGRAMMABLE CONTROL 8 SEGMENT PROGRAMMABLE CONTROL Benchtop Muffle Thermo Scientific...
-
Page 87: 16 Segment Programmable Control
Wiring Diagrams 5 X 16 SEGMENT PROGRAMMABLE CONTROL 5 X 16 SEGMENT PROGRAMMABLE CONTROL Thermo Scientific Benchtop Muffle... - Page 88 Wiring Diagrams Benchtop Muffle Thermo Scientific...
-
Page 89: Chapter 17 Regulatory Compliance
Canadian ISED IC Notice This ISM digital apparatus complies with Canadian ICES-001. Cet appareil ISM est conforme á la norme NMB-001 du Canada Thermo Scientific Benchtop Muffle... -
Page 90: Additional Regulations & Markings
• Polybrominated biphenyls (PBB) (0.1 %) • Polybrominated diphenyl ethers (PBDE) (0.1 %) 2015/863 Annex II (RoHS3, In effect after July 22, 2019) • Bis(2-ethylhexyl) phthalate (DEHP) (0.1 %) • Butyl benzyl phthalate (BBP) (0.1 %) Benchtop Muffle Thermo Scientific... - Page 91 Our compliance is witnessed by written declaration from our suppliers and/or component testing. This confirms that any potential trace contamination levels of the substances listed above are below the maximum level set by the latest regulations or are exempt due to their application. Thermo Scientific Benchtop Muffle...
-
Page 92: Weee Compliance
EU Member State, and this product should be disposed of or recycled through them. Further information on our compliance with these Directives, the recyclers in your country, and information on Thermo Scientific products which may assist the detection of s u b s t a n c e s... - Page 93 Important For your future reference and when contacting the factory, please have the following information readily available: Model Number: Serial Number: Date Purchased: The above information can be found on the dataplate attached to the equipment. If available, please provide the date purchased, the source of purchase (manufacturer or specific agent/rep organization), and purchase order number.
- Page 96 Thermo Fisher Scientific Inc. 275 Aiken Road Asheville, NC 28804 United States www.thermofisher.com LT1284X1 Rev. K Contact Us North America: 866-984-3766 Europe: France +33 2 2803 2180 Germany +49 9184 90 9640 UK/Ireland + 44 870 609 9203 Asia: China +86 21 6865 4588 India 1800 22 8374 Japan +81 45 453 9220...
Need help?
Do you have a question about the 47900 and is the answer not in the manual?
Questions and answers