
Related Manuals for Ibx KJD10


Summary of Contents for Ibx KJD10
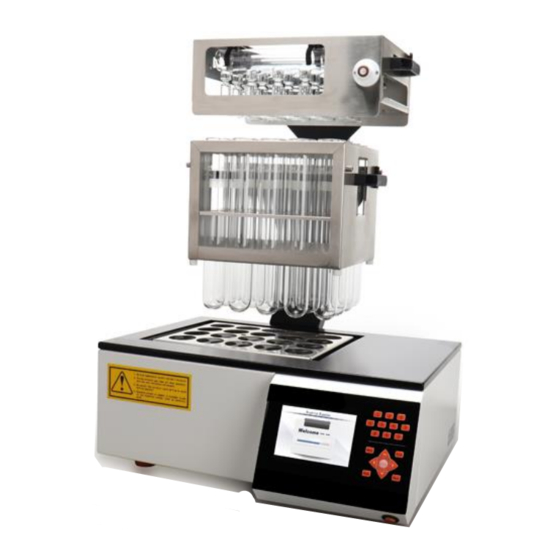
- Page 1 KJD10 Kjeldahl Digestion System Please read the User Manual carefully before use, and follow all operating and safety instructions! user manual english...
-
Page 2: Important Notice
User Manual KJD10 Kjeldahl Digestion System Important notice This instrument is designed for laboratory usage only. Please read this manual carefully before installing or operating this equipment. The instrument shall not be modified in any way. Any modification will void the warranty and may result in potential hazard. - Page 3 Warning: The instrument cannot provide the designed protection for operators who do not follow the right procedures and requirements given by the manufacturer. Warning: All solutions must be handled with care according to the lab’s safety regulation. Please make a reference to the related material safety data sheet. Wear the lab-gown, goggle and rubber gloves all the time.
- Page 4 1. Summary Kjeldahl Digestor, adopted with globally advanced high temperature infra-red duct radiant heating technology and MPU control platform, is characterized by its accurate temperature control and fast temperature rise. The temperature rise, divided into linear temperature rise mode and curved temperature rise mode, allows storage of 500 groups of digestion solutions.
- Page 5 1.1 Features: The heating efficiency is greatly improved by the infrared radiation and graphite block, which ⚫ guarantees uniform temperature. Mass storage: 500 groups of digestion solution, each of them has 25 temperature spots at most. ⚫ Two modes of heating: straight line and curve; twenty heating programs in total; 1-99 intervals are ⚫...
- Page 6 Operating procedures: • Power on the instrument • Put the digestion tubes loaded with sample in the rack, and install the rack on the Graphite Digester, which connects the Exhaust System. Connect and start the Exhaust System to the Kjeldahl Digestor and open the condensate water switch. Check the connection and condensate water.
-
Page 7: Main Performance
Main performance Technical Specifications • Temperature range: room temperature + 5 ℃ to 450 ℃; • Controllable accuracy: ±1℃ • Heating method: infrared radiation heating and graphite conduction • Insulation material: environmental protection fiber and unique duct insulation technology • Digestive tube: 300 mL •... - Page 8 Structure Fig. 2 1. Battery main switch 2. Shell 3. Stainless steel decorative sheet 4. Digestion duct 5. Gas collection hood 6. Cooling frame 7. Waste discharge outlet 8. Test tube rack 9. Graphite heating block 10. Operation panel 3.2 Gas collection hood Operation procedure 3.2.1 Fix the Gas collection hood prior to digestion: Place the test-tube rack in a proper position, match the...
- Page 9 Dip tray mated for Gas collection hood. The mated dip tray is shown in Fig. 5. 3.3 Corollary Equipment There are two solutions for waste gas absorption: KJDF1 Exhaust System (must purchase separately) is selective to the Kjeldahl Digestor 3.3.1 Being environmental-friendly, KJDF1 Exhaust System is used to condensate and neutralize the acidic or alkali waste gas generated in the experiment.
-
Page 10: Installation
Installation Installation Check before Installation 4.1.1 Open the package and check the device and its parts according to the packing list. If there is any damage, please keep the damaged parts and contact us immediately. Installation steps 4.1.2 The device shall be installed at places adjacent to water source and drain tank and provided with power sockets and grounded line. - Page 11 The additional Function icon indication: Indication of heating state: enlarging (heating on), normal (heating off). Indication of the heating duct state. Indication of timing state: enlarging (timing on), normal (timing off). Indication of reaching the set temperature: enlarging (already reached), normal (not reached yet). Indication of the overheating state: enlarging (overheating by 10 degrees), normal (no overheating).
- Page 12 Detailed Explanation of each interface 4.2.3 The waiting interface will be shown on the first page. See Fig.9. 4.2.3.1. Fig.9 4.2.3.2 Enter the main interface in 5 seconds, include linear heating and curve heating as Fig.10. Fig. 10 Linear heating: Press 【Enter】to enter the setup interface, setting temperature and time and press 【Enter】start heating and timing.
- Page 13 Curve heating: 2) Select curve heating (shown in the figure 12), press Enter key and enter curve heating interface. The system has automatic memory of the last setting. Press Enter key for heating according to the curve set last time. Fig.
- Page 14 Press the Menu key on the main interface for setting module, including system parameter setting 4.2.3.3 and heating curve setting. Fig. 15 Press 【←】【→】key for selection of system parameter setting or curve setting, and press Enter key for setting interface. 1) Setting for heating curve: Fig.
-
Page 15: Maintenance And Repair
Function introduction Actual temperature: input the measured standard temperature (temperature stable). Sensor temperature: temperature measured by the sensor. Timing mode: count up timing and count down timing. Timing point: start of heating and reaching set temperature. Restore factory setting: restore parameter setting for delivery, wipe customer storage schemes. Press Enter key on the main interface for help module: 4.2.3.4 Fig. - Page 16 Common Faults Treatment 5.2. Source of Number Causes Solutions trouble The fuse is burnt Replace the fuses Power line not properly Properly connect the power line No power connected The infrared radiation Replace the infrared radiation heating heating pipe is damaged pipe Slow heating Low or instable...
- Page 17 Experiment Example Oxidizing acid and mixed acid are often used in wet digestion, such as concentrated sulfuric acid, nitric- sulphuric acid, nitric-perchloric acid and hydrofluoric acid, etc. The following example shows how to determine the protein in food with sulphuric acid. Measure 0.2-2.00g pre-processed solid sample and put the sample in a tube;...
- Page 18 Safety Tips 8.2. This section is about the safe use of the device, including the safe operation and warning. The following instructions must be read carefully by all persons who have or will have the responsibility for using or serving the device. Any consequence caused by misuse of the device should be taken by the user.
- Page 20 www.labbox.com...
Need help?
Do you have a question about the KJD10 and is the answer not in the manual?
Questions and answers