
Related Manuals for Duramaxx Powerpoint

Summary of Contents for Duramaxx Powerpoint
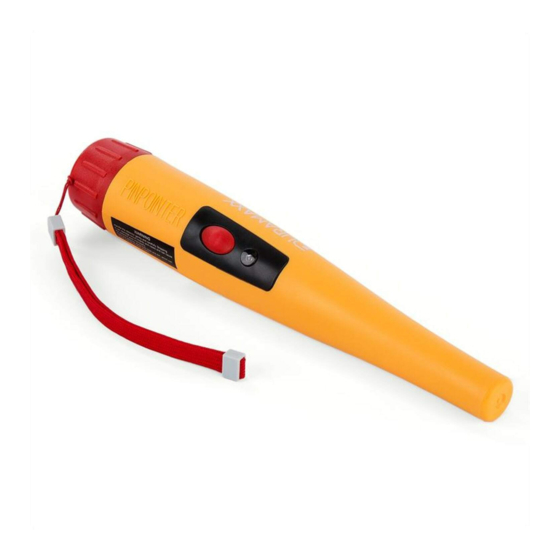
- Page 1 Powerpoint Digitaler Pinpointer Digital Pinpointer Puntero digital Pinpointer numérique Pinpointer digitale 10031375...
-
Page 3: Table Of Contents
Sehr geehrter Kunde, wir gratulieren Ihnen zum Erwerb Ihres Gerätes. Lesen Sie die folgenden Hinweise sorgfältig durch und befolgen Sie diese, um möglichen Schäden vorzubeugen. Für Schäden, die durch Missachtung der Hinweise und unsachgemäßen Gebrauch entstehen, übernehmen wir keine Haftung. Scannen Sie den folgenden QR-Code, um Zugriff auf die aktuellste Bedienungsanleitung und weitere Informationen rund um das Produkt zu erhalten: INHALTSVERZEICHNIS... -
Page 4: Einleitung
EINLEITUNG Der Pinpointer ist für die genaue Ortung von Metallobjekten bestimmt. Das Gerät sollte in Kombination mit einem großen Metalldetektor verwendet werden. Der Metalldetektor kann nur eine grobe Ortung von vergrabenen Metallobjekten vornehmen und Sie müssen deshalb zur Suche des Objekts häufig ein großes Loch graben. -
Page 5: Geräteübersicht
GERÄTEÜBERSICHT Batterieabdeckung Magnetischer Stab O-Ring Gummidichtung Batterie Runde Plastikhülle Batteriesockel Batteriehalterung Leiterplatte LED-Leuchte Schalter LED-Einschaltknopf Magnetische Stabhalterung... -
Page 6: Funktionen
FUNKTIONEN Einschaltknopf/ Balanceknopf Um den Einschaltknopf als Balanceknopf zu benutzen, drücken Sie bitte einmal leicht darauf. Die LED-Leuchte wird zwei Mal aufleuchten und das Gerät wird zwei Mal kurz vibrieren. Anschließend wird die weiße LED-Beleuchtung aufleuchten, was bedeutet, dass der Pinpointer verbunden und austariert und nun funktionsbereit ist. - Page 7 Batterie und Batterieabdeckung: Bitte drehen Sie die Batterieabdeckung gegen den Uhrzeigersinn um das Batteriefach zu öffnen und drehen Sie sie im Uhrzeigersinn um die Abdeckung zu fixieren. Bitte achten Sie darauf eine 9 V Alkali-Batterie zu verwenden. Die Lebensdauer einer Alkali-Batterie liegt bei durchschnittlich 20 Stunden. Wenn Sie die Batterie wechseln, achten Sie darauf, dass die Batterie richtig eingelegt ist, die O-Ring Gummidichtung richtig sitzt und das Batteriefach richtig verschlossen ist, um das Eindringen von Wasser zu verhindern.
-
Page 8: Schnellstart
SCHNELLSTART Um den Pinpointer richtig zu verwenden empfehlen wir Ihnen die Anweisungen genau durchzulesen und im Innenbereich mit dem Pinpointer zu üben. Sie sollten erst im Freien nach Schätzen suchen wenn Sie sich mit den grundlegenden Einstellungen vertraut gemacht haben. Metallproben vorbereiten: Dieser Pinpointer ist ein Non-Motion Metalldetektor. - Page 9 Schalten Sie den Pinpointer ein. Die Signalstärke LED wird zunächst zwei Mai aufleuchten und der Vibrationsmotor zwei Mai vibrieren. Anschließend wird sich die Beleuchtungs-LED einschalten, was bedeutet, dass sich das Gerat automatisch austariert hat. Der Pinpointer ist dann im Wartezustand. Hinweis: Wenn Sie den Standort des Geräts verändern oder das Gerat drehen, kann es durch den Einfluss des magnetischen Feldes oder elektromagnetischen Feldern in der Nahe vorkommen, dass das Gerat...
-
Page 10: Feldeinsatz
Versuchen Sie, den Pinpointer ruhig zu halten und drücken Sie den Gleichgewichtsknopf, wenn die LED-leuchte auf weiß umgeschaltet hat und die Vibrationsintensität am Höchsten ist. Dann wird der Pinpointer erneut ausbalanciert und die Anzeigeempfindlichkeit wird abnehmen. Zu diesem Zeitpunkt wird die LED Leuchte nicht angehen und das Gerat nicht mehr vibrieren. - Page 11 Wenn das Zielobjekt nicht tief vergraben ist, können Sie folgende Methode ausprobieren: Bitte schalten Sie den Pinpointer an und balancieren Sie ihn in dem Bereich aus, wo das Zielobjekt vergraben sein konnte. Bitte halten Sie den Pinpointer die komplette Zeit Ober vertikal und bewegen Sie ihn langsam auf den Boden zu (siehe Abbildung).
- Page 12 Wenn das gesuchte Objekt tief vergraben liegt und außerhalb des Suchbereichs des Pinpointers liegt, sollten Sie zur genaueren Positionsbestimmung erneut den Metalldetektor verwenden. Nachdem Sie die Position festgestellt haben, können Sie mit dem Graben beginnen. Sie sollten die bereits aufgeschüttete Erde mit dem Pinpointer überprüfen, um festzustellen, ob Sie das gesuchte Objekt bereits ausgegraben haben, oder ob es sich noch im Boden befindet (siehe Abbildung).
- Page 13 Die Umgebung ist komplex. Wenn der Pinpointer überall ein Alarmsignal abgibt und ständig vibriert und blinkt, sollten Sie ihn erneut ausbalancieren. Sie sollten zur genauen Positionsbestimmung besonders auf den Farbwechsel der LED- Leuchte und auf die Vibrationsfrequenz achten. Wenn sich die Vibrationsfrequenz erhöht und die LED-Leuchte auf weiß...
-
Page 14: Spezielle Entsorgungshinweise Für Verbraucher In Deutschland
SPEZIELLE ENTSORGUNGSHINWEISE FÜR VERBRAUCHER IN DEUTSCHLAND Entsorgen Sie Ihre Altgeräte fachgerecht. Dadurch wird gewährleistet, dass die Altgeräte umweltgerecht verwertet und negative Auswirkungen auf die Umwelt und menschliche Gesundheit vermieden werden. Bei der Entsorgung sind folgende Regeln zu beachten: • Jeder Verbraucher ist gesetzlich verpflichtet, Elektro- und Elektronikaltgeräte (Altgeräte) sowie Batterien und Akkus getrennt vom Hausmüll zu entsorgen. - Page 15 • Bei einem Vertrieb unter Verwendung von Fernkommunikationsmitteln ist die unentgeltliche Abholung am Ort der Abgabe auf Elektro- und Elektronikgeräte der Kategorien 1, 2 und 4 gemäß § 2 Abs. 1 ElektroG, nämlich „Wärmeüberträger“, „Bildschirmgeräte“ (Oberfläche von mehr als 100 cm²) oder „Großgeräte“ (letztere mit mindestens einer äußeren Abmessung über 50 Zentimeter) beschränkt.
-
Page 16: Hinweise Zur Entsorgung
HINWEISE ZUR ENTSORGUNG Wenn es in Ihrem Land eine gesetzliche Regelung zur Entsorgung von elektrischen und elektronischen Geräten gibt, weist dieses Symbol auf dem Produkt oder auf der Verpackung darauf hin, dass dieses Produkt nicht im Hausmüll entsorgt werden darf. Stattdessen muss es zu einer Sammelstelle für das Recycling von elektrischen und elektronischen Geräten gebracht werden. - Page 17 Dear customer, Congratulations on the purchase of your device. Please read the following instructions carefully and follow them to prevent potential damage. We accept no liability for damage caused by disregarding the instructions or improper use. Please scan the QR code to access the latest operating instructions and for further information about the product.
-
Page 18: Introduction
INTRODUCTION The pinpointer is intended for precisely locating metal objects. The device should be used in conjunction with a large metal detector. The metal detector can only roughly locate buried metal objects and you therefore often have to dig a large hole to find the object. In addition, small metal objects are often heavily oxidised and fused with the sediment, making them difficult to identify. -
Page 19: Device Overview
DEVICE OVERVIEW Battery cover Magnetic rod O-ring rubber seal Battery Round plastic cover Battery socket Battery holder Circuit board LED light Switches LED power button Magnetic rod holder... -
Page 20: Functions
FUNCTIONS Power button/balance button To use the power button as a balance button, press it lightly once. The LED light will flash twice and the unit will vibrate twice briefly. The white LED light will then illuminate, indicating that the pinpointer is connected and balanced and is now ready to function. - Page 21 Battery and battery cover: Please turn the battery cover anticlockwise to open the battery compartment and turn it clockwise to secure the cover. Please be sure to use a 9 V alkaline battery. The average life of an alkaline battery is 20 hours. When changing the battery, make sure that the battery is inserted correctly, the O-ring rubber seal is seated properly and the battery compartment is closed properly to prevent water ingress.
-
Page 22: Quick Start
QUICK START To use the pinpointer correctly, we recommend that you read the instructions carefully and practise with the pinpointer indoors. You should only search for treasures outdoors once you have familiarised yourself with the basic settings. Prepare metal samples: This pinpointer is a non-motion metal detector. Provided that you approach a target, it will react to all types of metal. - Page 23 Switch on the pinpointer. The signal strength LED will initially light up twice and the vibration motor will vibrate twice. Then the illumination LED will turn on, which means that the unit has automatically balanced itself. The pinpointer is then in the waiting state. Note: If you change the location of the unit or rotate the unit, the unit may constantly deflect or the sensitivity of the display may decrease due to the influence of the magnetic field or electromagnetic fields in the vicinity.
-
Page 24: Field Operation
Try to hold the pinpointer steady and press the balance button when the LED light has turned white and the vibration intensity is at its highest. Then the pinpointer will be rebalanced and the display sensitivity will decrease. At this point, the LED light will not come on and the unit will no longer vibrate. - Page 25 If the target object is not buried deep, you can try the following method: Please turn on the pinpointer and balance it in the area where the target object could be buried. Please hold the pinpointer vertically the entire time and move it slowly towards the ground (see illustration). At the location, where the target object is buried the device will sound an alarm.
- Page 26 If the object you are looking for is deeply buried and outside the pinpointer's search range, you should use the metal detector again to determine its position more precisely. After you have established the position, you can start digging You should check the earth that has already piled up with the pinpointer to see if you have already dug up the object you are looking for or if it is still in the ground (see illustration).
- Page 27 The environment is complex. If the pinpointer emits an alarm signal everywhere and vibrates and flashes constantly, you should rebalance it. You should pay particular attention to the colour change of the LED light and the vibration frequency to determine the exact position. When the vibration frequency increases and the LED light changes to white, the distance to the target object is at its shortest.
-
Page 28: Disposal Considerations
DISPOSAL CONSIDERATIONS If there is a legal regulation in your country regarding the disposal of electrical and electronic equipment, this symbol on the product or on the packaging indicates that this product must not be disposed of with household waste. Instead, it must be taken to a collection point for the recycling of electrical and electronic equipment. - Page 29 Cher client, chère cliente, Toutes nos félicitations pour l’acquisition de ce nouvel appareil. Lisez attentivement les indications suivantes et suivez-les pour éviter d'éventuels dommages. Nous ne saurions être tenus pour responsables des dommages dus au non-respect des consignes et à la mauvaise utilisation de l’appareil.
-
Page 30: Introduction
INTRODUCTION Le Pinpointer est destiné à la localisation précise d'objets métalliques. L'appareil doit être utilisé en combinaison avec un grand détecteur de métaux. Le détecteur de métaux ne peut effectuer qu'une localisation approximative des objets métalliques enterrés ce qui vous oblige souvent à creuser un grand trou pour trouver l'objet. -
Page 31: Aperçu De L'appareil
APERÇU DE L'APPAREIL Couvercle du compartiment Barre magnétique à pile Joint torique Joint en Pile caoutchouc Étui plastique rond Socle à piles Support de pile Circuit imprimé Lampe LED Interrupteur Bouton d'allumage LED Support de barre magnétique... -
Page 32: Fonctions
FONCTIONS Bouton de mise en marche/ Bouton d'équilibrage Pour utiliser le bouton de mise en marche comme bouton d'équilibrage, veuillez appuyer légèrement une fois dessus. Le voyant lumineux s'allume deux fois et l'appareil vibre brièvement deux fois. Ensuite, le voyant blanc s'allume pour indiquer que le Pinpointer est connecté... - Page 33 Pile et couvercle du compartiment à pile : Tournez le couvercle du compartiment à pile en sens inverse des aiguilles d'une montre pour ouvrir le compartiment et tournez-le dans le sens des aiguilles d'une montre pour fixer le couvercle. Utilisez une pile alcaline 9 V. La durée de vie d'une pile alcaline est en moyenne de 20 heures.
-
Page 34: Démarrage Rapide
DÉMARRAGE RAPIDE Pour utiliser correctement le Pinpointer, nous vous recommandons de lire attentivement les instructions et de vous entraîner à l'intérieur. Vous ne devriez pas chercher de trésors à l'extérieur avant de vous être familiarisé avec les réglages de base. Préparation des échantillons de métal : Ce Pinpointer est un détecteur de métaux non-motion. - Page 35 Allumez le Pinpointer. La LED de l'intensité du signal s'allume d'abord deux fois et le moteur vibre deux fois. Ensuite, la LED d'éclairage s'allume et indique que l'appareil s'est automatiquement équilibré. Le Pinpointer est alors prêt. Remarque : si vous déplacez l'appareil ou si vous le faites pivoter, il se peut qu'il se mette à...
-
Page 36: Intervention Sur Le Terrain
Essayez de maintenir le Pinpointer immobile et appuyez sur le bouton d'équilibre lorsque le voyant LED est passé au blanc et que l'intensité des vibrations est maximale. Le Pinpointer est alors rééquilibré et la sensibilité de l'affichage diminue. A ce moment-là, la LED ne s'allume pas et l'appareil ne vibre plus. - Page 37 Si l'objet cible n'est pas profondément enterré, vous pouvez essayer la méthode suivante : Allumez le Pinpointer et équilibrez - le dans la zone où l'objet cible pourrait être enterré. Tenez toujours le Pinpointer verticalement au-dessus et déplacez-le lentement vers le sol (voir illustration).
- Page 38 Si l'objet recherché est profondément enterré et se trouve en dehors de la zone de recherche du Pinpointer, utilisez à nouveau le détecteur de métaux pour obtenir une position plus précise. Une fois que vous avez déterminé la position, vous pouvez commencer à creuser . Vous devriez analyser la terre déjà...
- Page 39 L'environnement est complexe. Si le Pinpointer émet un signal d'alarme partout et qu'il vibre et clignote en permanence, vous devez le rééquilibrer. Pour déterminer la position exacte, soyez particulièrement attentif au changement de couleur de la lampe LED et à la fréquence des vibrations.
-
Page 40: Informations Sur Le Recyclage
INFORMATIONS SUR LE RECYCLAGE Si la mise en rebut des appareils électriques et électroniques est réglementée dans votre pays, ce symbole sur le produit ou sur l'emballage indique qu'il ne doit pas être éliminé avec les ordures ménagères. Vous devez l'acheminer vers un point de collecte pour le recyclage des appareils électriques et électroniques. - Page 41 Estimado cliente: Le felicitamos por la adquisición de este producto. Lea atentamente el siguiente manual y siga cuidadosamente las instrucciones de uso con el fin de evitar posibles daños. La empresa no se responsabiliza de los daños ocasionados por un uso indebido del producto o por haber desatendido las indicaciones de seguridad.
-
Page 42: Introducción
INTRODUCCIÓN El puntero está destinado a la localización precisa de objetos metálicos. El dispositivo debe utilizarse en combinación con un detector de metales de gran tamaño. El detector de metales sólo puede hacer una localización aproximada de los objetos metálicos enterrados, por lo que a menudo hay que cavar un gran agujero para encontrar el objeto. -
Page 43: Descripción General Del Aparato
DESCRIPCIÓN GENERAL DEL APARATO Tapa de la batería Barra magnética Junta de goma en forma de O Batería Cubierta de plástico redonda Toma de la batería Portapilas Placa conductora Luz LED Interruptor Botón de encendido LED Soporte magnético... -
Page 44: Funciones
FUNCIONES Botón de encendido/ Botón de calibración Para utilizar el botón de encendido como botón de calibración, púlselo ligeramente una vez. La luz LED parpadeará dos veces y la unidad vibrará dos veces brevemente. La luz LED blanca se encenderá, indicando que el puntero está... - Page 45 Pila y tapa: Gire la tapa de la batería en sentido contrario a las agujas del reloj para abrir el compartimento y gírela en el sentido de las agujas del reloj para cerrarlo. Asegúrese de utilizar una pila alcalina de 9 V. La vida media de una pila alcalina es de 20 horas.
-
Page 46: Inicio Rápido
INICIO RÁPIDO Para utilizar correctamente el puntero, le recomendamos que lea atentamente las instrucciones y practique antes en interiores. Sólo debe buscar tesoros en el exterior cuando se haya familiarizado con los ajustes básicos. Prepare muestras de metal: se trata de un puntero que detecta metales sin moverse. - Page 47 Encienda el puntero. El LED de intensidad de la señal se iluminará dos veces y el motor vibrará también dos veces. Finalmente, se iluminará el LED, señal de que la unidad se ha recalibrado automáticamente. El puntero queda entonces en reposo. Nota: Si cambia la ubicación de la unidad o la gira, esta puede desviarse constantemente o perder sensibilidad debido a la influencia del campo magnético o los campos electromagnéticos próximos.
-
Page 48: Uso En El Campo
Intente mantener el puntero fijo y pulse el botón de calibración cuando la luz LED se haya vuelto blanca y la intensidad de la vibración sea máxima. Entonces el puntero se recalibra y la sensibilidad de la pantalla disminuirá. La luz LED no se encenderá y la unidad dejará de vibrar. Esto significa que el radio de búsqueda se ha reducido. - Page 49 Si el objeto de destino no está enterrado a gran profundidad, puede probar el siguiente método: encienda el puntero y calíbrelo en el área en la que podría estar enterrado el objetivo. Mantenga el puntero en posición vertical y acérquelo lentamente al suelo (véase la ilustración). El dispositivo emitirá...
- Page 50 Si el objeto que busca está profundamente enterrado y fuera del rango de búsqueda del puntero, debe utilizar nuevamente el detector de metales para determinar su posición con mayor precisión. Tras haber establecido la posición, puede empezar a cavar . Compruebe con el puntero la tierra que vaya quedando amontonada para comprobar si ya ha desenterrado el objeto que busca o si todavía está...
- Page 51 El entorno es complejo. Si el puntero emite la señal de alarma en todas las direcciones y vibra y parpadea constantemente, debe recalibrarlo. Debe prestar especial atención al cambio de color de la luz LED y a la frecuencia de vibración para determinar la posición exacta. Cuando la frecuencia de vibración aumenta y la luz LED cambia a blanco, la distancia al objetivo es mínima.
-
Page 52: Indicaciones Sobre La Retirada Del Aparato
INDICACIONES SOBRE LA RETIRADA DEL APARATO Si en su país existe una disposición legal relativa a la eliminación de aparatos eléctricos y electrónicos, este símbolo estampado en el producto o en el embalaje advierte de que no debe eliminarse como residuo doméstico. - Page 53 Gentile cliente, La ringraziamo per l'acquisto del dispositivo. La preghiamo di leggere attentamente le seguenti indicazioni e di seguirle per prevenire eventuali danni. Non ci assumiamo alcuna responsabilità per danni scaturiti da una mancata osservanza delle indicazioni relative alla sicurezza e da un uso improprio del dispositivo.
-
Page 54: Introduzione
INTRODUZIONE Il pinpointer è progettato per una precisa localizzazione degli oggetti metallici. Il dispositivo dovrebbe essere usato in combinazione con un metal detector di grandi dimensioni. Il metal detector può solo localizzare approssimativamente gli oggetti metallici sepolti e quindi è spesso necessario scavare una buca per trovare l'oggetto. -
Page 55: Descrizione Del Dispositivo
DESCRIZIONE DEL DISPOSITIVO Coperchio delle pile Asta magnetica Guarnizione o-ring di gomma Batteria Involucro rotondo di plastica Attacco della batteria Portabatterie Piastra a circuito stampato Spia a LED Interruttore Supporto porta asta Pulsante di accensione a LED magnetico... -
Page 56: Funzioni
FUNZIONI Pulsante di accensione/ Pulsante di bilanciamento Per usare il pulsante di accensione come un pulsante di bilanciamento, premerlo leggermente una volta. La spia a LED lampeggia due volte e il dispositivo vibra due volte brevemente. La spia a LED bianca si accende e ciò... - Page 57 Pila e coperchio pila Ruotare il coperchio della pila in senso antiorario per aprirlo e ruotarlo in senso orario per chiuderlo. Assicurarsi di utilizzare una pila alcalina da 9 V. La durata media di una pila alcalina è di 20 ore. Quando si sostituisce la pila, accertarsi che la batteria sia inserita correttamente, che la guarnizione o-ring in gomma sia posizionata correttamente e che il vano batteria sia chiuso correttamente per evitare che possa penetrare acqua al suo interno.
-
Page 58: Guida Rapida
GUIDA RAPIDA Per utilizzare correttamente il pinpointer, si consiglia di leggere attentamente le istruzioni e di fare pratica in casa con il pinpointer. Si consiglia di cercare tesori all'aperto solo dopo aver preso confidenza con le impostazioni di base. Preparare i metalli: Questo pinpointer è un metal detector non-motion. Se ci si avvicina a un obiettivo, questo reagisce a tutti i tipi di metallo. - Page 59 Accendere il pinpointer. La spia a LED della potenza del segnale si illumina inizialmente due volte e il motore vibra due volte. Infine si accende il LED relativo all'illuminazione, che significa che il dispositivo si è tarato automaticamente. Il pinpointer è in standby. Nota: se si modifica la posizione del dispositivo o se lo si ruota, può...
-
Page 60: Impiego Sul Campo
Cercare di tenere il pinpointer immobile e premere il pulsante di bilanciamento se la spia a LED è diventata bianca e l'intensità della vibrazione è elevata. In seguito il pinpointer viene di nuovo bilanciato e la sensibilità della spia diminuisce. A questo punto la spia a LED non si accende e il dispositivo non vibra più. - Page 61 Se l'oggetto non è sepolto in profondità, provare con il seguente metodo: accendere il pinpointer e bilanciarlo nell'area dove potrebbe essere sepolto. Tenere il pinpointer in posizione verticale per tutto il tempo e spostarlo lentamente sul terreno (vedi figura). Nella posizione dove il bersaglio è...
- Page 62 Se l'oggetto che si sta cercando è sepolto in profondità e si trova al di fuori dell'area di ricerca del pinpointer, usare di nuovo il metal detector per determinare la posizione esatta. Dopo aver stabilito la posizione, iniziare a scavare . Controllare con il pinpointer il terreno scavato per accertarsi che l'oggetto cercato non sia già...
- Page 63 L'ambiente è complesso. Se il pinpointer emette un segnale di allarme ovunque vibrando e lampeggiando costantemente, è necessario riequilibrarlo. Per determinare la posizione esatta, è necessario prestare particolare attenzione al cambiamento del colore della spia a LED e alla frequenza di vibrazione. Se la frequenza di vibrazione aumenta e la spia a LED diventa bianca, la distanza dell'oggetto è...
-
Page 64: Indicazioni Per Lo Smaltimento
INDICAZIONI PER LO SMALTIMENTO. Se nel tuo Paese sono vigenti regolamenti legislativi relativi allo smaltimento di dispositivi elettrici ed elettronici, questo simbolo sul prodotto o sull'imballaggio indica che non è consentito smaltire questo prodotto insieme ai rifiuti domestici. Il dispositivo deve invece essere portato in un centro di raccolta per il riciclaggio di dispositivi elettrici ed elettronici.
Need help?
Do you have a question about the Powerpoint and is the answer not in the manual?
Questions and answers