
Related Manuals for DJO Global ARTROMOT-F


Summary of Contents for DJO Global ARTROMOT-F
- Page 1 GEBRAUCHSANLEITUNG ARTROMOT®-F DE · GEBRAUCHSANLEITUNG US/GB · OPERATING INSTRUCTIONS MOT-301-DE_USA-GB_Rev_03-04-01-2017_DV3.indd 1 17.01.17 10:10...
- Page 2 MOT-301-DE_USA-GB_Rev_03-04-01-2017_DV3.indd 2 17.01.17 10:10...
-
Page 3: Gerätebeschreibung
Gerätebeschreibung Device description 17 16 MOT-301-DE_USA-GB_Rev_03-04-01-2017_DV3.indd 3 17.01.17 10:10... -
Page 4: Abbildungen
Abbildungen Figures MOT-301-DE_USA-GB_Rev_03-04-01-2017_DV3.indd 4 17.01.17 10:10... - Page 5 MOT-301-DE_USA-GB_Rev_03-04-01-2017_DV3.indd 5 17.01.17 10:10...
-
Page 6: Table Of Contents
Inhalt Gerätebeschreibung Abbildungen 1. Informationen zum Ein satz der Bewegungsschiene 1.1 Einsatzmöglichkeiten 1.2 Therapieziele 1.3 Indikationen 2. Beschreibung der ARTROMOT®-F 3. Sicherheitshinweise 4. Einstellen des Gerätes 4.1 Einstellen des Gerätes für die Fingerbehandlung 4.2 Einstellen des Gerätes für die Daumenbehandlung 4.3 Einstellen des Gerätes für die MP-Block-Behandlung (Innere Minus-Position) 5. -
Page 7: Informationen Zum Ein Satz Der Bewegungsschiene
1. Informationen zum Ein satz der Bewegungsschiene – Offene Reposition und starre interne 1.1 Einsatzmöglichkeiten Fixierung einer intraartikulären, dia physären und metaphysären Fraktur der Phalanx- und Mittelhandknochen Die ARTROMOT®-F ist eine motorisier te Bewegungsschiene zur kontinuierlichen – Flexor- und Extensorsehnentenolyse passiven Bewegung (Continuous Passive –... -
Page 8: Beschreibung Der Artromot®-F
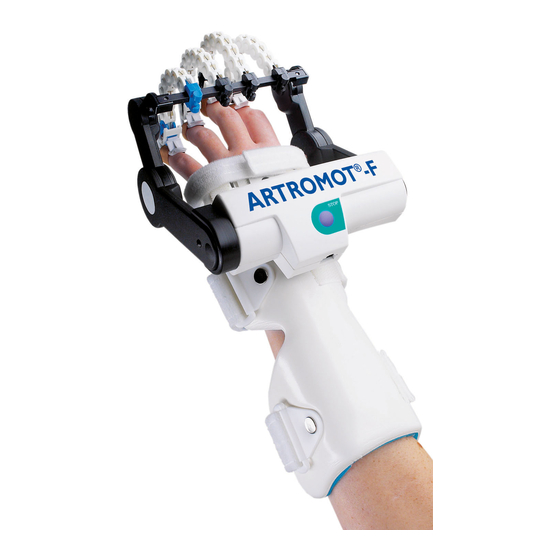
2. Beschreibung der ARTROMOT®-F Die motorisierte Bewegungsschiene 19. Anschlußkabel ermöglicht folgende Bewegungen: 20. Schraubenzieher Extension/Flexion MCP: 0°–90° (MCP/MP – Fingergrundgelenk) Symbol-Erklärung Extension/Flexion PIP: 0°–110° (PIP – Proximales Interphalangealgelenk) Extension/Flexion DIP: 0°–70° (DIP – Distales Interphalangealgelenk) Die ARTROMOT®-F zeichnet sich unter Extension Geschwin- Batterie... -
Page 9: Sicherheitshinweise
3. Sicherheitshinweise die einen sicheren Gebrauch des Gerätes Achtung! ausschließen, unzugänglich aufbewahrt werden. Unbedingt vor Inbetriebnahme lesen! – Bei Patienten, die die Handprogram- miereinheit nicht bedienen können, – Beachten Sie, dass das Gerät abgeschaltet z.B. bei Lähmung, muss die Behandlung ist, bevor der Netzstecker gezogen wird. -
Page 10: Einstellen Des Gerätes
– Achten Sie bei der Reinigung darauf, – Legen Sie die Unterarmfixierungsschiene dass das Gerät nicht direkt mit der (12) so auf den Unterarm, dass das distale Reinigungslösung benetzt wird, da die Schienenende in der Mitte der MP- Flüssigkeit in das Gehäuse ein dringen Gelenke liegt. -
Page 11: Einstellen Des Gerätes Für Die Daumenbehandlung
verwendet werden. Der blaue Finger- Å Anbringen der Fingerclips (16) führer (8) kann einen durchschnittlichen und -führer (7/8) Daumen gut bewegen. – Legen Sie die Hand auf eine gerade – Bringen Sie die Klebeseite der VHB- Fläche, um eine ulnare Deviation des Auflage (17) an der Unterseite der Hand gelenks während der Beugung Finger clips (16) an. -
Page 12: Programmieren Der Artromot®-F
5. Programmieren der ARTROMOT®-F 3. Zum Programmieren der Extension die Vor dem Programmieren EXT-Taste drücken. Auf der LCD-Anzeige erscheint das Extensions piktogramm Vergewissern Sie sich, dass das Gerät vor und die derzeitig programmierte Exten- dem Betrieb vollständig zusammengebaut sionseinstellung. ist. 4. -
Page 13: Programmieren Der Sonderfunktionen
4. Nachdem das Programmieren abgeschlos- schalten. Auf der LCD-Anzeige erscheint sen ist, nochmals die Einstell taste SET das Thermometer; das Piktogramm für drücken, um die Ein stellung zu speichern. die Aufwärmfunktion. Wenn Sie die Einstelltaste nicht drücken, 3. Um die Behandlung zu starten, drücken können Sie mit dem Programmieren Sie die START/STOP-Taste. -
Page 14: Umbau
6. Umbau Sperrfunktion Mit der Sperrfunktion kann das medizi- Fingerführer austauschen/ nische Personal Einstellungen wirksam umsetzen sperren, damit der Patient keine Nachein- stellungen vornehmen kann. 1. Es gibt 3 mittelgroße Fingerführer (schwarz) und einen kleinen (blau). Wenn Funktionen etc. gesperrt wurden, Zusätzliche Fingerführer in den Größen wird das Piktogramm der Sperrfunktion klein, mittelgroß... - Page 15 – Das Gerät auf sichtbare Schäden über- 1. Zur Nacheinstellung der Antriebsstange prüfen, z.B. verbogene Teile, eingerisse- und der Fingerführer mit Hilfe des ne oder kaputte Abdeckungen, durch- Gerätes IMMER die Handprogram- gescheuerte oder beschädigte Drähte miereinheit verwenden. usw. Bei Anzeichen von Schäden muss das Gerät vor dem nächsten Gebrauch 2.
-
Page 16: Technische Daten
Wartung nach 12 Monaten: 8. Technische Daten – Ggf. die elektrische Leitfähigkeit der Erdverbindung vom Geräterahmen zum Elektrischer Erdungsstift des Netzteils (wenn vorhan- Anschluss: Batterie 6V 4AA den) mit einem Schutzanalysegerät oder 100-240 V AC einem geeigneten Utensil überprüfen. (je nach Einstellung) 50-60 Hz –... -
Page 17: Kontakt
Für Produktfragen und Service stehen wir Ihnen gerne zur Verfügung: ARTROMOT® International Bitte setzten Sie sich mit Ihrem örtlichen Händler, der DJO Global Hauptniederlas- sung in USA, der DJO Global International Hauptniederlassung in England, oder direkt mit DJO Global Deutschland in Verbindung. -
Page 18: Technischer Service
10. Technischer Service Achtung! Das Produkt darf nicht auf eine offene Wunde gelegt werden. Bei Reizung, Un- 10.1 Technische Hotline wohlsein oder schlechter Zirkulation muss der Gebrauch abgebrochen und sofort ein Haben Sie technische Fragen? Arzt verständigt werden. Benötigen Sie den technischen Service? VOR KINDERN UNZUGÄNGLICH AUF- BEWAHREN! Telefon :... -
Page 19: Handschuh
11.2 Handschuh – Wählen Sie die richtige Handschuhgröße für den Patienten aus. – Befestigen Sie das Klettverschluss-pols- ter an der Unterseite der 4 Clips (20). – Bringen Sie die Clips an den Fingerspit- zen auf den Fingernagel an und befes- tigen Sie diese lose mit dem Klettver- schlussriemen. -
Page 20: Konformitätserklärung
QAL Medical LLC. A division of Quality Assembly and Logistics, LLC Registered to ISO 13485 for Quality Assurance 3000 Woleske Road Marinette, Wisconsin 54143 USA Tel. 715.735.4700; 888.430.1625 Fax 715.732.6402 www.QALmedical.com EC Konformitätserklärung QAL Medical LLC. erklärt hiermit, dass die folgenden Continuous Passive Motion (CPM) medizinisch-technischen Geräte der Klasse IIa (Anhang IX, Regel 9) zuge- ordnet werden und mit den notwendigen Anforderungen und Richtlinien für Medizinprodukte 93/42/EEG übereinstimmen. - Page 21 MOT-301-DE_USA-GB_Rev_03-04-01-2017_DV3.indd 21 17.01.17 10:10...
- Page 22 Contents Device description Figures 1. How to use the motion device 1.1 Possible applications 1.2 Objectives of therapy 1.3 Indications 2. ARTROMOT®-F description 3. Safety instructions 4. Adjusting the device 4.1 Adjusting the device for the finger treatment 4.2 Adjusting the device for the thumb treatment 4.3 Adjusting the device for MP Block treatment 5.
-
Page 23: How To Use The Motion Device
1. How to use the motion device – Flexor and extensor tendon synovecto- 1.1 Possible applications mies, following arthrotomy and draina- ge of acute septic arthritis The ARTROMOT®-F is a motorized motion – Prothetic replacement of MP and PIP device used for Continuous Passive Motion joints (CPM) of the hand and finger joints. -
Page 24: Artromot®-F Description
2. ARTROMOT®-F description The CPM device allows for the following 19 Coil Cord motions of the finger/hand joints: 20 Philips screwdriver Extension/flexion MCP: 0°–90° (MCP or MP – Metacarpophalangeal joint) Symbol-Erklärung Extension/flexion PIP: 0°–110° (PIP – Proximal interphalangeal joint) Extension/flexion DIP: 0°–70°... -
Page 25: Safety Instructions
3. Safety instructions as paralyzed persons or those who PRECAUTION! have had operations on both shoulders, specialists must constantly supervise Please read before starting the device! treatment. – The doctor or therapist must decide on – Turn the power off before unplugging. a case-to-case basis whether the device Unplug the power supply by grasping can be used with the particular patient. -
Page 26: Adjusting The Device
4. Adjusting the device – Loosen the splint clamp (3) underneath 4.1 Adjusting the device for the the actuator housing (1) by turning it finger treatment several times. – Slide the CPM actuator onto the splint’s † Attaching the Splint mounting bracket (15) and adjust the CPM actuator distally or proximally along the mounting bracket. -
Page 27: Adjusting The Device For The Thumb Treatment
4.2 Adjusting the device for PRECAUTION! the thumb treatment As the force of the motor needs to be concentrated on the PIP joints, not – Rotate splint from the dorsal forearm to on the MP joints, move the motor so that the radial side as shown. -
Page 28: Programming The Artromot®-F
5. Programming the ARTROMOT®-F 3. To program extension press EXT button. Before programming The LCD will display the extension icon and the currently programmed extensi- Ensure the device is completely assembled on setting. prior to operation 4. To program the desired amount of extension, press the + and –... -
Page 29: Programming The Special Functions
Programming Pause 5.2 Programming the special functions 1. With power on, press the SET button. The yellow light will appear indicating PRECAUTION! that the controller is ready to receive new programming. The LCD will flash all The following are NOT for patient use. the system icons. -
Page 30: Conversion
out. The icon of each feature you 3. With the bar detached, slide the finger lock out will appear. You may lock actuators off the bar and replace or rear- out one or all features. range them for left or right hand set up. 4. - Page 31 – Ensure that are labels are present. – Replace the patient softgoods kit. – Verify that the device operates to its set limits over several complete cycles. – For Range of Motion (ROM) settings verify device calibration by observing the ROM of the device while taking a visual reading using a geniometer at the device’s anatomic pivot points.
-
Page 32: Specifications
Sterilization 8. Specifications – This device does not require sterilization for use. Electrical connection: Battery 6V 4AA – Exposing the device to sterilization con- 100-240 V, ditions will damage the device and may result in a potential hazard. 50/60 Hz Warranty: Rated current motor: 2.5 A max. -
Page 33: Contact
ARTROMOT® International: Please contact your local dealer, the DJO Global Headquarters in the USA, the DJO Global International Headquarters in Eng- land or DJO Global in Germany. DJO Global International Headquarters: DJO UK Ltd. 1a Guildford Business Park Guildford... -
Page 34: Technical Service
Parts needed: (fig.11) 10. Technical service A: Finger Clip B: Adhesive-backed Velcro hook 10.1 Technical hotline C: Accessory D-Ring strap D: Silipos Digital Cap Haben Sie technische Fragen? Benötigen Sie den technischen Service? Directions for use: Telefon : +49-180-5-1 ormed de –... -
Page 35: Spare Parts
– Attach the splint on top of the glove and adjust the splint shape in order to fit the patient’s forearm before securing the Velcro straps on the splint. (fig.15/16) 12. Spare parts Spare parts are given in a separate spare part list. -
Page 36: Declaration Of Conformity
QAL Medical LLC. A division of Quality Assembly and Logistics, LLC Registered to ISO 13485 for Quality Assurance 3000 Woleske Road Marinette, Wisconsin 54143 USA Tel. 715.735.4700; 888.430.1625 Fax 715.732.6402 www.QALmedical.com EC Declaration of Conformity QAL Medical LLC. declares that the following Continuous Passive Motion (CPM) medical devices have been classified as Class IIa (Annex IX Rule 9) and are in conformity with the essential requirements and provisions of Council Directive 93/42/EEC as amended by Directive 2007/47/EC:... - Page 37 MOT-301-DE_USA-GB_Rev_03-04-01-2017_DV3.indd 37 17.01.17 10:10...
- Page 38 Notes MOT-301-DE_USA-GB_Rev_03-04-01-2017_DV3.indd 38 17.01.17 10:10...
- Page 39 Notes MOT-301-DE_USA-GB_Rev_03-04-01-2017_DV3.indd 39 17.01.17 10:10...
- Page 40 Exclusive distributed by: ORMED GmbH Merzhauser Str. 112 · 79100 Freiburg · Germany Tel. +49 761 4566-01 · Fax +49 761 4566-5501 medizintechnik@DJOglobal.com · www.DJOglobal.de MOT-301-DE_USA-GB_Rev_03-04-01-2017_DV3.indd 40 17.01.17 10:10...
Need help?
Do you have a question about the ARTROMOT-F and is the answer not in the manual?
Questions and answers