Table of Contents
Advertisement
Quick Links
V2.3
RUNGU Juggernaut User Manual – 2020 model year
®
rungu
juggernaut owners
manual
1
Congratulations on purchasing the Juggernaut
! Before you ride and make new tracks, please read the
following instructions carefully.
IMPORTANT- Standard Bearer Machines will not be liable for any damage or injury that may occur due
to operation of our Juggernauts. By using the Juggernaut, you are agreeing to Standard Bearer Machines
Terms and Conditions and the warnings and conditions of the Generic Bike Manual which are included
with other files in the USB key accompanying the Juggernaut.
1
As the owner, you agree and are bound by all sales and transfer conditions as defined in
in "SBM Rungu Sales
Terms and Conditions US 2022."
Copies of these documents are available upon request by e-mailing
sales@riderungu.com.
Copyright 2017 Standard Bearer Machines, LLC
1
Advertisement
Table of Contents

Subscribe to Our Youtube Channel
Related Manuals for Rungu JUGGERNAUT 2020


Summary of Contents for Rungu JUGGERNAUT 2020
- Page 1 V2.3 RUNGU Juggernaut User Manual – 2020 model year ® rungu juggernaut owners manual Congratulations on purchasing the Juggernaut ! Before you ride and make new tracks, please read the following instructions carefully. IMPORTANT- Standard Bearer Machines will not be liable for any damage or injury that may occur due to operation of our Juggernauts.
-
Page 2: Table Of Contents
Tools required ............................5 Unpacking and Assembly Instructions ...................... 6 Additional Installation Instructions – Mud Guards ................. 20 Additional Installation Instructions – Rungu Cargo Rack ................ 25 Cautions and Safety ............................ 31 General Cautions and Warnings ......................31 Riding the Juggernaut ..........................32 Juggernaut Operation Cautions ...................... -
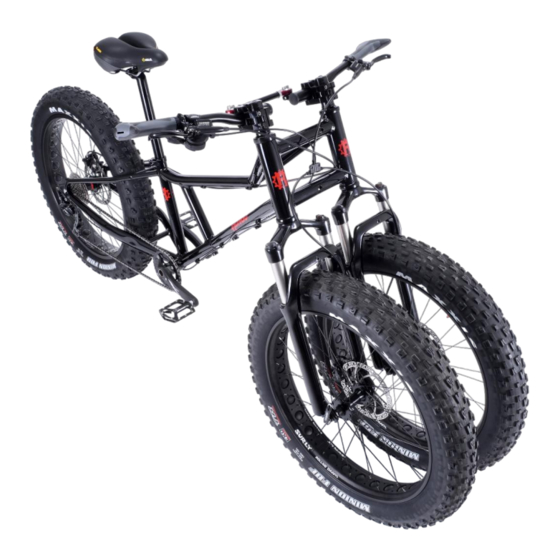
Page 3: Parts Identification
V2.3 RUNGU Juggernaut User Manual – 2020 model year Parts identification The following images show the names of various components on the Juggernaut Copyright 2017 Standard Bearer Machines, LLC... - Page 4 V2.3 RUNGU Juggernaut User Manual – 2020 model year Copyright 2017 Standard Bearer Machines, LLC...
-
Page 5: Unpacking And Assembly Instructions
V2.3 RUNGU Juggernaut User Manual – 2020 model year Unpacking and Assembly Instructions Warning: Failure to follow instructions may lead to incomplete or faulty assembly that can result in accidental rider injury or death. Before you ride and make new tracks, please follow the assembly instructions carefully. The team at Standard Bearer Machines recommends that you have the assembly performed by a qualified bike mechanic. -
Page 6: Unpacking And Assembly Instructions
If you intend to ship or return your Rungu, please keep all packing materials. 1. If you have purchased a model with a Rungu Cargo Rack or an optional Cargo Rack, remove the rack and place it to one side. - Page 7 V2.3 RUNGU Juggernaut User Manual – 2020 model year 5. Lift the frame and attached components from the carton. CAUTION: THE JUGGERNAUT WITHOUT FRONT WHEELS WEIGHS 40 LBS (23 KG) USE TWO (2) PEOPLE TO REMOVE THE JUGGERNAUT FROM THE PACKAGING TO AVOID INJURY 6.
- Page 8 V2.3 RUNGU Juggernaut User Manual – 2020 model year 8. Place the right-side handlebar in the clamp such that there’s a 1/8” gap between the handlebar end stop and the side of the stem as seen from the front of the handlebar.
- Page 9 V2.3 RUNGU Juggernaut User Manual – 2020 model year 11. Fasten, the right-side retention bolts using a crossing pattern (shown below) of tightening the upper handlebar retention screw and then bottom screw instead of tightening both top screws and then the bottom screws for each clamp.
- Page 10 V2.3 RUNGU Juggernaut User Manual – 2020 model year 14. Insert the skewer into the LEFT wheel from the side of the brake disc as shown below. Copyright 2017 Standard Bearer Machines, LLC...
- Page 11 V2.3 RUNGU Juggernaut User Manual – 2020 model year 15. Replace the conical spring (small end first) on the other side of the wheel. Screw the end cap on a few turns to ready the wheel for installation. 16. Prep the RIGHT wheel. Insert the other skewer into the RIGHT wheel from the side OPPOSITE to the brake disc as shown below.
- Page 12 V2.3 RUNGU Juggernaut User Manual – 2020 model year 17. Replace the conical spring (small end first) on the other side of the wheel. Screw on the end cap with a few turns to ready the wheel for installation. 18. Get the bike ready to mount the front wheels by making sure the parking brake is off (which is the way the bike ships).
- Page 13 V2.3 RUNGU Juggernaut User Manual – 2020 model year 20. The ends of the axle will sit in the fork “dropouts” when correctly aligned. You may have to unscrew the end cap a turn or two if the fork doesn’t drop in place.
- Page 14 V2.3 RUNGU Juggernaut User Manual – 2020 model year 22. The ends of the axle will sit in the fork “dropouts” when correctly aligned. You may have to unscrew the end cap a turn or two if the fork doesn’t drop in place.
- Page 15 V2.3 RUNGU Juggernaut User Manual – 2020 model year 24. Tighten the end cap nut on the RIGHT wheel and close the quick-release lever. As a guideline the end cap nut should begin to clamp onto the fork drop out when the lever points away from the wheel at a right angle.
- Page 16 V2.3 RUNGU Juggernaut User Manual – 2020 model year 25. Remove the pedals from the box and install the RIGHT Pedal first – the RIGHT pedal is marked with an “R” as shown below. 26. Use your fingers to thread the pedal shaft by inserting the threaded shaft into the crank arm.
- Page 17 V2.3 RUNGU Juggernaut User Manual – 2020 model year 27. Use a 6mm Hex wrench to tighten the pedal once the pedal is fully inserted. 28. Install the LEFT Pedal next – LEFT pedal is marked with an “L” as shown below.
- Page 18 V2.3 RUNGU Juggernaut User Manual – 2020 model year 29. Use your fingers to thread the pedal shaft by inserting the threaded shaft into the crank arm. Then hold the threaded section of the pedal in the crank arm mounting hole and spin the entire crank arm in a clockwise motion as depicted below.
- Page 19 Note: Tire pressure plays an especially important role in how you enjoy your Rungu Juggernaut. If you plan to ride mostly on soft ground like sand or snow, use a tire pressure of 5 (34 kPa) for best traction and control as well as minimizing tread wear.
-
Page 20: Additional Installation Instructions - Mud Guards
V2.3 RUNGU Juggernaut User Manual – 2020 model year Additional Installation Instructions – Mud Guards If you received Mud Guards as part of your package, follow the directions below for installation. 1. Remove the mud flaps from packaging along with their screws and retention nuts. Remove the retention nut from each screw. - Page 21 V2.3 RUNGU Juggernaut User Manual – 2020 model year 2. Slide the mud guard from front of fork backwards until mounting tab aligns with mounting hole on fork bridge. 3. Align the mounting slot with the mounting hole on the fork bridge. Install the screw from the front of the fork through the mounting slot as shown below.
- Page 22 V2.3 RUNGU Juggernaut User Manual – 2020 model year 4. Thread the nut onto the back of the screw behind fork bridge. 5. Use an adjustable wrench or 10 mm socket wrench to secure the nut. Copyright 2017 Standard Bearer Machines, LLC...
- Page 23 V2.3 RUNGU Juggernaut User Manual – 2020 model year Use a 5mm hex wrench to continue threading the nut onto the screw 7. Before fully tightening the nut, slide the mud guard up vertically to maximize wheel clearance. Copyright 2017 Standard Bearer Machines, LLC...
- Page 24 V2.3 RUNGU Juggernaut User Manual – 2020 model year 8. Adjust the mud flap to align it with the tire and fully tighten the nut. 9. Bend the mud guard forward to allow even clearance between the mudguard and the tire.
-
Page 25: Additional Installation Instructions - Rungu Cargo Rack
V2.3 RUNGU Juggernaut User Manual – 2020 model year Additional Installation Instructions – Rungu Cargo Rack 1. Place the rack over the rear tire making sure that the tabs at the bottom of the rack are on the outside of the metal rack supports. - Page 26 V2.3 RUNGU Juggernaut User Manual – 2020 model year Metal rack support (left) Metal rack support (right) Copyright 2017 Standard Bearer Machines, LLC...
- Page 27 V2.3 RUNGU Juggernaut User Manual – 2020 model year 2. Slide the front tab of the rack into the rear rack support as shown. The rack will come to rest here and on the right and left rack supports so you can insert fasteners next.
- Page 28 V2.3 RUNGU Juggernaut User Manual – 2020 model year 4. Align the holes in the tab at the bottom left side of the rack with the fastening location on the left side metal rack support. Thread an M8 screw and washer through the tab and into the rack support.
- Page 29 V2.3 RUNGU Juggernaut User Manual – 2020 model year 5. Align the holes in the tab at the bottom right side of the rack with the fastening location on the right-side metal rack support. Thread an M8 screw and washer through the tab and into the rack support.
- Page 30 V2.3 RUNGU Juggernaut User Manual – 2020 model year 6. Use a 6 mm hex wrench to tighten all three screws, start with the screw on the mounting plate in the front. Copyright 2017 Standard Bearer Machines, LLC...
-
Page 31: Cautions And Safety
The Juggernaut is a tricycle that you can ride like a bicycle with the added benefit of more stability on soft ground. Refer to the All Purpose Bicycle Manual available on the Rungu USB drive that ships with the Juggernaut to new customers or online at this link WARNING: Being a tricycle, the Juggernaut has a tie-rod that connects the two front forks. -
Page 32: Riding The Juggernaut
Your Rungu Juggernaut comes with “Presta” or “French Valve” innertubes, which work better at low pressures than “Schraeder” or “English Valves” (standard on car tires). Some bicycle pumps come with Presta valve adapters built into the pump outlet, but many do not. Rungu ships Juggernaut with a “screw-on” adapter. -
Page 33: Using The Presta "Screw-On" Valve Adapters
V2.3 RUNGU Juggernaut User Manual – 2020 model year Using the Presta “screw-on” valve adapters 1. Unscrew the protective cap from the presta valve on the tire you want to inflate. 2. Unscrew the captive nut on the top of the presta valve to allow air to flow into the tire. - Page 34 V2.3 RUNGU Juggernaut User Manual – 2020 model year 3. Screw on the Presta valve adapter. 4. Connect the bike tire pump and inflate tire to the pressure appropriate for where you’re riding – as recommended in the before you ride section of this document.
- Page 35 V2.3 RUNGU Juggernaut User Manual – 2020 model year 5. Remove the bike tire pump and unscrew the Presta valve adapter. Put the valve adapter in a safe place; they are easy to lose. CAUTION: DO NOT LEAVE THE PRESTA VALVE ADAPTER IN PLACE. THE CAPTIVE NUT NEEDS TO BE RE-FASTENED TO RETAIN TIRE AIR PRESSURE.
-
Page 36: Before You Ride - Safety Check
2010." Wear a helmet. 2. Make sure the stems are tightly clamped to your forks. To do this, stand in front of the Rungu astride the left wheel facing the steering assembly. Hold both handlebars and try to turn the steering. - Page 37 V2.3 RUNGU Juggernaut User Manual – 2020 model year dropout for the rear wheel. If they are not, STOP. Unclamp the quick release, reposition the wheel and re-clamp the quick release to retain the wheel. 4. Make sure each quick release skewer is clamping the wheel. The quick releases should be difficult to open.
- Page 38 15 PSI (103 KPa). Note: Tire pressure plays an especially important role in how you enjoy your Rungu JUGGERNAUT. If you plan to ride mostly on soft ground like sand or snow, use a tire pressure between 5 (34 kPa) and 6 PSI (41 kPa) for best traction and control as well as minimizing tread wear.
-
Page 39: Using Derailleur (Gear) Shifters
V2.3 RUNGU Juggernaut User Manual – 2020 model year Using Derailleur (Gear) Shifters You use a shifter on the right-side handlebar to change gears and optimize your Juggernaut riding experience. Selecting the right gear lets you apply the appropriate power for the appropriate terrain. -
Page 40: Riding Safety
Juggernauts makes cornering on hard surfaces smooth and improves control on soft sand. The team at Rungu recommends leaving the suspension activated (not locked out) for all terrain, but you may want to try de-activating the suspension if you’re in deeper snow for better carving capability. -
Page 41: Using The Parking Brake Switch
(bumpy riding). It has the significant advantage of maintaining better gear engagement and limiting “chain suck” due to changing weather conditions. For these reasons, the team at Rungu strongly recommend the clutch switched on when riding in all conditions. To switch on the... -
Page 42: Rungu Juggernaut Maintenance, Care And Repair
V2.3 RUNGU Juggernaut User Manual – 2020 model year Rungu Juggernaut Maintenance, Care and Repair Before Each Ride See section labeled “Before your first ride – Safety Check” Securing your Juggernaut When riding the Juggernaut in areas where theft is a concern, use appropriate cable or chain locking devices and make sure to thread the cable/or chain through the frame, wheels and saddle/seatpost to avoid quick removal. -
Page 43: Chain Maintenance - Cleaning And Lubrication Every 40 Miles Of Hard Use
V2.3 RUNGU Juggernaut User Manual – 2020 model year Chain Maintenance – Cleaning and Lubrication every 40 miles of hard use Every 40 miles in wet, salty or muddy conditions, clean the chain and reapply lubricant. First clean wipe the chain with a rag and then use a chain cleaner like the one in the image below. We... -
Page 44: Rear Wheel Removal Or Replacement
How to remove the rear wheel 1. First, shift the rear wheel into 9 gear. Whether or not the chain is on the Rungu, shifting to 9 gear before wheel removal makes wheel removal easier. 2. If possible, find an object (e.g. empty bucket, cardboard box) that you can use to support the bike after the rear wheel is removed. - Page 45 V2.3 RUNGU Juggernaut User Manual – 2020 model year 3. If you have the microSHIFT Advent Derailleur, switch off the derailleur clutch by pushing down on the switch so it aligns with the white circle. 4. Release the quick release lever...
- Page 46 V2.3 RUNGU Juggernaut User Manual – 2020 model year 5. Loosen the quick release skewer by unscrewing the end cap. Be careful to not lose the springs or other components of the skewer if you remove the end cap. 6. The wheel will drop out and the cassette will get caught on the derailleur pulley.
-
Page 47: How To Replace The Rear Wheel
V2.3 RUNGU Juggernaut User Manual – 2020 model year How to replace the rear wheel 1. If you have the microSHIFT Advent derailleur, make sure that the derailleur clutch switch is OFF. Regardless the derailleur, make sure that the derailleur is shifted into 9 gear. - Page 48 V2.3 RUNGU Juggernaut User Manual – 2020 model year 3. Make sure the wheel axle is seated in the left and right dropouts, then carefully lower the wheel onto the ground. Gravity helps seat the axle in the dropouts. Then, tighten the quick release end cap.
- Page 49 6. After checking that the rear wheel is fastened tightly, switch on the derailleur clutch and test ride the Rungu for more than five minutes to make sure the speedometer is working. WARNING: MAKE SURE TO TIGHTEN THE QUICK-RELEASE IN THE FRAME SO THAT THE WHEEL CANNOT FALL OUT;...
-
Page 50: Technical Information
V2.3 RUNGU Juggernaut User Manual – 2020 model year Technical Information Copyright 2017 Standard Bearer Machines, LLC... -
Page 51: Troubleshooting
If the derailleur, hanger and frame are intact, 4. Replace the chain. 5. Contact Rungu Support if you have other questions. Problem: I hear a loud click noise coming when I’m pedaling in a high gear The cassette cog is worn out; replace cassette. -
Page 52: Getting More Information
If the derailleur, hanger and frame are intact, 4. Contact Rungu Support if you have other questions. Getting more information Thank you again for purchasing a Rungu Juggernaut. For further questions, please consult the Support Page on the riderungu.com website or email support@riderungu.com.
Need help?
Do you have a question about the JUGGERNAUT 2020 and is the answer not in the manual?
Questions and answers