Table of Contents
Advertisement
Quick Links
V1.1
2022 RUNGU Dualie Standard/Steep
®
tm
rungu
dualie
owner
manual - standard and
steep models
1
Congratulations on purchasing a Rungu Dualie
! You own the latest generation of the ultimate electric
alternative to a Quad ATV for off-road utility and fun. Before you ride, please read the following
instructions carefully.
Rungu Dualie uses the Bafang BBSHD mid-drive motor with a custom Rungu 52V (nominal voltage) input
that generates more than 1.4kW of mechanical power for off-road use. You access the power by
pedaling ("Pedal Assist") or pressing the thumb throttle. In "Pedal Assist," the Dualie senses when you
start to pedal and engages the motor to assist your pedaling - you don't have to use the throttle if you
don't want to. The amount of power assist varies based on the power level you select as you ride.
Unless you have ordered your Dualie with Class 1 or Class 2 reprogramming, we ship the Dualie
configured with five selectable power levels starting with very little assistance up to full power, which is
intended for use off-road only. The power settings are discussed below.
Note: US Federal Law mandates a 750W/20 MPH limit for riding an e-bike on public roads without a
license. Please check with your local government to ensure you follow all local laws and ordinances.
Standard Bearer Machines are not liable for those who choose not to follow their local laws.
CAUTION: STANDARD BEARER MACHINES WILL NOT BE HELD RESPONSIBLE FOR PEOPLE WHO CHOOSE
TO DISREGARD THE LAW!
WARNING: IMPORTANT- STANDARD BEARER MACHINES WILL NOT BE LIABLE FOR ANY DAMAGE OR
INJURY THAT MAY OCCUR DUE TO OPERATION OF YOUR DUALIE. BY USING THE DUALIE, YOU ARE
AGREEING TO STANDARD BEARER MACHINES TERMS AND CONDITIONS AND THE WARNINGS AND
CONDITIONS OF THE GENERIC BIKE MANUAL WHICH ARE INCLUDED WITH OTHER LINKS ON THE
MANUAL GUIDE THAT COMES WITH THIS PRODUCT.
Standard Bearer Machines, LLC (Standard Bearer Machines) thanks you for your purchase!
1
As the owner, you agree and are bound by all sales and transfer conditions as defined
in "SBM Rungu Sales Terms
and Conditions US 2022."
Copies of these documents are available on the list of electronic document links that
ship with the product or upon request by e-mailing sales@riderungu.com.
Copyright 2021 Standard Bearer Machines, LLC
1
Advertisement
Table of Contents

Subscribe to Our Youtube Channel
Related Manuals for Rungu DUALIE


Summary of Contents for Rungu DUALIE
- Page 1 The amount of power assist varies based on the power level you select as you ride. Unless you have ordered your Dualie with Class 1 or Class 2 reprogramming, we ship the Dualie configured with five selectable power levels starting with very little assistance up to full power, which is intended for use off-road only.
-
Page 2: Table Of Contents
8. Preparing your Battery Charger for use ..................41 9. Charging without removing the battery– Rungu Dualie ..............42 10. Charging your Main Battery after removing the battery– Dualie (single battery version only) ..44 11. Inflating Tires – using Presta valve adapters ................. 46 Using the Presta “screw-on”... - Page 3 23. After Each Ride ..........................69 24. Battery Care ........................... 69 25. Storage When Not Using Dualie for Periods of Two Weeks or Longer .......... 69 26. Prolonging the Life of your Battery – Best Practices ..............70 27. Chain Maintenance – Cleaning and Lubrication every 40 miles of hard use ......... 71 28.
- Page 4 V1.1 2022 RUNGU Dualie Standard/Steep 35. Performance ..........................86 36. Electrical ............................86 Troubleshooting ............................87 37. Electrical ............................87 38. Motor and System Performance ....................88 39. Mechanical ............................. 89 Getting more information ........................... 90 Copyright 2021 Standard Bearer Machines, LLC...
-
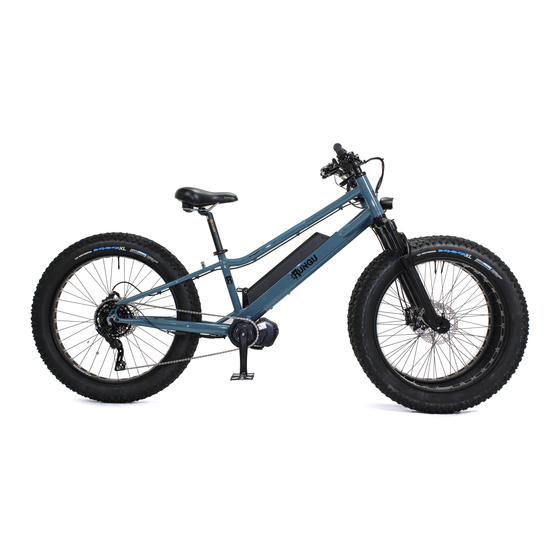
Page 5: Rungu Dualie Parts Identification
V1.1 2022 RUNGU Dualie Standard/Steep Rungu Dualie parts identification The following images show the names of various components on a Rungu Dualie Figure 1 Right Side View Figure 2 Steering assembly Copyright 2021 Standard Bearer Machines, LLC... - Page 6 V1.1 2022 RUNGU Dualie Standard/Steep Figure 3 Parking Brake View Figure 4 Battery access and charging views Copyright 2021 Standard Bearer Machines, LLC...
-
Page 7: Unpacking And Assembly Instructions
V1.1 2022 RUNGU Dualie Standard/Steep Unpacking and Assembly Instructions Before you ride and make new tracks, please follow the assembly instructions carefully. The team at Standard Bearer Machines recommends that you have the assembly performed by a qualified bike mechanic. -
Page 8: Instructions
Presta adapters, keys and pedals as well as other accessories that come with the specific model you ordered. Note: If you purchased a Dualie with the optional Cargo Rack, remove the rack first and place it to the side. Accessory Box. May be... - Page 9 2022 RUNGU Dualie Standard/Steep CAUTION: AVOID USING A KNIFE TO REMOVE PACKAGING. USING A KNIFE MAY SCRATCH THE FINISH OF YOUR NEW DUALIE. 45. Use the 5mm hex wrench to loosen and remove the four bolts from the right-side handlebar clamp 46.
- Page 10 V1.1 2022 RUNGU Dualie Standard/Steep 48. Replace the four bolts in the handlebar clamp and finger tighten. 49. From the front of the bike, align the handlebar by rotating it so the middle hashmark lines up with the upper inside edge of the stem as shown below.
- Page 11 V1.1 2022 RUNGU Dualie Standard/Steep 50. Fasten, the right-side retention bolts using a crossing pattern (shown below) of tightening the upper handlebar retention screw and then bottom screw instead of tightening both top screws and then the bottom screws for each clamp.
- Page 12 V1.1 2022 RUNGU Dualie Standard/Steep 53. Mount the keypad onto the left handlebar and slide the keypad near the throttle. Copyright 2021 Standard Bearer Machines, LLC...
- Page 13 V1.1 2022 RUNGU Dualie Standard/Steep 54. Reinsert the retention screw and tighten so the keypad doesn’t rotate on the handlebar. 55. Open the accessory box to remove the two quick release skewers from the packaging. 56. Select which wheel is the right-side wheel and the left-side wheel. Each wheel is labeled “Left”...
- Page 14 V1.1 2022 RUNGU Dualie Standard/Steep 57. Remove the two quick release skewers from the accessories box. Unscrew the end cap nut from the quick-release skewers and remove one of the two conical springs for each skewer. 58. Insert the skewer into the LEFT wheel from the side of the brake disc as shown below.
- Page 15 V1.1 2022 RUNGU Dualie Standard/Steep 59. Replace the conical spring (small end first) on the other side of the wheel. Screw the end cap on a few turns to ready the wheel for installation. 60. Prep the RIGHT wheel. Insert the other skewer into the RIGHT wheel from the side OPPOSITE to the brake disc as shown below.
- Page 16 V1.1 2022 RUNGU Dualie Standard/Steep 61. Replace the conical spring (small end first) on the other side of the wheel. Screw on the end cap with a few turns to ready the wheel for installation. 62. Get the bike ready to mount the front wheels by making sure the parking brake is off (which is the way the bike ships).
- Page 17 V1.1 2022 RUNGU Dualie Standard/Steep 64. The ends of the axle will sit in the fork “dropouts” when correctly aligned. You may have to unscrew the end cap a turn or two if the fork doesn’t drop in place. 65. Tilt the bike and mount the LEFT wheel to the LEFT fork making sure that the rotor fits between the brake caliper pads.
- Page 18 V1.1 2022 RUNGU Dualie Standard/Steep 66. The ends of the axle will sit in the fork “dropouts” when correctly aligned. You may have to unscrew the end cap a turn or two if the fork doesn’t drop in place. 67. Tighten the end cap nut on the LEFT wheel and close the quick-release lever. As a guideline the end cap nut should begin to clamp onto the fork drop out when the lever points away from the wheel at a right angle.
- Page 19 V1.1 2022 RUNGU Dualie Standard/Steep 68. Tighten the end cap nut on the RIGHT wheel and close the quick-release lever. As a guideline the end cap nut should begin to clamp onto the fork drop out when the lever points away from the wheel at a right angle.
- Page 20 V1.1 2022 RUNGU Dualie Standard/Steep 69. Remove the pedals from the box and install the RIGHT Pedal first – the RIGHT pedal is marked with an “R” as shown below. 70. Use your fingers to thread the pedal shaft by inserting the threaded shaft into the crank arm.
- Page 21 V1.1 2022 RUNGU Dualie Standard/Steep 71. Use a 6mm Hex wrench to tighten the pedal once the pedal is fully inserted. 72. Install the LEFT Pedal next – LEFT pedal is marked with an “L” as shown below. Copyright 2021 Standard Bearer Machines, LLC...
- Page 22 V1.1 2022 RUNGU Dualie Standard/Steep 73. Use your fingers to thread the pedal shaft by inserting the threaded shaft into the crank arm. Then hold the threaded section of the pedal in the crank arm mounting hole and spin the entire crank arm in a clockwise motion as depicted below.
- Page 23 Note: Tire pressure plays an especially important role in how you enjoy your Rungu Dualie. If you plan to ride mostly on soft ground like sand or snow, use a tire pressure of 5 (34 kPa) for best traction and control as well as minimizing tread wear.
-
Page 24: Additional Installation Instructions - Mud Guards
V1.1 2022 RUNGU Dualie Standard/Steep Additional Installation Instructions – Mud Guards If you received Mud Guards as part of your package, follow the directions below for installation. 1. Remove the mud flaps from packaging along with their screws and retention nuts. Remove the retention nut from each screw. - Page 25 V1.1 2022 RUNGU Dualie Standard/Steep 2. Slide the mud guard from front of fork backwards until mounting tab aligns with mounting hole on fork bridge. 3. Align the mounting slot with the mounting hole on the fork bridge. Install the screw from the front of the fork through the mounting slot as shown below.
- Page 26 V1.1 2022 RUNGU Dualie Standard/Steep 4. Thread the nut onto the back of the screw behind fork bridge. 5. Use an adjustable wrench or 10 mm socket wrench to secure the nut. Copyright 2021 Standard Bearer Machines, LLC...
- Page 27 V1.1 2022 RUNGU Dualie Standard/Steep Use a 5mm hex wrench to continue threading the nut onto the screw 7. Before fully tightening the nut, slide the mud guard up vertically to maximize wheel clearance. Copyright 2021 Standard Bearer Machines, LLC...
- Page 28 V1.1 2022 RUNGU Dualie Standard/Steep 8. Adjust the mud flap to align it with the tire and fully tighten the nut. 9. Bend the mud guard forward to allow even clearance between the mudguard and the tire. 10. Repeat these steps for the second mud flap.
-
Page 29: Additional Installation Instructions - Rungu Cargo Rack
V1.1 2022 RUNGU Dualie Standard/Steep Additional Installation Instructions – Rungu Cargo Rack 1. Place the rack over the rear tire making sure that the tabs at the bottom of the rack are on the outside of the metal rack supports. - Page 30 V1.1 2022 RUNGU Dualie Standard/Steep 2. Slide the front tab of the rack into the rear rack support as shown. The rack will come to rest here and on the right and left rack supports so you can insert fasteners next.
- Page 31 V1.1 2022 RUNGU Dualie Standard/Steep 4. Align the holes in the tab at the bottom left side of the rack with the fastening location on the left side metal rack support. Thread an M8 screw and washer through the tab and into the rack support.
-
Page 32: Additional Installation Instructions - Pannier Bags
V1.1 2022 RUNGU Dualie Standard/Steep Additional Installation Instructions – Pannier Bags. If you purchased the pannier bag mounts as an accessory, mounting and removing pannier bags has never been easier. 1. Adjust the bottom clip using the adjustment knob on the bag so that the clip faces down. Align the bag with the bottom mount so that the clip mount channel fits between the two pannier bag mount blocks. - Page 33 V1.1 2022 RUNGU Dualie Standard/Steep 2. Adjust the upper quick-release catches using the adjustment knobs so that the catches fit between the two upper mounting blocks. 3. Push down on the pannier while pulling up on the quick release strap. This opens the two catches so that they engage the upper mounting tube.
- Page 34 V1.1 2022 RUNGU Dualie Standard/Steep 4. Lower the pannier onto the upper mounting tube and let go of the quick release strap. This locks the pannier in place. Copyright 2021 Standard Bearer Machines, LLC...
-
Page 35: Cautions And Safety
Cautions and Safety General Cautions and Warnings The Rungu Dualie is an electric vehicle that you can ride like a bicycle with the added benefit of more stability on soft ground and difficult terrain. For all bicycle riding cautions and warnings, refer to the... -
Page 36: Battery Safety
Each battery has a Battery Management System (BMS) built into the battery to protect you and the Rungu from dangerous battery faults. Lithium cells have a lot of energy stored in a small package. There is always a possibility a battery cell fault can release this energy and can cause fire and/or severe injury unless the battery is constantly monitored during discharging and charging. -
Page 37: Battery Safety Precautions
IMMEDIATELY. Turn off the Dualie and inspect your battery system. Check for a burnt smell and inspect there are no melted or shorted wires. Shorted wires or a burnt smell indicate a shorted or failed BMS, stop using Rungu and contact us as soon as possible. -
Page 38: Battery Safety (In Depth)
V1.1 2022 RUNGU Dualie Standard/Steep Battery Safety (In Depth) Main reasons a battery packs fail Battery packs can fail when the BMS fails or is over-ridden allowing the following to occur: • Short-circuit • Over-charging – voltage higher than tolerated by cells •... -
Page 39: Battery Failure Response Procedure
V1.1 2022 RUNGU Dualie Standard/Steep Battery Failure Response Procedure WARNING: IF THERE IS A FIRE, STAY AWAY FROM THE SMOKE, FUMES AND FLAMES. CONTACT LOCAL FIRE AUTHORITIES TO PUT OUT THE FIRE. • Monitor the temperature from a safe distance using a non-contact thermometer or thermal imager. -
Page 40: Operating Rungu Dualie
Up to four (4) LED segments may light to show the estimate amount of charge remaining in the battery. NOTE: Your Dualie battery has a built-in USB charging port. This port is available for use as long as the battery is charged. -
Page 41: Preparing Your Battery Charger For Use
2022 RUNGU Dualie Standard/Steep Preparing your Battery Charger for use Rungu Dualie Standard and Steep owners receive one of two different battery chargers. If you receive a charger with labeling showing “110-240VAC 50/60Hz” (as shown below) continue reading at the next section about charging your battery. -
Page 42: Charging Without Removing The Battery- Rungu Dualie
2022 RUNGU Dualie Standard/Steep Charging without removing the battery– Rungu Dualie WARNING: REMOVE YOUR BATTERY AND CHARGE IT INDOORS IF YOUR RUNGU DUALIE IS STORED AT A TEMPERATURE OF 32⁰ F (0⁰ C) OR LOWER. CHARGING THE BATTERY IN AN AMBIENT TEMPERATURE OF 32⁰... - Page 43 V1.1 2022 RUNGU Dualie Standard/Steep WARNING: IF YOU FULLY CHARGE THE BATTERY, DISCONNECT THE BATTERY FROM THE CHARGER AS SOON AS POSSIBLE OR WITHIN A FEW HOURS OF COMPLETING A FULL CHARGE. FAILURE TO DO SO MAY CAUSE THE BATTERY TO SWELL AND FAIL. A...
-
Page 44: Charging Your Main Battery After Removing The Battery- Dualie (Single Battery Version Only)
Charging your Main Battery after removing the battery– Dualie (single battery version only) 1. If the ambient temperature surrounding your Dualie is below 32⁰ F (0 C) and you want to charge your Main Battery indoors, you can remove the battery and charge it indoors. Use the keys supplied with your Dualie to unlock the battery from the left side of the frame 2. - Page 45 V1.1 2022 RUNGU Dualie Standard/Steep 3. Place the battery on the ground or in a secure location and follow the instructions in the prior section to recharge the battery. CAUTION: REFER TO THE BATTERY CARE SECTION IN THIS DOCUMENT FOR MORE INSTRUCTIONS ON HOW TO MAXIMIZE THE LIFE OF YOUR BATTERIES.
-
Page 46: Inflating Tires - Using Presta Valve Adapters
“Schraeder” or “English Valves” (standard on car tires). Some bicycle pumps come with Presta valve adapters built into the pump outlet, but many do not. Rungu ships Dualie Standard, Dualie Steep and Dualie XR bikes with a “screw-on” adapter. Rungu ships the Dualie Rugged and Dualie XR Rubicon Trail edition units with the Cycplus portable tire pump;... - Page 47 V1.1 2022 RUNGU Dualie Standard/Steep 3. Screw on the Presta valve adapter. 4. Connect the bike tire pump and inflate tire to the pressure appropriate for where you’re riding – as recommended in the before you ride section of this document.
- Page 48 V1.1 2022 RUNGU Dualie Standard/Steep 5. Remove the bike tire pump and unscrew the Presta valve adapter. Put the valve adapter in a safe place; they are easy to lose. CAUTION: DO NOT LEAVE THE PRESTA VALVE ADAPTER IN PLACE. THE CAPTIVE NUT NEEDS TO BE RE-FASTENED TO RETAIN TIRE AIR PRESSURE.
-
Page 49: Before You Ride - Safety Check
2010." Wear a helmet. 2. Make sure the stems are tightly clamped to your forks. To do this, stand in front of the Rungu astride the left wheel facing the steering assembly. Hold both handlebars and try to turn the steering. - Page 50 V1.1 2022 RUNGU Dualie Standard/Steep dropout for the rear wheel. If they are not, STOP. Unclamp the quick release, reposition the wheel and re-clamp the quick release to retain the wheel. 4. Make sure each quick release skewer is clamping the wheel. The quick releases should be difficult to open.
- Page 51 15 PSI (103 KPa). Note: Tire pressure plays an especially important role in how you enjoy your Rungu DUALIE. If you plan to ride mostly on soft ground like sand or snow, use a tire pressure between 5 (34 kPa) and 6 PSI (41 kPa) for best traction and control as well as minimizing tread wear.
-
Page 52: Using The Control Keypad And Understanding The Dashboard
The keypad has the on and off switch, controls the power output level of the motor, turns the integrated Rungu E-Light on and off, and sets up the display settings. This section provides an overview of the controls that gives you enough information to operate your Dualie. -
Page 53: Reading The Dashboard
The e-Light status changes when you turn on the integrated headlight. To turn on the integrated headlight, press and hold the Rungu E-light toggle on the keypad for one to two seconds. When you turn on the headlight, an image of the headlight appears at the top of the display and the screen dims for night-time riding. -
Page 54: Accessing The Display Settings
Center Dial – Speedometer and power meter In the center of the display appears a graphic representation of Dualie speed and battery output power. When riding, the digits in the center will display your speed. Depending on a display setting, the speed appears in miles per hour or kilometers per hour. -
Page 55: Toggling The Integrated Headlight On And Off
Turning off Dualie Use the on/off key to turn off Dualie. Dualie also turns off if left idle for a few minutes. Display settings control the amount of time in minutes. -
Page 56: Built-In Usb Charging Port
Using the Display setting “Password,” set a four-digit password for powering Dualie. The next time you power Dualie, the Display will require you to enter the four digits using the “+” and “-“ keys to scroll 0 through 9 and advance to the next digit using the “i” key. The Display Setting item is described in the “Rungu MDV Display User Guide”... -
Page 57: Riding The Rungu Dualie
Figure 5 Rungu Dualie Chain Guard If you do not use a Rungu Chainguard, but ride with long pants, use a pants cuff protector to keep your pants cuff from getting caught in the chain. Pants cuff protectors are commonly available where bikes or sold and from Amazon as shown below. - Page 58 WARNING: RIDING WITH LONG PANTS WITHOUT USING A PANTS CUFF PROTECTOR OR CHAINGUARD MAY CAUSE THE CHAIN AND CHAINRING TO CATCH YOUR PANTS CUFF, WHICH CAN LEAD TO LOSING CONTROL OF THE RUNGU DUALIE AND SEVERE INJURY OR DEATH. Copyright 2021 Standard Bearer Machines, LLC...
-
Page 59: Using Derailleur (Gear) Shifters
Dualie. Each Dualie has 9 gears – first gear is the largest sprocket on the rear wheel; ninth uses the smallest. First gear has the lowest gear ratio between the motor and the rear wheel. First gear is used for hill climbing or crossing the most difficult soft terrain. -
Page 60: Understanding And Changing Rungu Dualie Power Level
DUALIE motor in this way. If you’re operating DUALIE on flat paved roads, using level 2 or 3 is adequate to maintain a speed of 10 mph with minimal effort. -
Page 61: Power Level And Gear Combination Guidelines
As noted, you can also set the number of power levels to be three or nine. Here are the power output tables for these levels. If you purchased your Dualie configured as a Class 1 or Class 2 e-bike, you’ll find the output to be half what is displayed above. -
Page 62: Power Level Selection Guidelines: Problems Resulting From Not Following Gear Shifting
LEVEL 4 OR 5 AND HILL CLIMBING MAXIMIZES CHAIN WEAR AND MAY RESULT IN A BROKEN CHAIN, BENT CASSETTE COGS OR BOTH. THE DUALIE USES A CHAIN DESIGNED FOR THE OUTPUT OF THE MOTOR, HOWEVER REPEATED GEAR CHANGES AT THE HIGHER POWER LEVELS GENERATES VERY HIGH FORCE AND CAN BREAK A LINK. - Page 63 Same cog after three miles of acceleration from a full stop in 10 gear using power level 5. Note tooth damage. Also prior Shimano version of Cassette. For detailed information on how to change Display settings, refer to the “Rungu MDV Display User Guide” that you can find online at this link.
-
Page 64: Rungu Dualie Operation Cautions
As with steep hills, changing gears under load may cause the chain to break or the sprockets in the cassette to bend. Note: Always ride Dualie at a level and speed you are comfortable with. If you’re uncomfortable with the terrain, walk the bike. -
Page 65: Riding Safety
Adjusting the Front Suspension The front suspension has two manual controls that can change ride and handling characteristics. Looking from above astride the Dualie, the left-side knob controls the stiffness of the suspension. The right-side switch is used to disable/enable the suspension. -
Page 66: Using The Parking Brake
Release the lever to make sure the knob is in position as shown below. The knob holds the brake lever in place, which in turn holds the dual front rotors in place and prevents Rungu Dualie from moving when parked. The parking brake is very useful when parking on an angled surface. - Page 67 V1.1 2022 RUNGU Dualie Standard/Steep To disengage the parking brake, hold in the left brake lever in and pull the knob away from the from the lever. Release the brake lever. REMEMBER to disengage the parking brake before riding. NOTE: Riding with the parking brake engaged produces significant wear on the brake pads leading to a decrease in brake pad life and stopping power.
-
Page 68: Using The Microshift Derailleur Clutch
(bumpy riding). It has the significant advantage of maintaining better gear engagement and limiting “chain suck” due to changing weather conditions. For these reasons, the team at Rungu strongly recommend the clutch switched on when riding in all conditions. To switch on the... -
Page 69: Rungu Dualie Maintenance, Care And Repair
Standard Bearer Machines selected these batteries and the electrical system to be as maintenance free as possible. In the event you plan to not use the Dualie for a period of more than three weeks, open the battery case (or cases), disconnect the battery from both connectors, and remove the battery(ies) and store it (them) with ~50% charge (around 50-52V). -
Page 70: Prolonging The Life Of Your Battery - Best Practices
Prolonging the Life of your Battery – Best Practices The Dualie features powerful, lightweight and high-performing batteries. NMC based systems should expect around 3-5 years of use depending on how you take care of your battery and up to 800 charge cycles. -
Page 71: Chain Maintenance - Cleaning And Lubrication Every 40 Miles Of Hard Use
V1.1 2022 RUNGU Dualie Standard/Steep Chain Maintenance – Cleaning and Lubrication every 40 miles of hard use Every 40 miles in wet, salty or muddy conditions, clean the chain and reapply lubricant. First clean wipe the chain with a rag and then use a chain cleaner like the one in the image below. We... -
Page 72: Maintenance - After Strenuous Rides, And Every 500 Miles Or Six Months
Bicycle stores also have equipment to bleed the hydraulic system and replace the mineral oil. The same is true for brake pads. Check the components tab on the Support page of the Rungu Website to find links to useful maintenance videos appropriate for the Dualie. Standard Bearer Machines periodically updates these links, if you cannot find information you need send an email to support@riderungu.com. -
Page 73: Rear Wheel Removal Or Replacement
How to remove the rear wheel 1. First, shift the rear wheel into 9 gear. Whether or not the chain is on the Rungu, shifting to 9 gear before wheel removal makes wheel removal easier. 2. If possible, find an object (e.g. empty bucket, cardboard box) that you can use to support the bike after the rear wheel is removed. - Page 74 V1.1 2022 RUNGU Dualie Standard/Steep 3. If you have the microSHIFT Advent Derailleur, switch off the derailleur clutch by pushing down on the switch so it aligns with the white circle. 4. Release the quick release lever Copyright 2021 Standard Bearer Machines, LLC...
- Page 75 V1.1 2022 RUNGU Dualie Standard/Steep 5. Loosen the quick release skewer by unscrewing the end cap. Be careful to not lose the springs or other components of the skewer if you remove the end cap. 6. The wheel will drop out and the cassette will get caught on the derailleur pulley.
-
Page 76: How To Replace The Rear Wheel
V1.1 2022 RUNGU Dualie Standard/Steep How to replace the rear wheel 1. If you have the microSHIFT Advent derailleur, make sure that the derailleur clutch switch is OFF. Regardless the derailleur, make sure that the derailleur is shifted into 9 gear. - Page 77 V1.1 2022 RUNGU Dualie Standard/Steep 3. Make sure the wheel axle is seated in the left and right dropouts, then carefully lower the wheel onto the ground. Gravity helps seat the axle in the dropouts. Then, tighten the quick release end cap.
- Page 78 6. After checking that the rear wheel is fastened tightly, switch on the derailleur clutch and test ride the Rungu for more than five minutes to make sure the speedometer is working. WARNING: MAKE SURE TO TIGHTEN THE QUICK-RELEASE IN THE FRAME SO THAT THE WHEEL CANNOT FALL OUT;...
-
Page 79: Fixing A Broken Chain
Dualie riders. A chain breaking while on a ride can ruin the ride if you haven’t not prepared with either a spare chain or at a minimum, a spare master link – most of the time chain breaks occur at the master link. - Page 80 V1.1 2022 RUNGU Dualie Standard/Steep 4. Insert the pins of each side of the master link into the ends of the chain. 5. Pull the chain together and align the pins with the slots on the master link plates. Copyright 2021 Standard Bearer Machines, LLC...
- Page 81 V1.1 2022 RUNGU Dualie Standard/Steep 6. Rotate the chain so that the master link is above the chainstay and on the chain ring. With the rear brake engaged, you can step or use your hand on the right-side pedal to pull on the chain and set the master link.
-
Page 82: Wheel Magnet Alignment - "Error 21
1. Check that the sensor is in place. It is found inside the left chain stay. Check the image below and verify the same sensor is on your Dualie. If not contact Rungu or go online to obtain a replacement sensor. - Page 83 2022 RUNGU Dualie Standard/Steep 3. Check the picture below and verify your rear wheel has a magnet attached to one spoke. If you cannot find the magnet on one of the spokes, reorder one from Rungu or other sources online before proceeding.
-
Page 84: Transporting Rungu Dualie
2022 RUNGU Dualie Standard/Steep Transporting Rungu Dualie If you plan to transport Rungu Dualie in or on your vehicle, there are some important do’s and don’ts to consider. DO transport your Rungu Dualie upright. Rungu produces a hitch rack designed specifically for the double-wheel e-bike and can be found on the Rungu Website –... -
Page 85: Technical Information
V1.1 2022 RUNGU Dualie Standard/Steep Technical Information Default Display Settings Units: Imperial Brightness: 100% MAX PAS: 5 Auto Off: 2 minutes Power View: Power SOC View: Volts Trip Reset: No AL Sensitivity: Off Password: None Dimensions Copyright 2021 Standard Bearer Machines, LLC... -
Page 86: Performance
V1.1 2022 RUNGU Dualie Standard/Steep Performance Electrical Copyright 2021 Standard Bearer Machines, LLC... -
Page 87: Troubleshooting
5. If none of the proposed solutions work, contact Rungu. Problem: I drove my Dualie until it went completely dead and now it will not charge. This is a problem that occurs when you fully deplete the battery. The BMS on the battery protects the battery from discharging any further and force shuts itself off. -
Page 88: Motor And System Performance
Problem: The Dualie feels sluggish in difficult environments Hills, snow, and soft sand will slow down the DUALIE and cause you to use more power and pedaling. This is normal. If you feel like you have experienced better power in the past check the following items Solution: 1. -
Page 89: Mechanical
If the derailleur, hanger and frame are intact, 4. Replace the chain. 5. Contact Rungu Support if you have other questions. Problem: I hear a loud click noise coming when I’m pedaling in a high gear The cassette cog is worn out; replace cassette. Refer to the “Understanding and changing the Power... -
Page 90: Getting More Information
If the derailleur, hanger and frame are intact, 4. Contact Rungu Support if you have other questions. Getting more information Thank you again for purchasing a Rungu Dualie. For further questions, please consult the Support Page on the riderungu.com website or email support@riderungu.com.
Need help?
Do you have a question about the DUALIE and is the answer not in the manual?
Questions and answers