Advertisement
Table of Contents:
Important Information . . . . . . . . . . . . . . . . . . 2
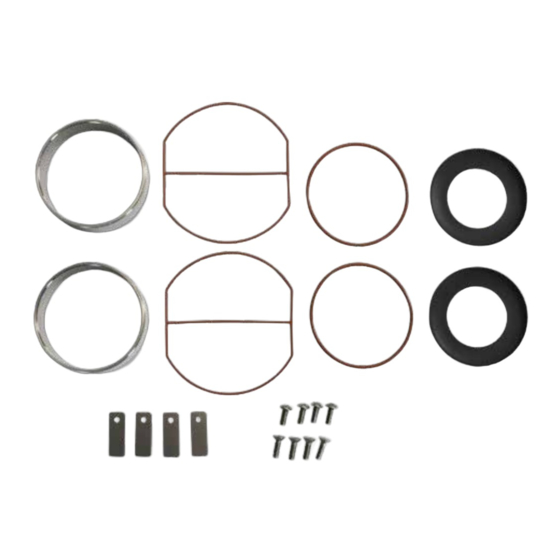
Product Contents . . . . . . . . . . . . . . . . . . . . . . . . 2
SilentAir
Maintenance Kit
INSTALLATION MANUAL
Installation Instructions. . . . . . . . . . . . . . . . .3-8
Changing the Air Filter . . . . . . . . . . . . . . . . . . . 8
G33
™
(RP33 82R)
Item #510111
Advertisement
Table of Contents

Subscribe to Our Youtube Channel
Related Manuals for Airmax SilentAir G33


Summary of Contents for Airmax SilentAir G33
- Page 1 SilentAir ™ (RP33 82R) Maintenance Kit INSTALLATION MANUAL Item #510111 Table of Contents: Important Information ....2 Installation Instructions....3-8 Product Contents .
- Page 2 • ALWAYS unplug the compressor from power source and remove pressure from airlines before installing the maintenance kit. IMPORTANT: Airmax® is not responsible for equipment damage or failure, losses, injury or death resulting from failure to follow safety precautions, misuse or abuse of equipment.
- Page 3 See Video Instructions of the G33 (RP33 82R) Maintenance Kit installation online at airmaxeco.com/InstallRP33 Tools Required: • 5/32” Allen Wrench • 1/8” Allen Wrench • T25 Torx Wrench • Flathead Screwdriver • Small Pick Tool • Heat Source Installation Instructions: Step 1 Use a 5/32”...
- Page 4 Step 3 Remove the cylinder heads along with the valve plate and set to the side. Step 4 Starting with one cylinder, use a 1/8” Allen wrench to remove the two screws on the piston retainer plate. Step 5 Remove and discard the old cylinder sleeve.
- Page 5 Step 7 Place the retainer plate and and piston cup on top of the new piston cylinder sleeve. Flip over to ensure the piston cup is properly aligned within the cylinder sleeve. Step 8 Install the cylinder sleeve into the grooves of the compressor body and line up the holes for the piston retainer plate.
- Page 6 Step 11 Install the new leaf valves. Align the leaf valve over the hole on the valve plate and secure with a set screw. Repeat for the second side. Do not over tighten (Recommended Torque: 10-13 in lb). Step 12 Flip the valve plate over and repeat the process for the other two leaf valves, heating the screws with a...
- Page 7 Step 15 Install the two new gaskets onto the top of the valve plate. Step 16 Install the head cover plates. Align the pins to the holes on top of the valve plate. Step 17 Install the four longer screws into the holes along the outside of the compressor.
- Page 8 To replace the air filter, hold the base of the air filter and turn the top counterclockwise to remove the air filter cap. Replace the old air filter element with a new one. THANK YOU FOR CHOOSING: Airmax, Inc. 15425 Chets Way Street Armada, MI 48005 866-424-7629 www.airmaxeco.com...
Need help?
Do you have a question about the SilentAir G33 and is the answer not in the manual?
Questions and answers