Table of Contents
Advertisement
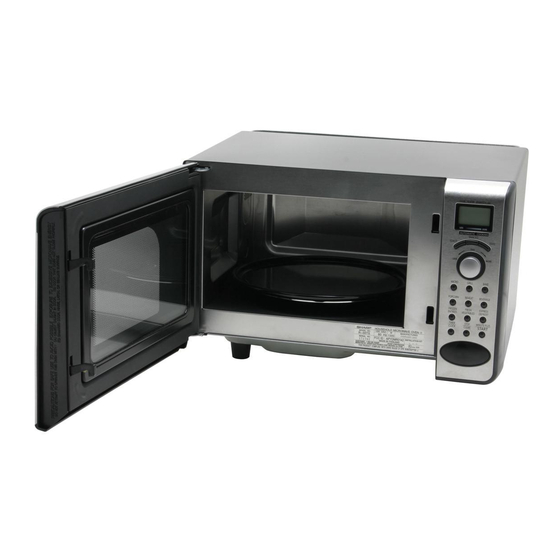
TOASTER OVEN
WITH M I C R O WAV E
OPERATION MANUAL
®
C O N T E N T S
• Precautions to Avoid Possible
Exposure to Excessive Microwave
Energy ................................ Inside Front Cover
• For Customer Assistance ... Inside Front Cover
• Consumer Limited Warranty ...................
• Product Information Card ........................
• Important Safety Instructions ..................
• Unpacking and Installation Instructions ...
• Grounding Instructions ............................
• Information You Need to Know ............... 4 - 7
• Part Names .............................................
• Before Operating .....................................
• Manual Operation.................................... 10-12
• Special Features ..................................... 12-20
Automatic Cooking ................................
Microwave Options ...............................
Express Defrost ....................................
Manual Defrost .....................................
• Other Convenient Features ..................... 21-22
• Cleaning and Care ..................................
• Service Call Check ..................................
• Specifications ..........................................
R E A D A L L I N S T R U C T I O N S C A R E F U L L Y B E F O R E U S I N G
MODEL
R-55TS
TM
1
1
2
3
3
8- 9
10
12
16
18
19
23
24
24
Advertisement
Table of Contents

Related Manuals for Sharp Warm & Toasty R-55TS


Summary of Contents for Sharp Warm & Toasty R-55TS
- Page 1 TOASTER OVEN WITH M I C R O WAV E OPERATION MANUAL ® MODEL R-55TS C O N T E N T S • Precautions to Avoid Possible Exposure to Excessive Microwave Energy ... Inside Front Cover • For Customer Assistance ... Inside Front Cover •...
-
Page 2: Precautions To Avoid Possible Exposure To Excessive Microwave Energy
F O R C U S T O M E R A S S I S T A N C E To aid in reporting this toaster oven with microwave in case of loss or theft, please record below the model number and serial number located on the unit. -
Page 3: Consumer Limited Warranty
Product, and shall constitute full satisfaction of all claims, whether based on con- tract, negligence, strict liability or otherwise. In no event shall Sharp be liable, or in any way responsible, for any damages or defects in the Product which were caused by repairs or attempted repairs performed by anyone other than an authorized servicer. -
Page 4: Important Safety Instructions
Use extreme care when inserting a spoon or other utensil into the container. 18. If the oven light fails, consult a SHARP AU- THORIZED SERVICER. 19. Oversized foods or oversized metal utensils should not be inserted in this oven as they may create a fire or risk of electric shock. -
Page 5: Unpacking And Installation Instructions
Should there be any interference caused by the microwave oven to your radio or TV, check that the micro- wave oven is on a different electrical circuit, relocate the radio or TV as far away from the oven as feasible or check position and signal of receiving antenna. -
Page 6: Information You Need To Know
When using the oven at power levels below MICRO 100%, you may hear the magnetron cycling on and off. It is nor- mal for the exterior of the oven to be warm to the touch when cooking or reheating. ABOUT FOOD... -
Page 7: About Utensils And Coverings
It is not necessary to buy all new cookware. Many pieces already in your kitchen can be used successfully in your new toaster oven with microwave. The chart below will help you decide what utensils and coverings should be used in each mode. - Page 8 Could char. DISH CHECK. If you wish to check if a dish is safe for microwaving, place the empty dish in the oven and microwave on HIGH (100%) for 30 seconds. If the dish becomes very hot, do NOT use it for microwaving.
-
Page 9: About Microwave Cooking
• Stay near the oven while it's in use and check cooking progress frequently so that there is no chance of overcooking food. • NEVER use the cavity for storing cookbooks or other items. -
Page 10: Part Names
10 Bottom grill heater (bottom heater) The bottom heater is under the cavity floor. 11 Ventilation openings (rear) 12 Oven light It will light when oven is operating or door is open. 13 Waveguide cover: DO NOT REMOVE. 14 Rotary dial 15 Control panel... - Page 11 P A R T N A M E S 12, 14 12, 13 16 - 17 10, 21, 22 Number next to the control panel illustration indicates page on which there are a feature description and usage information. R - 5 5 T S 12, 15 10, 12, 22 10, 21...
-
Page 12: To Set The Clock
• Before the oven can be used, follow these procedures: 1. Plug in the oven. Close the door. The oven display will begin flashing 88:88 2. Touch STOP/CLEAR. - Page 13 M A N U A L O P E R A T I O N CONDITION THE HEATERS Condition the oven before cooking in it for the first time to eliminate any smoke or burning odor. To condition, follow procedure below with nothing in the oven.
-
Page 14: Special Features
Touch START. Preheat starts. No food in oven. When the oven reaches the programmed temperature, a signal will sound 4 times and the oven will display 350F.* Open the door. Place food in the oven. Close the door. Touch START. - Page 15 NOTE: Cooking time is adjusted by initial oven temperature. After touching START, the oven will show AT-1, for the first 10 seconds, to check the initial temperature. Remove the turntable from the oven. Place food directly on turntable support.
- Page 16 S P E C I A L F E A T U R E S AUTOMATIC SNACK CHART F O O D AS-1 French Fries Number Cooking Time Recommended Quantity of Bars 15 min. 30 sec. 16 min. 30 sec. 17 min.
- Page 17 S P E C I A L F E A T U R E S AUTOMATIC BAKE CHART M E N U AB-1 Baked Potatoes Number Cooking Time Recommended Quantity of Bars 14 min. 1 medium 16 min. 17 min. 2 medium 18 min.
-
Page 18: Microwave Options
S P E C I A L F E A T U R E S MICROWAVE OPTIONS Microwave options allow you to cook or reheat many of your favorite foods by touching just one pad. • Suppose you want to reheat 1 cup of beverage. P R O C E D U R E Select desired setting. - Page 19 If you like tender crisp vegetables, double measured quantity per setting. For example, use 2 cups of zucchini but touch FRESH VEGETABLES only once. After cooking, remove from oven, stir, cover and let stand 3 to 5 minutes before serving.
-
Page 20: Express Defrost
.5 - 2.0 lb Bone-in Poultry NOTE: Check foods when oven signals. After final stage, small sections may still be icy. Let stand to continue thawing. Do not defrost until all ice crystals are thawed. Shielding prevents cooking from occurring before the center of the food is defrosted. Use small smooth strips of aluminum foil to cover edges and thinner sections of the food. -
Page 21: Manual Defrost
1/4-inch thick. Using 3-inch cookie cutter, cut dough into 4 shortbreads. Place on wax paper lined turntable and bake in preheated oven until lightly browned. Remove from oven and allow to stand 2 minutes for shortbreads to become firm. Remove from turntable and allow to cool completely. - Page 22 Rub mushrooms on both sides with olive oil. Stuff mushrooms with sausage mixture. Place on turntable and bake in the preheated oven. The appetizers can be prepared ahead and refrigerated until serving time. To reheat, place stuffed mushrooms on serving plate and cover lightly with wax paper.
-
Page 23: Multiple Sequence Cooking
O T H E R C O N V E N I E N T F E A T U R E S MULTIPLE SEQUENCE COOKING Your oven can be programmed for up to 3 cooking se- quences, switching from one power level setting or other option to another automatically. -
Page 24: More Or Less Time Adjustment
Less = 1 bar CHILD LOCK The Child Lock prevents unwanted oven operation such as by small children. The oven can be set so that the control panel is deactivated or locked. To set, touch TIMER/ CLOCK, adjust the rotary dial to the START and hold for three seconds. -
Page 25: Cleaning And Care
To remove, combine 1 cup water, grated peel and juice of 1 lemon and several whole cloves in a 2-cup glass measuring cup. Boil for several minutes using 100% power. Allow to set in oven until cool. Wipe interior with a soft cloth. Turntable / Turntable Support The turntable and turntable support can be removed for easy cleaning. -
Page 26: Service Call Check
NOTE: 1. If time appearing in the display is counting down very rapidly, check DEMONSTRATION MODE on page 22 and cancel. 2. If the oven is set for more than 20 minutes at MICRO 100 percent power level, after the first 20 minutes the power level will automatically adjust to 70 percent power to avoid overcooking. - Page 27 G U I A A U T O - T O U C H Para mayor información y precauciones de seguridad, consulte el Manual de Operaciones. FIJACION DEL RELOJ Si en la pantalla aparece toque primero 88:88 STOP/CLEAR. 1 Pulse CLOCK e introduzca la hora empleando el mando giratorio.
-
Page 28: Microwave Time Cooking
(Press 4 times) AB- 5 Cakes (Press 5 times) ® SHARP ELECTRONICS CORPORATION Sharp Plaza, Mahwah, NJ 07430-2135 MICROWAVE TIME COOKING Micro 100% Cooking 1 Enter cooking time by using the rotary dial. 2 Touch START. Variable Power Cooking 1 After Step 1 above, touch MICRO pad 4 times.Ex.
Need help?
Do you have a question about the Warm & Toasty R-55TS and is the answer not in the manual?
Questions and answers