
Related Manuals for Sharp R-1340R


Summary of Contents for Sharp R-1340R
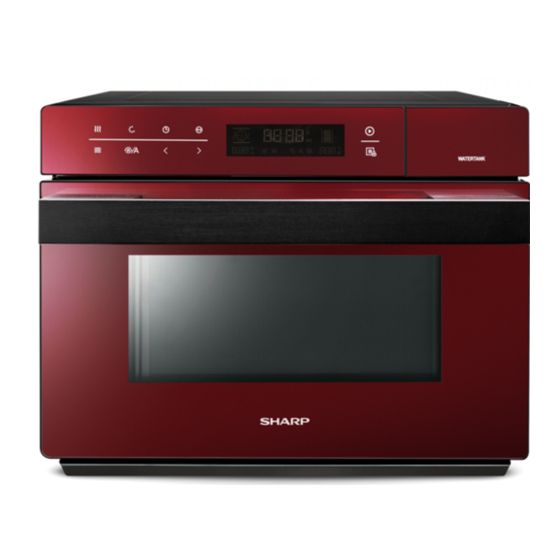
- Page 1 5合1純蒸氣焗爐 5-IN-1 PURE STEAM OVEN R-1340R 使用說明書 OPERATION MANUAL 使用前 , 請仔細閱讀說明書並妥善保存 。 READ THE MANUAL CAREFULLY BEFORE USING THE APPLIANCE AND KEEP IT PROPERLY FOR FUTURE REFERENCE.
-
Page 3: Table Of Contents
CONTENTS Contents Convection Cooking Mode ............E-17 • Convection ..............E-17 Precautions • Convection & Microwave ..........E-18 Specifications Grill Cooking Mode ..............E-19 Important Safety Instructions • Grill ................E-19 • Grill Fan ................E-20 Cleaning and Care • Grill & Microwave ............E-21 Oven and Accessories •... -
Page 4: Precautions
WARNING: If the oven door or door seals are damaged, the oven must not be used until it has been repaired by a qualified technician. If the product is not cleaned regularly, the appliance surface will be degraded to affect the appliance service life and danger may occur. SPECIFICATIONS Model: R-1340R Rated Voltage 220-230V~50Hz... -
Page 5: Important Safety Instructions
IMPORTANT SAFETY INSTRUCTIONS WARNING To reduce the risk of fire, electric shock or injury to persons. Please follow the precautions and the following safety instructions: WARNING: Liquids and other food must not be heated in sealed containers since they are liable to explode. WARNING: It is hazardous for anyone except for a qualified technician to disassemble, repair or modify the oven. - Page 6 14. Eggs with shell and whole hard-boiled eggs should not be heated in oven since they may explode. 15. This appliance is for household use only. 16. If the power supply cord is damaged, do not use the product. Please call SHARP service center for repair. 17. Do not store or use this appliance outdoors.
- Page 7 IMPORTANT SAFETY INSTRUCTIONS 27. Use the cooking thermometers to measure the temperature of food. 28. The oven is for household used only. It must not be placed in a cabinet. 29. The oven is used for heating food and beverages. Drying of food or clothing and heating of warming pads, slippers, sponges, damp cloth may lead to the risk of injury or ignition.
- Page 8 IMPORTANT SAFETY INSTRUCTIONS 33. DANGER: Electric Shock Hazard. Touching the internal components can cause serious personal injury or death. Do not disassemble this appliance. 34. WARNING: Do not open the oven with your face close to the oven. Steam from the oven may cause burns. 35.
-
Page 9: Cleaning And Care
CLEANING AND CARE Remove the power supply plug. Clean the cavity of the oven with a slightly moist cloth. Clean the accessories in soapy water. The door frame and seal and other parts must be cleaned carefully with a moist cloth when they are dirty. Do not use a corrosive cleaning agent;... -
Page 10: Oven And Accessories
OVEN AND ACCESSORIES Control panel Display Heating tube Oven light Door glass Convection fan Steam inlet and outlet Water tank Drip tray 10. Grill rack (Do not use when microwave cooking) 11. Glass tray... -
Page 11: Installation
INSTALLATION BEFORE INSTALLATION (a) Place at a position more than 85cm above the ground. (b) Place against the back wall. Reserve a gap not less than 20cm Remove all packing materials and accessories. Check the oven for any from the right and left wall. And leave at least 30cm space damage such as broken door. -
Page 12: Before First Use
BEFORE FIRST USE INITIAL CLEANING AND HEATING • Remove all accessories • Ventilate the room • Press “ “ to choose the convection mode “ “ . • Press “ “ to select temperature at 230˚C. • Press “ “ and “ “... -
Page 13: Control Panel
CONTROL PANEL CLOCK SETTING Press “ “ and hold for 3 seconds to set the clock. Press “ “ or “ “ to set the time (between 00:00 and 23:59). After you have set the time, press “ “ to finish setting. E-11... -
Page 14: Cooking Chart
COOKING CHART Cooking Mode Preheat Temperature / Power Time Range Pure Steam 50 - 100˚C 90 mins Steam: L1 - L4 Steam & Convection 90 mins Convection: 180 - 220˚C Steam: 80 - 100˚C Steam & Microwave 90 mins Microwave: 100 - 300W Convection 50 - 230˚C 5 hours... -
Page 15: Steam Cooking Mode
E-06: Water tank is not close well, check whether the water tank is install properly. Note: If the water tank is fully filled and properly installed, but abnormal buzzer ring and the lack of water icon show on the screen, please contact SHARP service center for repair. E-13... -
Page 16: Pure Steam
STEAM COOKING MODE PURE STEAM Press “ “ to enter into the pure steam mode, the default time 10:00 blinks. Press “ “or “ “ to select the cooking time. The maxmum cooking time is 90 minutes. Press the “ “, the default temperature 100 C blinks, then press “... -
Page 17: Steam & Convection
STEAM COOKING MODE STEAM & CONVECTION Press ” “ 3 times to select steam & convection cooking mode, the default temperature 180 C blinks. Press ” “ or ” “ to select temperature. (180 C, 190 C, 200 C, 210 C, 220 Press ”... -
Page 18: Steam & Microwave
STEAM COOKING MODE STEAM & MICROWAVE Press ” “ 2 times to select steam & microwave cooking mode , the default cooking time ”10:00“ blinks. Press ” “ or ” “ to select the cooking time. The maximum cooking time is 90 minutes. Press ”... -
Page 19: Convection Cooking Mode
CONVECTION COOKING MODE CONVECTION Press ” “ to select convection cooking mode, the default temperature 180 C blinks. Press ” “ or ” “ to select temperature from 50 C to 230 C. (50 C, 100 C, 105 C, 110 C, 115 C, 120 C, 125... -
Page 20: Convection & Microwave
CONVECTION COOKING MODE CONVECTION & MICROWAVE Press ” “ 3 times to select convection & microwave cooking mode. The default temperature is 180 degrees. The default microwave power is 300W. Press ” “ or ” “ to select from 50 C to 230 C. -
Page 21: Grill Cooking Mode
GRILL COOKING MODE GRILL Press ” “ 2 times to select grill cooking mode. The default grill power is 3 (Level 3). The default cooking time is 10 minutes. Press ” “ or ” “ to select the grill power level [3 (max), 2, 1 (min)]. Press ”... -
Page 22: Grill Fan
GRILL COOKING MODE GRILL FAN Press ” “ 4 times to select grill fan cooking mode. The default temperature is 180 C. The default cooking time is 10 minutes. Press ” “ or ” “ to select temperature from 35 C to 180 C. -
Page 23: Grill & Microwave
GRILL COOKING MODE GRILL & MICROWAVE Press ” “ 5 times to select grill & microwave cooking mode. The default grill power is 3 (level 3). The default microwave power is 300W. Press ” “ or ” “ to adjust the grill power level [3 (max), 2, 1 (min)]. Press ”... -
Page 24: Grill Fan & Microwave
GRILL COOKING MODE GRILL FAN & MICROWAVE Press ” “ 6 times to select grill fan & microwave cooking mode. The default temperature is 180 degrees. The default microwave power is 300W. Press ” “ or ” “ to select temperature from 100 C to 180 C. -
Page 25: Fermentation Mode
FERMENTATION MODE Press ” “ 4 times to select grill fan cooking mode. The default temperature is 180 C. The default cooking time is 10 minutes. Press ” to select temperature 35 Press ” “ and then press ” “ or ” “... -
Page 26: Microwave Cooking Mode
MICROWAVE COOKING MODE Press the ” “ button to select the microwave cooking mode. Press ” “ or ” “ to select cooking time, the maximum cooking time is 90 minutes. (If the microwave power set at 900W, the maximum cooking time is 30 minutes.). Press ”... -
Page 27: Microwave Power Chart
MICROWAVE COOKING MODE MICROWAVE POWER CHART Microwave Power 100% Display 900W 700W 450W 300W 100W You may choose the power levels according to the type of food. Details refer to the following table. Power level Food • Boiling water, reheating 900 W •... -
Page 28: Auto Cooking Mode
AUTO COOKING MODE Press ” “ 2 times, the default menu type P01 blinks. Press ” “ o r ” “ to select the menu type, the corresponding cooking time will be changed at the same time. Press ” “ and then press ” “... - Page 29 AUTO COOKING MODE AUTO MENU CHART AUTO-MENU DISPLAY WEIGHT (g) POWER Carrots (Cook) Steam 100 Steam 100 Carrots (Fast Cook) Microwave 300W 1000 Vegetable (Cook) Steam 100 Broccoli (Cook) Steam 100 Steam 100 Broccoli (Fast Cook) Microwave 300W 1000 Potato (Cook) Steam 100 Steam 100 Potato (Fast Cook)
-
Page 30: Auto Menu Chart
AUTO COOKING MODE AUTO MENU CHART AUTO-MENU DISPLAY WEIGHT (g) POWER Fish (Steam) Steam 100 Preheat Fish (BBQ) Convection 200 Steam L1 Preheat Pizza (Fresh) Convection 230 Convection 230 Pizza (Frozen) Microwave 450W Preheat Toast (Light) Convection 230 Preheat Toast (Dark) Convection 230 Convection 200 Roast Beef (Cook) - Page 31 AUTO COOKING MODE AUTO MENU CHART AUTO-MENU DISPLAY WEIGHT (g) POWER Convection 200 Lasagna (Cook) Steam L1 Convection 220 Lasagna (Fast Cook) Microwave 300W Steam 100 Pork Knuckle (Cook) Convection 230 Chocolate (Melt) Microwave 300W Butter (Melt) Microwave 700W E-29...
-
Page 32: Preheating Mode
PREHEATING MODE If you want to preheat the food before grill or convection, press ” “ after setting. ” “ icon will be showed on the screen. Press ” “ button to start preheating. After preheating, you will hear three beeps. You can stop preheating by opening the oven door or pressing the ”... -
Page 33: Defrost Mode
DEFROST MODE Press ” “ button to select defrost mode. Press ” “ button and then press ” “ or ” “ to adjust the defrost weight, the corresponding cooking time will be changed. Press ” “ button to start cooking. E-31... -
Page 34: Descale Mode
DESCALE MODE Scale may form in the water circuit inside the oven during steam generation, which could cause the oven malfunction. It is necessary to carry out descale mode when steam program run for 20 hours cumulatively. Fill 1000ml of fresh water and add 1 tablespoon pure citric acid into the water tank. Install the water tank properly. -
Page 35: Child Lock
CHILD LOCK Lock: Press ” “ for 3 seconds, you will hear a long ”beep“ and ” “ icon will be showed on screen. Unlock : Press ” “ for 3 seconds, you will hear a long ”beep“, the lock is released, and ” “... -
Page 36: Trouble Shooting
1. Power plug is not plugged in tightly. Unplug. Then plug again after 10 seconds. 2. Fuse blown or circuit board is damaged. Contact SHARP service center for repair. 3. Trouble with outlet. Close the door again. 4. Door is not closed properly. - Page 37 目錄 目錄 ..................烤焗烹調模式 ................ C-17 • 烤焗 ................C-17 注意事項 ................• 烤焗及微波 ..............C-18 規格 ..................燒烤烹調模式 ................. C-19 重要安全須知 ................ • 燒烤 ................C-19 • 燒烤(熱風對流) ............清潔及注意事項 ..............C-20 • 燒烤及微波 ..............C-21 焗爐及配件 ................• 燒烤(熱風對流)及微波 ..........C-22 安裝須知...
-
Page 38: 注意事項
注意事項 切勿在爐門打開時使用蒸爐 。 警告 : 如爐門打開或密封襯墊受損 , 必須經由合資格技師修理妥當之後方可使用 。 如產品缺乏定期清潔 , 其表面可能受到侵蝕 , 因而影響產品的 使用壽命甚至影響產品使用的安全性 。 規格 型號: R-1340R 交流電壓 最大電力消耗 220-230V~50Hz 2750W 電力消耗(微波) 容量 1550W 34公升 輸出功率(微波) 外部尺寸 (W x H x D) 900W 501 x 418 x 526* mm 輸出功率(燒烤) -
Page 39: 重要安全須知
重要安全須知 警告 為減低因使用產品導致失火 、 觸電或傷人之風險 , 請遵照注意事項及下列安全須知 : 警告 : 液體及其他食物必不可在密封容器內加熱 , 否則可能造成爆炸 。 警告 : 除合資格技師外 , 任何其他人如拆除 、 維修或調校蒸爐均可構成危險 。 本產品設計並非讓兒童使用 , 請看管兒童並確保他們不可以蒸爐嬉戲或視之為玩具 。 本產品並非為身體 、 感官或心理有缺憾 , 或缺乏相關經驗或知識的人士而設計 , 除非他們受到負責其安全的人監督 , 或已接受其操作指示 的情況下使用 。 切勿讓兒童觸及本產品及其電線 。 將器皿放入本產品進行烹調前 , 請檢查器皿以確定適用於相關的烹調模式 。 請經常清潔蒸爐以保持吸氣口及排氣口暢通... - Page 40 重要安全須知 13. 請遵照安裝指示安裝及放置蒸爐 。 14. 切勿使用蒸爐將連殼生雞蛋及連殼熟雞蛋加熱 , 否則可能導致爆炸 。 15. 本產品設計僅適用於家居環境 。 16. 如電源線受損 , 請勿使用本產品 , 並應聯絡 SHARP 服務中心安排維修 。 17. 切勿於戶外儲放或使用蒸爐 。 18. 切勿將本產品放置於濕度高的地方 , 例如氣體煮食爐旁邊 、 通電位置或洗手盆 。 19. 當蒸爐在使用期間或之後 , 蒸爐表面 、 排氣口和爐腔的溫度將十分高 。 故切勿摸觸上述位置以免造成燙傷 。...
- Page 41 重要安全須知 27. 請使用食物溫度計量度食物溫度 。 28. 本產品設計僅適用於家居環境 。 切勿將產品放置於廚櫃內 。 29. 蒸爐只可用作加熱食物和飲料 , 請勿用作烘乾食物或衣服 、 加熱暖包 、 拖鞋 、 海綿 、 濕布 , 否則可造成傷害或起火 。 30. 當完成烹調並待蒸爐冷卻後 , 請清空儲水箱 , 並利用軟布或海綿抹淨爐腔 。 待數分鐘後 , 清空滴水托盤 。 31. 當清潔本產品時 , 切勿將產品浸入水或其他液體當中 。 32.
- Page 42 重要安全須知 33. 危險 : 觸電危險 : 接觸內部零件可導致嚴重受傷或死亡 , 切勿拆除本產品 。 34. 警告 : 慎防 : 打開爐門時 , 勿將臉部貼近蒸爐 , 否則爐內湧出的蒸氣或可導致燙傷 。 35. 警告 : 觸電危險 : 如不適當地連接本產品到標準接地家居電源插座 , 或將造成觸電 。 如產品未正確安裝或連接到標準接地家居電源插座 , 切 勿將插頭連接到電源插座 。 36. 首次使用蒸爐前 , 必須連接本產品到標準接地家居電源插座 。 一旦遇有漏電情況 , 標準接地設計可提供一組迴路以避免漏電發生 。 本產品 之電源線插頭必須連接到標準接地雙極單相電源插座...
-
Page 43: 清潔及注意事項
清潔及注意事項 卸下電源插頭 。 請用微濕的毛巾清潔爐腔 。 請用混入梘液的水清潔配件 。 如爐門門框 、 密封襯墊及其他部份沾上污垢 , 可用濕布小心清潔 。 切勿使用腐蝕性的清潔劑 , 否則將對本產品造成損壞或損蝕 。 先將半個檸檬放入一個碗內 , 並注入 300 毫升清水 , 再放入爐內以 900W 的微波強度加熱 10 分鐘 , 然後便可使用柔的乾布抹淨爐腔 。... -
Page 44: 焗爐及配件
焗爐及配件 控制面板 顯示屏 發熱管 照明燈 爐門玻璃 對流風扇 蒸氣吸氣口及排氣口 儲水箱 滴水托盤 10. 燒烤網架 (切勿於微波烹調時使用) 11. 玻璃盤... -
Page 45: 安裝須知
安裝須知 安裝前 (a) 應放置於距離地面超過85厘米的位置 。 (b) 置於靠牆位置 , 並讓爐箱兩側與牆身保持不少於 20 厘米的 先移除所有包裝物料並取出配件 。 仔細檢查蒸爐是否有任何損壞跡 空間 , 而爐上方則應保持最少 30 厘米的空間 。 象 , 例如爐門是否受損 。 蒸爐如有任何損壞 , 切勿進行安裝 。 (c) 切勿除去爐底部的爐腳 。 切勿移除於爐腔內壁用作保護磁控管的淺啡色雲母表層 。 (d) 切勿阻礙吸氣及排氣口 。 (e) 請將蒸爐放置於盡可能遠離收音機和電視的位置 , 因為蒸氣 選擇一處可提供足夠空間確保空氣流通的平面... -
Page 46: 首次使用前
首次使用前 首次清潔及加熱 移除所有配件 • 保持房間空氣流通 • 按 “ “ 鍵選擇烤焗模式 “ “ 。 • 按 “ “ 鍵選擇溫度為 230°C 。 • 按 “ “ 和 “ “ 鍵將空置的爐設定加熱 1 小時 。 • 按 “ “ 鍵開始操作 。 • 操作結束後 , 用濕布抹淨爐腔 。 •... -
Page 47: 操控面板
操控面板 時鐘設定 持續按下 “ “ 鍵 3 秒鐘以設定時鐘 。 按 “ “ 或 “ “ 鍵設定時間 ( 範圍由 00:00 至 23:59 ) 。 當完成設定時間後 , 按 “ “ 鍵結束設定 。 C-11... -
Page 48: 烹調功能表
烹調功能表 烹調模式 預熱 溫度/火力 烹調時間 純蒸 90 分鐘 50 - 100˚C 蒸煮: L1 -L4 蒸煮及烤焗 90 分鐘 烤焗: 180 - 220˚C 蒸煮: 80 - 100˚C 蒸煮及微波 90 分鐘 微波: 100 - 300W 烤焗 可以 5 小時 50 - 230˚C 烤焗: 50 - 230˚C 烤焗及微波... - Page 49 當儲水箱儲水量回復正常後 , 按 “ “ 鍵恢復烹調操作 。 完成蒸煮烹調後 : 移除儲水箱並清空爐內水份 。 • 請定期取出滴水托盤進行清潔 。 • 故障代號 : 當進行蒸煮期間 , 或可能出現下列故障代號 : E-06 : 儲水箱未妥善關閉 , 請檢查儲水箱安裝是否正確 。 注意 : 如儲水箱未注滿或未適當安裝 , 提示聲將響起 , 同時顯示屏上會顯示水份不足的圖案 。 請聯絡 SHARP 服務中心安排維修 。 C-13...
-
Page 50: 純蒸
蒸煮烹調模式 純蒸 按 ” “ 鍵進入純蒸模式 , 預設烹調時間顯示為 10:00 (閃動) 。 按 ” “ 或 ” “ 鍵設定時間 , 最長為 90 分鐘 。 按 ” “ 鍵 , 顯示屏上預設溫度顯示為 100°C (閃動) , 這時可按 ” “ 或 ” “ 鍵設定溫度 (可選擇 50°C 、 60°C 、 70°C 、 80°C 、 85°C 、 90°C 、... -
Page 51: 蒸煮及烤焗
蒸煮烹調模式 蒸煮及烤焗 按 ” “ 鍵 3 次選擇蒸煮及烤焗烹調模式 , 預設烹調溫度顯示為 180°C (閃動) 。 按 ” “ 或 ” “ 鍵設定溫度 (可選擇 180°C 、 190°C 、 200°C 、 210°C 、 220°C) 。 按 ” “ 鍵 , 預設蒸煮火力顯示為 L3 (閃動) , 這時可按 ” “... -
Page 52: 蒸煮及微波
蒸煮烹調模式 蒸煮及微波 按 ” “ 鍵 2 次選擇蒸煮及微波烹調模式 , 預設烹調時間顯示為 10:00 (閃動) 。 按 ” “ 或 ” “ 鍵設定烹調時間 , 最長為 90 分鐘 。 按 ” “ 鍵 , 然後按 ” “ 或 ” “ 鍵設定火力 (可選擇 100W 或 300W) 。 按... -
Page 53: 烤焗
烤焗烹調模式 烤焗 按 ” “ 鍵選擇烤焗烹調模式 , 預設烹調溫度顯示為 180°C (閃動) 。 按 ” “ 或 ” “ 鍵設定溫度 , 範圍由 50°C 至 230°C (可選擇 50°C 、 100°C 、 105°C 、 110°C 、 115°C 、 120°C 、 125°C 、 130°C 、 135°C 、 140°C 、... -
Page 54: 烤焗及微波
烤焗烹調模式 烤焗及微波 按 ” “ 鍵 3 次選擇烤焗及微波烹調模式 , 預設烹調溫度為 180°C , 預設微波火力為 300W 。 按 ” “ 或 ” “ 鍵設定溫度 , 範圍由 50°C 至 230°C (可選擇50°C 、 100°C 、 105°C 、 110°C 、 115°C 、 120°C 、 125°C 、 130°C 、 135°C 、 140°C 、... -
Page 55: 燒烤烹調模式
燒烤烹調模式 燒烤 按 ” “ 鍵 2 次選擇燒烤烹調模式 , 預設燒烤火力為 3 (第3級) , 預設烹調時間為 10 分鐘 。 按 ” “ 或 ” “ 鍵設定燒烤火力 [3 (最大) 、 2 、 1 (最小)] 。 按 ” “ 鍵 , 然後按 ” “ 或 ” “... -
Page 56: 燒烤(熱風對流)
燒烤烹調模式 燒烤 ( 熱風對流 ) 按 ” “ 鍵 4 次選擇燒烤 (熱風對流) 烹調模式 , 預設溫度為 180°C , 預設烹調時間為 10 分鐘 。 按 ” “ 或 ” “ 鍵設定溫度 , 範圍由 35°C 至 180°C (可選擇 35°C 、 100°C 、 105°C 、 110°C 、 115°C 、 120°C 、 125°C 、 130°C 、 135°C 、 140°C 、 145°C 、... -
Page 57: 燒烤(熱風對流)及微波
燒烤烹調模式 燒烤及微波 按 ” “ 鍵 5 次選擇燒烤及微波烹調模式 , 預設燒烤火力為 3 (第3級) , 預設微波火力為 300W 。 按 ” “ 或 ” “ 鍵設定燒烤火力 [3 (最大) 、 2 、 1 (最小)] 。 按 ” “ , 預設微波火力顯示為 300W (閃動) , 這時可按 ” “... - Page 58 燒烤烹調模式 燒烤 (熱風對流) 及微波 按 ” “ 鍵 6 次選擇燒烤 (熱風對流) 及微波烹調模式 , 預設溫度為 180°C , 預設微波火力為 300W 。 按 ” “鍵設定溫度 , 範圍由 100°C 至 180°C (可選擇100 C 、 105 C 、 110 C 、 115 C 、 120 C 、...
-
Page 59: 發酵模式
發酵模式 按 ” “ 鍵 4 次選擇燒烤及 熱風 烹調模式 , 預設燒烤火力為 3 (第3級) , 預設微波火力為 300W 。 按 ” “ 鍵設定溫度至 35 C 。 按 ” “ 鍵 , 然後按 ” “ 或 ” “ 鍵設定烹調時間 , 最長為 5 小時 。 按... -
Page 60: 微波烹調模式
微波烹調模式 1. 按 ” “ 鍵選擇微波烹調模式 。 2. 按 ” “ 或 ” “ 鍵設定烹調時間 , 最長為 90 分鐘 。 (如微波火力設定為 900W , 最長烹調時間將為 30 分鐘 。 ) 3. 按 ” “ 預設微波火力顯示為 900W (閃動) , 這時可按 ” “ 鍵調校火力 (可選擇100W 、 300W 、 450W 、 700W 、 900W) 。 “或... - Page 61 微波烹調模式 微波火力功能表 微波火力 100% 顯示 900W 700W 450W 300W 100W 閣下或可按食物種類選擇所需烹調火力 , 詳情可參閱下表 。 火力強度 食物 煲水 , 翻熱 • 煮雞肉 、 魚 、 蔬菜 900 W • 翻熱 • 煮菇類 , 貝殼類 • 700 W 煮以雞蛋或芝士製食物 • 煮飯 , 煲湯 450 W •...
-
Page 62: 自動烹調模式
自動烹調模式 1. 按 ” “ 鍵 2 次 , 預設自動烹調功能選擇為 P01 (閃動) 。 2. 按 ” “ 或 ” “ 鍵選擇自動功能 , 顯示屏上的相對烹調時間顯示將隨之變更 。 3. 按 ” “ , 然後按 ” “ 鍵調校食物重量 , 顯示屏上的烹調時間將隨之變更 。 “或 ” 按 ” “... -
Page 63: 自動烹調功能表
自動烹調功能表 自動烹調功能表 自動功能 顯示 重量 (克) 火力 胡蘿蔔 (烹調) 純蒸 100 蒸煮 100 胡蘿蔔 (快速烹調) 微波 300W 1000 蔬菜 (烹調) 純蒸 100 西蘭花 (烹調) 純蒸 100 蒸煮 100 西蘭花 (快速烹調) 微波 300W 1000 馬鈴薯 (烹調) 純蒸100 蒸煮 100 馬鈴薯 (快速烹調) 微波... - Page 64 自動烹調功能表 自動烹調功能表 自動功能 顯示 重量 (克) 火力 魚 (蒸煮) 純蒸 100 預熱 魚 (炭燒) 烤焗 200 蒸煮 L1 預熱 薄餅 (新鮮) 烤焗 230 烤焗 230 薄餅 (冷藏) 微波 450W 預熱 多士 (微焦) 烤焗 230 預熱 多士 (焦香) 烤焗 230 烤焗 200 烤牛肉...
- Page 65 自動烹調功能表 自動烹調功能表 自動功能 顯示 重量 (克) 火力 烤焗 200 千層麵 (烹調) 蒸煮 L1 烤焗 220 千層麵 (快速烹調) 微波 300W 蒸煮 100 豬手 (烹調) 烤焗 230 朱古力 (軟化) 微波 300W 牛油 (軟化) 微波 700W C-29...
-
Page 66: 預熱模式
預熱模式 如閣下需在烤焗或燒烤食物前將食物預熱 , 請在完成烤焗設定後按 ” “ 鍵 , 顯示屏會顯示 ” “ 的圖案 。 按 ” “ 鍵開始預熱 。 當操作完成後 , 蒸氣焗爐會發出三下 「咇」 聲 。 閣下可打開爐門或按下 ” “ 鍵結束預熱操作 。 注意 : 本預熱功能只在閣下已選定烤焗或燒烤 (熱風對流) 模式後方可進行操作 。 • 當預熱操作進行期間 , 切勿將食物放入爐內 。 •... -
Page 67: 解凍模式
解凍模式 按 ” “ 鍵選擇解凍模式 。 按 ” “ 鍵 , 然後按 ” “ 或 ” “ 鍵調校需解凍食物的重量 , 顯示屏上的相對烹調時間會隨之變更 。 按 ” “ 鍵開始解凍 。 C-31... -
Page 68: 除垢模式
除垢模式 當產生蒸氣時 , 爐內循環水管或會形成污垢 , 因而可能導致蒸氣焗爐出現故障 。 因此 , 每當使用蒸煮功能累計達 20 小時 , 便須進行一次除垢 模式 。 將 1000 毫升水注入儲水箱 , 並混入 1 茶匙檸檬汁 。 將儲水箱裝妥 。 按 ” “ 鍵 3 次 , 顯示屏會出現預設時間為 20:00 的顯示 。 按 ” “ 鍵開始操作 。 當操作完成... -
Page 69: 兒童安全鎖
兒童安全鎖 上鎖 : 持續按下 ” “ 鍵 3 秒 , 蒸氣焗爐會發出一下長的 「咇」 聲 , 同時顯示屏將出現 ” “ 的圖案 。 解鎖 : 持續按下 ” “ 鍵 3 秒 , 蒸氣焗爐會發出一下長的 「咇」 聲 , 同時顯示屏上的 ” “ 圖案將消失 。 C-33... -
Page 70: 故障排解說明
蒸煮操作進行期間 , 會出現這正常情況 。 爐內積水 蒸氣產生時會形成積水 。 以乾布清潔 。 蒸氣焗爐無法開啟操作 1. 未穩妥插上電源線插頭 。 拔除插頭 , 10 秒後重新插上 。 2. 保險絲溶斷或電路板受損 。 聯絡 SHARP 服務中心安排維修 。 3. 家居電插座故障 。 聯絡合資格技師安排維修 。 4. 爐門未關妥 。 重新將爐門關上 。 當使用蒸氣焗爐時 , 玻璃盤發出噪音 有油或食物濺到玻璃盤或爐壁上 。 潔蒸氣焗爐 。... - Page 71 PN:16170000A38075...
Need help?
Do you have a question about the R-1340R and is the answer not in the manual?
Questions and answers