Table of Contents
Advertisement
Quick Links
Advertisement
Table of Contents

Related Manuals for Samsung SADPCI-202


Summary of Contents for Samsung SADPCI-202
- Page 1 SADPCI-202 Digital Satellite Receiver Instruction manual...
-
Page 2: Table Of Contents
Table of Contents 1. Safety and precautions 2. Accessories 3. System Connection 4. Front Panel 5. Rear Panel 6. Remote Control Unit 7. Quick Start 8. Downloading Channels 9. Viewing your channels 10. Multi-satellite 11. Favourite Channels 12. Electronic Programme Guide(EPG) 13. -
Page 3: Safety And Precautions
Safety and Precautions: Thank you for purchasing the new SAMSUNG digital satellite receiver. For your safety and proper operation of your receiver, please take time reading this manual fully before installing and operating the receiver. Safety notice: DANGER! HIGH VOLTAGE! RISK OF ELECTRIC SHOCK! Lethal voltages are present inside the unit. -
Page 4: Accessories
Accessories: User Manual: 1 Batteries: 2 UHF TV cable: 1 Remote Control Unit: 1 RADIO TV SAT LANG INFO M U T E V O L V O L MENU SIGNAL F 1 HELP... -
Page 5: System Connection
System Connection: Please unplug all unites from mains outlet before installation. Once all connections are made please check again before connecting the equipment to the mains outlet. The following shows a typical installation of a satellite receiver. If you require further assistance for the installation of your satellite receiver, please contact your local distributor. -
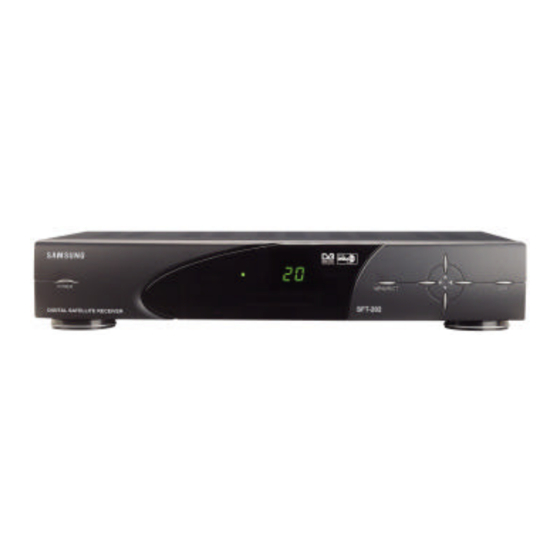
Page 6: Front Panel
Front Panel: A. Standby: To switch the receiver on / off. B. Menu: To enter the main menu. C. Volume +/-: To increase or decrease volume level. D. Exit: To back step or exit from menu. E. Display: Displays channel mode and channel number (see below*). F. -
Page 7: Rear Panel
Rear Panel Please refer to the diagram above for all the connection possibilities of your receiver. Do not connect the unit to the mains socket until all other connections have been made and checked. IF Input: Connect the cable from your dish to this connector. Loop Out: If you have a second satellite receiver, connect the second satellite receiver’s LNB input to this connector. -
Page 8: Remote Control Unit
Remote Control Unit: By-Pass SCART priority VCR loop through Display radio channel list Display TV channel list To switch your receiver on from stand by or off to stand by To change volume, or to move cursor left, right in menu To select menu option, or to updated on entry Programme Guide :... -
Page 9: Quick Start
Quick Start: After initialisation, the Language selection screen will be displayed. By using the LEFT/RIGHT keys, you may select the different menu languages available. Once you have selected the desired menu language, press OK to continue with set-up. After selecting the menu language, the receiver will display the Channel Tuning Menu: (Menu, Channel Setup, OK) Preset Entry: Move the cursor to highlight the “Satellite”... -
Page 10: Downloading Channels
Downloading Channels: With a “Signal Found” message displayed the signal meters in the Channel Tuning Menu,and depending on whether you have selected a Satellite or Bouquet search. Press the OK key to begin auto search (Satellite, Network or Bouquet). A uto C hannel Search TV channels Searching 11.381 GHz …... -
Page 11: Viewing Your Channels
Viewing your channels: There are several ways to access the stored channels: Using the UP/DOWN keys on the remote handset to access the channels sequentially. Using the numeric keys (0-9) by typing the channel number to access the channels directly. Using the TV key on your handset to display the TV channel list. -
Page 12: Favourite Channels
Favourite Channels : Before you can use the “Favourite Channels List ” , you must first add your favourite channels into the favourites list. Please refer to the instructions below: 1. In view mode press the TV button to display the TV channel list. 2. -
Page 13: Selecting Different Audio Channels
Selecting different audio channels: In digital satellite broadcasts, multiple audio languages can be simultaneously transmitted by the programme provider. Default audio setting: The user can first select a default audio language via the “Preferences” menu for the receiver. Once the default audio language has been stored, all newly found TV/Radio channels will then be stored with the selected default audio language. -
Page 14: Additional Information
At any time you can check the memory status on you receiver. The indicator shows the amount of receiver memory used by the stored channels. Press: Menu, Channel Setup, Memory Status : Memory Used SAMSUNG Use INFO key for diagnostic info Pic. Size: Frames/Sec: Asp. Ratio:... -
Page 15: Parental Control
Canal +11 TV14 19.2E Canal+2 TV17 19.2E CNBC TV22 19.2E TV18 19.2E Fashion TV35 19.2E TV57 19.2E TV60 19.2E TV54 19.2E Astra F2 to Lock/Unlock F2 to Lock/Unlock TV 124 Canal + CHANNEL LOCKED, F2 TO DISABLE LOCK SAMSUNG 19.2E Signa l... -
Page 16: Changing The Pin
Changing the PIN: The factory default PIN is set to: 0000. At any time the user may change this PIN code by accessing the “Change PIN” menu: Channel Lock Menu Lock Enter new PIN: Confirm: Lock/Unlock Channels Change PIN Note: Channel Lock is only effective if Installation/Channel Setup menus are also locked with Menu Lock To change the PIN code, enter in the new PIN into the New PIN box and re-enter the same PIN again... -
Page 17: Advanced Users Guide
Advanced users guide: Tuning to different channel frequencies: If the satellite you desire is not in the Preset listing, or you want to tune the receiver to a different set of channels, please follow the instructions below: To access the tuning menu, press the Menu key: Move the cursor to Channel Setup and press OK. -
Page 18: Tuning Modes
Tuning Modes: Auto Tuning From the select frequencies, the receiver will automatically search for all other frequencies within the tuning range and downloads them automatically into the receiver. Once the channels have been downloaded, all the TV and Radio channels will be displayed separately allowing the user to inspect them and decide whether they are to be stored or aborted. -
Page 19: Setup Satellite
Setup Satellite: If your desired satellite position is not on the Preset List, you can manually edit an existing satellite or add a new satellite name to the preset list. To add a new satellite to your list, you must first enter the channel tuning mode: Press Menu, Channel Setup, OK: From the Channel tuning menu press F1 to enter manual tuner mode. -
Page 20: Editing Channels
Editing channels: Should you wish to modify or view details of a particular channel, you may do so by using the Edit Channel Details menu. Please note that apart from editing the channel name, editing any of the channel parameters will cause the channel to either be lost or changed (different audio/video). -
Page 21: Sort Free To Air Channels
Sort Free to Air Channels : This function automatically separates the scrambled channels from the free-to-air channels by actually checking each channel for video and audio. The user first decides whether to sort TV or Radio channels (or both at the same time), and then selects whether to delete the scrambled channels or simply move them to the end of the channel list. -
Page 22: Deleting Channels
Reset to factory defaults section in this manual. you may select individual channels for deletion. you may delete all channels in one operation. TV Channels TV 124 SAMSUNG Warning Radio List radio channels 1 Sky 1... -
Page 23: Installation Lnb
Installation: LNB: The installation menu provides access to LNB settings and features. These can expand the receivers capabilities as well as customising the receiver to your preference. Press Menu and select Installation to access the Installation menu: High DiSEqC Tone LNB Power DiSEqC 1.0 The default LNB setting is as per the diagram above. -
Page 24: Tv/Vcr Settings
TV/VCR settings: The TV/VCR menu contains various options that allow you to configure the receiver to suit your system: Press Menu, select Installation to access the TV/VCR Menu: The following options are available: TV Type: Select between a standard aspect ratio TV (4:3) or Wide-screen (16:9) TV. 16:9 mode is only active when a programme is transmitted in 16:9 format. -
Page 25: Preferences
Preferences: This menu allows you to customise the receiver to suit your individual needs. To access the Preferences menu: Press Menu, select system. Select Menu Language: You may change the default menu language. The number of languages available depends on the receiver’s software version. EPG Type: You can change the Electronic Programme Guide format between FULL EPG or... -
Page 26: Reset To Factory Defaults
Reset to factory defaults: The Reset To Factory Defaults option is provided to enable the user to completely reset the receiver. Unlike the Clear All Channel Information option which allows the user to clear only the channel list, the Reset To Factory Defaults option will clear all changes made by the user, including Installation, Channel Setup and Parental Control changes. -
Page 27: Trouble Shooting
Trouble shooting: If you suspect there is a fault with your receiver, please check the following trouble shooting guide before calling an authorised service agent. Warning! Under no circumstances attempt to repair the receiver yourself. Tampering with the receiver may result in fatal electric shock and will invalidate your warranty. Symptom: No receiver display Receiver is ON, but no picture or sound... -
Page 28: Analogue Option
Analogue option The digital satellite receiver analogue option is an advanced analogue receiver module specially designed to be used with the digital satellite receiver. With the capacity for 600 channels, single or twin input Low-Threshold tuner* (3.5dB max.), dual IF bandwidth tuner* and high sensitivity PLL audio demodulation circuitry, the analogue option will provide excellent reception capability even under very poor signal conditions. -
Page 29: Using The Analogue Option
using the analogue option The built-in analogue option enables you to receive analogue satellite transmission. Your analogue receiver has been pre-programmed with the most popular satellite channels. Refer the Analogue Channel List for full details. To set up the analogue receiver (assuming your TV has already been tuned to your satellite receiver, otherwise refer to instructions in page 6 of the main manual) Unplug the receiver from the mains outlet. -
Page 30: Video Menu
1. Video Menu: CH Name: Displays channel name. To change the channel name, move the cursor by using Left/Right key. Then you can change the channel name by using Up/Down key. SAT: Displays the satellite group the current channel belongs to. Y ou can change the channel/satellite assignment by using the Left/Right keys. -
Page 31: System Menu
3. System Menu LNB INPUT: Select upto eight LNB settings for your analogue system, A1 to A4, B1 to B4. You can assign different LNB parameters (local oscillator frequency, LNB power, 22KHz, 12V and DiSEqC control) for each LNB setting. For the selected input set the following: LOCAL OSC: Select the appropriate LNB local oscillator frequency. - Page 32 Favourite Key: Press the favourite key to display the Favourite Menu (Up to 40 favourite channels can be stored): By using the Up/Down, Left/Right keys to move the cursor to select a favourite channel number. Now, either press OK to view the selected favourite channel, or press the favourite key again to store the current channel as a favourite channel.
-
Page 33: Positioner Model
positioner model: For models fitted with the integrated positioner module, refer to the following instructions for positioner setup (assuming your dish has already been correctly setup): At the back of the receiver you will find eight connectors provided for the dish actuator - M1, M2, SENS, GND: From your actuator motor you will find four wires –... - Page 34 You may now begin to setup the positioner: Confirm the dish actuator is correctly installed by moving the cursor to DISH POS and then press the Left/Right keys to move the dish east and west (usually Left key for East and Right key for West). You should see the counter counting up and down (If your dish moves in opposite direction to the East/West keys, reverse the wires connected to M1 and M2).
-
Page 35: Channel Listing
SADPCI-202 Channel Listing SATELLITE 26.0 E ARABSAT 2A/3A ALMANAR TV ABU DHABI TV KUWAIT ALGERIAN TV IRAQ QATAR TV JORDAN SAUDI 1 IQRA SAUDI CH 2 IMARAT FM ARABIC ARABIC CLASSICS FM 99.7 RTA CH 1 RTA CH 2 RTA CH 3... - Page 36 SADPCI-202 Channel Listing SATELLITE OMAN TV KUWAIT YEN TV ART 5 BAHRAIN CNN RADIO EL SHARQ OMDURMAN V.O.K.1 AL-QURAN MONTE CARLO V.O.K.2 CHANNEL 4 IMARAT R.DUBAI DUBAI FM SYRIAN RADIO MBC FM QATAR RADIO RADIO OMAN OMAN FM ARABIC ARABIC CLASSIC...
- Page 37 SADPCI-202 Channel Listing SATELLITE DISCOVERY BRAVO VIVA BAYERISCHES NIKELODEON SKY SPORTS 2 RTL 2 SHOP AMERICA EUROSPORT SAT1 FOX KIDS SKY ONE KABEL 1 3 SAT BLOOMBERG SKY NEWS SUPER RTL PRO 7 SKY MOVIAX PREMIERE SKY PRIER SKY SPORTS 1...
- Page 38 SADPCI-202 Channel Listing SATELLITE WDR 2 EINS LIVE IC R1 IC R2 JAM FM DW 1 DW 3 DW 4 TAMIL ROCK KLASSIK IC R 1 IC R 2 SKY RADIO BYERN DEUTSCH VIRGIN HOREB SUNSHINE N-JOY SUNRISE TAMIL SWR 3 100.6...
- Page 39 SADPCI-202 Channel Listing 2SATELLITE LA CINQ BBC WORLD DEUTSCHE VIVA 2 TVE INT TV 5 EUROPE TV 4 POL RAI UNO EUROSOPORT CANAL + POLSAT RAI DUE TV POLONIA RTL 7 CANAL + RAI TRE 123 SAT TBN EUROPE 69 X TV...
- Page 40 SADPCI-202 Channel Listing SATEELLITE RADIO MC RADIO UNO RADIO TRE R. ITA R. MANA RMF FM RADIO DUE RAI INT GR PARLA POLSKIE POLSKIE POLSKIE R MARYJA R WAWA RDP INT RDP ANT RDP TIMOR EURO SPOT BARTOK R 30.5E...
- Page 41 SADPCI-202 Channel Listing SATELLITE EUTELSAT 2F4 EBU FEED EBU FEED EBU FEED EBU FEED EBU FEED EBU FEED PIK 1 CYPRUS EBU SPORTS 68.5E PAS 4/7 SIMA-YEH MOGHAVAT IRANIAN EXIL SABC 1 FEED NHK LONDON SABC 3 SABC 2 FEED...
- Page 42 SADPCI-202 Channel Listing SATELLITE NATIONAL PUNJAB RAJASTHAN FEED ORIYA BIHAR FEED 42.0E TURKSAT 1C CINE 5 KANAL D SHOW TV STAR TV TRT INT SAMANYOLU TV KANAL 7 INT TRT 1 TRT 3 TRT 4 TRT AVRASYA D FUN TRT 2...
- Page 43 SADPCI-202 Channel Listing SATELLITE TGRT HERBALIF INTERSTA SAMANYOL MORAL FM METRO FM KRAL FM SUPER FM BURU RAD DYNYA RA RADYO SA 5.0E SIRIUS 2/3 VH-1 TEST CARD BLOOMBERG Z TV HALLMARK VIASAT P TV 4 TV 6 NIKELOD TV 3 SWE...
- Page 44 SADPCI-202 Channel Listing SATELLITE TV 1000 TV 3N TV 3D TV 3 S TV 2 PEOPLE’S TV 4.0W AMOS 1 IBA CH 1 METV CHANNEL 2 5.0W TELECOM 2C FRANCE 2 TV 5 LA CINQUIE TV 5 INFO C+FRANCE TF 1 FRANCE 3 8.0W...
- Page 45 SADPCI-202 Channel Listing SATELLITE TV 5 27.5W INTELSAT 605 FEED BOP TV ALGERIE 30.0W HISPASAT 1A/1B/1C C+ESPANA 31.5W INTELSAT 801 TELE SAHEL TELE SAHEL 34.5W INTELSAT 601 MTA INT MTA INT MTA INT MTA INT MTA INT MTA INT MTA INT...
-
Page 46: Audio Table
Audio Table MO/STEREO STER STER STER STER MONO MONO MONO MONO MONO MONO MONO MONO MONO MONO MONO MONO MONO MONO MONO MONO MONO STER STER STER MONO MONO MONO MONO MONO MONO MONO MONO MONO MONO MONO MONO MONO MONO MONO MONO... -
Page 47: Common Interface
Common interface: Your receiver is equipped with a twin-slot Common Interface (CI), accepting both Type 1 and Type 2 PCMCIA modules (see diagram below). Plug in the appropriate CI module together with a valid SMART Card. You will then have access to the respective scrambled and pay-per-view services. Insert the SMART card into the CI module, and the module into the slots provided behind the hinged door at the front of the receiver. -
Page 48: Common Interface(Option)
Common Interface (cont.): To access the Common Interface menu: Press Menu, select CI. The information available on the CI menu depends on the CI module provider. Typically they will contain subscription information such as subscription duration, accessible programmes, maturity level, network information etc. -
Page 49: Technical Specifications
Technical Specifications: Electrical Specification Video Inputs: Video Outputs: Audio Inputs: Audio Outputs: Mains power: Connectors 4 x Phono/RCA: RS232: Modulator/Bypass: Satellite IF input: Satellite IF loop out: Tuner Loop though Digital tuner with LNB input, and loop output Full power loop through supported Frequency Range at LNB input: Input connector: Impedance:... - Page 50 Transport, A/V Decoding Demultiplexor: PID Filters: PCR recovery: Video Decoder: Bitstreams Supported: Video Resolution: Video Memory: Audio Decoder: Type: Layers: Audio Modes: Output Sample Rates Supported: Data rates supported PAL/NTSC Encoder: Supported Outputs: UHF/VHF Modulator: Tuning Range: (UHF): (VHF): Processor and memory System CPU: RAM: ROM:...