Table of Contents
Advertisement
Available languages
Available languages
Quick Links
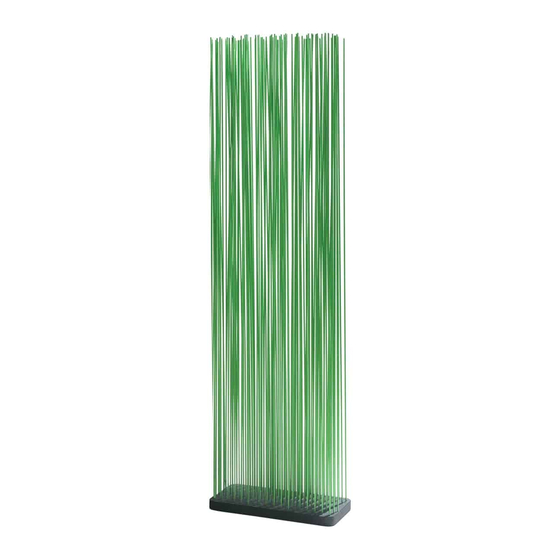
STICKS
© design by hsu-li teo & stefan kaiser
READ INSIDE
ASSEMBLY INSTRUCTIONS,
HOW TO USE, USEFUL TIPS
FOR KEEPING YOUR TOOL FOR
TOGETHERNESS IN SHAPE
PRODUCT
BASES 60X30 – BASES 30X30 – BASES 50X25 – BASES SHARP
CURVED – BASES WIDE CURVED – OPTIONAL LIGHT – EXTRA
WEIGHT – OPTIONAL CONNECTOR – OPTIONAL CABLE –
MAINTENANCE
LANGUAGES
EN – NL – DE – FR – IT – ES
MORE
WWW.EXTREMIS.COM
Advertisement
Table of Contents

Related Manuals for Extremis STICKS


Summary of Contents for Extremis STICKS
- Page 1 STICKS © design by hsu-li teo & stefan kaiser READ INSIDE LANGUAGES ASSEMBLY INSTRUCTIONS, EN – NL – DE – FR – IT – ES HOW TO USE, USEFUL TIPS MORE FOR KEEPING YOUR TOOL FOR TOGETHERNESS IN SHAPE WWW.EXTREMIS.COM PRODUCT BASES 60X30 –...
- Page 2 contents...
-
Page 3: Table Of Contents
P. 4 contents p. 4 assembly sticks p. 6 maintenance p. 6 warnings p. 6 floor fastening p. 7 sticks with led p. 8 extra weight p. 10 connection piece p. 11 NEDERLANDS P. 12 inhoud p. 12 montage sticks p. -
Page 4: English
CONTENTS STICKS OUTDOOR / INDOOR 1 x base 60x30 1 x base sharp curved 1 x base wide curved (rubber) (rubber) (rubber) 1 x base 30x30 fibre glass rods (rubber) (96 st. / 48 st.) FEET TO BE USED ONLY IN... - Page 5 OPTIONS COOL / WARM LED 1 x base 60x30 1 x base sharp curved 1 x base wide curved (cool or warm led) (cool or warm led) (cool or warm led) BEWARE: RUBBERWOOD BASES ARE NOT SUITABLE 1 x base 30x30 (cool or warm led) FOR OUTDOOR USE ! CONNECTING BASES WITH...
-
Page 6: Assembly Sticks
FOR THE RUBBER BASE When you disassemble the Sticks space divider, bundle the rods with the same side up or down, as the base sometimes leaves marks on the rods. When re-inserting the rods in the base, make sure they are facing the same way as they did before the disassembly. -
Page 7: Floor Fastening
2. Position the base where you want 3. Drill a hole at the marked spot. the base and drill a ø6 mm hole to install your Sticks. Insert a pen Insert a plug n° 8 in the hole. through the base. -
Page 8: Sticks With Led
STICKS WITH LED Up to 10 bases can be fixed to each other with only 1 power supply. The cables attached to the LED lights are always connected to the adjacent base. The first bases cable must be connected to the power supply. - Page 9 2006/95/CE and 2004/108/CE. suitable plug yourself. SPECIFICATIONS 100-240 V ~ 50/60 Hz max. 10 bases type light bulb: 2 x LED light bulb Sticks Rubberwood bases cannot be used outdoors or in wet areas!! IP65 REPLACING A LED LIGHT BULB 1.
-
Page 10: Extra Weight
60x30 and 30x30 cm bases). 3. Put the extra weight on the bottom of the base 4. Attach the feet using the supplied longer screws. making sure the holes match up. Push the two cables through the two outer holes. sticks with extra weight... -
Page 11: Connection Piece
ASSEMBLY CONNECTION PIECE 1. Put the two bases against each other and position the connection piece on top of them as shown in the drawing above. Make sure the holes in the connection piece match up with the holes in the bases. 2. -
Page 12: Nederlands
INHOUD STICKS OUTDOOR / INDOOR 1 x sokkel 60x30 1 x sokkel scherp gebogen 1 x sokkel breed gebogen (rubber) (rubber) (rubber) 1 x sokkel 30x30 glasvezel stokken (rubber) (96 st. / 48 st.) VOETJES ENKEL NODIG BIJ 6 / 4 x voetje 6 / 4 x bolkop vijs 3,9x32 DELICATE VLOEREN. - Page 13 OPTIES KOUD / WARM LED 1 x sokkel 60x30 1 x sokkel scherp gebogen 1 x sokkel breed gebogen (koud of warm led) (koud of warm led) (koud of warm led) OPGEPAST: HOUTEN SOKKELS ZIJN NIET GESCHIKT 1 x sokkel 30x30 (koud of warm led) VOOR BUITENGEBRUIK ! SOKKELS + LED KOPPELEN:...
-
Page 14: Montage Sticks
VOOR DE RUBBER SOKKEL GELDT Als u Sticks demonteert, bundel dan de stokjes zodat de onderkanten samen blijven. De sokkel kan namelijk verkleuring nalaten op de stokjes. Wanneer u Sticks opnieuw monteert, steek dan de stokjes langs dezelfde kant in de sokkel. -
Page 15: Grondverankering
GRONDVERANKERING 1. Markeer eerst het midden van de 2. Plaats de sokkel waar u de Sticks 3. Boor een gat in de grond op het sokkel en boor een gaatje van wil hebben en duid met een pen aangeduide punt. Voorzie het gat ø6 mm door de sokkel. -
Page 16: Sticks Med Led
STICKS MET LED Tot 10 sokkels kunnen aan elkaar gekoppeld worden met slechts 1 power supply. De kabels die vastzitten aan het LED-lichtjes, worden telkens aan de daaropvolgende sokkel gekoppeld. De eerste sokkel wordt verbonden met de power supply. 1. Plaats eerste alle sokkels op (ongeveer) de gewenste 2. - Page 17 1 x voeding + verlengkabel 1m = max. 8 sokkels 1 x voeding + verlengkabel 4m = max. 6 sokkels 1 x voeding + verlengkabel 9m = max. 4 sokkels type lamp: 2 x LED lamp Sticks IP65 VERVANGEN VAN DE LED’S 1.
-
Page 18: Extra Gewicht
(geldt enkel voor basis 60x30 & 30x30). 3. Positioneer de verzwaringsplaat op de onderkant van 4. Monteer nu terug de voetjes met de langere de basis zodat de gaatjes mooi overeenkomen. Steek meegeleverde vijzen. de 2 kabels door de 2 buitenste gaten. sticks met verzwaringsplaten... -
Page 19: Koppelstuk
MONTAGE KOPPELSTUK 1. Plaats 2 sokkels naast elkaar en positioneer het koppelstuk boven op de sokkels zoals op bovenstaande tekening. Zorg ervoor dat de gaatjes van het koppelstuk overeenkomen met de gaatjes van de sokkels. 2. Steek nu de stokjes door de gaatjes van het koppelstuk 3. -
Page 20: Deutsch
INHALT STICKS OUTDOOR / INDOOR 1 x Sockel 60x30 1 x sharf gebogener Sockel 1 x breit gebogener Sockel (Gummi) (Gummi) (Gummi) 1 x Sockel 30x30 Glasfaserstäbe (Gummi) (96 / 48 St.) FÜSSE SOLLTEN NUR BEI EMPFINDLICHEN FUSSBÖDEN 6 / 4 x Fuß... - Page 21 OPTIONAL KALT- ODER WARMWEISSE LEDS 1 x Sockel 60x30 1 x sharf gebogener Sockel 1 x breit gebogener Sockel (kalt- oder warmweiße LEDs) (kalt- oder warmweiße LEDs) (kalt- oder warmweiße LEDs) ACHTUNG: HOLZSOCKEL SIND NICHT FÜR DEN EIN- 1 x Sockel 30x30 (kalt- oder warmweiße LEDs) SATZ IM FREIEN GEEIGNET! ELEKTRISCHE KOMPONENTEN...
-
Page 22: Montage Sticks
Übergängen eingesetzt werden. Damit lassen sich besondere Effekte erzielen. BEIM GUMMISOCKEL BEACHTEN Bei der Demontage der Sticks die Stäbe so bündeln, dass die unteren Enden der Stäbe sich auf derselben Seite befinden. Der Sockel kann die Stäbe nämlich verfärben. -
Page 23: Bodenverankerung
BODENVERANKERUNG 1. Markieren Sie zuerst die Mitte 2. Stellen Sie den Sockel an die 3. Bohren Sie an der markierten des Sockels und bohren Sie ein gewünschte Stelle und markieren Stelle ein Loch in den Boden. Loch mit ø 6 mm. Sie mit einem Stift das Loch in Stecken Sie einen 8er-Dübel in der Mitte auf dem Boden. -
Page 24: Sticks Mit Led
STICKS MIT LED An einen einzigen Netzanschluss können bis zu 10 Sockel in Reihe angeschlossen werden. Die Kabel an den LED-Leuchten werden jeweils mit den LED-Leuchten des nächsten Sockels verbunden. Der erste Sockel wird an das Stromnetz angeschlossen. 1. Stellen Sie zuerst alle Sockel (ungefähr) am 2. - Page 25 Richtlinien 2006/95/CE und 2004/108/CE. Stecker vor. TECHNISCHE DATEN 100-240 V ~ 50/60 Hz max. 10 Sockel Art der Lampe: 2 x Sticks-LED Lampe Holzsockel nicht im Freien oder in Feuchträumen aufstellen!! IP65 AUSWECHSELN DER LEDS 1. Achten Sie darauf, dass der/die Sockel nicht mehr mit dem Stromnetz verbunden ist/sind! 2.
-
Page 26: Extra Ballast
3. Legen Sie die extra Ballastplatte auf die 4. Befestigen Sie die Füße mit den mitgelieferten Unterseite. Achten Sie darauf, dass die Bohrungen längeren Schrauben. übereinstimmen. Schieben Sie die zwei Kabel durch die beiden äußeren Löcher. sticks mit extra gewicht... -
Page 27: Verbindungsstück
MONTAGE VERBINDUNGSSTÜCK 1. Stellen Sie die beiden Sockel nebeneinander und legen Sie das Verbindungsstück wie auf der Zeichnung oben gezeigt darauf. Achten Sie darauf, dass die Löcher im Verbindungsstück mit den Löchern in den Sockeln übereinstimmen. 2. Stecken Sie einige Stäbe durch die Löcher im 3. -
Page 28: Contenu
CONTENU STICKS OUTDOOR / INDOOR 1 x base 60x30 1 x base arrondie – courbure forte 1 x base arrondie – courbure faible (caoutchouc) (caoutchouc) (caoutchouc) 1 x base 30x30 tiges en fibre de verre (caoutchouc) (96 st. / 48 st.) -
Page 29: Français
OPTIONS LED FROIDES / CHAUDES 1 x base 60x30 1 x base arrondie – courbure forte 1 x base arrondie – courbure faible (LED froides ou chaudes) (LED froides ou chaudes) (LED froides ou chaudes) ATTENTION: LES BASES EN BOIS NE CONVIENNENT 1 x base 30x30 (LED froides ou chaudes) PAS POUR UNE UTILISATION À... -
Page 30: Montage Sticks
MONTAGE STICKS POUR LA BASE EN CAOUTCHOUC Fixez les 6 petits pieds avec les vis fournies. CONSEILS Si vous voulez que les pieds soient moins visibles, utilisez les trous intérieurs. Si vous installez la base à l’extérieur, utilisez les trous extérieurs pour plus de stabilité. -
Page 31: Fixation Dans Le Sol
2. Placez la base à l’endroit où vous 3. Forez un trou dans le sol à marque au milieu de la base, voulez installer Sticks et marquez l’endroit indiqué. Insérez dans le et forez un petit trou de ø6 mm à... -
Page 32: Sticks Avec Led
STICKS AVEC LED Possibilité de relier jusqu’à 10 bases avec seulement 1 alimentation électrique. Les câbles attachés aux LED sont chaque fois reliés à la base suivante. La première base sera reliée à l’alimentation électrique. 1. Commencez par positionner toutes les bases plus ou 2. - Page 33 2006/95/CE et 2004/108/CE. CARACTÉRISTIQUES 100-240 V ~ 50/60 Hz max. 10 bases type de lampe: 2 x lampe LED Sticks Ne pas utiliser les bases en bois en plein air ou dans des endroits humides !! IP65 REMPLACEMENT DES LAMPES LED 1.
-
Page 34: Poids Supplémentaires
4. Refixez maintenant les petits pieds à l’aide des vis base, en veillant à bien faire correspondre les trous plus longues fournies dans les deux éléments. Faites passer les deux câbles par les deux trous extérieurs. sticks avec poids supplémentaire... -
Page 35: Pièce De Connexion
MONTAGE PIÈCE DE CONNEXION 1. Déposez les 2 bases côte à côte et positionnez la pièce de connexion sur les bases, comme indiqué sur l’illustration. Veillez à bien faire correspondre les trous de la pièce de connexion avec ceux des bases. 2. -
Page 36: Contenuto
CONTENUTO STICKS OUTDOOR / INDOOR 1 x base 60x30 1 x base curva 1 x base leggermente curva (gomma) (gomma) (gomma) 1 x base 30x30 bastoncino in fibra di vetro (gomma) (96 / 48 pezzi) I PIEDINI SERVONO SOLO 6 / 4 x tappi... -
Page 37: Italiano
OPZIONALE LED A LUCE FREDDA / CALDA 1 x base 60x30 1 x base curva 1 x base leggermente curva (led a luce fredda o calda) (led a luce fredda o calda) (led a luce fredda o calda) ATTENZIONE: LE BASI IN LEGNO NON SONO ADATTE 1 x base 30x30 (led a luce fredda o calda) PER L’USO ESTERNO ! -
Page 38: Montaggio Sticks
PER LA BASE DI GOMMA VALE QUANTO SEGUE Se si smonta Sticks, raggruppare i bastoncini in modo tale che le loro estremità inferiori restino unite, poiché la base può lasciare su di essi residui di colore. -
Page 39: Ancoraggio Al Suolo
2. Posizionare la base dove si 3. Praticare un foro sul suolo nel e forarla da parte a parte desidera collocare Sticks ed punto indicato. Dotare il foro di praticando un foro da 6 mm di indicare con una penna il foro un tassollo n°... -
Page 40: Sticks Con Led
STICKS CON LED È possibile collegare a una (1) sola presa di corrente fino a 10 basi collegando i cavi di ciascuna lampadina LED alla base successiva. La prima base sarà quella collegata alla presa di corrente. 1. Per prima cosa posizionare tutte le basi (più o meno) 2. - Page 41 2006/95/CE e 2004/108/CE. adeguata. SPECIFICHE 100-240 V ~ 50/60 Hz max. 10 basi tipo di lampadina: 2 x lampadine a LED Sticks Non utilizzare le basi di legno all’aperto o in ambienti umidi!! IP65 SOSTITUZIONE DEI LED 1. Accertarsi che le basi siano scollegate dalle rete elettrica! 2.
-
Page 42: Peso Supplementare
3. Posizionare la placca di peso supplementare sul fondo 4. Rimontare ora i piedini con le viti più lunghe in della base di modo che i fori coincidano. Far passare i dotazione. 2 cavi attraverso i 2 fori più esterni. sticks con peso supplementare... -
Page 43: Elemento Di Giunzione
MONTAGGIO DELL’ELEMENTO DI GIUNZIONE 1. Affiancare 2 basi e posizionare l’elemento di giunzione su di esse come illustrato nella figura sopra riportata. 2. Affiancare 2 basi e posizionare l’elemento di giunzione su di esse come illustrato nella figura sopra riportata. italiano... -
Page 44: Contenido
CONTENIDO STICKS OUTDOOR / INDOOR 1 x base 60x30 1 x base fuertemente curvada 1 x base ligeramente curvada (caucho) (caucho) (caucho) 1 x base 30x30 barra de fibra de vidrio (caucho) (96 / 48 pzas.) SOLO SE NECESITAN LOS PIECECITOS EN CASO DE 6 / 4 x collarines de plástico... -
Page 45: Español
OPCIONAL DEL FRÍO / CALIENTE 1 x base 60x30 1 x base fuertemente curvada 1 x base ligeramente curvada (DEL frío o caliente) (DEL frío o caliente) (DEL frío o caliente) ATENCIÓN: ¡ LAS BASES DE MADERA NO SON APTAS 1 x base 30x30 (DEL frío o caliente) PARA USO EXTERIOR ! -
Page 46: Monaje Sticks
PARA LA BASE DE GOMA SE APLICA LO SIGUIENTE Al desmontar los Sticks, ate las barras para que las puntas inferiores queden juntas. La base a veces deja marcas en las barras, - por eso al montar de nuevo las barras en la base debe poner la misma punta de las barras en la base. -
Page 47: Anclaje Al Suelo
2. Ponga la base o zócolo en el lugar 3. Taladre un agujero en el suelo base y taladre un agujero de donde quiere instalar los Sticks en el punto señalado. Ponga en el ø6 mm a través de la base. -
Page 48: Sticks Con Del
STICKS CON DEL Es posible acoplar 10 bases empleando solamente 1 alimentación eléctrica. Los cables fijados a las lámparas DEL cada vez se acoplan a la base siguiente. La base primera se conecta a la alimentación eléctrica. 1. Primero ponga todas las bases en el lugar deseado 2. - Page 49 2. Dé la vuelta a la base y desacople la lámpara DEL rota. 3. Ahora, por arriba, quite la lámpara rota de la base, empujando desde abajo si hace falta. Coloque una nueva lámpara DEL EXTREMIS. 4. Acople las lámparas DEL como se indica en la página anterior.
-
Page 50: Peso Extra
3. Posicione la placa de peso en el fondo de la base de 4. Ahora vuelva a montar los piececitos, empleando los tal manera que los agujeros corresponden. Inserte los tornillos más largos suministrados. 2 cables a través de los 2 agujeros externos. sticks con peso extra de vidrio... -
Page 51: Pieza De Conexión
MONTAJE DE LA PIEZA DE CONEXIÓN 1. Ponga una base junto a otra base y posicione la pieza de conexión sobre las dos bases, como se muestra en la figura de arriba. Asegúrese de que los agujeros de la pieza de conexión corresponden con los agujeros de las bases. - Page 52 W W W. E X T R E M I S .CO M All images, ideas, designs and design content are the intellectual property of Extremis and may not be copied, imitated or used, in whole or in part, without the prior written permission of Extremis.
Need help?
Do you have a question about the STICKS and is the answer not in the manual?
Questions and answers