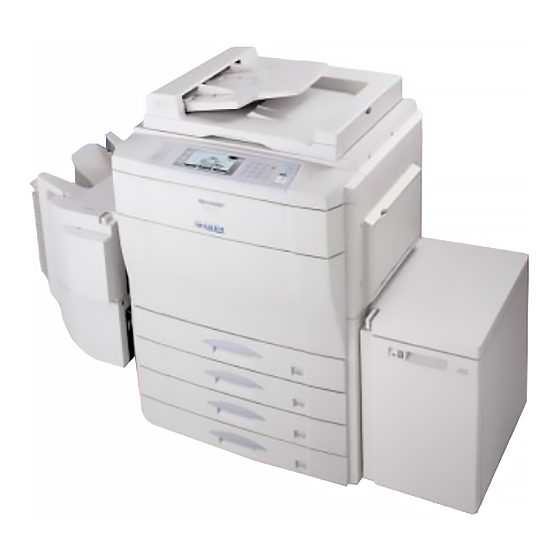
Sharp AR-C150 Service Manual
Digital full color copier
Hide thumbs
Also See for AR-C150:
- Service manual (214 pages) ,
- Key operator's manual (36 pages) ,
- Service manual (6 pages)
Table of Contents
Advertisement
Quick Links
[ 1 ] CONFIGURATION . . . . . . . . . . . . . . . . . . . . . . . . . . . . . . . . . . . 1-1
[ 2 ] SPECIFICATIONS . . . . . . . . . . . . . . . . . . . . . . . . . . . . . . . . . . . 2-1
[ 3 ] CONSUMABLE PARTS . . . . . . . . . . . . . . . . . . . . . . . . . . . . . . . 3-1
[ 6 ] MACHINE OPERATIONS . . . . . . . . . . . . . . . . . . . . . . . . . . . . . 6-1
[ 7 ] SETTING AND ADJUSTMENTS . . . . . . . . . . . . . . . . . . . . . . . . 7-1
[ 8 ] SIMULATION . . . . . . . . . . . . . . . . . . . . . . . . . . . . . . . . . . . . . . . 8-1
[ 9 ] USER PROGRAM . . . . . . . . . . . . . . . . . . . . . . . . . . . . . . . . . . . 9-1
[10] SELF DIAG MESSAGE AND TROUBLESHOOTING . . . . . . . 10-1
[11] MAINTENANCE AND DISASSEMBLY/ASSEMBLY . . . . . . . . 11-1
[12] BLOCK DIAGRAM . . . . . . . . . . . . . . . . . . . . . . . . . . . . . . . . . . 12-1
[13] ACTUAL WIRING CHART . . . . . . . . . . . . . . . . . . . . . . . . . . . . 13-1
[14] OTHERS . . . . . . . . . . . . . . . . . . . . . . . . . . . . . . . . . . . . . . . . . 14-1
This Service Manual describes only the different points from the
AR-C150. For servicing of the AR-C250, therefore, use this Service
Manual together with that of the AR-C150.
Parts marked with " " are important for maintaining the safety of the set. Be sure to replace these parts with specified
ones for maintaining the safety and performance of the set.
DIGITAL FULL
COLOR COPIER
MODEL
CONTENTS
CODE: 00ZARC250/F2E
AR-C150
AR-C250
This document has been published to be used
for after sales service only.
The contents are subject to change without notice.
Advertisement
Table of Contents

Related Manuals for Sharp AR-C150


Summary of Contents for Sharp AR-C150
- Page 1 [14] OTHERS ......... 14-1 This Service Manual describes only the different points from the AR-C150. For servicing of the AR-C250, therefore, use this Service Manual together with that of the AR-C150.
- Page 2 Cautions on laser +10 nm Caution Wave length 785 nm -15 nm This product contains a low power laser device. To ensure North America: (4.374 µs ±4.4 ns)/7 mm continued safety do not remove any cover or attempt to Pulse times Europe: (5.732 µs ±5.7 ns)/7 mm gain access to the inside of the product.
- Page 3 ADJ M8 Photoconductor phase adjustment ..7-9 [List (Adjustment/setup values, Necessary exclusive tool)] . 14-8 ∗ The sections marked with “ Complete ” describe all the contents of the AR-C150/C250. The other sections describe only the different points from the AR-C150.
- Page 4 PCU MAIN PWB The PCU MAIN PWB, formerly divided into two, is integrated into one. (Compatible with that for the AR-C150) PCU SUB PWB Change in the communication driver (Compatible with that for the AR-C100/C150) Copy lamp...
- Page 5 [1] CONFIGURATION 1. Main unit and option lineup (1) Main unit lineup AR-C150/C250 (2) Option lineup AR-LC2/Large capacity tray (excluding Japan) AR-RF1/Reversing automatic document feeder AR-DU2/Duplex module Fiery/Printer controller (AR-PE1) AR-CS2/500 sheet paper drawer AR-SS2/20 bin staple sorter (AR-PX1) Printer engine I/F kit...
- Page 6 Supplied from the copier body. Department supervision card reader (Japan only) AR-EC1 AR-C150/C250 Supplied from the copier body. Japan only Fiery Printer controller/Printer engine I/F kit AR-PE1/AR-PX1 AR-C150/C250 Supplied from the copier body. (AR-PX1) Original cover AR-VR2 AR-C150/C250 Outside of Japan only...
- Page 7 130 seconds surface) surface) 750 × 695 × 1060mm 725 × 695 × 1060mm AR-C150/C250 30 seconds (29.5 × 27.4 × 41.7) (28.5 × 27.4 × 41.7) b. Jam recovery time (height: floor to OC top (height: floor to OC top...
- Page 8 Note Color Text/Photo Manual AR-C100/C150 Area separation, filter process, mode dither pattern Auto Color blance, density fixed Text mode Manual AR-C150 Auto Color blance, density fixed Printed Photo Manual AR-C150 Filter process, dither pattern mode Photo mode Manual AR-C100/C150 Map mode...
- Page 9 The copy mode (Note *1) is substantially same as the copy mode (Note *2), and they differ in display. Since the descriptions on the copy mode of the AR-C250 is the most accurate, refer to it. Copy mode Image process, NOTE gradation control AR-C250 AR-C150 AR-C100 Color Copy Manual TEXT/PRINTED Area separation, filter...
-
Page 10: B: Color (A3/A3 Wide/11 × 17) Copy (Total)
b. Operation of COPY OF COPY mode (AR-C250) When the COPY OF COPY mode is ON, the pre-scanning is provided. The following table shows the relationship between each original mode and COPY OF COPY mode. Color Copy B/W Copy Copy mode COPY OF COPY COPY OF COPY COPY OF COPY... - Page 11 (B&W) (AR-C250) Multi scan/copy 1 scan/multi-copy 1 scan/multi-copy (color) (AR-C250) Multi scan/copy (color/B&W) (AR-C150) Duplex Multi scan/copy * (AR-C150) Multi scan/copy * (AR-C150) 1 scan/multi-copy Multi scan/copy * — copy 1 scan/multi copy (AR-C250) 1 scan/multi copy (AR-C250) * No multi-copy mode, only single copy a.
- Page 12 Black-and-white copy Color copy A3 wide copy Up to A4/LT B4/RG to A3/WLT Up to A4/LT B4/RG to A3/WLT Single-side copy Duplex copy 1 (AR-C150) 1 (AR-C150) — 999 (AR-C250) 999 (AR-C250) • (6) Copy area Image loss Front Rear...
- Page 13 No. of departments 400 (200 with card type) 3. Engine specifications A. Operation (display/operation) section Display Large mono-color LCD display (AR-C150) Large color LCD display (AR-C250) Operating procedure Touch-panel input B. Paper feeding, paper conveyance, and discharge section (1) Paper feeding performance a.
- Page 14 (2) Original standard position, scanning size, and scanning area Type Halogen lamp a. Original standard position Drive voltage Left-center Power consumption 130W (AR-C150) 170W (AR-C250) b. Scanning size Max. original size AB Series (7) Scanning sensor 11 × 17 Inch Series...
- Page 15 Printed sheets 8K (AR-C150) 4K (AR-C150) Type — (10% density) 8.64K (AR-C250/C150) 4.85K (AR-C250/C150) Capacity 600g 267g each (AR-C150) 300g each (AR-C250/C150) (13) Waste toner collector capacity Life (A4: each 8,640 sheets 4,000 sheets each Capacity — color 10%) (AR-C250/C150)
- Page 16 Upper heat roller pre-heat to B/W (HL1) Sleep Upper heat roller mode Lower heat roller (4) Heat roller J. Memory Type Silicone rubber roller 40φ (AR-C150) Type Capacity Memory contents Location 50φ (AR-C250) DRAM 128MB (AR-C150) Image data ICU MAIN...
- Page 17 — 5. Ambient conditions –10˚C 50˚C Temperature A. Space required Consumable items (unopened) Humidity (1) Area required AR-C150/C250 AR-C100 1412 × 695mm 1220 × 695mm Main unit 40˚C, 90% (55.6" × 27.4") (With AR-SS2) 1504 × 695mm With full options —...
- Page 18 D. Ambient conditions for transporting Main unit Humidity 30˚C, 90% 45˚C, 60% 20˚C 45˚C Temperature Consumable items Humidity 40˚C, 90% –5˚C 40˚C Temperature E. Standard temperature and humidity Temperature 20 to 25°C 65 ± 5% Humidity 2 – 12...
- Page 19 [3] CONSUMABLE PARTS 1. Consumable parts list AR-C150 Supply List (U.S.A./CANADA) DIMENSIONS LIFE (W × D × H): mm NAME CONTENT(S) Model INCOMPATIBILITY REMARK Note 1) /WHIGHT: kg × 10 4K Note 1) 329 × 590 × 218/5.62 (AR-C15NT6) × 10 = 1 Color Toner (cyan) "Toner Cartridge (cyan) (267g),...
- Page 20 × 3 DV seal kit DV seal unit (assemble) AR-C15DS 3,000 × 3 Staple cartridge Staple cartridge AR-SC1 For AR-FN4 AR-C150 Supply List (Europe/Australia/New Zealand) DIMENSIONS LIFE (W × D × H): mm NAME CONTENT(S) Model INCOMPATIBILITY REMARK Note 1) /WHIGHT: kg ×...
- Page 21 AR-C150/250 Supply List (Europe/Australia/New Zealand) NAME CONTENT (S) LIFE MODEL INCOMPATIBILITY REMARK × 10 4.85K × 10 Note 1) (AR-C25T6) × 10 = 1 Color Toner (cyan) Toner Cartridge (cyan) (300g), AR-C25LT6 Instruction Sheet AR-C25LT6 × 10 4.85K × 10 Note 1) (AR-C25T7) ×...
- Page 22 AR-C150 Supply List (Asia/Central & South America/Middle East/others) DIMENSIONS LIFE (W × D × H): mm NAME CONTENT(S) Model INCOMPATIBILITY REMARK Note 1) /WHIGHT: kg × 10 4K Note 1) 329 × 590 × 218/5.62 (AR-C15ST6) × 10 = 1 Color Toner (cyan) "Toner Cartridge (cyan) (267g),...
- Page 23 AR-C150/C250 supply system (Middle and South America/Middle East/Asia/others) Name Content Life Model Remark × 4 Developer unit kit Developer unit — AR-DW1 × 1 Waste toner container kit Drum waste toner container (AS) AR-C15HB 5% coverage of each of C/M/Y/K, total 20% coverage ×...
- Page 24 (4) (5) Figure 2. Photoconductor, developer, toner Indicates the production date. A. Serial number identification, effective life Figure Indicates the end digit of the production year. (1) Photoconductor Alphabet Indicates the management code. (A to Z) Effective life: 24 months from the production date (month) (3) Toner (11) (9) (10)
- Page 25 (2) Monochrome print paper (2) Storage environment (sealed) For monochrome print, the following specifications serve as the Max. change: Temperature 15°C/hour, criteria of applicable or not. Relative humidity 15%RH/hour, without dew (Values are under 20 ± 1°C, 65 ± 2%RH) Humidity Item Standard paper...
- Page 27 [6] MACHINE OPERATIONS 1. Operation mode This machine has the following operation modes. Mode Contents Copy Basic operation Used to select paper and set the copy mode mode magnification ratio and copy density, etc. Special function Used to edit images and adjust color. mode Duplex copy Used to make various setups of duplex...
-
Page 28: Dark/Light
AR-C150/C250 Operation Menus Level 1 Level 2 Level 3 Level 4 Level 5 5-way paper feed model (with an option tray installed) Basic menu Paper Tray 1 Tray 2 Tray 3 Tray 4 Japan Manual paper feed Normal paper Thick paper... - Page 29 Level 1 Level 2 Level 3 Level 4 Level 5 Binding margin Binding position (Left) Special functions Binding position (Right) Front/Binding margin UP 1 set 2 copy [ON/OFF] Front/Binding margin DOWN Back/Binding margin UP Back/Binding margin DOWN Centering [ON/OFF] Erase Erase width UP Erase width DOWN Center widht...
- Page 30 Level 1 Level 2 Level 3 Level 4 Level 5 Job program Program 1 Program 2 Program 3 Program 4 Program 5 Program 6 Program 7 Program selection Program 8 Program 1 Program 9 Program 2 Registration/Erase Program 3 Program 4 Program 5 Program 6 Program 7...
- Page 31 (Sleep mode shift timing extending condition) 3. Pre-heat mode and sleep mode When the non-operation of copying and printing continues and the fol- operations lowing case occurs within 10 min of entering the sleep mode, set the sleep mode timer to 10 min again, and extend the shift timing to the A.
- Page 32 b.PCU PWB Operation in the Section Signal name Content pre-heat mode Mode Operates. NOTE Developing PRD_AN? Toner Does not Sleep Does not operate. concentration operate. Preheat Refer to "d. Signals controlled by detection the PCU PWB in the pre-heat Fusing HLPR HL power relay mode".
- Page 33 Copy/Print Normal mode control temperature (HL1) Upper heat roller mode Normal mode control temperature (HL2) Lower heat roller Thick paper mode control temperature Upper heat roller AR-C150 (HL1) only Thick paper mode control temperature Lower heat roller AR-C150 (HL2) only...
- Page 34 4. Consumable parts life and machine operation The relationship between the consumable parts life and the machine operation is as shown in the table below. Consumable parts Condition Operation Message Toner Low toner About 30-sheet copy (print) allowed Copy allowed/ Supply toner Y,M,C Low toner About 30-sheet copy (print) allowed...
- Page 36 SET M4 Fusing capability setting with heavy paper 26-55 adjustment) (SIM 46-21) (ADJ M17/ADJ 3) on the original table. (in color copy) (AR-C150) The color patch image (adjustment pattern) printed by SIM 64-2 SET M5 Selection (setup) of the gamma 26-55 may be used.
- Page 37 SET M4 Auto color balance adjustment target Fusing capability setting with heavy selection paper (in color copy) (AR-C150) There are following two kinds of targets, and one of them can be A. Outline selected.) This setting is used to give priority to fusing capability over picture (Selection procedure of the service or the factory target) quality in the color copy mode with heavy paper.
- Page 38 44-31 (New) ADJ M9A Image registration adjustment (Auto adjustment) Main scanning direction copy magnification ratio adjustment 50-22 (AR-C250) (New version of AR-C150) (Scanner (Writing) unit) Main scanning direction image registration adjustment (Scanner (Writing) unit) Sub scanning direction color image resist adjustment (Scanner...
- Page 39 3) Hold the string and put the needle horizontally and move it toward ADJ M1 DV doctor gap adjustment the MG roller. (Do not use a clip which is too big to have a correct This adjustment must be performed in the following cases: position.) •...
- Page 40 ADJ M3 Toner concentration control reference level setting This adjustment must be performed in the following case: • When the developer is replaced. 1) With the front cabinet open, enter the SIM 25-2 mode. Normal mode adjustment spec Color Check pin AR-C100/C150 AR-C250 –525 ±...
- Page 41 ADJ M5 Paper skew adjustment This adjustment must be performed in the following cases: • When the resist roller section is disassembled. 1) Enter the SIM 64-1 mode. Select the black print mode. 2) Set the items as shown below: A: 5 B: 255 C: 1...
- Page 42 1) Before entering the SIM 44-13 mode, open the right cover of the machine to open the motor drive power line. 2) After completion of the adjustment, remove the adjustment sheet from the transfer belt. ADJ 2 Image density sensor sensing position adjustment This adjustment must be performed in the following cases: •...
- Page 43 3) Check the distortion of the printed image. 5) Enter the SIM 61-4 mode. If the right-angle level of the traverse print line is 0.5mm or less for the longitudinal print line of paper, there is no need to adjust. 0.5mm or less 6) Select 11 ×...
- Page 44 Compare the positions (front-rear) of the same color Compare the positions (front-rear) of the same color print patterns. Procedures 1) – 4) : Adjustment procedures of the black LSU Procedures 5) – 7) : Adjustment procedures of the color LSU 7 –...
- Page 45 2) Enter "2" in the setup item A (PRINT MODE) with the 10-key, then ADJ M8 Photoconductor phase adjustment press the [OK] key. (Default setting is 3.) This adjustment is available in two procedures, old and new. Both are 3) Select the paper feed cassette with A3 (11" × 17") paper in the basically the same.
- Page 46 Deflection pattern of Magenta 7 – 11...
- Page 47 ADJ M9A Image resist adjustment (Auto adjustment) (AR-C250) (New version of AR-C150) The following items are automatically adjusted. • ADJ M9/ADJ1 main scanning direction copy magnification ratio ad- 2) Enter "2" in the setup item A (PRINT MODE) with the 10-key, and justment (Scanner (writing) unit) (Black) press the [OK] key.
- Page 48 2) Press the [EXECUTE] key. A4R or 8 1/2 × 11R paper is automatically selected and a check pattern is printed. [Main/sub scanning resist automatic adjustment check pattern] A4R or 8 1/2 x 11R check pattern 2 check pattern 1 check pattern 2 check pattern 1...
- Page 49 3) Check the following items with the check pattern. ADJ M9 Main scanning direction copy ∗ Check that the section of the greatest density of C and M in magnification ratio adjustment MSR check pattern, MSF check pattern 1, and SS check pat- (Manual adjustment) (Scanner tern is in the range of ±...
- Page 50 [How to read the pattern] When deflection is made to the positive (+) side in the rough adjust- ment, increase the value on the positive (+) side. When the deflection is made to the negative (–) side in the rough ad- justment, increase the value on the negative (–) side.
- Page 51 If the rough adjustment pattern or the fine adjustment pattern is not in 1) Enter the SIM 50-21 mode. the above range, perform the following procedures. 2) Select the paper feed cassette of A4 (8 1/2" × 11") paper in the 5) Calculate the shift from the adjustment reference position for each setup item E (PAPER SEL).
- Page 52 ∗ ∗ ∗ ∗ A: Rough adjustment pattern ∗ B: Fine adjustment pattern ∗ C: Adjustment range 7 – 17...
- Page 53 [Sub scan registration adjustment pattern] (Example) Set the simulation set values as shown below. A: 100 A: 73 (=100 –27) → B: 112 B: 129 (=112 + 17) Set value C: 95 C: 110 (=95+15) 7 – 18...
- Page 54 [How to read the pattern] When deflection is made to the positive (+) side in the rough adjust- ment, increase the value on the positive (+) side. When the deflection is made to the negative (–) side in the rough ad- justment, increase the value on the negative (–) side.
- Page 55 7) With the scanner unit B in contact with two stoppers on the front ADJ M11 Image distortion adjustment and the rear frame side simultaneously, slide the scanner unit A This adjustment must be performed in the following cases: until it comes to the right end of the frame, and fix it to the drive •...
- Page 56 5) With the scanner unit drive shaft kept stationary, turn the scanner ADJ 2 Image sub scanning direction distortion unit drive pulley manually to change the parallelism of scanner adjustment units A and B. (Change the relative positions of the scanner unit 1) Make a test chart on A3 (11 ×...
- Page 57 5) Change the height balance of the front frame side scanner rail. (Example) Fit 10mm of the scale with 10mm of the copied scale and Perform procedures 2) – 5) until there is no difference between compare them. the left distortion and the right distortion. Main scanning direction copy magnification ration 100 –...
- Page 58 11) Insert the slide pin as shown below, and make positioning in the sub scanning direction. (Initial positioning is completed.) (Example 1) Copy A shorter than the original Scale (Original) 12) Make a copy in the initial position and check the copy magnification ratio again.
- Page 59 Half tone A – B = 4.0mm A–B =±2.0mm (400%) Half tone 6) Change the adjustment value. 5) Change the adjustment value. (Enter the adjustment value and press the [OK] key.) (Enter the adjustment value and press the OK key.) When the adjustment value is increased, the image is shifted When the adjustment value is increased, the image is shifted backward.
- Page 60 13) If the lead edge void area is not within the specified range, change the DEN-A value. 14) If the lead edge void area is not within the specified range, change the IMAGE LOSS value. 15) If the rear edge void area is not within the specified range, change the DEN-B value.
- Page 61 ADJ M17 Image quality adjustment Copy color balance density check (Check in the Text/Photo mode. ) (AR-C150) START (Check in the Text/Printed photo mode. ) (AR-C250) (Test chart UKOG-0162FCZZ/UKOG-0283FCZZ is used.) Is the Perform ADJ1 CCD gamma adjustment. copy color balance/...
- Page 62 Copy color balance and density check ADJ 1 CCD gamma adjustment (CCD calibration) (Normal document mode) Check the color balance and the density by making copies of Sharp gray chart and the serviceman chart. (AR-C100/C150/C250) This adjustment must be performed in the following cases: a.
- Page 63 This adjustment is required in the following cases: 6) Cancel the simulation mode. • When the CCD unit is replaced. NOTE: The SIT chart (UKOG-0280FCZZ) is affected by lights (espe- cially ultra-violet rays) and temperature and humidity. Store it • When U2 trouble occurs.
- Page 64 14) Perform half tone image correction. (Forcible execution) (SIM 44-26) 15) Use the test chart UKOG-0283FCZZ and check the copy color balance and the density in Text/Photo mode (AR-C150) Text/Printed photo mode (AR-C250). (Refer to the section of the copy color balance and the density.) Repeat procedures 13) –...
- Page 65 10) Use the test chart UKOG-0283FCZZ and check the copy color • When the scanner (reading) section is cleaned. balance and the density in the Text/Photo mode (AR-C150) • When a U2 trouble occurs. Text/Printed photo mode (AR-C250). (Refer to the section of the •...
-
Page 66: Model
Low density level copy mode of all copy modes Main Main Main Color Text Photo mode Manual AR-C100/C150 Auto Text mode Manual AR-C150 Auto Printed Photo mode Manual AR-C150 Photo mode Manual AR-C100/C150 Map mode Manual AR-C150 21/20 Monochrome Text Photo mode... - Page 67 (AR-C250) b. Adjustment procedure 1) Enter the SIM 46-25 mode. 2) Select the copy mode to be adjusted with the scroll key. 2) Select the color to be adjusted with the scroll key. 3) Enter the adjustment value with the 10-key, and press the [OK] key.
- Page 68 If there is any abnormality, the first display is shown again. ∗ When touching the crosses, never use a needle or a pin with a sharp point. 7 – 33...
-
Page 69: Ar- Ar- Ar- C100 C150 C250
Model Japan Except Japan AR-C100 5.5 – 6.0 mm 5.5 – 6.0 mm It is fixed at the center normally. AR-C150 5.5 – 6.0 mm 5.5 – 6.0 mm ADJ M22 Fusing pressure adjustment (Except AR-C250 6.0 – 7.0 mm 6.5 –... - Page 70 (AR-C250) 4) Press [EXECUTE] on the LCD of the operation panel to highlight If normal, the highlight is shifted from [MAX POSITION] to [MIN POSITION]. 5) Narrow the manual paper feed tray guide fully. 6) Press [EXECUTE] on the LCD of the operation panel to highlight Check that [COMPLETE] is highlighted.
- Page 72 [8] SIMULATION (Diagnostics, setting, adjustment value input, data display) 1. Outline and purpose There are the following simulation functions to check the machine operations, troubleshoot, find causes, make various settings, improves adjustment work speeds and serviceability. 1) Various adjustments 2) Specification and function setting 3) Trouble cancel 4) Operation check 5) Counters check, setting, clear...
- Page 73 START (Normal mode) Press the Program (P) key. Press the interrupt key. Press the clear key. Press the interrupt key. Standby for entry of Press the interrupt key. SIM code. Enter the main code of SIM with the 10-key. The main code of SIM is displayed.
- Page 74 Used to check the operations of the sensors Operation test/check Paper transport Operation and detectors in the large capacity tray and the related circuit. (AR-C150/C250) Used to check the operations of the loads in Operation test/check Paper transport Operation the large capacity tray and the control circuit.
- Page 75 (Display/Print) code.) Used to check the number of uses of the Operation data Counter staple, and the RADF. (AR-C150/C250) output/Check (Display/Print) Used to check the number of uses (print Operation data Paper transport Counter quantity) of each paper feed section.
- Page 76 Used to clear the self print and the list print Data clear Printer Counter Printer counter. "(After completion of maintenance, this counter is cleared. (AR-C150/C250) Used to check the operation of the main Operation test/check Image process Developer/ Operation drive (excluding the scanner section) and the...
- Page 77 Operation feed tray paper size detector and the related circuit. (The operation of the manual feed tray paper size detector can be monitored with the LCD display.) (AR-C150/C250) Used to adjust the manual feed tray paper Adjustment Paper transport Operation width detector detection level.
- Page 78 Code Function (Purpose) Purpose Section Item Main Used to set the fusing temperature in each Setting Fixing (Fusing) Operation operation mode. Used to adjust the fusing oil supply amount. Adjustment Fixing (Fusing) Operation (Adjustment of oil motor ON time and oil motor ON interval) Used to set enable/disable of correction Setting...
- Page 79 Picture quality Density mode in the low density area in the color copy mode. The copy densities all colors in the low density area are changed. (AR-C150/C250) Used to adjust the copy density in the low Adjustment Picture quality Density density area in the monochrome copy mode.
- Page 80 Picture quality Color balance balance (gamma) adjustment. (Auto adjustment) (AR-C100) Used to the half tone high density correction Setting Image process Operation operation. (AR-C150/C250) (Photoconductor/ Developing/Transfer/ Cleaning) Used to adjust the print (printer engine) color Adjustment Picture quality Color balance balance (gamma).
- Page 81 ADF/RADF. (AR-C150/C250) Used to adjust the optical sensor sensitivity Adjustment ADF/RADF/UDH/SPF Operation in ADF/RADF. (AR-C150/C250) Used to check the operation (read/write) of Operation test/check Operation the ICU main PWB (image DRAM). Used to check the operation of the scanner...
- Page 82 Function Used to check the operations of the RADF unit and the (Purpose) control circuit. (The document feed operation is Purpose Operation test/check repeatedly performed.) (AR-C150/C250) Function Used to check the operations of the scanner unit and Section ADF/RADF/UDH/SPF (Purpose) its control circuit.
- Page 83 Document exist Function Used to check the operations of the loads in the DSL3 Tray length sensor Normal display: Document empty (Purpose) sorter/finisher and the related circuits. (AR-C150/C250) (only for 13") Highlighted: Document exist Document width Normal display: Document empty Section...
- Page 84 (AR-SS2) Purpose Operation test/check Function Used to check the operations of the loads in the large (Purpose) capacity tray and the control circuit. (AR-C150/C250) Section Paper transport Item Operation Operation/ 1. The names of the loads which can be checked are Procedure displayed.
- Page 85 5 - 1 Purpose Operation test/check Function Used to check the operations of the operation panel (Purpose) display lamps and LCD and the control circuit. Section Operation (Display/Operation key) Item Operation 5 - 3 Operation/ The LCD shows the following message. Procedure (The contrast changes in the sequence of Current level →...
- Page 86 6 - 2 Purpose Operation test/check 6 - 1 Function Used to check the operation of each fan motor and its (Purpose) control circuit. Purpose Operation test/check Section Others Function Used to check the operations of the loads (clutches and (Purpose) solenoids) in the paper transport system and the control Item...
- Page 87 7 - 6 Purpose Setting/Operation test/check 8 - 1 Function Used to set the intermittent aging cycle. (Purpose) Purpose Adjustment/Operation test/check Item Operation Function Used to check and adjust the operation of each print (Purpose) mode developing bias voltage and the control circuit. Operation/ 1.
- Page 88 3. Enter the adjustment value with the 10-key pad. (Purpose) solenoids) in the duplex section and the control circuit. 4. Press the [OK] key. (AR-C150/C250) (Note) Never press the [EXECUTE] key. Section Duplex If the [EXECUTE] key should be pressed with the transfer...
- Page 89 Purpose Operation test/check Function Used to check the operation of the duplex unit align- 14 - 0 (Purpose) ment plate and the control circuit. (AR-C150/C250) Purpose Clear/Cancel (Trouble etc.) Section Duplex Function Used to cancel self diag troubles H3, H4, and H5.
- Page 90 Clear/Cancel (Trouble etc.) Function Used to cancel self diag trouble U6 (Large capacity Function Used to cancel self diag troubles PF (copy inhibition (Purpose) tray). (AR-C150/C250) (Purpose) command from the host computer). Section Paper transport Section Communication unit (TEL/LIU/MODEM etc.)
- Page 91 DF JAM Jam counter (DF) Item Counter TROUBLE Trouble counter Operation/ Procedure Display Content AR-C150/ COPY (COL) Copy counter (Color) C250 COPY (B/W) Copy counter (B/W) OTHERS (COL) Self print counter (Color) OTHERS (B/W) Self print counter (B/W) PRINTER (COL)
- Page 92 ROM trouble (PCU MAIN PWB) PPD1_SAD Remaining jam (ADU re-feed paper) AR-C100, Charger trouble (Black) PPD1_PRE Jam (The image ready signal is not AR-C150, Charger trouble (Cyan) supplied from ICU.) AR-C250 Charger trouble (Magenta) PPD1_PRI Jam (The print request command is not Charger trouble (Yellow) supplied from ICU.)
- Page 93 Main Main Model Content Model Content code code code code AR-C150, Sorter push bar motor trouble (Sorter AR-C100, Thermistor open/Fusing unit not installed AR-C250 detection) AR-C150, (HL4) AR-C250 The thermistor is open. (The input Sorter staple unit oscillation motor trouble voltage of 4.6V or more is detected.) The...
- Page 94 Operation data output/Check (Display/Print) with a new version if necessary. Function Used to check the number of uses of the staple, and (Purpose) the RADF. (AR-C150/C250) Item Counter Operation/ This data is used to check the use frequency of each Procedure section.
- Page 95 (history) of misfeed at each position. (If the misfeed TRAY4 Tray 4 counter count is considerably great, it may be judged as neces- LCC counter saary to repair.)(AR-C150/C250) Section ADF/RADF/UDH/SPF NFT (TTL) Manual feed counter (Total of normal paper, heavy paper, and OHP)
- Page 96 24 - 2 Purpose Data clear Function Used to clear the data of the number of uses (print (Purpose) quantity) of each paper feed section. Section Paper transport Item Counter Paper feed Operation/ 1. Select the counter to be cleared. Procedure (The selected key highlighted.) 2.
- Page 97 Used to clear the self print and the list print counter. Function Used to clear the OPC drum (membrane decrease) cor- (Purpose) (After completion of maintenance, this counter is (Purpose) rection counter. (Performed when the OPC drum is cleared.) (AR-C150/C250) replaced.) Section Printer Section Image process Photo conductor...
- Page 98 (Default value: 0)(AR-C150) After stirring for 3 minutes, the toner concentration detection level average value is set (stored) as the reference toner concentration control value.
-
Page 99: Ar-Ec1
*3: An original of A4R size is detected as 8.5" × 13". *4: An original of 8.5" × 14" is detected as 8.5" × 13". *5: Applicable by replacing the AR-AF1/RF1 original tray. [AR-C150] (Old) *6: Can be set with the key operator program. Set value... -
Page 100: Ar-C150
Content Developer counter (Color) A3 up quantity 1 limit limit value Developer counter (Color) A3 up quantity 2 Total counter (B/W) 1 (AR-C100) 2 (AR-C150/ C250) Total counter (Color) 1 (AR-C100) 2 (AR-C150/ C250)) Maintenance counter (B/W) Maintenance counter (Color) -
Page 101: Ar-C250
26 - 22 3 – 10 Without logo Purpose Setting Function Used to set the specification (language) for the destina- (Purpose) tion. (AR-C150/C250) Item Specifications Language Operation/ The language stored in the flash ROM (OPW PWB) is Procedure displayed. Display Language ENG.(US) - Page 102 26 - 32 Purpose Setting Function Used to set the fan rotating speed (low speed). (Purpose) Item Operation Operation/ 1. Select the fan motor whose speed is to be adjusted Procedure with [↑] and [↓] keys and press the [OK] key. 2.
- Page 103 Disables auto color calibration (auto Color copy charge (A3) (¥100/sheet) adjustment of copy color balance and Copy charge is displayed on the money entry density). 0 (AR-C150) menu. 1 (AR-C250) Enables auto color calibration (auto Copy charge is not displayed on the money adjustment of copy color balance and entry menu.
- Page 104 Setting 27 - 1 Function Used to set the fusing capability (image process) in the (Purpose) heavy paper mode. (AR-C150) Purpose Setting Used to select the gamma characteristics in the color Function Used to set the specifications for operations in case of copy mode.
- Page 105 3. When changing the number, enter the new number (max. 24 digits) with the 10-key and the following keys. [P]((program) key [AUDIT CLEAR] ((Dept. count end) key [i]((Information) key The entered number is displayed in the column of NEW. 4. When the [SET] key at the upper right is pressed, the newly set number for the selected PC/MODEM is registered.
- Page 106 RDSWU Upper paper feed section door open detection RDSWD Lower paper feed section door open detection Waste toner full detection DVCHK Developing unit not-installed detection (K) DVCHC Developing unit not-installed detection (C) DVCHM Developing unit not-installed detection (M) DVCHY Developing unit not-installed detection (Y) BELTCH Belt pull out detection HM_RE...
- Page 107 (Purpose) sensors and the related circuits. (The card reader sen- only) detection size sor operation can be monitored with the LCD display.) Manual feed tray (width (AR-C150/C250) only) detection size Section Others EXTRA Manual feed tray (width ...
- Page 108 only) detection size tion of the manual feed tray paper size detector can be One of Manual feed tray (width monitored with the LCD display.) (AR-C150/C250) these is only) detection size displayed. Section Paper transport ...
- Page 109 : OHP sensor adjustment target level OHP_JUDGE : OHP paper judgement reference level Function Used to check the OHP sensor and its control circuit. In the OHP paper judgement, this level (Purpose) (AR-C150/C250) is judged as the threshold value. Section Paper transport Item Operation Operation/...
- Page 110 The operation of this simulation differs depending on the setting of the destination (SIM 26-6). SIM26-6 setting INCH/AB Destination (Country information) series U.S.A. U.S.A. INCH Canada Canada INCH Inch series, other destinations Inch INCH Japan Japan AB series (B5 detection), other 41 - 3 AB_B destinations...
- Page 111 F: HL1 PRE_BK Control temperarture 70 to (HL1) when resetting to AR-C100 (152) B/W from preheat G: HL1 Heavy paper mode control 70 to AR-C150 HEAVYPAPER temperature (HL1) only H: HL2 Heavy paper mode control 70 to AR-C150 HEAVYPAPER temperature (HL2)
- Page 112 43 - 7 Purpose Adjustment Function Used to adjust the fusing oil supply amount. (Adjust- (Purpose) ment of oil motor ON time and oil motor ON interval) Section Fixing (Fusing) Item Operation Operation/ 1. Select the adjustment item with [↑], [↓] keys. Procedure A: ON-TIME Fusing oil pump ON time [ms]...
- Page 113 Lower Upper Default limit limit value BK_PAT_DV Initial developing bias voltage level (Black) C_PAT_DV Initial developing bias voltage level (Cyan) M_PAT_DV Initial developing bias voltage level (Magenta) Y_PAT_DV Initial developing bias voltage level (Yellow) 44 - 4 Purpose Setting Function Used to set the target image (reference) density level in (Purpose) correction (process correction) operations in the image...
- Page 114 [Content] Process control mode output Black GB current value/GB initial value Cyan GB current value/GB initial value Magenta GB current value/GB initial value Yellow GB current value/GB initial value Black DV current value/DV initial value Cyan DV current value/DV initial value [Content] Magenta DV current value/DV initial value...
- Page 115 44 - 12 44 - 14 Purpose Operation data output/Check (Display/Print) Purpose Operation data output/Check (Display/Print) Function Used to check the toner image patch density data in Function Used to monitor the output level of the fusing tempera- (Purpose) the image forming section correction (process correc- (Purpose) ture sensor, the machine temperature sensor, and the tion).
- Page 116 5. Check that output pattern. If the deflections of C, M, and Y are within the specified range (2 lines), terminate the simulation. If not, go to procedure 6. 6. Select "2" in the adjustment item A (PRINT MODE). 7. Press the [EXECUTE] key. Four sheet of drum deflection pattern is printed.
- Page 117 P1 Black PT/Black element Cyan PT Magenta PT Yellow PT P2 Black PT/Black element Cyan PT Magenta PT Yellow PT P3 Black PT/Black element Cyan PT Magenta PT Yellow PT ∗ This simulation is added from the middle of the production, and the photoconductor phase adjustment is shifted to SIM 44-31.
- Page 118 Disp Default DispChara Contents PosNo. Value Value Value 1ST PATCH Half tone process control 1st step No. 1 patch print gradation: Magenta 2ND PATCH Half tone process control 1st step No. 2 patch print gradation: Magenta 3RD PATCH Half tone process 44 - 25 control 1st step No.
- Page 119 If the [EXECUTE] key is pressed while the voltage is supplied, the voltage output is stopped and the [EXECUTE] key returns to the normal display. Since the transfer belt and the photoconductor drum are rotated simultaneously with outputting the transfer voltage in this simulation mode, the above parts will not be damaged.
- Page 120 A: Print mode (Used to check that the set range is 1 – 3 and that The copy densities all colors in the low density area are the default is "3".) changed. (AR-C150/C250) 1: Deflection check pattern for each 45 degrees (8 sheets Item...
- Page 121 (AR-C250) (AR-C150) Disp Default Disp Default DispChara Contents DispChara Contents PosNo. Value Value Value PosNo. Value Value Value TEXT/PRTD.PHOTO Exposure TEXT/PH_AE_SCN Copy density adjustment set adjustment value value (Color) ((B/W) Text/Printed Text/Printed Photo Photo, auto pre-scan mode) TEXT/PHOTO Exposure adjustment set...
- Page 122 46 - 6 Disp Default DispChara Contents PosNo. Value Value Value Purpose Adjustment TEXT/P_AE_SCN Exposure adjustment set Function 1) Used to set CCD black level offset level. value (B/W) (Purpose) 2) Used to set CCD white level gain. Text/Photo, Auto pre-scan Section Optical (Image scanning)
- Page 123 (AR-C250) 2. Select the adjustment point with [↑], [↓] keys. 3. Enter the adjustment value of the selected point with the 10- Disp Default DispChara Contents key. PosNo. Value Value Value 4. Press the [OK] key. OFFSET ODD CCD odd (The entered value is set.) number offset initial value/blue...
- Page 124 ↓ 46 - 11 POINT15 Half tone reference correction table S46 Purpose Adjustment correction quantity: yellow density 14 for Function Used to set the copy color balance (gamma for each text (Purpose) color). (Color/Text mode) (AR-C150/C250) Section 8 – 53...
- Page 125 46 - 12 Purpose Adjustment Function Used to set the copy color balance (gamma for each (Purpose) color). (Color/Printed Photo mode) (AR-C150) Used to adjust the copy color balance (gamma for each color). (Color/Text Printed Photo/Printed Photo mode) (AR-C250) Section (AR-C250)
- Page 126 Disp Disp Default Contents PosNo. Chara Value Value Value POINT1 Half tone reference correction table S46 correction quantity: yellow density 0 for photograph ↓ ↓ ↓ ↓ ↓ ↓ POINT15 Half tone reference correction table S46 correction quantity: 46 - 13 yellow density 14 for photograph Purpose...
- Page 127 14 for 46 - 14 Purpose Adjustment Function Used to set the copy color balance (gamma for each (Purpose) color). (Color/Map mode) (AR-C150/C250) Section Item Picture quality Color balance Operation/ 1. Select the color to be adjusted with the color keys Procedure (K, C, M, Y).
- Page 128 POINT1 Half tone reference Function Used to adjust the copy density (gamma). correction table S46 (Purpose) (Monochrome/Printed Photo mode) (AR-C150) correction quantity: Used to adjust the copy density (gamma). Copy document (Monochrome/Text Printed Photo/Printed Photo mode) mode black B/W (AR-C250)
- Page 129 Function Used to adjust the copy density (gamma). Function Used to adjust the copy density (gamma). (Purpose) (Monochrome/Photo mode) (AR-C100/C150) (Purpose) (Monochrome/Map mode)(AR-C150/C250) Used to adjust the copy density (gamma). Section (Monochrome/Text Photo/Photo mode) (AR-C250) Item Picture quality Density Section Operation/ 1.
- Page 130 5. Press the [EXECUTE] key. Item Picture quality Color balance The color balance adjustment test pattern corresponding to the Operation/ 1. Select the color to be adjusted with the color keys entered adjustment value is printed. Procedure (K, C, M, Y). Disp Disp Default...
- Page 131 Function Used to adjust the print (printer engine) color balance The color balance adjustment test pattern A is printed. (Purpose) (gamma). (Auto adjustment) (For AR-C150/C250) 5. Set the printed adjustment pattern on the original table. Item Picture quality Color balance 6.
- Page 132 Disp Disp Default Contents PosNo. Chara Value Value Value BLUE Set ratio of YELLOW for single color: blue PURPLE Set ratio of YELLOW for single color: purple ORANGE Set ratio of YELLOW for single color: orange BROWN Set ratio of YELLOW 46 - 25 for single color: brown Purpose...
- Page 133 Disp Disp Default Contents PosNo. Chara Value ORANGE Set ratio of CYAN for single color: orange Set ratio of MAGENTA for single color: orange Set ratio of YELLOW for single color: orange BROWN Set ratio of CYAN for single color: brown Set ratio of MAGENTA for single color: brown...
- Page 134 48 - 6 Operation/ 1. When the [EXECUTE] key is pressed, the mode Procedure enters the download mode (writing into the Flash Purpose Adjustment ROM). 2. Start a download program (for writing into the Flash ROM) on Function Used to adjust each motor rotating speed. the PC side, and perform downloading (writing into the Flash (Purpose) ROM).
- Page 135 E. Lead edge image loss --- (IMAGE LOSS) 50 - 10 Used to specify the image loss. (0 – 99: Reference value 40) (Default value: 40) Purpose Adjustment Actual adjustment procedures Function Used to adjust the print image center position. (Ad- 1.
- Page 136 PCU data 50 - 12 Disp Disp Contents Purpose Adjustment PosNo. Chara Value Value COPIES Print quantity Function Used to adjust the print image center position. (Ad- PAPER: MANUAL Print paper tray (Purpose) justed separately for each document mode.) PAPER: CAS1 selection Section PAPER: CAS2...
- Page 137 When ERROR is displayed, the reading operation and the result scanning directions at the same time. (AR-C250) (New of the ajdustment are erroneous. version of AR-C150) Item Picture quality Operation/ 1.
- Page 138 (Photoconductor/ and the desk paper feed. Developing/Transfer/ Resist quantity adjustment in high speed transport in Cleaning) LCC paper feed. (Default: 70) (AR-C150/C250) Item Operation Resist quantity adjustment in ADU paper feed. Operation/ 1. Select the adjustment item with [↑], [↓] keys.
- Page 139 Paper exit/reverse sensor 53 - 1 Purpose Adjustment Function Used to adjust the document stop position in each (Purpose) operation mode of ADF/RADF. (AR-C150/C250) Section ADF/RADF/UDH/SPF 60 - 1 Item Operation Operation/ 1. Select the adjustment mode with [↑], [↓] keys.
- Page 140 Description on display item Display item Content EVEN AVE Shading even number average value/green ODD/EVEN OFFSET CCD odd number offset value/green BLACK OFFSET CCD even number offset value/green ADJUST ODD GAIN CCD odd number gain value/green ADJUST EVEN GAIN CCD even number gain value/green ODD MAX Shading odd number max.
- Page 141 By pressing each color key, the color coefficient data of the color (Purpose) color balance adjustment. is displayed. The standard color balance (gamma) or an optional color balance (gamma) is set as the service target. (AR-C150/C250) Item Picture quality Color balance Operation/ 1. In the copy color balance adjustment (manual...
- Page 142 Operation/ 1. When the [EXECUTE] key is pressed, the [YES] Procedure and [NO] keys become active. 2. When the [YES] key is pressed, the CCD color 64 - 1 balance value is set to the default. 3. Enter the simulation mode of SIM 63-9. Purpose Operation test/check Function...
- Page 143 (AR-C250) Default Item Display item Hight Description value PRINT PATTERN Self print pattern Gradation sub scanning direction (input process) Gradation main scanning direction (input process) Grid (input process) Gradation pattern: 255, 0 – 254, increment of 1 gradation Grid (Half tone) Gradation sub scanning direction (Half tone): 16 steps, 16 intervals, 15 start Gradation main scanning direction (Half tone): 16 steps, 16 intervals, 15 start Equal pitch pattern sub scanning direction 1 by 4...
- Page 144 64 - 2 Purpose Adjustment/setup/operation data output, adjustment (display, print) Function Used to print the color patch image (adjustment pat- (Purpose) tern). The above color patch image (adjustment pattern) is outputted according to the currently adjusted color balance (gamma). Use SIM 63-7 to read the color patch image (adjust- ment pattern), which can be used as the service target of the automatic color balance (gamma) adjustment.
- Page 146 2) Touch KEY OPERATOR PROGRAM on the touch panel. [9] USER PROGRAM 3) The key operator code is requested to be entered. Enter the code. (Default: 00000) A. Outline The user program is divided into the following levels. User setup Contrast adjustment Key operator Total use quantity...
- Page 147 Auto color calibration (Auto color balance Auto color balance (gamma) adjustment by the user (To display the operation menu Inhibit (Gamma) adjustment) of this function, SIM 26-53 must be set to Enable of this function.) (AR-C150) Not inhibit (AR-C250) 9 – 2...
- Page 148 [10] SELF DIAG MESSAGE AND TROUBLESHOOTING 5. List Main Title (Content) Section Operation mode Remedy NOTE code code ROM trouble (PCU MAIN PWB) PCU MAIN PWB When POWER ON Power OFF/ON Main charger trouble (BLACK) Image process Warm-up / Power Initialize Source-ON Main charger trouble (CYAN)
- Page 149 In the case of AR-C100, the error code (BLACK) (OPC drum) source-ON is displayed (print disabled). In the case of AR-C150/C250, the error code is stored in the trouble memory (print enabled). Drum marking detection trouble Image process OPC drum rotation Power...
- Page 150 All modes Power In the case of AR-C100, the error code (Transfer) source-ON is displayed (print disabled). In the case of AR-C150/C250, the error code is stored in the trouble memory (print enabled). Temperature sensor trouble (Image Image process All modes...
- Page 151 Main Title (Content) Section Operation mode Remedy NOTE code code Fusing section (lower) low temperature Fusing All modes SIM 14 trouble (HL2) Paper jam in the fusing/paper exit Fusing Copy / Print SIM 14 sections Fusing oil empty (Oil sensor trouble) Fusing All modes Power...
- Page 152 Main Title (Content) Section Operation mode Remedy NOTE code code RADF resist sensor trouble RADF RADF Power Source-ON RADF expulsion sensor trouble RADF RADF Power Source-ON RADF timing sensor trouble RADF RADF Power Source-ON RADF paper feed motor trouble RADF RADF Power Source-ON...
- Page 153 Main Shading trouble (White correction) Title code code Phenomena Display Lamp E7 11 Message Detail In shading correction, the CCD white reading level is abnormal (with the scanner lamp OFF). Section Scanner (reading) / ICU SCAN PWB Operation mode Warm-up / Initialize Note Case 1 Trouble...
- Page 154 Communication trouble between PCU MAIN PWB - Finisher control PWB Main Title code code (Detected by PCU MAIN PWB) Phenomenon Display Lamp F1 0 Message Detail Communication test error after turning on the power or canceling the simulation Section PCU MAIN PWB/Finisher control PWB Operation mode When power ON/Initializing NOTE...
- Page 155 Main Finisher staple trouble (Finisher side detection) Title code code Phenomenon Display Lamp F1 10 Message Detail The staple home position sensor signal OFF is not recognized within the specified time after output of the staple motor ON signal. / Though the staple home position sensor OFF signal is recognized after output of the staple motor ON signal, but the staple home position sensor ON signal is not recognized within the specified time.
- Page 156 Main Finisher tray lift trouble (Finisher side detection) Title code code Phenomenon Display Lamp F1 15 Message Detail In the tray lift up operation, the tray upper limit sensor ON is recognized. / The specified number or more of the tray lift motor rotation sensor signals are not recognized within the specified time after starting rotation of the tray lift motor.
- Page 157 Main Finisher alignment trouble (Rear side) (Finisher side detection) Title code code Phenomenon Display Lamp F1 20 Message Detail In the initial operation, the alignment plate home position sensor signal OFF is not recognized within the specified time after starting rotation of the alignment motor. / In the initial operation, the alignment plate home position sensor signal ON is not recognized within the specified time after starting rotation of the alignment motor.
- Page 158 Main Drum marking sensor gain adjustment error (BLACK) Title code code Phenomena Display Lamp F2 54 Message Detail In the image density correction, the drum surface area is read by the drum marking sensor and the sensor gain is adjusted so that the output becomes a fixed value. However, the output of the specified range cannot be obtained even though the sensor gain is changed.
- Page 159 Main Drum marking sensor gain adjustment error (CYAN) Title code code Phenomena Display Lamp F2 55 Message Detail In the image density correction, the drum surface area is read by the drum marking sensor and the sensor gain is adjusted so that the output becomes a fixed value. However, the output of the specified range cannot be obtained even though the sensor gain is changed.
- Page 160 Main Drum marking sensor gain adjustment error (MAGENTA) Title code code Phenomena Display Lamp F2 56 Message Detail In the image density correction, the drum surface area is read by the drum marking sensor and the sensor gain is adjusted so that the output becomes a fixed value. However, the output of the specified range cannot be obtained even though the sensor gain is changed.
- Page 161 Image process (Transfer) Operation mode All modes Note In the case of AR-C100, the error code is displayed (print disabled). In the case of AR-C150, the error code is stored in the trouble memory (print enabled). Case 1 Trouble Bad connection between the image density sensor and the PCU SUB PWB.
- Page 162 Main Manufacturing No. data (ICU MAIN PWB / PCU MAIN PWB) discrepancy Title code code Phenomena Display Lamp U2 30 Message Detail The serial No. data stored in the ICU MAIN PWB (EEPROM) and that in the PCU MAIN PWB (EEPROM) do not coincide.
- Page 163 [11] MAINTENANCE AND DISASSEMBLY/ASSEMBLY 1. Necessary procedure for maintenance and servicing (1) Items to be performed before maintenance servicing 1 Item Simulation Check the print counter value of each section in each operation mode. Check the number of times of paper jams and troubles. Check the paper jam positions and contents.
- Page 164 2. List • OIL/GRE (Lubricate, grease); CLN (Cleaning); ADJ (Adjustment); REP (Replacement, installation); CP (Change position); CHK (Check); (Clean, replace, lubricate, grease as necessary); ABL (Disassembly, assembly) Fusing/paper exit sections Unit Part Every service 80K 120K 160K 200K 240K 280K 320K Remark CODE U No.
- Page 165 Unit Part Every 120K 160K 200K 240K 280K 320K Remark service U No. Unit name P No. Part name CODE call Ua02 Paper exit unit ∗ ∗ ∗ ∗ P01 Paper exit detector ∗ ∗ ∗ ∗ ∗ ∗ ∗ ∗...
- Page 166 S07/Ua01/P01 Thermistor (upper) S07/Ua01/P02 Duplex paper exit detector 1) Remove the screw, and remove the fusing upper cover. 1) Open the paper exit transport guide. 2) Remove the connector, and remove the duplex paper exit detector (S07/Ua01/P02/CLN). 2) Remove the oil applying unit. ∗...
- Page 167 5) Remove the Thermistor pair (lower) (S07/Ua01/P03/CLN). S07/Ua01/P05 Upper cleaning roller ∗ Clean with alcohol. 1) Open the paper exit/transport mechanism. 2) Remove the screw, and remove the upper cleaning roller unit. S07/Ua01/P03/CLN (Note) Fix the thermistor so that the thermistor harness is way from the drive section (gear).
- Page 168 S07/Ua01/P07 Fusing drive motor S07/Ua01/P11 Oil applying roller 1) Remove the screw and the connector, and remove the fusing 1) Remove the screw, and remove the oil applying unit. drive motor (S07/Ua01/P07). S07/Ua1/P07 2) Remove the oil applying roller. S07/Ua01/P08 Upper heat roller gear R 1) Remove the upper heat roller unit.
- Page 169 Heater lamp control PWB (AC sub PWB) 1) Remove the connector, and remove the heater lamp control PWB (AC sub PWB) (S07/Ua01/P16). S07/Ua01/P15 Duplex gate solenoid (AR-C150/C250) 1) Open the paper exit/transport guide. S07/Ua01/P17 Lower separation pawl 1) Open the upper and the lower fusing units.
- Page 170 Lower heater lamp 1) Remove the lamp holders and the connectors. 2) Pull out the lower heat lamp. 3) Remove the spring, and remove the lower separation pawl (S07/Ua01/P17/CHK/REP). (AR-C150) S07/Ua01/P19 Lower heat roller 1) Remove the heater lamps. S07/Ua01/P14 S07/Ua01/P18 2) Open the upper and the lower fusing units.
- Page 171 4) Remove the parts, and remove the lower heat roller. S07/Ua02/P01 Paper exit detector 1) Remove the paper exit unit. S07/Ua02 2) Remove the connector, and remove the paper exit detector (S07/Ua02/P01/CLN). ∗ Clean it. S07/Ua01/P20 Paper entry detector 1) Remove the connector, and remove the paper entry detector (S07/Ua01/P20).
- Page 172 11 – 10...
- Page 173 [12] BLOCK DIAGRAM 1. Overall block diagram 12 – 1...
- Page 175 [13] ACTUAL WIRING CHART OPTION IF SECTION 13 – 1...
- Page 176 13 – 2...
- Page 177 ICU MAIN PWB Flash ROM capacity of the Flash ROM must be as shown above.) Flash ROM for operation control PWB 16Mbit (AR-C150) b) Only each PWB program is written. 16Mbit × 2 (AR-C250) 2) Two Flash ROM sockets on the ICU MAIN PWB are used to copy B.
- Page 178 "xOpexxx_d. For operation 16Mbit Program for ICU MAIN PWB Flash ROM (Version operation pgm" control PWB (AR-C150)/ operation 5.06 or later)/(PCU MAIN PWB Flash 16Mbit × 2 control PWB Flash ROM control PWB ROM (Version 5.03 or later) are Flash ROM...
- Page 179 (1)-b Method of writing the program data from a PC to the ICU MAIN 2. Precautions PWB Flash ROM. (1) Flash ROM version The program for each PWB is copied to the Flash ROM on the Write side socket. For this procedure, the Flash ROM of the following version must be installed to the machine.
- Page 180 2) Connect the personal computer and the level converter. 4. Flash ROM version up procedure Level converter (Preliminary procedure) 1) Remove the right upper cabinet of the machine. (2 screws) 2) Remove the shield plate and the stopper shaft. (3 screws) 3) Connect the serial I/F connector on the ICU-MAIN PWB with the level converter.
- Page 181 – 3 – Open the "Device manager" tab. – 6 – Open the "Port setup" tab, and enter "115200" in the column of bit/sec. If the above communication speed cannot be set, select and set one of the following speeds. 9600/19200/38600/57600 –...
- Page 182 11) Select the data file which is to be copied (written) to the Flash 14) Remove the Flash ROM (which was upgraded) installed to the ROM installed to the ICU MAIN PWB Write socket in procedure ICU MAIN PWB Write socket in procedure 1). When another Flash ROM is to be upgraded, install it to the ICU –...
- Page 183 Copy (write) LED1 (Read) LED2 (Write) Operating status Content Remedies mode Blink Blink Flash ROM to When turning on the A target Flash ROM is attached to the Write socket Flash ROM power when the power is turned on. No target Flash ROM is attached to the Write socket Insert a target Flash ROM into the when the power is turned on.
- Page 184 [List (Adjustment/setup values, Necessary exclusive tool)] 1. List of adjustment/setup values Simulation Model Data store Code Content/Item Set range Default NOTE location Main Sub. C100 C150 C250 Aging setup A: Aging ON/OFF The setup data are not stored. B: JAM detection ON/OFF setup ON/OFF C: Fusing ON/OFF setup ON/OFF...
-
Page 185: Table Of Contents
EEPROM paper, cover paper) count Others : 1 (PCU PWB) up YES/NO setup ∗ User auto color calibration A: YES/NO 0 – 1 AR-C150: 0 EEPROM (Copy color AR-C250: 1 (PCU PWB) balance/density auto adjustment) YES/NO setup LCD brightness Dark – Light 10 –... - Page 186 Simulation Model Code Data store Content/Item Set range Default NOTE location Main Sub. C100 C150 C250 PC/MODEM A: PC/MODEM communication trouble 0 – 1 EEPROM communication trouble (U7-00) detection YES/NO (PCU PWB) (U7-00) detection YES/NO setup Host computer/Modem Host computer/MODEM number EEPROM number setup (PCU PWB)
- Page 187 0 – 359 E: Paper (Paper tray) 1 – 6 Copy density adjustment A: Text/Photo mode 1 – 99 EEPROM (Color mode) (AR-C150) (ICU PWB) B: Text mode 1 – 99 C: Printed photo mode 1 – 99 D: Photo mode 1 –...
- Page 188 A: Text/Photo, Auto pre-scan mode 1 – 99 EEPROM (Black/white mode) (ICU PWB) B: Text/Photo, Auto mode 1 – 99 (AR-C150) C: Text/Photo,Manual mode 1 – 99 D: Text, Auto pre-scan mode 1 – 99 E: Text, Auto mode 1 – 99 F: Text, Manual mode 1 –...
- Page 189 A – O: Black B/W density 1 – 15 245 – 755 EEPROM (Monochrome, Printed (ICU PWB) Photo mode) (AR-C150) Copy density adjustment A – O: Black B/W density 1 – 15 245 – 755 (Color, Text printed photo, Printed Photo mode)
- Page 190 Print (printer engine) copy The adjustment value EEPROM color balance/density cannot be entered (ICU PWB) (gamma) adjustment (auto directly. adjustment) (AR-C150/C250) Copy color blance C (RED) 0 – 255 EEPROM adjustment (Mono color C (GREEN) 0 – 255 (ICU PWB)
- Page 191 Simulation Model Code Data store Content/Item Set range Default NOTE location Main Sub. C100 C150 C250 Paper image off-center A: Manual paper feed tray 30 – 70 EEPROM adjustment (ICU PWB) B: Paper feed tray 1 20 – 80 C: Paper feed tray 2 20 –...
- Page 192 Simulation Model Code Data store Content/Item Set range Default NOTE location Main Sub. C100 C150 C250 Scanner (CCD) gamma The adjustment value EEPROM adjustment (Correction) cannot be entered (ICU PWB) (Copy document mode) directly Scanner (CCD) gamma The correction data EEPROM default setup (Copy cannot be entered...
- Page 193 PostScript® is a registered trademark of Adobe Systems Incorporated. NetWare is a registered trademark of Novell, Inc. All other trademarks and copyrights are the property of their respective owners. SHARP CORPORATION Digital Document Systems Group Quality & Reliability Control Center...
Need help?
Do you have a question about the AR-C150 and is the answer not in the manual?
Questions and answers