Advertisement
Quick Links
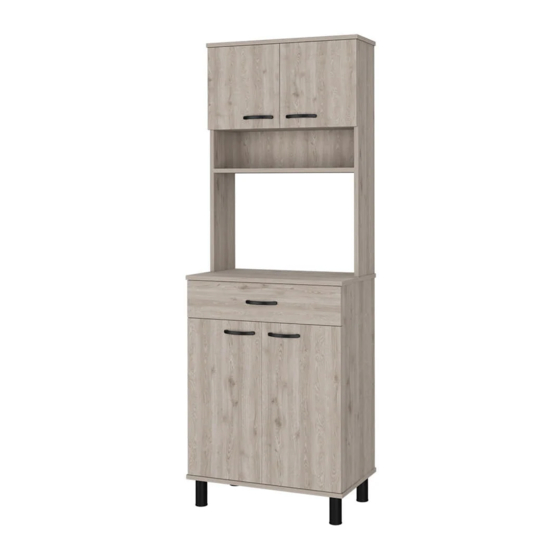
Height: 66,53 in
Alto: 169 cm
Width: 23,62 in
Ancho: 60 cm
Depth: 13,77 in
Fondo: 35 cm
ASSEMBLY INSTRUCTIONS
INSTRUCCIONES DE ENSAMBLE
INSTRUCTIONS D'ASSEMBLAGE
Hauter: 169 cm
Largeur: 60 cm
Profondeur: 35 cm
2 PEOPLE ASSEMBLY RECOMMENDED
SE RECOMIENDA EL ARMADO ENTRE 2 PERSONAS
ASSEMBLAGE DE 2 PERSONNES RECOMMANDÉ
Advertisement

Subscribe to Our Youtube Channel
Related Manuals for rst brands SL-CAB-9


Summary of Contents for rst brands SL-CAB-9
- Page 1 ASSEMBLY INSTRUCTIONS INSTRUCCIONES DE ENSAMBLE INSTRUCTIONS D’ASSEMBLAGE Height: 66,53 in Alto: 169 cm Hauter: 169 cm 2 PEOPLE ASSEMBLY RECOMMENDED Width: 23,62 in Ancho: 60 cm Largeur: 60 cm SE RECOMIENDA EL ARMADO ENTRE 2 PERSONAS ASSEMBLAGE DE 2 PERSONNES RECOMMANDÉ Depth: 13,77 in Fondo: 35 cm Profondeur: 35 cm...
- Page 2 IMPORTANT RECOMMENDATIONS / RECOMENDACIONES IMPORTANTES / RECOMMANDATIONS IMPORTANTES -The cabinet MUST be used exclusively indoors, do not expose to direct sun. / El mueble debe ser usado únicamente en interiores, no exponer al sol directo. / L'armoire DOIT être utilisée exclusivement à l'intérieur, ne pas l'exposer directement au soleil.
- Page 3 INDEX ÍNDICE/ INDICE Assembly Hardware Herrajes para Armado/ Matériel d'assemblage Assembly Parts Piezas de Armado/ Pièces d'assemblage Suggested Loads Cargas Sugeridas/ Charges suggérées Assembly Recommendations Recomendaciones de Ensamble/ Recommandations d'assemblage 7-24 Assembly Steps Pasos de Armado/ Étapes d'assemblage Warranty Garantía/ Garantie REQUIRED TOOLS* SUGGESTED TOOLS*...
- Page 4 ASSEMBLY HARDWARE / HERRAJES PARA ARMADO/ MATÉRIEL D’ASSEMBLAGE Please check that the hardware content is correct. If any item is missing, please call to our customer service line. Compruebe que el contenido de los herrajes sea el correcto. En caso de que falte alguna pieza, por favor llame a nuestra línea de atención al cliente.
- Page 5 ASSEMBLY PARTS / PIEZAS DE ARMADO / PIÈCES DE MONTAGE A - x1 F - x1 K - x1 P - x1 U - x1 B - x1 G - x1 L - x1 Q - x1 V - x2 C - x1 H - x1 M - x1...
- Page 6 MAX SUGGESTED LOADS / CARGAS MÁXIMAS SUGERIDAS / CHARGES MAXIMALES SUGGÉRÉES 17,63lb 17,63lb 17,63lb 15kg 15kg 33,06lb 6 kg 6 kg 13,22lb 10kg 10kg 22,04lb ASSEMBLY RECOMMENDATIONS / RECOMENDACIONES DE ENSAMBLE / RECOMMANDATIONS DE MONTAGE Two people are recommended to assemble the product. Ensamble el mueble entre dos personas.
- Page 7 Repeat this in the following steps. Repita esto en todos los ensambles Répétez ce processus dans les étapes suivantes.
- Page 8 Gently hit to adjust. Golpee suavemente para ajustar Frappez doucement pour ajuster.
- Page 9 Rotate to tighten. Gently hit Gire para apretar. to adjust. Tournez pour serrer. Golpee suavemente para ajustar Frappez doucement pour ajuster.
- Page 10 Turn Over Voltear Faites retourner P 10...
- Page 11 Rotate to tighten. Gire para apretar. Tournez pour serrer. Gently hit to adjust. Golpee suavemente para ajustar Frappez doucement pour ajuster. Slide the back panels inside the cabinet Deslice los fondos dentro del mueble Faites glisser les panneaux arrière à l'intérieur du meuble.
- Page 12 Turn Over Voltear Faites retourner P 12...
- Page 13 Rotate to tighten. Gire para apretar. Tournez pour serrer. Gently hit to adjust. Golpee suavemente para ajustar Frappez doucement pour ajuster. P 13...
- Page 14 P 14...
- Page 15 Rotate to tighten. Gire para apretar. Tournez pour serrer. Gently hit to adjust. Golpee suavemente para ajustar Frappez doucement pour ajuster. Turn Over Voltear Faites retourner P 15...
- Page 16 Gently hit to adjust. Golpee suavemente para ajustar Frappez Rotate to tighten. doucement pour ajuster. Gire para apretar. Tournez pour serrer. Slide the back panels inside the cabinet Deslice los fondos dentro del mueble Faites glisser les panneaux arrière à l'intérieur du meuble.
- Page 17 Turn Over Voltear Faites retourner Rotate to tighten. Gire para apretar. Tournez pour serrer. P 17...
- Page 18 Rotate to tighten. Gire para apretar. Tournez pour serrer. Turn Over Voltear Faites retourner P 18...
- Page 19 Fixing the cabinet to the wall. OPTION 1. Instalación del mueble a la pared. OPCIÓN 1. Fixez le cabinet au mur. OPTION 1 18,8 22,4 18,8 5/16 Drill bit. Broca de 5/16". Foret 5/16. 162,35 63,9 *Floor / Piso / *Centímetros / Inches / Pouces...
- Page 20 Fixing the cabinet to the wall. OPTION 2. Instalación del mueble a la pared. OPCIÓN 2. Fixez le cabinet au mur. OPTION 2 For the user safety, Por la seguridad Pour la sécurité it is recommended del usuario se recomienda de l'utilisateur, to anchor the cabinet anclar el mueble a la pared.
- Page 21 2" P 21...
- Page 22 P 22...
- Page 23 Rotate to tighten. Gire para apretar. Tournez pour serrer. Slide the drawer inside the cabinet Deslice el cajón dentro del mueble Faites glisser les panneaux arrière à l'intérieur du meuble. P 23...
- Page 24 Door installation. Instalación de las puertas. Installation de la porte Hinge adjustment Ajuste de las bisagras Réglage de la charnière Depth adjustment Side adjustment Height adjustment Ajuste de profundidad Ajuste lateral Ajuste de altura Réglage lateral Réglage hauter Réglage de la profondeur After you finish the adjustment After you finish assembling the of the cams, cover them with...
-
Page 25: Warranty Policy
WARRANTY POLICY /PÓLIZA DE GARANTÍA /POLITIQUE DE GARANTIE Welcome / Bienvenido / Bienvenue Here we are committed to your satisfaction by offering you a competitive warranty to ensure all our products are free from defects, in material and workmanship, to the original purchaser for a period of one year from the date of your purchase. Aquí...
Need help?
Do you have a question about the SL-CAB-9 and is the answer not in the manual?
Questions and answers