Table of Contents
Advertisement
Quick Links
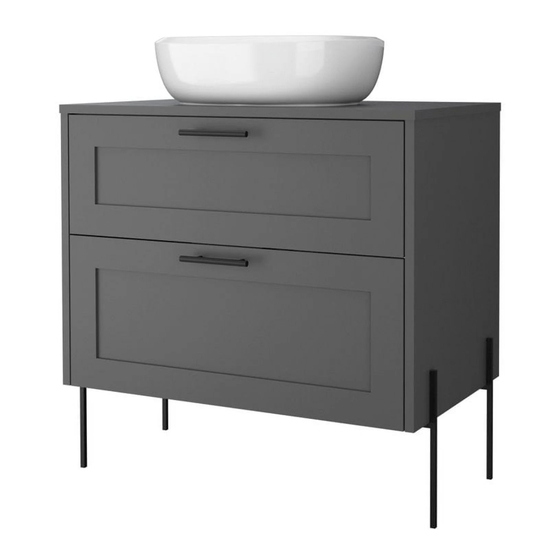
Height: 37,13 in
Width: 32,28 in
Depth: 19,37 in
LOT N°
For assistance with assembly or customer service, call 1-877-924-2090 (English) Monday-Friday, 8 a.m. to 5 p.m. Mountain
Time, North America. Email: customerservice@rstbrands.com or visit our website at www.rstbrands.com /
Pour obtenir de l'aide pour l'assemblage ou le service à la clientèle, composez le 1-877-924-2090 (Anglais) du lundi au vendredi,
de 8 h à 17 h, heure des Rocheuses, Amérique du Nord. Courriel: customerservice@rstbrands.com ou visitez notre site Web à
Hauteur: 94,3 cm
Largeur: 82 cm
Profondeur: 49,2 cm
www.rstbrands.com
ASSEMBLY INSTRUCTIONS
INSTRUCTIONS D'ASSEMBLAGE
2 PEOPLE ASSEMBLY RECOMMENDED
ASSEMBLAGE DE 2 PERSONNES
RECOMMANDÉ
REF./SKU SL-VNTY-3-K - SL-VNTY-3-GRY-K.
Advertisement
Table of Contents

Subscribe to Our Youtube Channel
Related Manuals for rst brands SL-VNTY-3-K


Summary of Contents for rst brands SL-VNTY-3-K
- Page 1 Depth: 19,37 in Profondeur: 49,2 cm LOT N° REF./SKU SL-VNTY-3-K - SL-VNTY-3-GRY-K. For assistance with assembly or customer service, call 1-877-924-2090 (English) Monday-Friday, 8 a.m. to 5 p.m. Mountain Time, North America. Email: customerservice@rstbrands.com or visit our website at www.rstbrands.com / Pour obtenir de l'aide pour l'assemblage ou le service à...
- Page 2 IMPORTANT RECOMMENDATIONS / RECOMMANDATIONS IMPORTANTES -The cabinet MUST be used exclusively indoors, do not expose to direct sun. / L'armoire DOIT être utilisée exclusivement à l'intérieur, ne pas l'exposer directement au soleil.. -Do NOT overload the cabinet (see suggested loads), Do not hit or hammer the cabinet (just when indicated) Ne surchargez PAS l'armoire (voir les charges suggérées), ne frappez pas ou ne martelez pas l'armoire (juste au moment indiqué).
-
Page 3: Required Tools
INDEX ÍNDICE Assembly Hardware Matériel d'assemblage Assembly Parts Pièces d'assemblage Suggested Loads Charges suggérées Assembly Recommendations Recommandations d'assemblage 7-23 Assembly Steps Étapes d'assemblage 7-23 Warranty Garantie REQUIRED TOOLS* SUGGESTED TOOLS* OUTILS NÉCESSAIRES* OUTILS SUGGÉRÉS Drill / electric screwdriver Perceuse / tournevis électrique * Non inclus, et non montré... -
Page 4: Assembly Hardware
ASSEMBLY HARDWARE MATÉRIEL D’ASSEMBLAGE Please check that the hardware content is correct. Veuillez vérifier que le contenu matériel est correct. If any item is missing, please call to our customer Si un article manque, veuillez appeler notre service service line. clientèle. -
Page 5: Assembly Parts
ASSEMBLY PARTS PIÈCES DE MONTAGE F - x1 K - x1 P - x2 A - x1 G - x1 L - x1 FACE A - x1 B - x1 H - x1 M - x1 FACE B - x1 C - x1 I - x1 N - x1... -
Page 6: Assembly Recommendations
MAX SUGGESTED LOADS CHARGES MAXIMALES SUGGÉRÉES ASSEMBLY RECOMMANDATIONS DE RECOMMENDATIONS MONTAGE Two people are recommended to assemble Deux personnes sont recommandées pour the product. assembler le produit. Assemble the cabinet on a flat, smooth Assemblez l'armoire sur une surface plane surface, preferably on a carpeted floor et lisse, de préférence sur une moquette or the carton box of the product. - Page 7 Gently hit to adjust. Repeat this process in the following steps. Frappez doucement pour ajuster. Répétez ce processus dans les étapes suivantes. Rotate Faites retourner Page 7...
- Page 8 Rotate 180° / Gire 180° Gently hit the pieces with a rubber hammer to adjust the joint. Frappez doucement les pièces avec un marteau en caoutchouc Turn minifix cams to pour ajuster le joint. the right to tighten. Tournez les cames minifix vers la droite pour serrer.
- Page 9 Page 9...
- Page 10 Gently hit to adjust. Rotate to tighten. Frappez doucement Tournez pour serrer. pour ajuster. Page 10...
- Page 11 Rotate to tighten. Tournez pour serrer. Apply this step if you dont want a floating layout Faites cette étape si vous voulez une installation fixe Page 11...
- Page 12 Apply this step if you dont want a floating layout Faites cette étape si vous voulez une installation fixe Rotate to tighten. Tournez pour serrer. Page 12...
- Page 13 Option A: Floating Layout Option B: Fixed Layout Option A: Installation mobile Option B: Installation fixe 5/16" DRILL BIT. Foret 5/16. 2 1/2" WALL / WALL / *INCHES / Centimètre *INCHES / Centimètre 5.59 10.07 10.07 5.59 5.59 10.07 10.07 5.59 14.20 25.60...
- Page 14 Rotate Faites retourner Page 14...
- Page 15 Rotate Voltear Rotate to tighten. Tournez pour serrer. Page 15...
- Page 16 Rotate Voltear Rotate Voltear Page 16...
- Page 17 Rotate to tighten. Tournez pour serrer. Gently hit to adjust. Frappez doucement pour ajuster. Page 17...
- Page 18 Rotate to tighten. Tournez pour serrer. Gently hit to adjust. Frappez doucement pour ajuster. Rotate Faites retourner Page 18...
- Page 19 Rotate Voltear Rotate to tighten. Tournez pour serrer. Page 19...
- Page 20 Rotate Faites retourner Rotate Faites retourner Page 20...
- Page 21 Rotate to tighten. Tournez pour serrer. Rotate to tighten. Tournez pour serrer. Page 21...
- Page 22 Make sure each metallic tab of the slides is inserted into the hole in the of the drawers as shown below / Assurez-vous que chaque crochet de métal des glissières soit inséré dans le trou du tiroir tel qu'illustré ci-dessous Make sure to fit the plastic lock with the Drawer Slide in the front of the drawer, as shown below / Assurez-vous de fixer le verrou de plastique avec...
- Page 23 Sink Installation Installation d’évier Keep in mind to apply silicone to install the sink, as is explained below /Gardez à l'esprit d'appliquer du silicone pour installer le lavabo, tel qu'expliqué ci-dessous Nettoyez le dessus et appliquez du silicone Appliquez du silicone sur les extrémités Placez le lavabo sur l'unité...
-
Page 24: Warranty Policy
POLITIQUE DE GARANTIE Bienvenue dans la famille RST Chez RST Brands ™, nous nous engageons à votre satisfaction en vous offrant une garantie compétitive pour nous assurer que tous nos produits sont exempts de défauts, de matériaux et de fabrication, à l'acheteur d'origine pendant une période d'un an à compter de la date de votre achat.
Need help?
Do you have a question about the SL-VNTY-3-K and is the answer not in the manual?
Questions and answers