TP-Link Archer AX10 Manual
Hide thumbs
Also See for Archer AX10:
- Installation manual ,
- User manual (107 pages) ,
- User manual (106 pages)
Advertisement
Advertisement

Subscribe to Our Youtube Channel
Related Manuals for TP-Link Archer AX10


Summary of Contents for TP-Link Archer AX10
-
Page 2: Table Of Contents
Content 1. Product Overview 2. Advanced & Addition Features 3. Package Content 4. Router Physical Setup 5. Quick Setup 6. Wireless Setting 7. Modify HSI Setting/Change Domain Work Order 8. Basic Troubleshooting... -
Page 3: Product Overview
Product Overview... - Page 4 Product Overview AX1500 Next-Gen Wi-Fi 6 Router Faster AX Wi-Fi speeds up to 1.5 Gbps Ultra-Low Latency by AX Tech Connect More Devices with OFDMA Responsive Processing with 1.5 GHz Triple-Core Full Gigabit Ports...
- Page 5 Specification Wireless: • 1201 Mbps (5 GHz, 11ax) + 300 Mbps (2.4 GHz, 11n), compatible with 11a/b/g/n/ac Wi-Fi standards Hardware: • Ethernet Ports: One Gigabit WAN Port, four Gigabit LAN Ports • Hardware: 1.5 GHz Triple-Core CPU • Buttons: WPS/Wi-Fi Button, Power On/Of Button, Reset Button •...
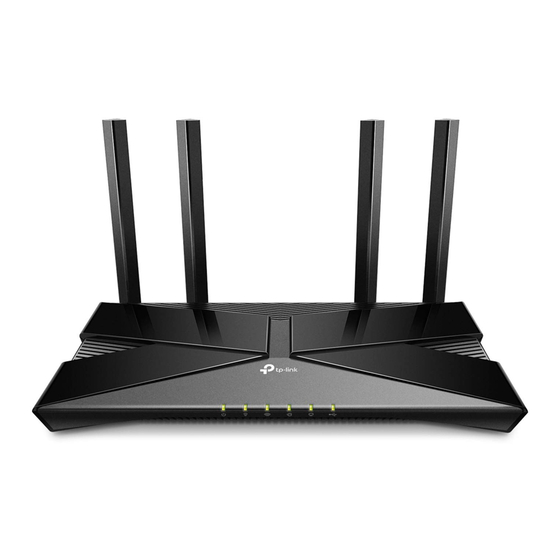
- Page 6 Front View...
- Page 7 LED INDICATORS Power on/off indicator...
- Page 8 Back View...
-
Page 9: Advanced & Addition Features
Advanced & Addition Features... - Page 10 Advanced & Addition Features Reliability • Secure VPN Access –Connects to a private network with a safe and secure Open VPN and PPTP VPN connection. • Airtime Fairness –Balances bandwidth of connected devices to improve overall throughput and efficiency. • Smart Connect –Intelligently switches each device’s connection to the optimum available WiFi band.
- Page 11 Advanced & Addition Features Easy of Use • Intuitive Web UI –Ensures quick and simple Installation without hassle. • Fast Encryption –One-touch WPA wireless security encryption. • Easy ON/OFF –Turn ON or OFF wireless function using the WiFi button. • Power ON/OFF –Conveniently power ON or OFF your router as required.
- Page 12 Advanced & Addition Features Security • Guest Network –Keeps your main network secure by creating a separate network for friends and visitors. • Access Control –Establishes a whitelist or blacklist to allow or restrict certain devices to access the internet. •...
-
Page 13: Package Content
Package Content • Archer AX10 - AX1500 Wireless Dual Band Gigabit Router (RGW). • RJ45 Cat 5e Ethernet Cable. • Power Adapter. • Quick Installation Guide. -
Page 14: Router Physical Setup
Router Physical Setup 1. Connect the modem (BTU/ONT) to the router’s WAN port (Blue Color) with an Ethernet cable. 2. Turn on the modem (BTU/ONT), and then wait about 2 minutes for it to restart. 3. Connect the power adapter to the router and turn on the router. 4. - Page 15 Router Physical Setup - Tips Position of the Router You can access your network from anywhere within the wireless network coverage. However, the wireless signal strength and coverage varies depending on the actual environment where your modem router is in. Many obstacles may limit the range of the wireless signal, for example, concrete structures, thick walls.
-
Page 16: Quick Setup
Quick Setup... - Page 17 Quick Setup 1. Connect your computer to the RGW via one of the following options: Option 1: Wired Turn off the Wi-Fi on your computer and connect the devices as shown below. Option 2: Wireless - Find the SSID (Network Name) and Wireless Password printed on the label at the bottom of the router.
- Page 18 Quick Setup With a web-based utility, it is easy to configure and manage the router. The web-based utility can be used on any Windows, Mac OS or UNIX OS with a Web browser, such as Microsoft Internet Explorer, Mozilla Firefox or Apple Safari. 2.Launch the web browser then key in the URL http://tplinkwifi.net http://192.168.1.1...
- Page 19 Quick Setup Follow the step-by-step instructions to complete Quick Setup configuration: 4. Select your Time Zone, then click‘Next’.
- Page 20 Quick Setup 5. Select the correct Internet Service Mode and Internet Service Type, then click ‘Next’. Internet Service Internet Access Provider VLAN HSI VLAN VoBB Mode Service Type TM (Retail) Celcom 2 Celcom 2 Home CTSB (Retail) Celcom 1 Celcom 1 Home CTSB (Biz) Celcom 1 Celcom 2 Biz...
- Page 21 Quick Setup 6. Key in the Username and Password as per details given in the Work Order, then click ‘Next’.
- Page 22 Quick Setup 7. You can change the default SSID and password as preferred by the customer then click ‘Next’.
- Page 23 Quick Setup 8. Connection Test In Progress. Please wait….
- Page 24 Quick Setup 9. Connection Success! Click‘Next’.
- Page 25 Quick Setup 10. Once completed, the page as below will be displayed. Now you can enjoy the internet service.
-
Page 26: Wireless Setting
Wireless Setting... - Page 27 Wireless Setting (Basic) Wireless Setting In the Wireless Setting, you are able to : 1. Enable Smart Connect Smart Connect allows each of the router's wireless bands to use the same wireless settings. The router can balance network demand and assign devices to the optimum band.
- Page 28 Wireless Setting (Basic) WiFi for Guest You can offer to the customer to create dedicated WiFi network for their guest. 1. Please key in the preferred WiFi SSID and the password for guest as given by the customer. 2. Click ‘Save’.
-
Page 29: Modify Hsi Setting/Change Domain Work Order
Modify HSI Setting / Change Domain Work Order... - Page 30 Modify HSI Setting/Change Domain The change domain work order is to change the current HSI setting in the RGW from private IP to the Public Dynamic IP. For On Site Installation-Change Domain work order, you just need to modify the setting from the existing configuration domain xxxxx@celcomhome to the new domain xxxxx@celcomfirstfibre.com.my.
- Page 31 Change Domain How to verify the account already assigned with Public Dynamic IP? Click Network Map, check the Internet IP Address Value. The IP range for Public IP should start with 183.171.xxx.xxx The IP range for Private IP should start with 172.17..xxx.xxx...
- Page 32 Change Domain IMPORTANT NOTES We do not provide any setting at the customer’s additional equipment (CCTV/Alarm, Smart Home, etc). Please advice customer to contact their equipment vendor/provider for further assistance.
-
Page 33: Basic Troubleshooting
Basic Troubleshooting... - Page 34 Basic Troubleshooting Guidelines...
- Page 35 Basic Troubleshooting Guidelines LED Indicators Explanation • If the Internet LED is OFF, please check the WAN Port and to ensure the cable are properly connected. • If the Internet LED is Orange, please check the Internet configuration. Please ensure the setting parameter (Username &...
- Page 36 Basic Troubleshooting Guidelines What should do if cannot access the internet? • Make sure the Ethernet cables are correctly and securely connected to the modem router. • Try to log in to the web management page of the modem router using the default address at http://192.168.1.1 .
- Page 37 Basic Troubleshooting Guidelines • Please check the internet connection status at the Network Map.
- Page 38 Basic Troubleshooting Guidelines • Please check all the parameter value (VLAN ID, connection type, account Username and the Password) are correct. • To modify the setting, click Internet menu and you can do the changes here. Click ‘Save’ to save the setting.
- Page 39 Basic Troubleshooting Guidelines • If the service is back to normal (connected), you can see the symbol tick at the Internet icon and the IP number at the Internet IP Address.
- Page 40 Basic Troubleshooting Guidelines • Reference for the VLAN ID value: Access Provider VLAN HSI VLAN VoBB TM (Retail) CTSB (Retail) CTSB (Biz) SACOFA (Retail) Forest City (Retail) Forest City (Biz)
- Page 41 Basic Troubleshooting Guidelines What can I do if I cannot find my wireless network or I cannot connect the wireless network? If you failed to find any wireless network, follow the steps below: 1. Make sure the wireless function isenabled if you’re using a laptop/smartphone with built-in wireless adapter.
- Page 42 Basic Troubleshooting Guidelines I can’t get the internet speed as per subscribed? There are many factors that caused you can’t get maximum internet speed like a such as poor WiFi coverage, WiFi deadzones, WiFi interference, device software/hardware issues and many more. To measure the actual internet speed, please disconnect all the devices from the WiFi/LAN network then please perform the speed test by using direct cable to the computer.
- Page 43 Basic Troubleshooting Guidelines If you failed to connect to the Wireless Network, please follow the steps below: 1. Try to reboot all the devices. 2. On device, please try to ‘Forget Network’ or delete the WiFi history or Reset Network Setting then try to pair with the WiFi by key in the correct password.
- Page 44 Auto Reboot To ensure the customer get the best WiFi experience and performance, highly recommended to frequently reboot the RGW. You can assist the customer to configure the router with Auto Reboot feature. To enable this feature, please click Advanced>System>Reboot> Reboot Schedule and choose the suitable setting as per available.
Need help?
Do you have a question about the Archer AX10 and is the answer not in the manual?
Questions and answers