Fluance RT80 User Manual
High fidelity vinyl turntable
Hide thumbs
Also See for RT80:
- User manual ,
- Instructional manual (20 pages) ,
- Stylus replacement/upgrade manual (12 pages)

Related Manuals for Fluance RT80


Summary of Contents for Fluance RT80
- Page 1 RT80/RT81 - High Fidelity Vinyl Turntable User Manual v2.3 Fluance.com Serious Performance ™...
- Page 2 Fluance RT80/RT81 User Manual Introduction Fluance believes everyone should experience audio in its truest form, recreating the performance the way the artist intended. Utilizing only superior components and expert audio engineering, their products are a testament to the performance that can be achieved when a passion for music takes center stage.
-
Page 3: Table Of Contents
What’s Included Table of Contents Components and Connections First Time Setup Step One: Installing the Platter Step Two: Installing the Counterweight Step Three: Installing the Headshell Step Four: Balancing the Tonearm Step Five: Setting the Preamp Switch Step Six: Connecting the Power Step Seven: Connecting the RCA Cable Step Eight: Dust Cover Installation Playing a Record... -
Page 4: What's Included
Fluance RT80/RT81 User Manual What’s Included Dust Cover & Platter with Turntable Mat Headshell with Turntable Rubber Belt Stylus RT80 - Felt RT81 - Rubber Counterweight 45 Adapter Power RCA Audio Adapter Cable with Ground LIFETIME Customer Support Dust Cover... -
Page 5: Components And Connections
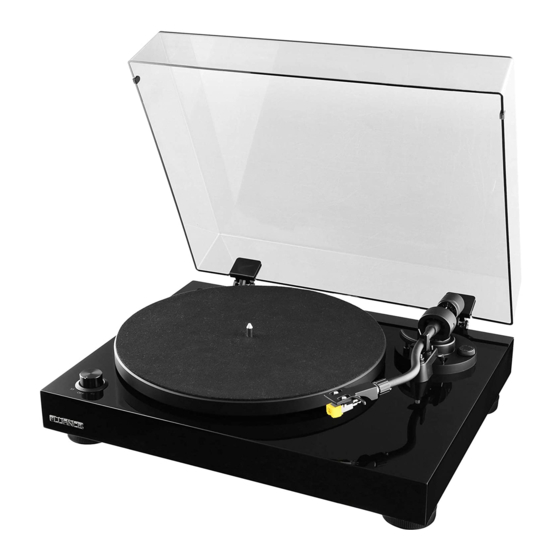
Fluance RT80/RT81 User Manual Components and Connections Platter 11. Tonearm Lock 2. Rubber Belt 12. Tonearm 3. Motor Pulley 13. Headshell & Stylus 4. Spindle 14. RCA Audio Outputs 5. Turntable Mat 15. Ground Terminal 6. Speed Selection 16. Preamp Switch 7. -
Page 6: First Time Setup
Remove the installation Note: When using the Fluance rubber turntable mat ribbon and rotate the platter several ensure the Fluance logo is facing up when placing times to ensure the rubber belt is the mat. secure and not twisted. -
Page 7: Step Two: Installing The Counterweight
Fluance RT80/RT81 User Manual Step Two: Installing the Counterweight Secure the tonearm using the 2. Slide the counterweight onto the end tonearm lock. of the tonearm with numbers facing forward until it clicks on. Counterweight Tonearm Tonearm Lock Step Three: Installing the Headshell Remove the headshell from the 2. -
Page 8: Step Four: Balancing The Tonearm
Step Four: Balancing the Tonearm Important! Complete all steps for balancing the tonearm. Incorrect tonearm balancing can cause damage to the stylus and to your records. For additional assistance go to: www.fluance.com/support to watch a tutorial video for this process Remove the stylus protector. -
Page 9: Step Five: Setting The Preamp Switch
Fluance RT80/RT81 User Manual Step Four (Continued): Balancing the Tonearm 7. Rotate the entire counterweight 8. Set the anti-skating control to “2” to counterclockwise until the indicator match the tracking force. ring is set to “2” on the center line. -
Page 10: Step Six: Connecting The Power
Fluance RT80/RT81 User Manual Step Six: Connecting the Power Ensure the power adapter is securely connected to a power outlet. Insert the power ca- ble into the power input on the back of the turntable. Important: Only use the official power adapter included with your turntable. -
Page 11: Step Eight: Dust Cover Installation
2. Carefully open the hinges on the dust cover and insert into the hinge mounts installed on the back of the turntable. The turntable setup is now complete! Enjoy your Fluance turntable. Should you require any further assistance please contact us at:... -
Page 12: Playing A Record
33 RPM) Fluance recommends burning in your record player for 24 hours. To do this turn off Auto Stop on the back of your record player and then select either the 33 or 45 speed setting. Your platter should begin spinning and start the burn-in process. -
Page 13: Maintenance
ATN95E ATN91 ATN95E Replacing the Cartridge Replacement cartridges and a helpful cartridge installation guide and video are available on www.fluance.com. There is also a Cartridge Alignment Protractor at the end of this manual for convenience. Cartridge Connections Wire Channel White... -
Page 14: Replacing The Rubber Belt
Fluance RT80/RT81 User Manual Replacing the Rubber Belt Remove the defective rubber belt from the motor pulley. 2. Lift and remove the platter from the spindle. Remove and discard the defective rubber belt. 3. Wrap the new rubber belt around the inner ring on the underside of the platter and ensure the rubber belt is not twisted. -
Page 15: Troubleshooting
Fluance RT80/RT81 User Manual Troubleshooting Turntable Not Spinning • The turntable should be connected to a known good power outlet and the power cable should be securely inserted into the unit. • Remove the turntable mat and rotate the platter until the motor pulley is visible. - Page 16 Ensure that the Preamp Switch is set to the LINE position if not using an external preamp. • If low volume persists more information is available at: www.fluance.com/support Audio From Only One Channel • Test the speakers with another device such as a CD Player or Smartphone.
-
Page 17: Specifications
Fluance RT80/RT81 User Manual Specifications Specifications RT80 RT81 Cabinet Specifications Material Finish Painted High Gloss (Black) High Gloss Walnut Dust Cover Yes - Tinted Yes - Tinted Turntable Specifications Drive System Belt Drive Belt Drive Motor DC Motor DC Motor... - Page 18 Fluance RT80/RT81 User Manual Specifications RT80 RT81 Channel Separation 18dB at 1kHz 20dB at 1kHz Channel Balance 2.5dB or less at 1kHz 2.0dB or less at 1kHz Load Impedance/Capacitance 47k Ohms/100pF 47k Ohms/100pF Output Voltage 2.5mV +/–3dB 2.5mV (+/–3dB) Weight 5.0g (+/- 0.5g)
-
Page 19: Warranty
Fluance RT80/RT81 User Manual Warranty Thank you for choosing Fluance! We guarantee your investment in our products is a solid one. High performance components combined with quality craftsmanship allow us to maintain the highest possible production standards. All items are guaranteed against defects in materials and craftsmanship. -
Page 20: Important Safety Instructions
Fluance RT80/RT81 User Manual Important Safety Instructions WA R N I N G WARNING: RISK OF ELECTRIC SHOCK TO REDUCE THE RISK OF FIRE OR ELECTRIC SHOCK, DO NOT EXPOSE THIS DO NOT OPEN APPARATUS TO RAIN OR MOISTURE The lightning flash with arrowhead symbol within an... -
Page 21: Fcc & Ic Information
Fluance RT80/RT81 User Manual FCC & IC Information WARNING: To reduce the risk of fire or electrical shock, do not expose this appliance to rain or moisture. Electrical equipment should NEVER be kept or stored in damp environments. This equipment has been tested and found to comply with the limits for a Class B digital device, pursuant to Part 15 of the FCC Rules. - Page 22 Fluance RT80/RT81 User Manual Cartridge Alignment Protractor Correct cartridge alignment ensures the stylus is positioned properly relative to the grooves on the record. Incorrect alignment can cause distortion and can also cause unwanted wear and tear on your stylus. Follow the instructions below to ensure your cartridge is mounted correctly.
-
Page 23: Cartridge Alignment Protractor Cutout
Fluance RT80/RT81 User Manual Cartridge Alignment Protractor Cutout Note: Only 1 protractor is required for the cartridge alignment process. 3 cutouts have been provided for convenience. - Page 24 Fluance.com...
Need help?
Do you have a question about the RT80 and is the answer not in the manual?
Questions and answers