Advertisement
Quick Links
Advertisement

Related Manuals for Burrow PROSPECT


Summary of Contents for Burrow PROSPECT
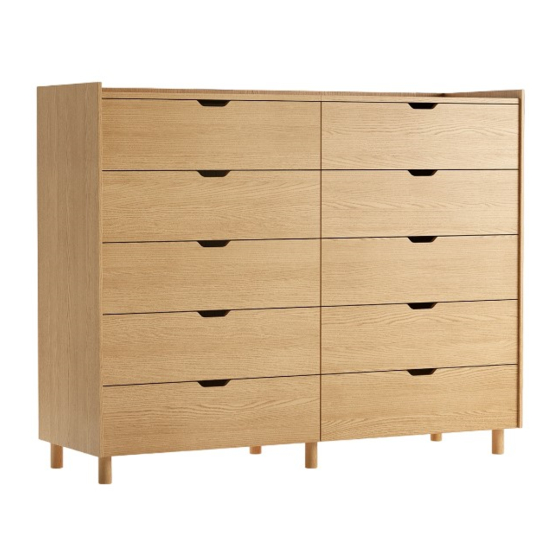
- Page 1 PROSPECT 10-DRAWER & 15-DRAWER TALL DRESSER Assembly Instructions...
- Page 2 Everything you need is Thanks for bringing Burrow into your home. included We’ve worked hard to make your work setting up your new furniture as easy as possible. You’ll need an extra set of hands, so be sure to grab a friend before you get started.
- Page 3 To help you identify different but similar- Feel free to contact support@burrow.com looking pieces, we’ve created a system with any specific questions! of removable label stickers. Pieces with a green “A” sticker are on the right-hand side of the piece, if you’re facing the front of it.
- Page 4 Screw in two of the anti-tip brackets to the underside of each top panel, using the wood screws and the pilot holes as guides. Put the eye at the end of an anti-tip cable Secure the assembly by fitting the straight in between the brackets.
- Page 5 Take a back wall panel, and lean it against make a mark where each screw will go. Then, the wall as close to the final position of your hammer in the wall claw anchors at each of dresser as possible. Flip to the last page of the marks, and use the wall claw screws to this booklet, use the printed ruler to measure attach brackets to the wall.
- Page 6 screw in two leg and plate assemblies Place the base panels upside-down in a across the gap, with the legs in the row on the floor, as shown. Using two innermost position. thumbscrews for leg plate, screw the leg and plate assemblies into the outer corners of the base panels.
- Page 7 Attach the center walls to each other by lining up the screw holes on the left and right sides. The flat faces should be touching, and the drawer tracks should be mirrored. Secure using two thumbscrews, and set aside. Attach the left wall to the left base panel by the edge of the wall.
- Page 8 While someone holds the left wall upright, and six on the edges of the walls. Align these attach an interior wall to the meeting point clips, and press them together until you hear of the base panels by lining up the green a click.
- Page 9 clips, and press them together until you hear Attach the right wall to the right base panel a click. If you have a 9-drawer configuration, by lining up the green (A) stickers, with the you will need to attach the second interior “Top A”...
- Page 10 points. Push or pull the top panel towards the Attach the top panels to the walls by aligning back of the dresser to lock the clips. the yellow (B) and green (A) stickers, and clicking down into place at all connection Thread the anti-tip cables through the holes through the back walls, and then click the in the support panels.
- Page 11 Gently, and with diligent care, place the dresser in its final position, and attach the anti-tip cables to their counterparts on the wall, following the instructions from Step 2. Tip: If your floors are just a hair uneven, you can unscrew each leg a little bit to raise that section of the dresser to compensate.
- Page 12 Attach the left side of the drawer by lining up the yellow (B) stickers, making sure the groove at the bottom creates a continual line between the front and side. Slide the base into the grooves on the sides and front of the drawer, making sure the side with the sticker will be on the bottom of the drawer.
- Page 13 Finally, attach the back of the drawer by lining up the yellow (B) and green (A) stickers with the stickers on the drawer sides, making sure the groove at the bottom creates a continual line between the back and sides. Repeat steps 16 through 19 for all your drawers.
- Page 14 Pull out the bottom-most drawer tracks from be flush with the inside of the track before the dresser as far as they’ll go. Disengage placing the drawer. the orange pin at the front of each track by pulling the trigger inward. The pins should Lay the drawer onto the tracks.
- Page 15 If Kondo your closet and start using your new the drawer isn’t shutting fully, or seems Prospect Dresser. Be sure to tag @burrow on misaligned, make sure all connection pins/ Instagram and use the hashtag #myburrow to inserts between the drawer and the tracks are share your setup with us.
- Page 16 Anti-tip hardware template The holes along the top edge of the back your wall, and using the printed ruler to the wall panel allow the anti-tip hardware to right, mark two spots on your wall for each connect from the inside of the dresser to bracket, as indicated.
-
Page 17: Measurement Tool
You can set the back wall panel aside after that, and return to step 3 to continue assembling your dresser. Measurement tool Mark a spot on the wall here, for the top screw Mark a spot on the wall here, for the bottom screw Align center of hole here... - Page 20 Need a hand? Send an email to support@burrow.com or text us at (224) 628-7769 and our world-class support team will help you sort things out.
Need help?
Do you have a question about the PROSPECT and is the answer not in the manual?
Questions and answers