Advertisement
Assembly
Instructions
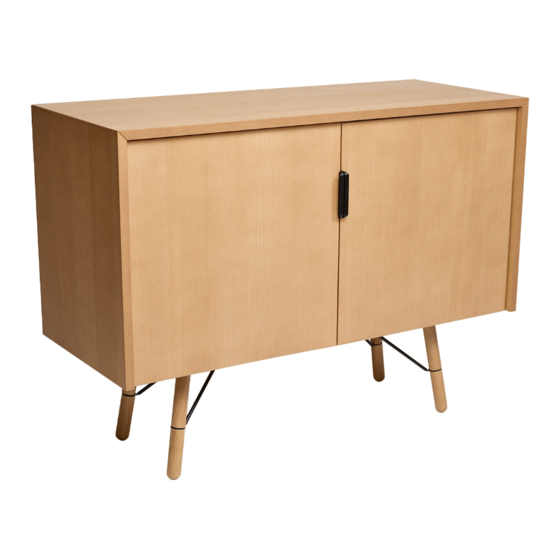
Thanks for bringing Burrow into your home.
Everything we make is incredibly simple to set up,
including your new credenza. The only tool that
you will need is the hex key included in the
package, however an extra set of hands to help
flip will be useful.
Feel free to contact support@burrow.com with
any specific questions!
1
Start with the top panel lying upside down on a soft
surface like a rug or the cardboard box. Attach the
right wall by lowering it onto the alignment pins, and
make sure the groove along the edge of the wall
lines up with the groove on the top panel.
Everything you need
is included:
1 x
Top panel
1 x
Bottom panel
1 x
Back wall
2 x
Shelves
2 x
Doors
2 x
Side walls
1 x
Divider
2
Insert the hex key into each of the 3 holes along
the joint between the two panels and turn 90º
clockwise to engage the locking mechanism. If it
won't turn a full 90º, check that the side wall is
perfectly flush with the top panel.
1 x
Hex Key
4 x
Hinge
2 x
Thumbscrews
4 x
Right pegs
4 x
Left pegs
4 x
Long leg
4 x
Short leg
2 x
Stretchers
3
Attach the left wall by lowering it onto the align-
ment pins, and make sure the groove along the
edge of the wall lines up with the groove on the top
panel.
Advertisement
Table of Contents

Related Manuals for Burrow Serif Credenza


Summary of Contents for Burrow Serif Credenza
- Page 1 Instructions is included: Hex Key Hinge Top panel Thanks for bringing Burrow into your home. Everything we make is incredibly simple to set up, Thumbscrews Bottom panel including your new credenza. The only tool that you will need is the hex key included in the...
- Page 2 Insert the hex key into each of the 3 holes along It’s time to attach the bottom panel. Flip credenza Lower the back wall, with the back groove on the the joint between the two panels and turn 90º over on to its back. Gently flex the side walls out top, into the frame created by the groove along clockwise to engage the locking mechanism.
- Page 3 Complete the leg assembly by screwing the short Slide the divider wall into the center of the Gather all of your pegs and separate them into legs into the inserts on the long legs, through the credenza along the plastic rails. Firmly push until L pegs and R pegs.
- Page 4 Door Options Slow motion hinges Horizontal Alignment Vertical Alignment (moving your doors left and right) (moving your doors up and down) Each of the door hinges has a ‘slow motion’ mode, which adds resistance so that your doors won’t If your doors have a slight overlap (or a gap) If one of your handles is slightly higher than the slam shut.
Need help?
Do you have a question about the Serif Credenza and is the answer not in the manual?
Questions and answers