Table of Contents
Advertisement
Quick Links
Advertisement
Table of Contents

Related Manuals for Russell Hobbs RHPYRO6503B SS


Summary of Contents for Russell Hobbs RHPYRO6503B SS
- Page 1 Pyrolytic Oven Instruction Manual Model number(s): RHPYRO6503B SS For Customer Services & Spare Parts please call 0345 208 8750 Opening times: Monday - Friday 8am – 8pm & Saturday 9am – 1pm or visit us at www.productcare.co.uk IMPORTANT: RETAIN FOR FUTURE REFERENCE...
-
Page 2: Table Of Contents
Contents Safety Instructions ………………………………………. Product Overview ………………………………………. Positioning ………………………………………. Installation ………………………………………. Usage ………………………………………. 10-25 Oven functions ………………………………………. 11-12 Dials & Button functions ………………………………………. Oven cavity & before first use ………………………………………. Setting the clock ………………………………………. Function & temperature setting ………………………………………. Minute minder ………………………………………. -
Page 3: Safety Instructions
Safety Instructions Important note: Please read this booklet before installing and switching on this appliance. The manufacturer assumes no responsibility for incorrect installation and usage as described in this booklet. This appliance can be used by children aged from 8 years and above and persons with reduced physical, sensory or mental capabilities or lack of experience and knowledge if they have been given supervision or instruction concerning use of the appliance in a safe way and understand... - Page 4 Safety Instructions • This appliance can only be installed in a well-ventilated place in accordance with existing regulations and ventilation specifications. • This appliance is intended for domestic use and the household environment only. The appliance is not intended for use outside. •...
- Page 5 Safety Instructions • Alcoholic vapours may catch fire in the hot cooking compartment. Never prepare food containing large quantities of drinks with a high alcohol content. Only use small quantities of drinks with a high alcohol content. Open the appliance door with care. •...
-
Page 6: Product Overview
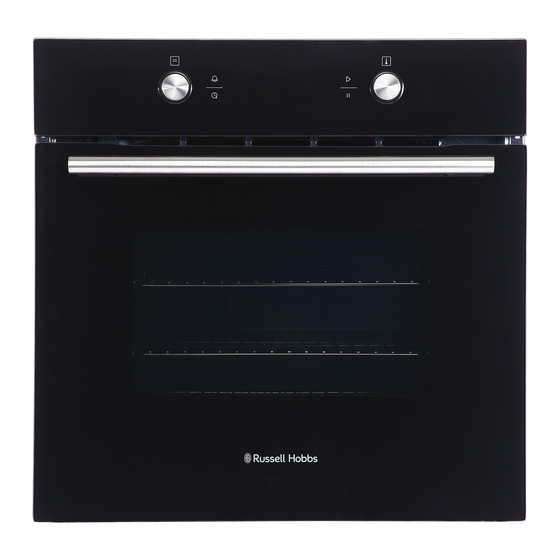
Product overview 1. Oven function dial 6. Temperature/adjustment 2. Function touch buttons dial 3. Handle 7. 2 x Wire shelf 4. Glass window 8. 1 x Universal tray & handle 5. LED Display 9. 1 x Wire rack 10.2 x Distance holding screws Unit &... -
Page 7: Positioning
Positioning • This appliance is to be installed under a counter top or in cabinets. • Avoid damaging the product during installation. • The appliance can only be used safely if it is correctly installed according to the safety instructions. The installer is responsible for ensuring that the appliance works correct when installed. -
Page 8: Installation
Installation Preparation & installation Ensure that there are no electric wires, gas or water pipes in the area where holes are to be made. Components of the appliance may have sharp edges. Wear protective gloves. 1. Ensure that there is an electrical power point within adequate distance of the oven after it has been installed. - Page 9 Installation Electrical connection • WARNING- THIS APPLIANCE MUST BE EARTHED • This appliance is designed to be connected to a 220-240V~50Hz AC electricity supply. • Before proceeding with the electrical connection, verify that the current carrying capacity of the system and the isolator / main switch is adequate for the maximum power rating of the oven.
-
Page 10: Usage
Usage Control panel The appliance has an oven function dial, temperature dial, a display and function buttons, these are explained below: 1. Oven function dial 5. Start cooking touch button 2. Minute minder touch button 6. Pause/stop cooking touch button 3. - Page 11 Usage Note: Always pre-heat the oven to the required temperature before cooking. Oven function dial The oven function dial allows you to set the oven function mode for the oven. The dial has to be pressed in for it to pop out, before it can then be rotated clockwise or anti-clockwise to set the required oven function.
- Page 12 Usage Symbol Function Convection heating with fan: The fan distributes the heated air around the food that is emitted by the top and bottom heating elements. Best suited for baking, roasting all meat, vegetables and pre-cooked meals. Single grill: Part of the area below the grill heating element becomes hot. The inner grill element is on.
-
Page 13: Oven Functions
Usage Temperature/adjustment dial Use the Temperature/adjustment dial to set the required temperature for the oven. The dial has to be pressed in for it to pop out, before it can then be rotated clockwise to set the required temperature. The temperature can be set between 50°C and 250°C (this is dependent on the function that is selected) and the grill temperature can be set between 180°C and 240°C. -
Page 14: Oven Cavity & Before First Use
Usage The oven cavity • The oven light is located in the cooking compartment. During oven operation, the oven light is on. • A cooling fan protects the oven from overheating. • The cooling fan switches on and off as required. The hot air escapes above the door. -
Page 15: Setting The Clock
Usage • After the oven cavity has cooled, it should then be cleaned with warm soapy water, using either a sponge or soft cloth. No abrasive cleaners should be used. • Outer parts of the oven should be cleaned with warm soapy water, using either a sponge or soft cloth. -
Page 16: Function & Temperature Setting
Usage Note: Always pre-heat the oven to the required temperature before cooking. Selecting an oven function and temperature The oven function dial should be used to select the particular mode of cooking that you require. The appliance will utilise different elements within the oven cavity, depending on the oven function that you select. -
Page 17: Minute Minder
Usage The minute minder The minute minder is a countdown timer that is independent from the oven functions. When the countdown time has finished, an audible signal will sound. The minute minder must be set prior to selecting an oven function. NOTE: The minute minder can be used without an oven cooking function selected, and it will work as a separate kitchen timer. -
Page 18: Duration Timer
Usage The duration timer The duration timer is a countdown timer that is linked to your oven. When the countdown has finished, an audible signal will sound and the oven will turn off. To set the duration timer: 1. After you have selected an oven function and pressed start, the oven will start to heat and will run until it is turned off unless the duration timer is set. -
Page 19: Reservation Function
Usage Reservation function The reservation function allows you to set the time you want your oven to come at, with the function you require and for the duration you require. Note: The clock must be set for this function to work To set the reservation function: 1. -
Page 20: Cancel Function, Checking Time
Usage Notes: • The reservation time can be checked by pressing clock button, the reservation time will be display for 3 seconds later before the display reverts back to the current time again. • When the reservation function has been set, press the cancel button once and the oven function, temperature and cooking duration of the reservation function will be shown on the display. - Page 21 Usage To switch off the safety lock, press and hold the pause/stop cooking touch button and start cooking touch button simultaneously for 3 seconds. There will be a long audible signal and the lock symbol will go out, these confirm that the safety lock has been switched off.
-
Page 22: Cooking Guidelines & Warnings
Usage Cooking guidelines Please refer to the information given on food packaging for guidance on cooking temperatures and times. Once familiar with the performance of your appliance, temperatures and times can be varied to suit personal preference. When using the fan oven function you should follow the information given on the food packaging for this particular mode of cooking. - Page 23 Usage Warnings Keep the oven door closed when using any of the cooking functions, including all grill functions. Do not use aluminium foil to cover the enamelled baking tray or heat items wrapped in aluminium foil under the grill. The high reflectivity of the foil could potentially damage the grill element.
-
Page 24: Accessories
Usage Accessories Warning: • All accessories must be removed before Pyrolytic cleaning is started. • Correct placement of the shelves between the side supports is imperative. This will ensure that food does not fall off or slide out when in the oven or being carefully removed from the oven. - Page 25 Usage Universal tray - for cooking large quantities of food such as cakes, pastries, frozen food, etc. Can also be used under the wire rack to catch fat when grilling. Slide the baking tray into the oven with the sloping edge facing towards the oven door. Wire rack - for grilling and roasting.
-
Page 26: Cleaning & Maintenance
Cleaning and Maintenance: Important notes: • The appliance will become hot during operation, allow the appliance to cool down before cleaning. • Do not use any high-pressure cleaners or steam cleaners. • Wash new sponge cloths thoroughly before use. • Do not leave acidic substances (lemon juice, vinegar) on stainless steel parts. •... - Page 27 Cleaning and Maintenance: How to clean: • After each use, clean all surfaces once they have cooled down. If any residue is left (baked-on food, drops of grease etc.), however little, will become stuck to the surface and more difficult to remove later. •...
- Page 28 Cleaning and Maintenance: • Very dirty door seal: If the door seal is very dirty, the appliance door will no longer close properly when the appliance is in use. The fronts of adjacent units could be damaged. Always keep the door seal clean. •...
- Page 29 Cleaning and Maintenance: 5. The length of cycle can be decreased by 30 minutes to 1 hour and 30 minutes (1:30) by turning the oven function dial, should your oven only be lightly soiled. 6. The oven door will automatically lock when the temperature inside the oven reaches 300°C.
- Page 30 Cleaning and Maintenance: Changing the bulb If the bulb in the oven light fails, it must be replaced with a heat resistant 25 watt bulbs only. To replace the bulb follow the below steps: Note: the oven lamp is located at the top right on the back of the oven. 1.
-
Page 31: Trouble Shooting
Trouble Shooting: Problem Solution The circuit break is defective or turned off check circuit breaker is in working order and that it is not switched off No power Power cut or faulty fuse Check whether other kitchen appliances are working or check in the fuse box to make sure that the fuse for the appliance is working The oven doesn’t heat up... -
Page 32: Guarantee
Guarantee This product is guaranteed for 12 months from the date of the original purchase. If any defect arises due to faulty materials or workmanship you must contact Product Care with the original proof of purchase so a replacement or refund can be arranged. Refund or replacement is at the discretion of Product Care. -
Page 33: Technical Specification
Technical Specification Model number RHPYRO6503B SS Rated Voltage 220V – 240V ~ 50Hz External Dimensions(HxWxD) 595mm x 595mm x 575mm For Customer Services & Spare Parts please call 0345 208 8750 Opening times: Monday - Friday 8am – 8pm & Saturday 9am – 1pm... -
Page 34: Notes
Notes For Customer Services & Spare Parts please call 0345 208 8750 Opening times: Monday - Friday 8am – 8pm & Saturday 9am – 1pm or visit us at www.productcare.co.uk... - Page 35 Notes For Customer Services & Spare Parts please call 0345 208 8750 Opening times: Monday - Friday 8am – 8pm & Saturday 9am – 1pm or visit us at www.productcare.co.uk...
- Page 36 For Customer Services & Spare Parts please call 0345 208 8750 Opening times: Monday – Friday 8am – 8pm & Saturday 9am – 1pm or visit us at www.productcare.co.uk This symbol is known as the 'Crossed-out wheelie bin Symbol'. When this symbol is marked on a product/batteries, it means that the product/batteries should not be disposed of with your general household waste.
Need help?
Do you have a question about the RHPYRO6503B SS and is the answer not in the manual?
Questions and answers