Advertisement
Quick Links
DO
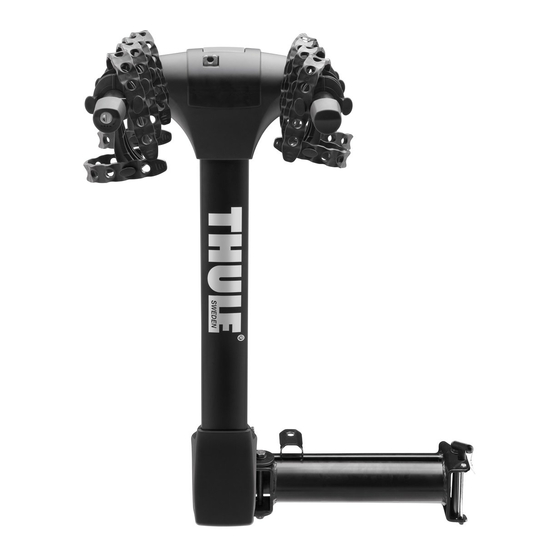
- Attach swing arm and upright
assembly as shown (STEP 1).
- Install in receiver and bolt
with washer and lock washer
(STEP 3).
- Load heaviest bike first- front
to the right. (STEP 7).
- Alternate bike direction.
- Secure bicycle to rack with
rubber straps and black safety
strap through the frames and
around the mast of the rack
(STEP 9).
- Check tightness of all bolts
and knobs periodically.
(every 6 months).
- Check rubber straps for wear
and replace if worn.
DO NOT
- Install on a trailer or other
towed vehicle.
- Put more than 2 bikes on a
class 1 hitch.
- Do not "overstretch" the
straps.
- Use the rack while traveling
on dirt roads.
- Use the rack to carry tandems
or recumbents.
- Put more than the intended
number of bikes on the rack.
506-7079
QUICK START
GUIDE for:
VERTEX SWING AWAY
9031XT
Advertisement

Summary of Contents for Thule VERTEX SWING AWAY
- Page 1 QUICK START GUIDE for: VERTEX SWING AWAY 9031XT - Attach swing arm and upright assembly as shown (STEP 1). - Install in receiver and bolt with washer and lock washer (STEP 3). - Load heaviest bike first- front to the right. (STEP 7).
- Page 2 VERTEX SWING AWAY 9031XT North American English PARTS INCLUDED 506-7079...
- Page 3 part description part number qty. Vertex Swing Bike Carrier — anti sway cage hold fast 8522903001 anti sway angled extension 8523108001 buckle strap 753203017 ripple strap 8523006001 hitch tool 8535524 1/2 - 13 bolt x 5.5" 8535583 stinger assembly 2" swing —...
-
Page 4: Carrier Assembly
- Install 1/2 – 13 x 5.5” bolt, flat washer and lock nut as illustrated. - Engage lock-up pin and loosely thread lower locking handle. - Tighten firmly using Thule tools provided. - Install 1/2 – 13 x 5.5” bolt, flat washer and lock nut as illustrated. - Page 5 TRANSPORTING CARRIER - Carrier can be easily handled / carried using handhold at the back of the carrier. - Insert base into receiver. - Assemble hitch pin, M12 lock washer, and M12 washer as shown. - Tighten firmly using hitch tool (K) provided. 506-7079...
- Page 6 BICYCLE TRANSPORTATION - A. Lift Hitch Switch Lever as illustrated. - B. With the other hand lift bike arm assembly upward until the Hitch Switch “clicks” into position. - Reverse operation to store or when traveling with no bike attached. - Attach cradle strap to cradle.
- Page 7 - Attach anti-sway angled extension to underside of cradles 1 and 4 as illustrated. - A. Load heaviest bike first onto the inner most cradles - handle bars facing passenger side of vehicle. - B. Fasten cradle straps. - Use 982XT Frame Adaptor (#982XT, sold separately) for bikes without traditional top tubes.
- Page 8 ATTACHING HOLD FAST ANTI-SWAY CAGES - A. To attach anti-sway cage, hold horizontal with smooth edge facing down and slide C-slot opening onto Anti-sway Extension / Cradle. - B. Swing down to vertical position. Place smooth curved surface against bicycle and attach strap as shown. - Mount bikes in alternate directions.
- Page 9 REAR COMPARTMENT ACCESS lock-up pin - A. Remove hold-open pin. Loosen lower locking handle completely and pull pin to open carrier. - B. While pushing bottom half of bike arm assembly open, rotate upright assembly as illustrated. In full open position lock-up pin will engage bracket.
- Page 10 lock-up pin lower locking handle CLOSING CARRIER - A. Remove hold-open pin. Pull lock up pin to release upper arm assembly and rotate bike arms to stop position. - B. Close carrier. Lock-up pin will click into closed position. - Tighten lower locking handle firmly. - WARNING: Before operating your vehicle, tighten locking handle firmly.
- Page 11 SECURITY / INSTALLING END CAP LOCK CORE - Install lock cylinder into locking end cap with Change Key. SECURITY / USING LOCKING CABLE - Lock bikes to carrier with cable lock. SECURITY / SNUG-TITE RECEIVER LOCK - Using Snug-Tite™ Receiver Lock (STL2, sold separately) carrier can be locked to vehicle hitch.


Need help?
Do you have a question about the VERTEX SWING AWAY and is the answer not in the manual?
Questions and answers