
Subscribe to Our Youtube Channel
Related Manuals for Honeywell Home T5


Summary of Contents for Honeywell Home T5
- Page 1 T5 Smart Thermostat Programmable Thermostat Quick Install Guide Menu RCHT8610WF, RCHT8612WF, RTH8800WF, Read before installing For more information visit honeywellhome.com...
- Page 2 Included in your box: Quick Install Guide Screws and anchors UWP™ Mounting System T5 Smart (UWP) Thermostat...
- Page 3 Get the most from T5 Smart Thermostat Multiple programming options that fit your lifestyle: Location-Based scheduling – The thermostat uses your smartphone’s location to know when you’re away, and saves you energy. Through geofence technology, it senses your return and helps make you comfortable upon arrival.
- Page 4 Tools you will need: Smartphone To install your thermostat and Phillips screwdriver photograph existing wiring. Small flat head screwdriver Pencil Level Home Wi-Fi Resideo app Password To configure your system and connect to your smartphone. You may need: Wire stripper Needle-nose pliers Drill and drill bit (7/32 in)
- Page 5 • Does not support input (S terminals) for indoor and outdoor sensors • Does not support relay (U terminals) for ventilation • Android or iOS smartphone, tablet, or device For help, contact: WEB honeywellhome.com/support PHONE 1-800-633-3991 SOCIAL Twitter: @Honeywell_Home, Facebook: Honeywell Home...
-
Page 6: Removing Your Old Thermostat
Removing your old thermostat Turn power OFF To protect yourself and your equipment, Turn off the power at the breaker box or switch that controls your heating/ cooling system. Switch Breaker box Check that your system is off Change the temperature on your old thermostat. - Page 7 Make sure there are no 120/240V wires Do you have thick black wires with wire nuts? Is your thermostat 120V or higher? If you answered yes to either of these questions, you have a line voltage system and the thermostat will not work.
- Page 8 Record if you have wires in the following terminals Do not include jumpers as a part of your count. The thermostat does not need jumpers. Terminal Wire Color Write down the color of the wires Check mark the wires that are connected to terminals. Next to the check mark, write down the color of the wire.
- Page 9 Disconnect the wires and remove the old wall plate Use a screwdriver to release wires from terminals. Tip: To prevent wires from falling back into the wall, wrap the wires around a pencil.
- Page 10 Installing your T5 Smart Thermostat T5 Smart Thermostat Screws Mounting Anchors Wall System...
- Page 11 10 Bundle and insert wires through the UWP Pull open the UWP and insert the bundle of wires through the back of the UWP. Make sure at least 1/4-inch of each wire is exposed for easy insertion into the wire terminals. 11 Insert the wall anchors It is recommended that you use the wall anchors included in the box to...
- Page 12 12 Set R-switch position and insert R-wire or wires Set the R-switch up or down based on your wiring notes in Step 7. Insert wires into the inner holes of the terminals on the UWP. The tabs will stay down once the wire is inserted. If you have 1 R-wire (R, Rh, or Rc) Set R-switch to Insert your R-wire...
- Page 13 13 Connect remaining wires from Step 8 This wiring is just an example, actual wiring may vary. Tip: Do not mount the UWP to the wall prior to connecting the wires. Depress the tabs to put the wires into the inner holes of their corresponding termi- nals on the UWP (one wire per terminal) until it is firmly in place.
- Page 14 15 Attach your thermostat Align the thermostat onto the UWP and firmly snap it into place. 16 Turn your power ON Turn on the power at the breaker box or switch that controls the heating/ cooling system. Switch Breaker box 17 Return to the thermostat Return to the thermostat.
- Page 15 Found. Tap SET UP NOW as shown below to continue. If your thermostat doesn’t appear, create an account (if necessary), or sign in to your Resideo account. Then select the T5 Smart Thermostat to install. c) The Resideo app will walk you through the rest of setup.
- Page 16 How to use your Resideo App Access the Thermostat menu MY HOME 72˚ FOLLOWING SCHEDULE Set desired temperature 72 ˚ Select Fan mode Auto/On/Circulate. Select System Schedule your home mode Auto/Heat/ comfort MODE SCHEDULE Cool/Off/EM Heat Interested in more Resideo products? Visit honeywellhome.com to learn about all available products connected by the Resideo app.
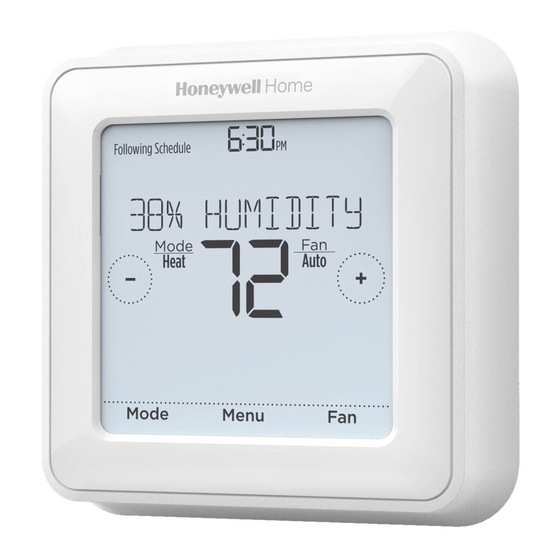
- Page 17 How to use your T5 Smart Thermostat Desired temperature Indoor Temperature Adjust temperature Displays desired Displays current Touch + or - to set indoor temperature. indoor temperature. your desired indoor temperature. Menu Mode Menu Select system mode Contains features: Select Fan mode...
-
Page 18: Manual Setup
Manual Setup If your Wi-Fi network is not working, you can alternatively setup your thermostat manually and connect your phone later. Start manual setup Touch START SETUP to begin. Select manual setup On the USE APP screen, touch No. Navigate and edit setup options to navigate through all the setup options. - Page 19 Manual Setup (cont.) Finish Setup Touch until you see Finish Setup. Touch Select or touch text area. Select Setup Wi-Fi At the end of setup process you will be prompted to SETUP WIFI. If your Wi-Fi is still not working, you have to manually set the time and date.
-
Page 20: Equipment Setup Options
Equipment Setup Options Option # Option Name Option Value (factory default in bold) Schedule Type No Schedule MO-SU = Every day the same MO-FR SA SU = 5-1-1 schedule MO-FR SA-SU = 5-2 schedule Each Day = Every day different Note: You can change default MO-FR, SA-SU schedule here. - Page 21 Equipment Setup Options Option # Option Name Option Value (factory default in bold) 0, 1, 2 Cool Stages/ Compressor Note: Select how many Cool or Compressor stages of your equipment Stages the thermostat will control. Maximum of 2 Cool/Compressor Stages. (#200=Conv./ #200=HP) Heat Stages/...
-
Page 22: Frequently Asked Questions
Most routers will broadcast two networks, one SSID on the 5.0 GHz radio and one SSID on the 2.4 GHz radio. A change was made on the Resideo app but it has not shown up on the T5 Smart thermostat. There may be a short delay after making temperature and setting changes in the Resideo app. -
Page 23: Regulatory Information
Frequently Asked Questions There is an alert that says Wi-Fi Signal Lost. What does that mean? The Wi-Fi signal to the thermostat has been lost. Wait for the thermostat to reconnect or select a new network within the Resideo app configuration menu. If the thermostat is unable to reconnect, you will need to troubleshoot the router to determine the cause. -
Page 24: Year Limited Warranty
Apple® HomeKit™ Setup Code The T5 Smart Thermostat supports Apple HomeKit. Open HomeKit app, follow the instructions and enter the code displayed on Thermostat when prompted. 2-Year Limited Warranty For Warranty information go to honeywellhome.com Use of the Works with Apple badge means that an accessory has been designed to work specifically with the technology identified in the badge and has been certified by the developer to meet Apple performance standards. -
Page 25: Guide D'installation Rapide
Thermostat intelligent T5 Thermostat Programmable Guide d’installation Menu rapide RCHT8610WF, RCHT8612WF, RTH8800WF, Lire avant l’installation Pour plus d’informations, visitez honeywellhome.com... - Page 26 Inclus dans cette boîte : Guide d’installation rapide Vis et ancres Système de montage UWP™ (UWP) Thermostat intelligent T5...
- Page 27 Tirez le maximum de votre thermostat intelligent T5 Plusieurs options de programmation pour votre style de vie : Plusieurs options de programmation pour votre style de vie : Programmation géodépendante – Le thermostat Il vous permet de réaliser Programmation géodépendante – Le thermostat Il vous permet de réaliser des économies d’énergie en surveillant vous allées et venues en utilisant...
- Page 28 Outils requis : Téléphone intelligent Pour installer le thermostat et prendre Tournevis cruciforme une photo du câblage existant. Petit tournevis plat Crayon Niveau Mot de passe Application Resideo Wi-Fi de la Pour configurer votre système et connecter votre téléphone résidence intelligent.
- Page 29 • Ne prend pas en charge le relais (bornes U) pour la ventilation • Téléphone intelligent, tablette ou dispositif Android ou iOS Pour obtenir de l’aide, veuillez contacter : SITE WEB honeywellhome.com TÉLÉPHONE 1-800-633-3991 RÉSEAUX SOCIAUX Twitter : @Honeywell_Home, Facebook : Honeywell Home...
- Page 30 Retrait de l’ancien thermostat Coupez l’électricité Arrêt Pour vous protéger ainsi que pour Marche protéger votre équipement, coupez l’alimentation au niveau du disjoncteur Marche ou de l’interrupteur contrôlant le système de chauffage/refroidissement. Interrupteur Disjoncteur Arrêt Vérifiez que le système est hors tension Modifiez la température sur l’ancien Marche...
- Page 31 Assurez-vous qu’aucun fil de 120/240 V n’est présent Y a-t-il d’épais fils noirs avec des capuchons de connexion? Votre thermostat est-il de 120 V ou plus? Si vous avez répondu oui à l’une ou l’autre de ces questions, votre système Capuchon de fonctionne sur tension secteur et le connexion...
- Page 32 Notez la présence de fils dans les bornes suivantes N’incluez pas les cavaliers. Le thermostat ne fonctionne pas avec des cavaliers. Borne Couleur de fil Notez la couleur des fils Cochez les fils connectés à des bornes. Indiquez la couleur du fil à côté de la coche.
- Page 33 Débranchez les fils et retirez l’ancienne plaque murale Utilisez un tournevis pour dégager les fils des bornes. Conseil : Pour éviter que les fils ne tombent derrière le mur, enroulez-les autour d’un crayon.
- Page 34 Installation de votre thermostat intelligent T5 Système de Thermostat montage Ancres intelligent T5...
- Page 35 10 Regroupez et insérez les fils dans le système de montage UWP Ouvrez le système UWP et insérez le faisceau de fils à l’arrière du système UWP. Assurez-vous qu’au moins 1/4 po de chaque fil est exposé pour faciliter l’insertion dans les cosses de câble.
- Page 36 12 Réglez la position du contacteur R et insérez le ou les fils R Placez le contacteur R en position haute ou basse en fonction des notes de câblage prises lors de l’étape 7. Insérez les fils dans les trous internes des bornes du système UWP. Les languettes resteront abaissées lorsque le fil est inséré.
- Page 37 13 Connectez les fils restants de Ce câblage n’est qu’un exemple; le câblage actuel peut être différent. l’étape 8 Conseil : Ne montez pas le système UWP sur le mur avant d’avoir connecté les fils. Appuyez sur les languettes pour insérer les fils dans les orifices internes de leurs bornes correspon- dantes sur le système UWP (un fil par...
- Page 38 15 Attachez le thermostat Alignez le thermostat sur le système UWP et emboîtez-le fermement. 16 Rétablissez l’alimentation Rétablissez l’alimentation au niveau Arrêt du disjoncteur ou de l’interrupteur contrôlant le système de chauffage/ Arrêt refroidissement. Marche Interrupteur Disjoncteur 17 Revenez au thermostat Arrêt Revenez au thermostat.
- Page 39 Si votre thermostat ne s’affiche pas, créez un compte (si nécessaire) ou connectez-vous à votre compte Resideo. Puis, sélectionnez le thermostat intelligent T5 à installer. L’application Resideo vous accompagnera tout au long de la configuration. Thermostat Found:...
- Page 40 Utilisation de votre application Resideo Accéder au Thermostat menu MY HOME 72˚ FOLLOWING SCHEDULE Régler la température Sélectionnez 72 ˚ désirée le mode ventilateur Auto/ On (Marche)/ Circulation Sélectionnez le Programmer votre mode de système confort MODE SCHEDULE Auto/Heat/Cool/ Off/EM Heat (Auto/Chauffage/ Refroidissement/ Arrêt/Chauffage...
- Page 41 Utilisation de votre thermostat intelligent T5 Température désirée Température Réglage de la intérieure température Affiche la température intérieure désirée. Affiche la température Touchez + ou - pour intérieure actuelle. régler la température intérieure désirée. Menu Mode Menu Fan (Ventilateur) Sélectionnez le Contient les Sélectionnez le mode...
-
Page 42: Configuration Manuelle
Configuration manuelle Si le réseau Wi-Fi ne fonctionne pas, il est aussi possible de configurer manuellement le thermo- stat et de le connecter ultérieurement à votre télé- phone. Commencez la configuration manuelle Touchez START SETUP (Commencer la configuration) pour commencer. Sélectionnez la configuration manuelle Sur l’écran USE APP (Naviguez et modifiez les options de configuration), touchez No (Non). - Page 43 Configuration manuelle (suite) Terminez la configuration Touchez jusqu’à ce que « Finish Setup » (Terminer la configuration) s’affiche. Touchez Select (Sélectionner) ou touchez la zone de texte. Select Configurez le Wi-Fi À la fin du processus de configuration, une invitation s’affichera pour la CONFIGURATION WIFI (SETUP WIFI).
- Page 44 Options de configuration de l’équipement N° de l’option Nom de l’option Valeur de l’option (réglage d’usine en gras) Type de programme No Schedule (Pas de programme) MO-SU = Every day the same (LUN-DIM = Chaque jour identique) MO-FR SA SU = 5-1-1 schedule (LUN-VEN SAM DIM = Programme 5-1-1) MO-FR SA-SU = 5-2 schedule (LUN-VEN SAM-DIM = Programme 5-2) Each Day = Every day different (Chaque jour = Chaque jour différent) Remarque : Le programme par défaut LUN-VEN, SAM-DIM peut être modifié...
- Page 45 Options de configuration de l’équipement N° de l’option Nom de l’option Valeur de l’option (réglage d’usine en gras) 0, 1, 2 Étages de refroid- issement / Étages Remarque : Sélectionnez le nombre d’étages de refroidissement ou de compresseur du compresseur contrôlés par le thermostat.
-
Page 46: Foire Aux Questions
Foire aux questions Le thermostat intelligent T5 fonctionnera-t-il toujours, même si la connexion au Wi-Fi est perdue? Oui, la température peut être directement ajustée au niveau du thermostat. Cependant, certaines fonctions, dont Geofencing, peuvent uniquement être gérées au moyen de l’application Resideo et ne pourront donc pas être utilisées sans connexion.Le thermostat se reconnecte... -
Page 47: Informations Réglementaires
Foire aux questions Un message s’affiche indiquant que le signal Wi-Fi a été perdu. Qu’est-ce que cela veut dire? Le signal Wi-Fi du thermostat a été perdu. Attendez que le thermostat se reconnecte ou sélectionnez un nouveau réseau dans le menu de configuration de l’application Resideo. Si le thermostat ne peut pas être reconnecté, vous devrez dépanner le routeur pour en déterminer la cause. -
Page 48: Garantie Limitée De 2 Ans
Apple® HomeKit™ Code de configuration Le thermostat intelligent T5 est compatible avec Apple HomeKit. Ouvrez l’application HomeKit, suivez les instructions et entrez le code affiché sur le thermostat lorsque vous y êtes invité. Garantie limitée de 2 ans Pour obtenir des renseignements à propos de la garantie, visitez honeywellhome.com L’utilisation de Works avec le badge Apple signifie qu’un accessoire a été...
Need help?
Do you have a question about the T5 and is the answer not in the manual?
Questions and answers