Advertisement
STEEDA
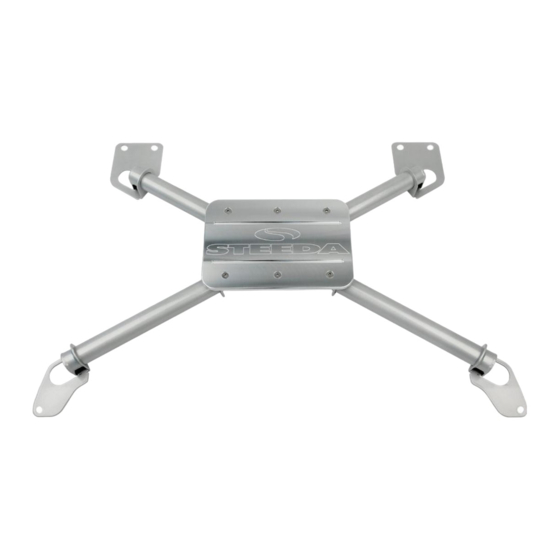
REAR SEAT
CHASSIS
X-BRACE
For: 2005+ Mustangs
Installation Instructions for #555-5085
A qualified technician should be used if you
are not confident with removing the rear seats.
Refer to a factory service manual for additional
guidance
Removal of the Factory Rear Seats
1. Slide the front seats all the way forward.
2. Release the tabs on the bottom of the rear seat bench. Seen in figure 1. Pull the front of the bench
upward and and lift it out of the car.
3. Remove the three pivot brackets for the backrests. There is one bracket in the center beneath the
backrests, and one to the outside, near each seat belt. Each bracket has a 13mm head screw. See figure 2.
4. Pull the cloth tab near the seat belt at the top of the backrests to release their hinges and remove the
backrests. See figure 2.
5. Unbolt the backrest strikers and set aside. There are two 10mm head screws securing each striker.
6. Remove the seat bench brackets. Each bracket has two T50 Torx screws. See figure 2.
7. Remove the seat belt buckles by removing the 15mm nut at each mount.
Note: For seat belt removal refer to a Ford factory service manual.
Feel around for the plastic clip
and push inward to release.
Copyright: Steeda Autosports
555-5085
Seat release tab
Backrest hinge
Bench bracket
Seat belt buckle
9/25/2012
Advertisement
Table of Contents

Related Manuals for Steeda 555-5085


Summary of Contents for Steeda 555-5085
- Page 1 STEEDA REAR SEAT CHASSIS X-BRACE For: 2005+ Mustangs Installation Instructions for #555-5085 A qualified technician should be used if you are not confident with removing the rear seats. Refer to a factory service manual for additional guidance Removal of the Factory Rear Seats 1.
- Page 2 Assembly of the Steeda Rear Seat Chassis X-Brace 8. If applicable, secure the dress-up plate to the X-brace with the provided screws and nuts. Use the longer screws and Nylon lock nuts on the center bolt holes. Use the shorter screws and standard nuts on the four corners.
Need help?
Do you have a question about the 555-5085 and is the answer not in the manual?
Questions and answers