Table of Contents
Advertisement
Quick Links
Advertisement
Table of Contents

Related Manuals for TUYA S1-TYB


Summary of Contents for TUYA S1-TYB
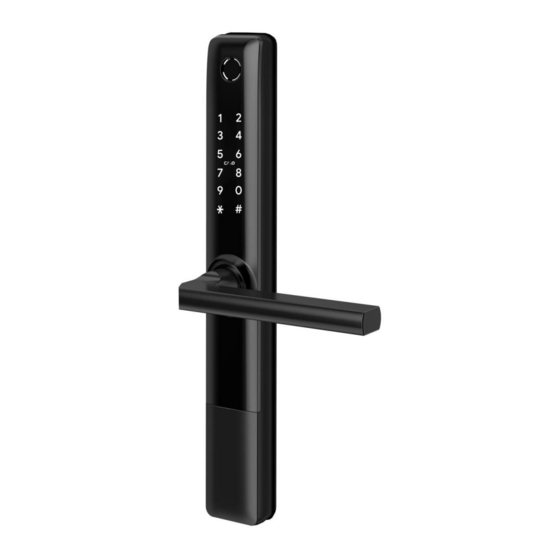
- Page 1 Smart Lock User Manual S1-TYB Special Attention: 1. Mechanical keys please keep outdoor, just in case keys lock in doors. 2. Please replace for the battery when low wattage alarm. 3.Reading this manual carefully before installation, and keep it for future reference.
-
Page 2: Packing List
1. Introduction 1.1.Lock structure 1.2.Packing List Check the following drawing to check whether the package contains all the parts Name Name Front Pane Sliding Screws:M5*10mm Mortise Screws:10*5mm Back Panel (For Aluminum Door) Mortise Screws:25*4mm Mortise (For Wooden Door) Card M5*25mm Screw Mechanical Key M5*30mm Screw Waterproof Rubber Plate... -
Page 3: Specifications
1.3.Specifications Suitable for Doors Aluminum door S1-TYB Models Applicable Wooden door Working Handle : SS304 Materials 6V/4x AA Batteries Panel : Aluminum alloy Voltage Door Lock Thickness to 2.5KG 35-65mm Weight Bluetooth Fingerprint(option) Fingerprint+Password Data Unlocking Password +Card≤100 Card Capacity... -
Page 4: Installation
2.Installation 2.1Turn the handle Notice: Adjust the handle according to the direction you open the door. - Page 5 2.2. Installation Diagram(For 3585) Step 1 Install Mortise 1.According to the size indicated by the hole icon, open the corresponding hole position as needed, and install the lock body. 2.Adjust the direction of the bolt according to the door opening direction Step 2 Install Sliding Screw Casing and Square Shaft...
-
Page 6: Step 6 Install The Battery
Step 4 Install Back Panel 1.Install another waterproof pad to the rear panel Step 5 Connect Front and Back Panels Wires 1. Fix the front and back panels with screws suitable for the thickness of the door 2. Connect the front power cord to the back panel Step 6 Install the Battery 1.Install 4* AA batteries... -
Page 7: Operation
3.Operation 3.1.Download You can search for [ Tuya Smart ] in various app stores or scan the QR code above to download 2.Register 1.Click “Sign Up”and read the Privacy Policy after it pops up. Click “Agree” and enter the registeration page. - Page 8 3.4.Add lock 1.Tap Add Device on the Home page or“+”in the upper right corner of the page to go to the Add Device page. then, you can manually add devices or search for devicesto add to the app. 2.Click on the "security sensors" category on the left , Find the door lock (Bluetooth) 3.Press 8+# on the lock and Prompt operation is successful, the keyboard light starts flashing,the lock will enter bluetooth search status...
- Page 9 3.5.Add user 3.5.1.Members and management Two different kinds of members 1. Family members-this type of member is consistent with the users in the family group in the app; when a new user is added to the family group in the app, one more family member will appear in the door lock member.
-
Page 10: Fingerprint Management
3.5.2.Opening record You can query the log in the door opening log, and the records are arranged in reverse order. The unlock ID that has been associated with the user name will directly display the corresponding user name, and the unlock ID that has not been associated with the name will display the specific unlock ID About the opening log display: When the door lock is connected to the mobile phone... -
Page 11: Password Management
3.6.2.Password management Connect the door lock through the app Bluetooth, the administrator can enter the password for himself other family members; before adding password, select the user corresponding to the added password Click "Add Password" to enter the password entry interface, which supports random generation and custom passwords. - Page 12 3.7.Add gateway(option) 3.7.1.Add bluetooth Gateway Electrify the gateway.The phone turns on Bluetooth and connects to 2.4g Wi-Fi (note that if the router supports both 2.4g and 5G modes, the phone must be connected to a 2.4g network; 2.4g and 5G hybrid modes are not supported).
- Page 13 3.7.2.Add door lock to the Bluetooth gateway There are two ways to add bluetooth door lock device under bluetooth gateway: Method 1 : Enter the Bluetooth Gateway Device APP panel (as shown in picture 1), select add in the list, and jump to the list of Bluetooth door lock devices that have been added (as shown in picture 2);...
- Page 14 4.FAQ 1) How to read operation In the Records of the main interface. . records? 2) Why can’t I unlock it after open You need to perform an unlock verification in any the passage mode method, than the passage mode will take effect. 3) What is the purpose of Auto You can set how long to lock after unlocking Lock...
- Page 15 Guarantee Customer Name: Customer Calls : Purchase Date : Product Name : Product Model : Note: Please keep this card so that you can use it when you need warranty service. We provide you with a one-year warranty from the date of purchase. This warranty service is valid for customers in any country in the world.
Need help?
Do you have a question about the S1-TYB and is the answer not in the manual?
Questions and answers