Table of Contents
Advertisement
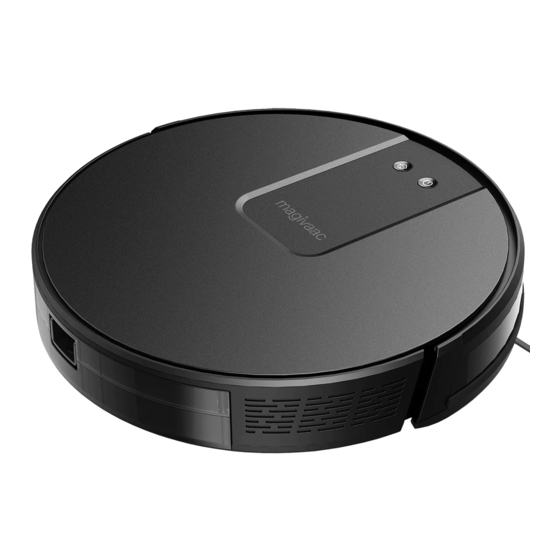
Model: RV2000
Batch: PR4362
PLEASE READ AND RETAIN THESE INSTRUCTIONS FOR FUTURE REFERENCE.
THIS APPLIANCE IS INTENDED FOR HOUSEHOLD USE ONLY.
The illustrations used in this manual are to illustrate the operation method and structure of
the product. Where there is a small difference between the physical item and the
illustrations, please take the physical as the standard.
Advertisement
Table of Contents

Subscribe to Our Youtube Channel
Related Manuals for Lenoxx magivaac RV2000


Summary of Contents for Lenoxx magivaac RV2000
- Page 1 Model: RV2000 Batch: PR4362 PLEASE READ AND RETAIN THESE INSTRUCTIONS FOR FUTURE REFERENCE. THIS APPLIANCE IS INTENDED FOR HOUSEHOLD USE ONLY. The illustrations used in this manual are to illustrate the operation method and structure of the product. Where there is a small difference between the physical item and the illustrations, please take the physical as the standard.
-
Page 2: Introduction
INTRODUCTION: Clean-up is both effortless and easy with this high powered 3-in-1 HEPA Robot Vacuum with Mop. Call out to your Amazon Alexa or Google Home or push a button on the downloadable smartphone app or included remote control to power up and get started. Enjoy 2kPa 3-speed suction power alongside with dual side vacuum brushes and a central operational vacuum brush to get the ultimate clean on both carpets and hard floors. -
Page 3: Safety Instructions
SAEFTY INSTRUCTIONS: 1. Only authorized technicians can disassemble this product. Users are not recommended to disassemble this product by themselves. 2. This product can only use the power adapter provided by the factory. If other adapters are used, the product may cause damage. 3. -
Page 4: Warnings
Warning: 1. Use only the original rechargeable battery and charging dock specially equipped by the manufacturer. Non -rechargeable batteries are strictly prohibited, please refer to" product parameters" for battery specification information. 2. Do not use product in an environment with open flames or fragile objects. 3. -
Page 5: Table Of Contents
CONTENTS: Introduction Safety Instructions Warnings Contents Product Composition/ Package Contents Product Composition/ Part Name Remote Control Light Indications Installation of App Quick Guide for App Use Product Usage/ Preparation Product Use/ Robot Charging Product Use: Using the Water Tank Component Maintenance/ Dust Container Component Maintenance/ Main Brush and Side Brush Component Maintenance/ Charge Dock Pins, Down View Sensor, Wheel and Universal Wheel... -
Page 6: Product Composition/ Package Contents
PRODUCT COMPOSITION/ PACKAGE CONTENTS: Robot Charging dock Remote Control Dust Container Cleaning Brush Side Brush x 2 Adaptor Instruction manual Hepa Filter Water Tank Mopping Pad... -
Page 7: Product Composition/ Part Name
PRODUCT COMPOSITION/ PART NAME: Home button Power button Power button: Press to turn the robot on or off. Push and hold it for 1 x second. When it is powered on and the green light is on, press the power button again to begin operation. - Page 8 Top: Control panel Surface Cover Omnidirectional/Lens Dust Box/ Water Tank Button Bottom: Ground Sensor Left Side brush Right Side Brush Left wheel Right wheel Dust box Charging Pole Piece Universal Wheel Battery Cover Rolling Brush Assembly...
- Page 9 Dust container: Water Tank and Mopping Pad Assembly: Water injection port Water tank Mopping pad Charging Dock: Indicators on the charging dock: When the charging dock is connected to power, the green indicator light will be blinking. The robot will automatically return to the charging dock when the battery is lower than 20% power.
-
Page 10: Remote Control
REMOTE CONTROL: Add 2 x AAA size batteries to the remote control. Add the batteries to the remote control as per the polarity markings in the battery compartment. Mopping button Decrease Increase suction suction power power 1. On/Off: Press to wake up or dormant the robot. 2. -
Page 11: Light Indications
To stop directional control, press the Pause/Start button, then press it again to start normal operation. 7. Pause/ Start: Press to pause the robot, press again to resume the robot. 8. Auto cleaning: Robot optimizes its cleaning path by selecting different cleaning modes automatically until cleaning is complete. -
Page 12: Installation Of App
INSTALLATION OF APP: Ensure that the robot, your router and your phone are close to each other before you start the APP connection. The suggested distance is less than 4 meters. Scan the applicable QR CODE below to download the TUYA Smart app, or search for the TUYA Smart app in your device’s app store: Download the TUYA Smart app (fig 01). - Page 13 Tap the plus (+) sign to add the home appliance (Fig 06). Add manually is shown on the top of the app screen. Tap Small Home Appliances (Fig 07). Choose Robot Vacuum (Fig 08). Select this vacuum from the list: Select the 2.4 GHz Wi-Fi network.
- Page 14 Start device connection and wait for pairing to occur (Fig 11). When completed successfully, an Added successfully message will be on the app screen (Fig 12). The robot name for the device can be changed if desired (Fig 13). Press Done in the middle of the app screen. Start using the app to control the robot (Fig 14).
- Page 15 Alternative pairing method. AP Mode pairing. AP Mode is a slower pairing mode which may be required if a more stable signal is needed. After selecting the Robot Vacuum (Wifi) from the devices in the app, and selecting the 2.4 GHz Wi-Fi network and pressing Next, Press EZ Mode in the top right had corner of the app screen.
-
Page 16: Quick Guide For App Use
QUICK GUIDE FOR APP USE: Select from ‘Auto cleaning’, Recharge mode’, ‘Room cleaning’, ‘Edge cleaning’, ‘Spot cleaning’ when required to use your desired cleaning methods (Fig 15 + Fig 16). Press ‘Cleaning strength’ to enter the suction power settings (Fig 17). Press ‘Schedule cleaning’... - Page 17 Working map and cleaning record: The app will show a map of the working cleaning part of the robot (Fig 22). Note, that this app may not update in real time. Tap “Cleaning record’ to view the cleaning records of the working time and cleaned area. The data can also be cleared (Fig 23).
- Page 18 Supported Third-party control: The robot works with Amazon Alexa, Google Assistant and some other third party control devices. in the top right corner (Fig 27). The find ‘Supported Third-party Control” and tap the corresponding icon to make connection (Fig 28). Share Devices: Only one main ID for one single device is available.
-
Page 19: Product Usage/ Preparation
PRODUCT USAGE/ PREPARATION: IMPORTANT TIPS BEFORE USE: Remove power cords and small objects from the floor that may entangle Robot. You can use the supplied cable ties to organize your wires and power cords. Fold tasseled edges of area rugs underneath to prevent tangling Robot. Avoid cleaning very dark-colored high-pile rugs or rugs thicker than 1.02 in/26 mm as they may cause Robot to malfunction. - Page 20 Remove Protection Before using the Robot, remove the protective strip on the Robot and remove the protective film on the charging dock. Ensure the side brushes are installed according to the left and right (L/R) before use.
-
Page 21: Product Use/ Robot Charging
PRODUCT USE/ ROBOT CHARGING: 1. Placing and charging: Ensure the charging base is against the wall and placed on a hard, flat ground. Rather than on rugs or carpet. Do not place items within the range of 1m to the left or right or the charging base and 2m ahead. - Page 22 During the cleaning process, the Robot can sense that its power is insufficient and automatically enters “Back to Charge” mode” and automatically finds the charging base to charge. You can also command the Robot to enter “Back to Charge” mode through the “Re-charge” button on the remote control.
-
Page 23: Product Use: Using The Water Tank
PRODUCT USE: USING THE WATER TANK: Do not use the floor mopping function on carpets. After moping the floor, please empty the water tank and remove the mopping pad. Do not store the water tank with water inside it. Add water to the water tank. Lift the rubber flap to access the filling hole. Fill the water tank with clean fresh water only. -
Page 24: Component Maintenance/ Dust Container
Press the power button to begin mopping. All the buttons on the remote control can be used. When the power settings buttons in the app or on the remote are pressed, the water volume used during mopping is adjusted. The mop pad fabric is Nylon. Wash in clean cold water with a small amount of laundry detergent or powder. - Page 25 4. Open the high efficiency filter. Open the high-efficiency filter and take out the high- efficiency filter and the primary filter, it is not recommended to clean the high-efficiency filter with water. Tap gently to remove dust. 6. Rinse the primary filter. The dust container can be scrubbed clean with a dishcloth.
- Page 26 Dry the dust box and filter assembly, and keep it dry to ensure its service life. Note: It is recommended to wash the primary filter with water after use of about 15 - 30 days. The maximum service life of the high efficiency filter is 3 months. 9.
-
Page 27: Component Maintenance/ Main Brush And Side Brush
COMPONENT MAINTENANCE/ MAIN BRUSH AND SIDE BRUSH: 1. Open the main cover brush assembly. 2. Take out the main brush shaft. 3. Use to the utility tool for cleaning tangled hair. 4. Clean the main brush with a dry cloth (not included). -
Page 28: Component Maintenance/ Charge Dock Pins, Down View Sensor
COMPONENT MAINTENANCE/ CHARGE DOCK PINS, DOWN VIEW SENSOR, DRIVE WHEEL AND UNIVERSAL WHEEL: Reminder: The interior of the charging dock, the down-view sensor and the bumper all contain sensitive electronic components. Please use a dry cloth (not included) when cleaning. Do not use a damp or wet cloth to prevent damage caused by water inflow. -
Page 29: Troubleshooting
Battery failure Abnormal battery Contact Lenoxx customer service charging Wheels stuck Check whether the wheel is entangled with Wheel jammed foreign objects and clean up the entangled objects. Then press the power button... -
Page 30: Specifications
SPECIFICATIONS: Parameter Classification Item 330 mm Diameter 76mm Height Structural 3.40 kg Net weight Shell material Gyroscope Navigation Auto, Edge, Spot, Room, Schedule Cleaning 2.4G Wi-Fi 2500mAh Li-ion Battery 2000PA Fan motor 400/600/1000PA Suction power 600 ml Bin capacity 350 ml Water tank capacity 0.3m/s Speed...
Need help?
Do you have a question about the magivaac RV2000 and is the answer not in the manual?
Questions and answers