Advertisement
Quick Links
ASSEMBLY
INSTRUCTION
30 minutes
APPROXIMATE ASSEMBLY TIME
REQUIRED ASSEMBLY TOOLS
SOME FOAM TUBE DEFORMATION MAY TAKE PLACE DURING TRANSPORT.
DESCRIPTION
6VL33
JUNIOR TRAMPOLINE WITH SKIRT - Green
2 PERSON ASSEMBLY
NOTICE
IT'S NORMAL AND IT SHOULD RECOVER OVER TIME.
20/F, Parkview Centre, 7 Lau Li Street, Causeway Bay, Hong Kong.
After Service Centre (+44) 0330 0904 420
FLOOR AREA
1.5M×1.5M×2M
REQUIRED ASSEMBLY SPACE
WEIGHT 3.8KG, BUILD IN LOCATION
ASSEMBLED DIMENSIONS
Advertisement

Related Manuals for SPORTSPOWER 6VL33


Summary of Contents for SPORTSPOWER 6VL33
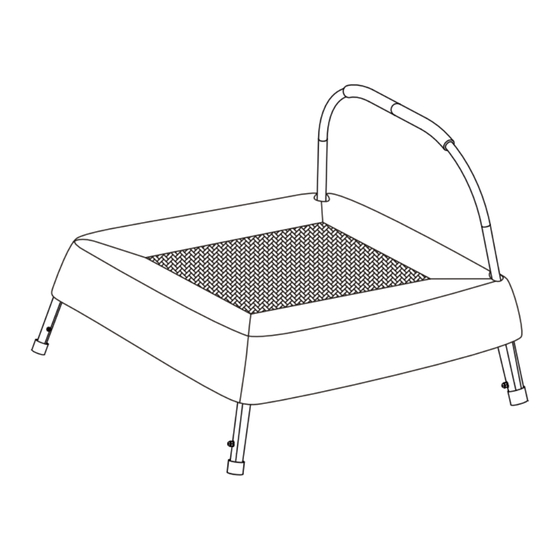
- Page 1 DESCRIPTION ASSEMBLY 6VL33 INSTRUCTION JUNIOR TRAMPOLINE WITH SKIRT - Green FLOOR AREA 1.5M×1.5M×2M 30 minutes APPROXIMATE ASSEMBLY TIME 2 PERSON ASSEMBLY REQUIRED ASSEMBLY SPACE WEIGHT 3.8KG, BUILD IN LOCATION REQUIRED ASSEMBLY TOOLS ASSEMBLED DIMENSIONS NOTICE SOME FOAM TUBE DEFORMATION MAY TAKE PLACE DURING TRANSPORT.
- Page 2 DESCRIPTION ASSEMBLY 6VL33 INSTRUCTION JUNIOR TRAMPOLINE WITH SKIRT - Green Part No. Description Picture LEFT HANDLE ARCH RIGHT HANDLE ARCH MAT WITH PAD ELASTIC CORD HOOK SLEEVE PLASTIC END CAP 20/F, Parkview Centre, 7 Lau Li Street, Causeway Bay, Hong Kong.
-
Page 3: Hardware List
DESCRIPTION ASSEMBLY 6VL33 INSTRUCTION JUNIOR TRAMPOLINE WITH SKIRT - Green HARDWARE LIST M6 x 36mm M6 x 33mm Φ6.5 x Φ14 Φ6.5 x Φ14 Bolt Short Bolt Flat Washer Spring Washer Cap Nut 10&13mm Spanner Allen Key 20/F, Parkview Centre, 7 Lau Li Street, Causeway Bay, Hong Kong. - Page 4 DESCRIPTION ASSEMBLY 6VL33 INSTRUCTION JUNIOR TRAMPOLINE WITH SKIRT - Green Top Tips before you start 1.Please check that all parts are in the package before you start the assembly of your product. Once assembled, the product is exempt from our home approval policy. IF ANY PARTS ARE MISSING, PLEASE CALL +44 0330 0904 420.
-
Page 5: Tightening Nuts And Bolts
DESCRIPTION ASSEMBLY 6VL33 INSTRUCTION JUNIOR TRAMPOLINE WITH SKIRT - Green ■ Dress children appropriately while on and around this product. Use well-fitting shoes that do not have slippery soles. DO NOT allow children to wear ponchos, scarves, hoods, jewelry, loose shoes, loose fitting clothing, neckties, clothing with loose strings and / or clothing that might be potentially hazardous while using this product. - Page 6 DESCRIPTION ASSEMBLY 6VL33 INSTRUCTION JUNIOR TRAMPOLINE WITH SKIRT - Green Step 1 Remove all parts from the packaging and lay the frame out in a large open space. 20/F, Parkview Centre, 7 Lau Li Street, Causeway Bay, Hong Kong. After Service Centre (+44) 0330 0904 420...
- Page 7 DESCRIPTION ASSEMBLY 6VL33 INSTRUCTION JUNIOR TRAMPOLINE WITH SKIRT - Green Step 2 Attach the two handle sections together securely with the spring clip located to the centre. The handles should form an arch. 20/F, Parkview Centre, 7 Lau Li Street, Causeway Bay, Hong Kong.
- Page 8 DESCRIPTION ASSEMBLY 6VL33 INSTRUCTION JUNIOR TRAMPOLINE WITH SKIRT - Green Step 3 Connect leg (3) and leg (4) using the short bolt (B), flat washer (C x 2), spring washer (D) and cap nut(E). Repeat this process for both the top and bottom holes of the leg frames.
- Page 9 DESCRIPTION ASSEMBLY 6VL33 INSTRUCTION JUNIOR TRAMPOLINE WITH SKIRT - Green Step 4 Place the assembled handle bar in between the #4 legs and secure the leg frames together as shown in the enlarged diagram. Once fully constructed, tighten all the fittings until firm.
- Page 10 DESCRIPTION ASSEMBLY 6VL33 INSTRUCTION JUNIOR TRAMPOLINE WITH SKIRT - Green Step 5 Position the mat (5) in the centre of the frame. Ensure the side with stitching is faced down. Starting at one corner, wrap the elastic cord (6) around the legs and up through the two straps as shown, ensuring that the length of the elastic cord is equal on both sides.
- Page 11 DESCRIPTION ASSEMBLY 6VL33 INSTRUCTION JUNIOR TRAMPOLINE WITH SKIRT - Green Step 6 Once the elastic cord has been fully wrapped around the mat and frame, attach the sleeve (8) and the hook (7) to the ends of the elastic cord as shown.
- Page 12 DESCRIPTION ASSEMBLY 6VL33 INSTRUCTION JUNIOR TRAMPOLINE WITH SKIRT - Green Step 7 Hook(7) the elastic ends together. Slide the plastic tube(8) over the hook covering it completely. Please take care when hooking the elastic cord around the final leg frame as the tension of the elastic cord at this point will be high.
- Page 13 DESCRIPTION ASSEMBLY 6VL33 INSTRUCTION JUNIOR TRAMPOLINE WITH SKIRT - Green Step 8 The trampoline mat and frame may need to be re-centered and re-aligned upon hooking the elastic around the trampoline legs due to high tension in the elastic cord. Please ensure that the gap between the mat and frame is equal on all four sides.
- Page 14 DESCRIPTION ASSEMBLY 6VL33 INSTRUCTION JUNIOR TRAMPOLINE WITH SKIRT - Green Step 9 Insert the end cap (9) into the legs. 20/F, Parkview Centre, 7 Lau Li Street, Causeway Bay, Hong Kong. After Service Centre (+44) 0330 0904 420 PAGE 14 OF 16...
- Page 15 DESCRIPTION ASSEMBLY 6VL33 INSTRUCTION JUNIOR TRAMPOLINE WITH SKIRT - Green Step 10 If the trampoline is not entirely straight after assembly, lift up the leg on one side and press down on the frame until it is straightened. Re-check all the screws to make sure they are securely fastened before use.
- Page 16 DESCRIPTION ASSEMBLY 6VL33 INSTRUCTION JUNIOR TRAMPOLINE WITH SKIRT - Green Step 11 Pull the pad(7) to fully cover the entire frame. Tie elastic bands around the legs. SP-19-SPW006PD-SD-17001 20/F, Parkview Centre, 7 Lau Li Street, Causeway Bay, Hong Kong. After Service Centre (+44) 0330 0904 420...
Need help?
Do you have a question about the 6VL33 and is the answer not in the manual?
Questions and answers