Table of Contents
Advertisement
Quick Links
T
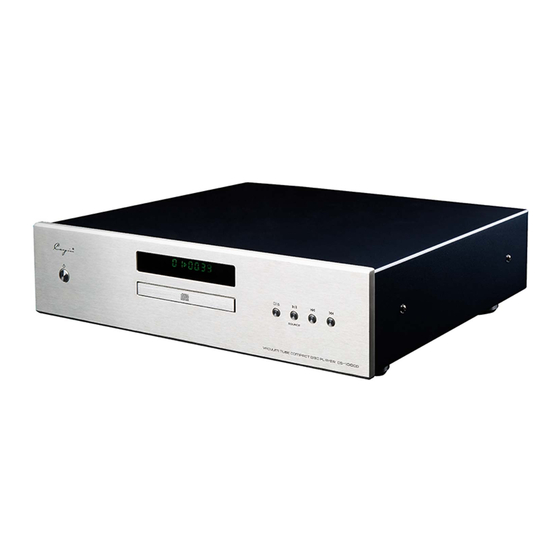
hank you for purchasing the Cayin CS-100CD compact disc player.
Used properly and carefully, it should give you many years of outstanding musical reproduction.
Please read this user manual carefully before using it.
ⅠOPENING THE PACKAGE
Please check the carton carefully whether there are any damages before you open it. Put it on a flat
surface with the arrow upward. Rip away the sealed tape and open the carton, then you'll find:
1. One set of CS-100CD compact disc player
2. SP-13H remote control unit
3. Two fuses
4. One power cord
5. One user manual
6. One warranty card
7. One USB cable
8. One driver software CD
ⅡFEATURES
Incorporated two pieces of PCM1792A DAC chip set from TI company for digital filter and D/A
converter. A fully balanced design for the output circuit.
Deploy dedicated, high quality Op-Amp for Low pass Filter circuit and I/V converter circuit.
Deploy four pieces of 6922EH vacuum tubes and audio grade capacitors for audio output. Separate
tube circuit for Balanced and Unbalanced output.
Deploy one 12DT5 for tube regulation so that it can have a superb power supply for the tube audio
circuit.
Versatile digital output and you can select between Optical, Coaxial or AES/EBU digital output.
Deploy USB Audio, Optical, Coaxial or AES/EUB for different input source selection.
Support Coaxial and Optical digital input and it is up to 24 bit/192 kHz.
Employ state of the art high resolution USB Audio technology, will accept and decode Hi-res digital
audio through USB interface and support up to 24 bit/192kHz.
Independent power supply to digital circuit and analogue circuit. Reduce power interference among
different circuit and make sure all components will have clean power all the time.
1
Advertisement
Table of Contents

Related Manuals for Cayin CS-100CD


Summary of Contents for Cayin CS-100CD
- Page 1 Cayin CS-100CD compact disc player. Used properly and carefully, it should give you many years of outstanding musical reproduction. Please read this user manual carefully before using it. ⅠOPENING THE PACKAGE Please check the carton carefully whether there are any damages before you open it. Put it on a flat surface with the arrow upward.
-
Page 2: Specifications
SPECIFICATIONS Ⅲ 1. CD PLAYER: Support CD,CD-R,16-bit 44.1kHz 2. Digital Input Optical input: 16/24-bit 44.1-192kHz Coaxial input: 0.5V @75Ω,16/24-bit 44.1-192kHz USB Audio : Compatible with Audio Class 1.0 and Audio Class 2.0. Support Windows 7® Windows 8® Windows 8.1® Windows 10® and Mac OS(10.6.3 and above) 2. - Page 3 Standby Button Standby Indicator Display Disc tray Remote sensor window Open/Stop button Play/Pause button Skip (previous) button Skip (next) button Ⅴ REAR PANEL Analog unbalance output (Right channel) Analog unbalance output (Left channel) Analog balance output (Right channel) Analog balance output (Left channel) Digital output (AES/EBU) Digital output (Coaxial) Digital output (Optical)
-
Page 4: Connection Diagram
AES/EBU output to the AES/EBU input of the DAC with AES/EBU cable. 4.Connect to Digital Audio Player Connect the COAXIAL input to the COAXIAL output of the digital audio player like Cayin N5,N6,i5 etc. with coaxial cable. Or you can connect the OPTICAL input to the OPTICAL output... -
Page 5: Remote Control Unit
of the digital audio player with optical cable. Note: Be sure to use at rated voltage. Please check whether the rated voltage marking on the rear panel corresponds to your line voltage. If not, please contact your dealer. CAUTION: Please shut down the power before connections in case of noise and damage to the unit. You need to wait for about 30 seconds after you turn on the unit every once, because the vacuum tube need to be preheated. -
Page 6: Installing Driver Software
Note: Point the Remote Control Unit at the Remote Sensor on the front panel within about 8 m and within about 30 . Do not drop or damp your remote control. The life of the batteries is about one year. Please replace the batteries in time. - Page 7 4. Follow the steps of the installation interface to continue,As below: 5. Click“Next”to install USB Audio 2.0 Class driver.
-
Page 8: Operation
6. Click“Finish”to complete the installation. There is no need to install driver software if your computer operation system is Mac. OPERATION Ⅷ 1. Turning on/off the unit Press the Power Switch (POWER) on the front panel, the standby indicator will light, and the unit will do self-check. - Page 9 Select CD Press the button on the front panel or press the “SOURCE” button on the remote control “/” unit to select CD state. the display will shows Playback 1.Press the Button on the front panel or the Button on the Remote Control Unit, “...
- Page 10 2) When accessing track numbers equal or greater than 10, press the two buttons of the track numbers in 2 seconds. For example, to select track 2, press the 2 button. To select track 12, press the 1 button and the 2 button in 2 seconds.
-
Page 11: Coaxial Input
USB, the display will show “USB”, USB input indicator will turn on. Select the USB audio device of the computer as CS-100CD Output, and keep it in working state. Press the button on the front panel or press the button on the remote control “”or“”... - Page 12 unit to enter the optical input interface. At the moment, the display will shows 3)Press the button on the front panel or press the button on the remote control “”or“” “”or“” unit can show the sample frequency. The sample frequency should be 44.1-192kHz. 6.Brightness adjusting (Remote only) This function allows you to adjust brightness of display window.
-
Page 13: Ⅻ Troubleshooting
3.When you wipe discs, Please move the cloth from the center hole toward the outer edge. 4.If a strange noise or vibration be heard or occur after starting playback, immediately press the Open/Close (or Open/Stop) Button to stop the disc rotation. 5.Please take out the disc from the disc tray when you do not need to use it. - Page 14 The disc cannot be Play the discs that can be identified identified by the player. The signal cables are not Connect the signal cables connected well. well. Just turning on the CD No sound. player, the vacuum tubes Wait for about 30 seconds after have not been preheated turning on power.
Need help?
Do you have a question about the CS-100CD and is the answer not in the manual?
Questions and answers