Table of Contents
Advertisement
Available languages
Available languages
ATTACH YOUR RECEIPT HERE
Serial Number
Questions, problems, missing parts? Before returning to your retailer, call our customer service
department at 1-866-439-9800, 8 a.m. - 6 p.m., EST, Monday - Thursday, 8 a.m. - 5 p.m., EST, Friday.
EB16163
welcoming • sophisticated • inspiring
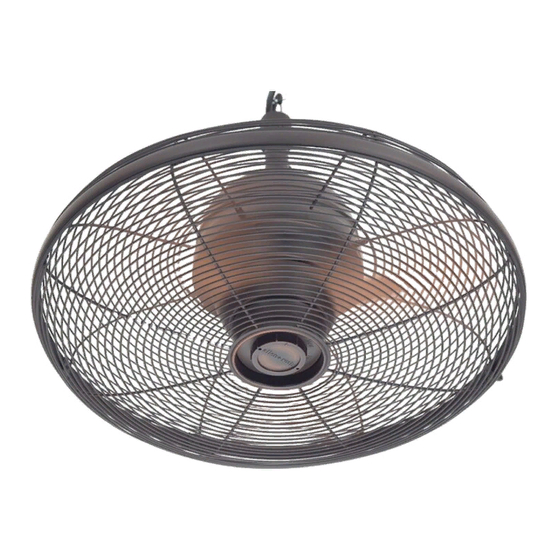
VALDOSTA PORTABLE FAN
Purchase Date
1
ITEM #0733159
MODEL #L1120H
Français p. 10
allenandroth.com
TM
Advertisement
Chapters
Table of Contents

Related Manuals for Allen + Roth VALDOSTA L1120H


Summary of Contents for Allen + Roth VALDOSTA L1120H
- Page 1 welcoming • sophisticated • inspiring ITEM #0733159 VALDOSTA PORTABLE FAN MODEL #L1120H Français p. 10 ATTACH YOUR RECEIPT HERE Serial Number Purchase Date Questions, problems, missing parts? Before returning to your retailer, call our customer service department at 1-866-439-9800, 8 a.m. - 6 p.m., EST, Monday - Thursday, 8 a.m. - 5 p.m., EST, Friday. EB16163 allenandroth.com...
-
Page 2: Table Of Contents
TABLE OF CONTENTS Package Contents....................... Hardware Contents......................Safety Information....................... Preparation ......................... Assembly Instructions......................Operating Instructions ......................Care and Maintenance ....................... Troubleshooting........................Limited Lifetime Warranty....................Replacement Parts List ...................... allenandroth.com... -
Page 3: Package Contents
PACKAGE CONTENTS PART DESCRIPTION QUANTITY Downrod Assembly Coupling Cover Rod Clip Motor Body Wire Clip Coupling (Preassembled to the Motor Body (D)) Cross Pin (Preassembled to Coupling (F)) Clip (Preassembled to Coupling (F)) Coupling Screw (Preassembled to Coupling (F)) allenandroth.com... -
Page 4: Hardware Contents
HARDWARE CONTENTS (shown actual size) Acorn Nut Set Screw Qty. 1 Qty. 1 SAFETY INFORMATION READ AND SAVE THESE INSTRUCTION • This fan is applicable only for gazebos or pagodas where a reliable mounting bracket is provided. • Ensure the hanging structure can support a minimum weight of 100 lbs. If you are not sure the hanging structure can support the weight, do not attempt to install this fan as it may fall and cause damage to the fan or personal injury. Contact a qualified, licensed electrician for information regarding proper mounting methods in your area. -
Page 5: Preparation
PREPARATION Before beginning assembly of the product, make sure all parts are present. Compare parts with package contents list and hardware contents list. If any part is missing or damaged, do not attempt to assemble the product. Estimated Assembly Time: 45 minutes Tools Required for Assembly (not included): Philips Screwdriver, Step Ladder, Tape and Pliers. - Page 6 ASSEMBLY INSTRUCTIONS 3. Insert downrod assembly (A) through coupling cover (B) into coupling (F). Make sure to align the hole in downrod assembly (A) with the hole in coupling (F). Install cross pin (G) through coupling (F) and downrod assembly (A). Insert clip (H) into cross pin (G) until it snaps into place.
-
Page 7: Operating Instructions
ASSEMBLY INSTRUCTIONS 6. Peel the backing off the adhesive tape stripes on the bottom of the wire clips (E). Attach the wire clips (E) as needed to the wall or ceiling and press gently. Clip the power cord to the wire clips (E). Plug the power cord into a ground 3-prong outlet. -
Page 8: Care And Maintenance
CARE AND MAINTENANCE IMPORTANT: Shut off the main power supply before beginning any maintenance. Do not use water or a damp cloth to clean the ceiling fan. • Clean fan housing with only a soft brush or lint-free cloth to avoid scratching the finish. Clean blades with a lint-free cloth. • This product employs overload protection (fuse). A blown fuse indicates an overload or short-circuit situation. If the fuse blows, unplug the product from the outlet and replace the fuse as below: 1) Grab the plug and remove it from the receptacle or other outlet device. -
Page 9: Limited Lifetime Warranty
PART DESCRIPTION PART # Downrod Assembly A103-0230275 Coupling Cover A106-0108275 Rod Clip B170-0010005 Wire Clip B166-0384036 Set Screw B171-0249070 Acorn nut B172-0446070 Printed in China allen + roth is a registered trademark of LF, LLC. All rights reserved ® allenandroth.com... - Page 10 welcoming • sophisticated • inspiring elcoming ARTICLE #0733159 VENTILATEUR PORTATIF VALDOSTA MODÈLE #L1120H JOIGNEZ VOTRE REÇU ICI Numéro de série Date d’achat Des questions, des problèmes, des pièces manquantes? Avant de retourner l’article au détaillant, appelez notre service à la clientèle au 1 866 439-9800, entre 8 h et 18 h (HNE), du lundi au jeudi, ou entre 8 h et 17 h (HNE) le vendredi.
- Page 11 TABLE DES MATIÈRES Contenu de l’emballage ...................... Quincaillerie incluse ......................Consignes de sécurité ......................Préparation ......................... Instructions pour l’assemblage .................... Mode d’emploi ........................Entretien ..........................Dépannage .......................... Garantie à vie limitée ......................Liste des pièces de rechange ..................... allenandroth.com...
-
Page 12: Contenu De L'emballage
CONTENU DE L’EMBALLAGE PIÈCE DESCRIPTION QUANTITÉ Ensemble de tige Couvercle du raccord Pince de tige Corps du moteur Attache-câble Raccord (préassemblé au corps du moteur [D]) Goupille latérale (préassemblée au raccord [F]) Attache (préassemblée au raccord [F]) Vis du raccord (préassemblée au raccord [F]) allenandroth.com... -
Page 13: Quincaillerie Incluse
QUINCAILLERIE INCLUSE (grandeur réelle illustrée) Écrou borgne Vis de calage Qté : 1 Qté : 1 CONSIGNES DE SÉCURITÉ VEUILLEZ LIRE ET CONSERVER CES INSTRUCTIONS Ce ventilateur convient uniquement aux pavillons de jardin et aux pagodes dotés d’un support de fixation solide. Assurez-vous que la structure peut soutenir un poids d’au moins 45,35 kg. -
Page 14: Préparation
PRÉPARATION Avant de commencer l’assemblage du produit, assurez-vous d’avoir toutes les pièces. Comparez le contenu de l’emballage avec la liste de la quincaillerie incluse. S’il y a des pièces manquantes ou endommagées, ne tentez pas d’assembler l’article. Temps d’assemblage approximatif : 45 minutes. Outils nécessaires pour l’assemblage (non inclus) : tournevis cruciforme, escabeau, ruban et pinces. - Page 15 INSTRUCTIONS POUR L’ASSEMBLAGE 3. Insérez l’ensemble de tige (A) dans le couvercle du raccord (B) situé sur le raccord (F). Assurez-vous d’aligner le trou de l’ensemble de tige (A) sur le trou du raccord (F). Insérez la goupille latérale (G) dans le raccord (F) et dans l’ensemble de tige (A).
-
Page 16: Mode D'emploi
INSTRUCTIONS POUR L’ASSEMBLAGE 6. Retirez la pellicule des bandes adhésives situées sous les attache-câble (E). Fixez les attache-câble (E) au mur ou au plafond en appuyant doucement. Fixez le cordon d’alimentation aux attache-câble (E). Branchez le cordon d’alimentation dans une prise à trois alvéoles mise à... -
Page 17: Entretien
ENTRETIEN IMPORTANT : Avant de procéder à tout entretien, coupez l’alimentation électrique principale.. N’utilisez ni eau ni linge humide pour nettoyer le ventilateur de plafond. Pour éviter d’égratigner le fini au nettoyage, utilisez uniquement une brosse souple ou un linge non pelucheux. -
Page 18: Garantie À Vie Limitée
Ensemble de tige A103-0230275 Couvercle du raccord A106-0108275 Pince de tige B170-0010005 Attache-câble B166-0384036 Vis de calage B171-0249070 Écrou borgne B172-0446070 Imprimé en Chine allen + roth ® est une marque de commerce déposée de LF, LLC. Tous droits réservés. allenandroth.com...
Need help?
Do you have a question about the VALDOSTA L1120H and is the answer not in the manual?
Questions and answers
How do I get the switch knob off so I can take the fan guard to wash it. Birds built a nest on the top of the fan guard and it is a mess.