Advertisement
USER MANUAL
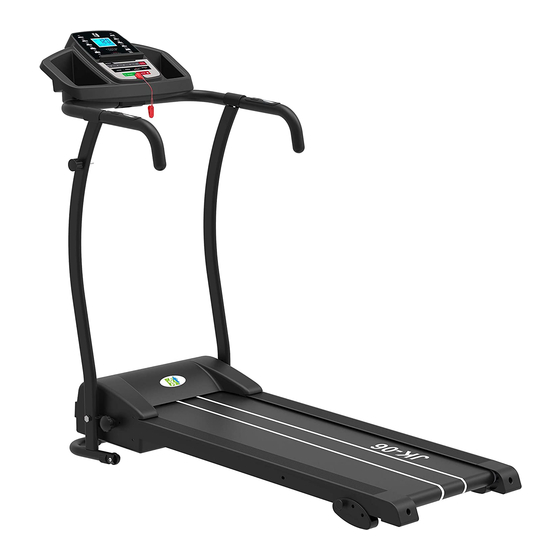
JK-06 TREADMILL
Please Keep For Future Reference
F4H-TM-JK06
IMPORTANT - Please Read Instructions Fully Before Assembly Or Use
These instructions contain important information which will help you get the best
from your equipment and ensure safe and correct assembly, use and maintenance.
If you need help or have damaged or missing parts,
call the Customer Helpline: 0330 124 0718 (Opening hours: Mon-Fri 9:00am-6:00pm)
or Email: customerservices@fit4home.co.uk
1
Advertisement
Table of Contents

Subscribe to Our Youtube Channel
Related Manuals for Fit4Home JK-06


Summary of Contents for Fit4Home JK-06
- Page 1 USER MANUAL JK-06 TREADMILL Please Keep For Future Reference F4H-TM-JK06 IMPORTANT - Please Read Instructions Fully Before Assembly Or Use These instructions contain important information which will help you get the best from your equipment and ensure safe and correct assembly, use and maintenance.
-
Page 2: Table Of Contents
CONTENTS Safety Information 03, 04 Tool Kid Assembly Instructions Step 1 Step 2 Step 3 Folding Instructions Operating the Monitor 09-11 Care & Maintenance 12-14 Warm Up & Cool Down 15,16 Fit4Home Declaration... -
Page 3: Safety Information
IMPORTANT SAFETY INFORMATION Basic precautions, including the following important safety instructions should always be followed when using this treadmill. Read all instructions before using this treadmill. DANGER: To reduce the risk of electric shock, always unplug the treadmill from the electrical outlet immediately after using and before cleaning, assembling, or servicing the treadmill. - Page 4 IMPORTANT SAFETY INFORMATION • Always hold on to the handrails while using the treadmill. • Always make sure the spring knob and round knob are in place when folding and moving the treadmill. • Do not leave children who are under 12 years-old unsupervised near or on the treadmill. •...
-
Page 5: Tool Kid
ASSEMBLY INSTRUCTIONS TOOL KIT STEP 1 1. Place the treadmill in the upright position on a level flat surface. 2. Semi-tighten the Knob (28) by turning it in a clockwise direction into the holes on the Base Frame, and tighten it by Wrench. -
Page 6: Step 2
ASSEMBLY INSTRUCTIONS STEP 2 1. Remove the four Head Hex Socket Screws in the end of the Left Stand Tube and Right Stand Tube. 2. Attach the Handlebar onto both ends of the Stand Tube, tighten the screws with the Allen Key provided. - Page 7 ASSEMBLY INSTRUCTIONS STEP 3 1. Turn the Computer Console up or down to align the Socket Head Screw hole. 2. Lock the Computer Console in place by tightening the Socket Head Screw (9).
-
Page 8: Folding Instructions
FOLDING INSTRUCTIONS TO FOLD After use, unscrew the safety lock on the bottom frame, fold the treadmill and pull the expandable safety lock out from the left Upright and release to lock the treadmill in an upright position. To avoid losing the safety lock, screw the safety lock to the bottom and upper frames whilst in an upright position. - Page 9 OPERATING THE COMPUTER TURNING ON THE MACHINE Turning on the power at the wall and the red ON/OFF power switch at the back of the machine. The machine should beep and the LED display will light up the console - you are now in stand by mode TURNING OFF THE MACHINE When you have finished your workout, press the red ON/OFF switch at the back of the machine,...
- Page 10 OPERATING THE COMPUTER STARTING THE MACHINE To start the machine, press the START button and the 3 second countdown will begin. The machine will start at the lowest speed of 0.8 km/h for 60 seconds CHANGING THE SPEED There are 3 ways to increase or decrease the speed 1.
- Page 11 OPERATING THE COMPUTER PROGRAMME There are 12 pre-set programs for you to choose and you can change the time and speed. The pre-set programs each have a pre-set time of 30 minutes that is divided into 20 segments of 1.5 minutes (each representing 5% of the total time selected). Refer to the table below: 1.
- Page 12 CARE AND MAINTENANCE WARNING: To prevent electrical shock, please turn off and unplug the treadmill before cleaning or performing routine maintenance. WARNING: Always check the wear and tear components like spring knob and running belt to prevent injury. CLEANING After each exercise, ensure that the unit is wiped down and any sweat is removed from the unit. The treadmill can be cleaned with a soft cloth and mild detergent.
- Page 13 CARE AND MAINTENANCE LUBRICATION Lubricating under the running belt will ensure superior performance and extend its life expectancy. After the first 25 hours of use (or 2-3 months) apply some lubricant, and repeat for every following 50 hours of use (or 5-8 months). How to check running belt for proper lubrication Lift one side of the running belt and feel the top surface of the running deck.
- Page 14 CARE AND MAINTENANCE BELT ADJUSTMENT The running belt is pre-adjusted to the running deck at the factory, but after prolonged use it can stretch and require readjustment. To adjust the belt, turn on the main power switch of the treadmill and let the belt run at a speed of 8-10 KPH. Use the 6 mm Allen Wrench provided to turn the rear roller adjustment bolts in order to centre the belt.
-
Page 15: Warm Up & Cool Down
WARM UP AND COOL DOWN EXERCISE INSTRUCTIONS The WARM-UP is an important part of any workout. The purpose of warming up is to prepare your body for exercise and to minimize injuries. Warm up for two to five minutes before aerobic exercising. - Page 16 WARM UP AND COOL DOWN ROUTINE QUADRICEP STRETCH With one hand against a wall for balance, reach behind you and pull your right foot up.Bring your heel as close to your buttocks as possible. Hold for 15 counts and repeat with left foot. INNER THIGH STRETCH Sit with the soles of your feet together and your knees pointing outward.
-
Page 17: Fit4Home
FIT4HOME LTD Fit4Home is essentially an online business which aims to provide high quality Exercise and Fitness products to ensure all customers maintain a healthy lifestyle. At Fit4Home we stock various different types of fitness and exercise equipment such as Treadmills, Cross Trainers, Weights, Exercise Bikes etc and aim to provide an excellent service to each and every one of our valued customers. -
Page 18: Declaration
Declaration of Conformity We, Importer Fit4home Ltd Unit A, Perseverance Mills, Olive Lane, Darwen BB3 3DQ United Kingdom Declare that the product HSM- MT05J Fit4 homeJK06 Treadmill Complies with the following European Directives: EC Low Voltage Directive 2014/35/EU EC Electromagnetic Compatibly Directive...
Need help?
Do you have a question about the JK-06 and is the answer not in the manual?
Questions and answers