Table of Contents
Advertisement
Quick Links
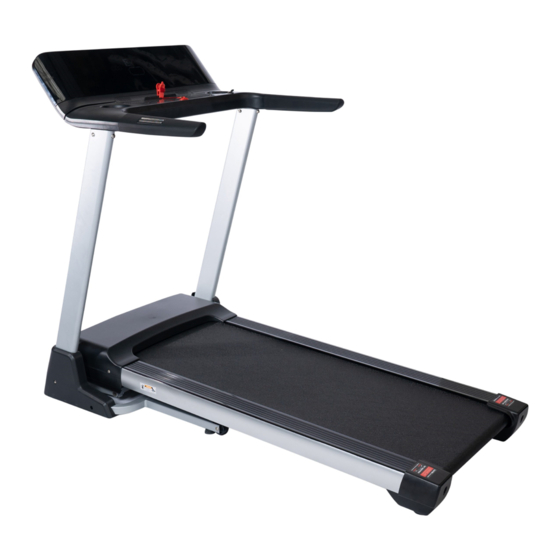
USER MANUAL
TF-D6501 TREADMILL
Please Keep For Future Reference
F4H-TM-TFD6501
IMPORTANT - Please Read Instructions Fully Before Assembly Or Use
These instructions contain important information which will help you get the best
from your equipment and ensure safe and correct assembly, use and maintenance.
If you need help or have damaged or missing parts,
call the Customer Helpline: 0330 124 0718 (Opening hours: Mon-Fri 9:00am-3:00pm)
or Email: customerservices@fit4home.co.uk
1
Advertisement
Table of Contents

Related Manuals for Fit4Home TF-D6501


Summary of Contents for Fit4Home TF-D6501
- Page 1 USER MANUAL TF-D6501 TREADMILL Please Keep For Future Reference F4H-TM-TFD6501 IMPORTANT - Please Read Instructions Fully Before Assembly Or Use These instructions contain important information which will help you get the best from your equipment and ensure safe and correct assembly, use and maintenance.
-
Page 2: Table Of Contents
CONTENTS Safety Information 03-04 Assembly Instructions Step 1 Step 2 Step 3 Step 4 Step 5 Folding Instructions Technical Parameter Computer Operation Guide 10-14 Exercise Instructions 15-16 Warm Up Running Belt Adjustment 18-19 Exploded Drawing Parts List 21-22 Troubleshooting Declaration... -
Page 3: Safety Information
IMPORTANT SAFETY INFORMATION Warning: We suggest that you should consult with your physician or health professional before starting your workout, especially for the age up to 35 old or health problem related people. We take no responsible for any troubles or hurts if you don’t following our specification. - Page 4 IMPORTANT SAFETY INFORMATION When you open the carton, and you will find the below parts in the carton DES. Spec Nos. DES. Spec Nos. Main frame Wrench with S=13, 14, 15 screw driver Panel assembly Bolt M8*45 Left base cover Bolt M6*15 Right base cover...
-
Page 5: Assembly Instructions
ASSEMBLY INSTRUCTIONS STEP 1 Open the carton, take out the above spare parts, put the Main Frame on the level ground. STEP 2 1. As the left picture A/B, first folding the computer and upright up in the direction of the arrow; 2. -
Page 6: Step 3
ASSEMBLY INSTRUCTIONS STEP 3 1. Connect the communication lines C and D one by one; 2. Then put the panel assembly(7) into console board assembly(6) and lock the bolt (40) , Spring washer(24), Flat washer (20) into panel assembly(7) STEP 4 1. -
Page 7: Step 5
ASSEMBLY INSTRUCTIONS STEP 5 1. Put the safety key (62) on the computer. ATTENTION: Please confirm complete assembly as the require above and lock all the bolt. Do the following operation after checking everything is OK. Before you use the treadmill, please read the instruction carefully. -
Page 8: Folding Instructions
FOLDING INSTRUCTIONS PULLING UP 1. Pull up the base frame at position( A) till hearing the sound that the air pressure bar (B) is locked into the round tube. PULLING DOWN 1. Support place A with hand , kick the place of air pressure bar, then the base frame will fall down automatically (Please keep anybody and any pet away the machine when falling down). -
Page 9: Technical Parameter
TECHNICAL PARAMETER BUILT UP SIZE (mm) 1660*840*1280mm POWER As the rating label showing FOLDED SIZE (mm) 960*840*1370mm MAXIMUM As the rating OUTPUT label showing POWER RUNNING AREA (mm) 500*1300 SPEED RANGE 1.0-18KM/H NET WEIGHT 70kg MAX USER 120KG WEIGHT 1 LCD WINDOW DISPLAY SPEED, TIME, DISTANCE, PULSE, CALORIES GROUNDING METHODS This product must be grounded. -
Page 10: Computer Operation Guide
COMPUTER OPERATION GUIDE 1. DISPLAY WINDOW 2. LCD WINDOW DISPLAY DETAILS INCILNE and CALORIES: Show Incline and calories, When the corresponding icon is lit, the corresponding element is displayed; TIME: Show running time; SPEED: Shows speed; PULSE and DISTANCE : Show heart beat data and running distance, When the corresponding icon is lit, the corresponding element is displayed;... - Page 11 COMPUTER OPERATION GUIDE “INCLINE (3,6,9,12) ”, Adjust the incline quickly. Left Handrail Button: Incline adjustment button. Right handrail button: Speed adjustment button. Notice: When any button is pressed, it will be accompanied by a prompt tone. When the button is adjusted for parameter overrun, it will be accompanied by a long tone prompt.
- Page 12 COMPUTER OPERATION GUIDE 5. HEART BEAT TEST When holding the hand pulse by two hands, the pulse window will show your heart beat after 5 seconds. In order to get an accurate heartbeat value, please holding the hand pulse more than 30 seconds to test when the machine stop.
- Page 13 COMPUTER OPERATION GUIDE 8. SAFETY KEY FUNCTION Pull out the safety pulling rope, then the treadmill will stop immediately. All the windows display“―――”. The incline keeps the current position inactive the buzzer will make 3 sound “B—B—”,now the treadmill must be stop. Attach the magnet end of the safety pulling rope to the computer, the treadmill will be at the beginning of running.The incline is still in its current position and does not move.
- Page 14 COMPUTER OPERATION GUIDE 13. DATE TABLE TIME To set time / 20 time = running time of each period PROG SPEED INCLINE SPEED INCLINE SPEED INCLINE SPEED INCLINE SPEED INCLINE SPEED INCLINE SPEED INCLINE SPEED INCLINE SPEED INCLINE SPEED INCLINE SPEED INCLINE SPEED...
-
Page 15: Exercise Instructions
EXERCISE INSTRUCTIONS WARM UP STAGE If you are over 35 years old, or not very healthy, also it’s your first time exercise, please consult with your doctor or professional person. Before you use the motorized treadmill, please learn how to control the machine, know well how to start, stop, adjust the speed and so on, don’t stand on the machine at this time. - Page 16 EXERCISE INSTRUCTIONS EXERCISE FREQUENCY The cycle time: 3-5times/Week, 15-60mints/Times.Make up the schedule of workout scientific, not only for your hobby. You can control the running intensity through adjusting the velocity and incline of treadmill. We suggest that you don’t set the incline at first; improve the incline is the effective way to strengthen the exercise’s intensity.
-
Page 17: Warm Up
WARM UP STAGE EXERCISE FREQUENCY Before exercise, it is better to do stretching exercises . Warm muscles stretch more easily, so the first of 5 ~ 10 minutes to warm up. Then in accordance with the following methods to stop and do stretching exercises - do five times, each leg every time 10 seconds or more time to do it again after the end of the exercise. -
Page 18: Running Belt Adjustment
RUNNING BELT ADJUSTMENT RUNNING BELT ADJUSTMENT Warning: ALWAYS UNPLUG THE TREADMILL FROM THE ELECTRICAL OUTLET BEFORE CLEANING OR SERVICING THE UNIT. Clean: General cleaning or the unit will greatly prolong the treadmill. Keep treadmill clean by dusting regularly. Be sure to clean the exposed part of the deck on either side of the walking belt and also the side rails. - Page 19 RUNNING BELT ADJUSTMENT CENTRE THE RUNNING BELT PIC A Place treadmill on a level surface. Run Treadmill at approximately 6-8KM/H, checking the running condition. If the belt has drifted to the right, pull out of the save clock and switch, turn the right adjusting bolt 1/4 turn clockwise, then start running until centering the belt.
-
Page 20: Exploded Drawing
EXPLODED DRAWING... -
Page 21: Parts List
PARTS LIST DESCRIPTION SPECS DESCRIPTION SPECS. Main frame Bolt M10*55 Base frame Distance sleeve Incline frame Cushion Left upright Isolation nylon pad Right upright Motor top cover Computer brack- Motor bottom cover Panel assembly Panel cover Left rotating Panel top cover plate Right rotating Panel bottom... - Page 22 PARTS LIST Spring washer Right base cover Spring washer Transport wheel Screw ST4.2*20 Foot Pad Φ30*18 Lock washer Oil bottle Screw ST4.2*20 Running board Screw ST4.2*25 DC motor Screw ST4.2*9 Incline motor Screw ST4.2*20 Single wire Screw ST4.2*50 Pulse wire Bolt M10*50 Control board...
-
Page 23: Troubleshooting
TROUBLESHOOTING CODE REASON SOLUTION 1.message wire is broken or 1.Check if the computer and bottom control board not connected well wire connect well; 2. Check if IC on bottom control board is loosen, reset the IC 1. Burst clash 1. Check if the power voltage is 50% lower than the normal voltage, please use the normal voltage to test;... -
Page 24: Declaration
Declaration of Conformity We, Importer Fit4home Ltd Unit A, Perseverance Mills, Olive Lane, Darwen BB3 3DQ United Kingdom Declare that the product STRYDER K6501 Treadmill Complies with the essential health and safety requirements of the following directive: EN 60335-1:2012 + A11:2014 +A13:2017...
Need help?
Do you have a question about the TF-D6501 and is the answer not in the manual?
Questions and answers