
Related Manuals for Toshiba ML2-TC10SAIT


Summary of Contents for Toshiba ML2-TC10SAIT
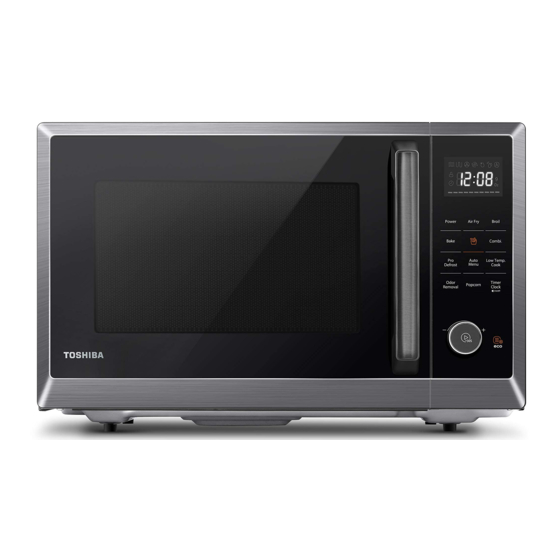
- Page 1 MICROWAVE OVEN INSTRUCTION MANUAL ML2-TC10SAIT(BS) Please review this instruction manual before operating.
-
Page 2: Table Of Contents
CONTENTS PRODUCT SAFETY Precautions to avoid possible exposure to excessive microwave energy Important safety instructions Grounding instructions Radio interference Utensils Materials you can use in microwave oven Materials can not be used in microwave oven PRODUCT SETTING Setting up your oven INSTRUCTION FOR USE Before using for the first time Operation... - Page 3 11. Weight Defrost 12. Time Defrost 13. Sensor Cook 14. Speed Cooking 15. Lock Function 16. Silent Mode 17. ECO Function 18. Inquiring Function Cleaning MAINTENANCE Trouble shooting One year limited warranty BEFORE OPERATING THIS PRODUCT, READ, UNDERSTAND, AND FOLLOW THESE INSTRUCTIONS. BE SURE TO SAVE THIS BOOKLIST FOR FUTURE NOTE REFERENCE.
-
Page 4: Product Safety
PRODUCT SAFETY PRECAUTIONS TO AVOID POSSIBLE EXPOSURE TO EXCESSIVE MICROWAVE ENERGY (a). Do not attempt to operate this oven with the door open. Operating with the door open can result in harmful exposure to microwave energy. It is important not to defeat or tamper with the safety interlocks. - Page 5 SPECIFICATIONS MODEL ML2-TC10SAIT(BS) RATED VOLTAGE 120V~ 60Hz RATED INPUT POWER(MICROWAVE) 1250W RATED OUTPUT POWER(MICROWAVE) 1000W RATED INPUT POWER(GRILL) 1000W RATED INPUT POWER(CONVECTION) 1800W All pictures in this manual are for illustrative purposes only; these may be slightly different from the purchased equipment, please refer to the NOTE actual product.
-
Page 6: Important Safety Instructions
IMPORTANT SAFETY INSTRUCTIONS To reduce the risk of burns, electric shock, fire, injury to persons or exposure to excessive microwave energy. WARNING When using electrical appliances, basic safety preca- utions should be followed, including the following. Read all instructions before As with any appliance, using the appliance. - Page 7 IMPORTANT SAFETY INSTRUCTIONS Liquids, such as water, removing the container. coffee, or tea are able 5. Use extreme care when to overheat beyond the inserting a spoon or boiling point without other utensil into the appearing to be boiling. container. Visible bubbling or boiling when the container is removed from the...
- Page 8 IMPORTANT SAFETY INSTRUCTIONS bag before placing bag closed glass jars are able to in oven. explode and should not be 3. If material inside of the heated in this oven. oven ignite, keep oven door closed, turn oven off, and disconnect the power cord, or shut off power at the fuse or circuit breaker panel.
- Page 9 IMPORTANT SAFETY INSTRUCTIONS this appliance. This type Do not let the cord hang over of oven is specifically edge of table or counter. designed to heat, cook or Do not use paper products dry food. when appliance is operated It is not designed for in the toaster mode.
-
Page 10: Grounding Instructions
GROUNDING INSTRUCTIONS This appliance must be grounded. In the event of an electrical short circuit, grounding reduces the risk of electric shock by providing an escape wire for the electric current. This appliance is equipped with a cord having a grounding wire with a grounding plug. - Page 11 GROUNDING INSTRUCTIONS Electric Shock Hazard: Improper use of the grounding can result in electric shock. Do not plug into an outlet until appliance is properly installed and grounded. 1. A short power-supply cord is provided to reduce the risks resulting from becoming entangled in or tripping over a longer cord.
-
Page 12: Radio Interference
RADIO INTERFERENCE 1. Operation of the microwave oven may cause interference to your radio, TV or similar equipment. 2. When there is interference, it may be reduced or eliminated by taking the following measures: (1). Clean door and sealing surface of the oven. (2). -
Page 13: Utensils
UTENSILS Personal Injury Hazard: Tightly-closed utensils could explode. Closed containers should be opened and plastic pouches should be pierced before cooking. See the instructions on "Materials you can use in microwave oven ." or "Materials can not be used CAUTION in microwave oven ."... -
Page 14: Materials You Can Use In Microwave Oven
MATERIALS YOU CAN USE IN MICROWAVE OVEN UTENSILS REMARKS Follow manufacturer’s instructions. The bottom of browning dish must be at least 3/16 inch (5mm) above the turntable. Incorrect usage may cause Browning dish the turntable to break. Microwave-safe only. Follow manufacturer’s instructions. Do not use cracked or chipped dishes. - Page 15 MATERIALS YOU CAN USE IN MICROWAVE OVEN UTENSILS REMARKS Microwave-safe only. Follow the manufacturer’s instructions. Should be labeled “Microwave Safe”. Some plastic containers soften, as the food inside gets hot. “Boiling bags” and tightly closed plastic bags should be Plastic slit, pierced or vented as directed by package.
-
Page 16: Materials Can Not Be Used In Microwave Oven
MATERIALS CAN NOT BE USED IN MICROWAVE OVEN UTENSILS REMARKS May cause arcing. Transfer food into microwave-safe dish. Aluminum tray May cause arcing. Transfer food into microwave-safe dish. Food carton with metal handle Metal shields the food from microwave energy. Metal trim may cause arcing. -
Page 17: Product Setting
PRODUCT SETTING SETTING UP YOUR OVEN NAMES OF MICROWAVE OVEN PARTS AND ACCESSORIES Remove the oven and all materials from the carton and oven cavity. Glass turntable Bake Tray (Cannot be used in conjunction with microwave function and can be placed on the girll rack) Lower Wire Rack ( Can not be used in Grill Rack ( Can not be used in... - Page 18 SETTING UP YOUR OVEN TURNTABLE INSTALLATION Clean the cooking compartment and place the turntable. For new installations, make sure all packaging and shipping tape has been removed from the turntable shaft. Before using the appliance to prepare food for the first time, you will need to put the turntable in place correctly.
- Page 19 COUNTERTOP INSTALLATION Remove all packing material and accessories. Examine the oven for any damage such as dents or broken door. Do not install if oven is damaged. Cabinet: Remove any protective film found on the microwave oven cabinet surface. Do not remove the light brown Mica cover that is attached to the oven cavity to protect the magnetron.
-
Page 20: Instruction For Use
INSTRUCTION FOR USE BEFORE USING FOR THE FIRST TIME The appliance may produce unpleasant odors when it is used for the first time. This section tells you what you need to do before using your microwave to prepare food for the first time. -
Page 21: Operation
OPERATION CONTROL PANEL AND FEATURES STOP/Cancel... -
Page 22: Power Levels
1. POWER LEVELS Ten power levels are available. Prior to cooking, press Power and "PL10" will display. Then press Power repeatedly to select a di erent power level. Please refer to page 21 "MICROWAVE COOK" for detailed power level setting. LEVEL POWER DISPLAY... -
Page 23: Kitchen Timer
Press Kit.Timer/Clock to con rm. • If the numbers entered are not within the range between 1:00 to 12:59, the setting will not be accepted until valid numbers are entered. • In the process of setting clock, if the STOP/Cancel pad is pressed or NOTE if there is no operation within 1 minute, the display will automatically return to the previous clock setting. -
Page 24: Microwave Cook
4. MICROWAVE COOK When the microwave oven is plugged into an outlet, "0:00" will display. Press Power repeatedly to choose the power level. Press Power once, and then turn the knob to set the power level Press to con rm the power level. Turn the knob to set the time,it should be within 0:05-95:00. -
Page 25: Combination Function (Convection + Microwave)
Turn the knob to set the time,it should be within 0:05-95:00. to start cooking. Press • When half of the time has passed, the buzzer will sound to remind you to turn the food over. If no operation, the oven will continue working. NOTE •... -
Page 26: Convection With Preheat
7. Convection with preheat Press Broil/Bake repeatedly to set the temperature. “100°F,150°F,250°F,275°F, 300F, 325F, 350°F,375°F” 400°F,425°F are available . Press Broil/Bake repeatedly twice, “100°F”will display,turn the knob to set the temperature. Press twice to start preheating. When preheating is completed, The temperature will ash,open the door and place food in the oven. -
Page 27: Auto Menu
9. Auto Menu In stand by state, Turn the knob right to set the menu. A01-A06 will display in order. Press to con rm the menu. Turn the knob to set the weight of the food. Press to start cooking. WEIGHT/ MENU DISPLAY... -
Page 28: Homefry
10. HomeFry Press repeatedly to choose the home fry menus. Press once ,“H01” will display, and then turn the knob to choose the home fry menus, H01-H10 are available. Press to con rm, and then press again to start cooking. WEIGHT/PORTION FOOD DISPLAY... -
Page 29: Time Defrost
Press to con rm. Turn the knob to choose the defrost weight, it should be within 4-70Oz. Press to start counting down. LED DISPLAY WEIGHT RANGE Vegetables 4-70Oz dEF1 dEF2 4-70Oz Fruit Chicken dEF3 4-70Oz Fish dEF4 4-70Oz Meat dEF5 4-70Oz Broth dEF6... -
Page 30: Sensor Cook
Press to con rm. Turn the knob to choose the defrost time, it should be within 0:05-95:00. Press to start counting down. 13. SENSOR COOK Press Sensor Cook repeatedly to choose the type of food. Press Sensor Cook once, Turn the knob to choose the type of food. -
Page 31: Speed Cooking
14. SPEED COOKING In stand-by state, turn the knob left to set the cooking time with 100% microwave power. It should be within 0:05-95:00. After setting the cooking time, press to start cooking Press once to cook with 100% microwave power with 30 seconds directly. -
Page 32: Silent Mode
SILENT MODE To enter the silent mode In stand-by state, press Sound On/OFF Lock 3s pad once, the screen will display “oFF” for 3 seconds. To exit the silent mode In stand-by and slient mode, press Sound On/OFF Lock 3s pad once, the screen will display “on”... -
Page 33: Cleaning
CLEANING With good care and cleaning, your appliance will retain its appearance and remain fully functioning for a long time to come. We will explain below how you should correctly care for and clean your appliance. • Scratched glass in the appliance door may develop into a crack. Do not use a glass scraper, sharp or abrasive cleaning aids or detergents. - Page 34 APPLIANCE FRONT WITH STAINLESS STEEL Hot soapy water: Clean using a dish cloth and then dry with a soft cloth. Remove splashes and patches of limescale, grease, starch and albumin immediately. Corrosion can form under these patches or splashes. Do not use glass cleaners or metal or glass scrapers for cleaning.
-
Page 35: Maintenance
MAINTENANCE TROUBLE SHOOTING Check your problem by using the chart below and try the solutions for each problem. If the microwave oven still does not work properly, contact the nearest authorized service center. TROUBLE POSSIBLE CAUSE POSSIBLE REMEDY a. Electrical cord for oven is not a. -
Page 36: One Year Limited Warranty
If service is required during the warranty period, properly pack your unit. We recommend using the original carton and packing materials. If additional assistance is needed, please contact customer assistance at: customercare@us.toshiba-lifestyle.com 855-204-5313 Midea America Corp. expressly disclaims all responsibility for consequential damages or incidental losses caused by use of the appliance. - Page 40 #DetailsMatter Customercare@us.toshiba-lifestyle.com 855-204-5313...
Need help?
Do you have a question about the ML2-TC10SAIT and is the answer not in the manual?
Questions and answers
I lost all power on unit. I have tried a different, known good, outlet. I get no power at all.
A Toshiba ML2-TC10SAIT unit losing all power could be caused by several factors:
1. Power Supply Issue – The unit may not be properly connected to a grounded outlet, or there could be a problem with the electrical supply.
2. Blown Fuse or Tripped Circuit Breaker – A power surge or overload could have caused a fuse inside the microwave to blow or a circuit breaker to trip.
3. Internal Component Failure – A malfunction in internal components, such as the power cord, transformer, or control board, could cause a loss of power.
4. Warranty Limitations – If the unit has been subjected to misuse, incorrect voltage, or non-household use, it may no longer function properly, and warranty service may not be available.
If the issue persists, professional service personnel should inspect the unit, as recommended in the manual.
This answer is automatically generated
@Mr. Anderson
How do I use the Combi cook function. Can I only use this function with the glass turntable?
To use the Combi cook function on the Toshiba ML2-TC10SAIT:
1. Press the "Combi." button repeatedly or press once and turn the knob to select the desired mode (C-1 or C-2).
2. Press to confirm.
3. Turn the knob to set the cooking time (between 0:05 and 95:00).
4. Press to start cooking.
Yes, the Combi cook function must be used with the glass turntable properly installed. The appliance should never be used without the turntable.
This answer is automatically generated
I run the microwave but it doesn't heat properly and shows an E before the time ends
Your Toshiba microwave ML2-TC10SAIT may not be heating properly and displaying an "E" before the time ends due to several possible reasons:
1. Door Not Fully Closed – Ensure the door is completely shut, as the microwave will not operate if the door is open or not latched properly.
2. Power Supply Issue – Check if the microwave is plugged into a properly grounded outlet and receiving adequate power.
3. Incorrect Settings – Verify that the correct cooking mode, time, and temperature are selected.
4. Faulty Internal Component – If the issue persists, there may be a problem with the magnetron, high-voltage transformer, or other internal components.
5. Error Code Indication – The "E" display may indicate an error. Refer to the manual for specific error codes and troubleshooting steps.
6. Service Required – If troubleshooting does not resolve the issue, contact an authorized service center for further inspection and repair.
This answer is automatically generated
What is the wattage of this appliance, the Toshiba ml2-tc10 sait (ss) 7-in-1 countertop microwave
How do I find the low temperature presets like for yogurt?