
Related Manuals for DR. Heater DR-910F


Summary of Contents for DR. Heater DR-910F
- Page 1 10,000W/240V WALL / CEILING MOUNTED GARAGE HEATER OWNER’S MANUAL Model No.: DR-910F 10,000W 240V 60Hz IMPORTANT INSTRUCTIONS READ & SAVE...
-
Page 2: Table Of Contents
TABLE OF CONTENTS Important Instructions……………………………………….3 Installing Instructions………………………. ……………… 5 Specifications and Wiring Diagram ………………………. 9 Parts of the Heater……………………….…………..……..10 Operating Instructions……………………….………..…..11 Maintenance and Cleaning………………………………..14 Troubleshooting…………………………………………….15... -
Page 3: Important Instructions
IMPORTANT INSTRUCTIONS PLEASE READ ALL INSTRUCTIONS BEFORE USING THIS HEATER NOTE: There may be a trace of smoke or odor when unit is first operated. Don’t be alarmed. This indicates that a drop of oil fell on the heating coil during the manufacturing process. It will quickly evaporate and should not re-occur. -
Page 4: Save These Instructions
8) This heater should be installed at least 6 feet (1.8 m) from the floor and no closer than 1 foot (0.3 m) from any adjacent surfaces or walls. Keep at least 1 foot (0.3 m) from the back wall, regardless of whether the wall mount bracket is used. -
Page 5: Before Installation
INSTALLATION INSTRUCTIONS WARNING: All wiring must be installed by a certified/licensed electrician. The heater must be grounded in accordance with applicable national and local building codes. All wiring procedures and connections should be in accordance with applicable national and local codes. Before installation: Disconnect the main supply connection. - Page 6 4. Mark the drill-hole positions on the wall or ceiling for the mounting bracket. 5. Drill the required holes with diameter fitted to the anchor provided for positioning the mounting bracket. 6. Insert the anchors. Ceiling Mount Wall Mount 7. Attach the mounting bracket to the wall and secure with mounting screws.
- Page 7 12. Insert the bolt provided through the mounting bracket and the heater handle. Tighten with the nut and washer. Wall Mount Ceiling Mount 13. Loosen the screw to remove the wiring compartment/connection cover in the rear of the heater. There are three pigtail leads, both Black (L1) and White (L2) are for power connection;...
- Page 8 17 How to install a wall thermostat (Not included) : A. Install the thermostat to the wall : B. Press the rocker switch to WALL THERMOSTAT, insert two 16AWG wires to Terminal A inside the heater. Make sure to tighten the screws in Terminal A. TERMINAL A 16AWG WIRES C.
- Page 9 SPECIFICATIONS 10,000W/240V WALL / CEILING MOUNTED GARAGE HEATER Model: DR-910F Voltage: 240 V Watts: 10,000 W Frequency: 60 Hz Recommended Heating Capacity: 1.25watts / ft³ (0.03m³)
-
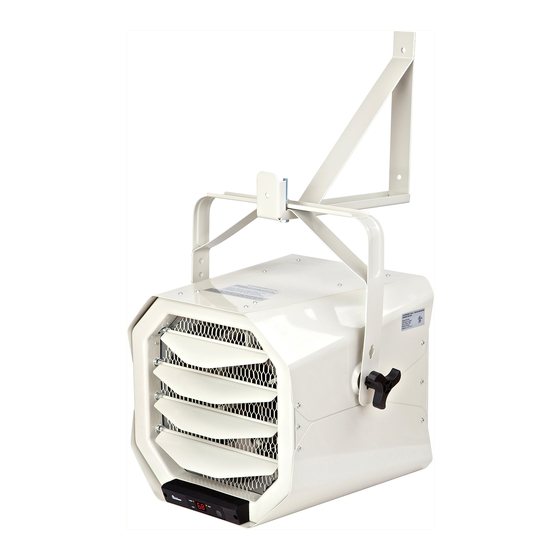
Page 10: Parts Of The Heater
PARTS OF THE HEATER Wall Mount Bracket Internal/Wall Ceiling Bracket Thermostat Switch C. Upper Housing Control Panel D. Louver for air direction Alarm LED Tilt Adjustable Knob Power LED Lower Housing M. Timer LED G. Front Exhaust Grill N. Heat LED H. - Page 11 O. Increase Temperature button P. Decrease Temperature button Q. Thermostat button R. Timer button S. Power button...
-
Page 12: Operating Instructions
OPERATING INSTRUCTIONS WARNING - The heater must be properly installed before it is used. HAZARD OF ELECTRIC SHOCK, EXPLOSION, OR ARC FLASH: Apply appropriate personal protective equipment (PPE) and follow safe electrical work practices. See NFPA 70. A circuit breaker must be installed and serviced only by qualified electrical personnel. - Page 13 CAUTION! Risk of malfunction & Damage : You must turn the ON/OFF switch to OFF before selecting the INSIDE/WALL thermostat. Selecting Inside Thermostat: 1 Turn the ON/OFF switch to OFF position, and then turn the thermostat rocker switch to INSIDE THERMOSTAT as indicated below: 2 Turn the ON/OFF switch to ON position again, the heater will work on the inside thermostat mode.
- Page 14 you must turn the ON/OFF switch to OFF and then select the INSIDE/WALL thermostat mode. Insert the batteries into the remote control as shown below: NOTE: Remove the batteries if the remote control is not to be used for a month or more. Batteries left in the remote may leak and cause damage.
- Page 15 temperature is equal to or greater than the setting temperature+2℉. Note: If you set the thermostat switch to WALL THERMOSTAT, press the + and - button cannot set the temperature, the heater will run in ON or OFF heating according the wall thermostat setting temperature.
-
Page 16: Maintenance And Cleaning
MAINTENCE AND CLEANING INSTRUCTIONS(separate page) No user maintenance on this heater should be undertaken except regular cleaning as described below. All other servicing or maintenance should be performed by qualified service personnel. Before any cleaning, make sure that: 1. Power supply is disconnected at the source. Switch off the circuit breaker. - Page 17 If your heater fails to operate, please follow these procedures: This heater is intended to be a wall/ceiling-mounted heater. It has a thermal cut-off protection. If the thermal cut-off protection trips, switch off the power. Switch off the circuit breaker. The unit should reset automatically after 10 minutes.
-
Page 18: Questions And Answers
1-800-317-1688. Prior to your call, please have your product’s model number, serial number, and purchase receipt/invoice ready so that we may assist you more expediently. Dr. Heater USA 239 Harbor Way SOUTH SAN FRANCISCO, CA 94080 TEL: 800-317-1688 EMAIL: SERVICE@DRHEATERUSA.COM...
Need help?
Do you have a question about the DR-910F and is the answer not in the manual?
Questions and answers