Table of Contents
Advertisement
Quick Links
Advertisement
Table of Contents

Related Manuals for CRG LF100

Summary of Contents for CRG LF100
- Page 2 LF100 LF500...
-
Page 3: Table Of Contents
CONTENTS Chapter 1. Cash Register Introduction..............1 1. Introduction......................1 1.1 Important....................... 1 1.2 Environmental operating characteristics..........2 1.3 Electrical characteristics................2 Chapter 2. Cash Register Characteristics............3 2.1 Parts of ECR..................... 3 2.1.1 Mode switch....................4 2.1.2 Display......................4 2.1.3 Cash drawer....................4 2.1.4 Interface..................... - Page 4 4.4 Sales setup......................20 Chapter 5. Basic Information................21 5.1 PLU setup......................21 5.1.1 Modify the PLU information..............24 5.1.2 Change the PLU stock................24 5.1.3 Delete the PLU..................25 5.2 Department setup..................25 5.3 Table setup...................... 27 5.4 Taste setup...................... 28 5.5 Payment setup....................28 5.6 Other name setup...................28 5.7 Tax setup......................29 5.7.1 PLU with VAT..................
- Page 5 6.4 Reduction, Discount, and Service charge function........39 6.4.1 Reduction....................39 6.4.2 Discount....................39 6.4.3 Service charge/Tip Operation...............40 6.5 Correction Operation..................40 6.5.1 Void/ Last item Qty Correction..............40 6.5.2 Void/ Cancel Products................41 6.5.3 Refund......................43 6.6 Payment Method.....................44 6.6.1 Cheque/Credit card Payment............... 44 6.6.2 Payment by User-defined..............44 6.7 Other Functions....................
- Page 6 8.3 External Printer Connection................55 8.4 Label Printer connection................56 8.5 Connection Cable...................58...
-
Page 7: Chapter 1. Cash Register Introduction
Chapter 1. Cash Register Introduction 1. Introduction We wish to thank you for the purchase of the electronic cash register. Please read the instructions to become familiar with its functions and operations before you start to operate this equipment. Keep this manual for future use. It will help you to solve most problems encountered in its operation. -
Page 8: Environmental Operating Characteristics
1.2 Environmental operating characteristics Operating temperature: 0ºC ~ +45ºC Storage temperature: -20º C ~ +55º C Relative humidity: 20% ~ 95% 1.3 Electrical characteristics Power voltage: AC220V ± 15% (for LF500) AC100-240V (for LF100) Power frequency: 50 Hz Power rated: 30W... -
Page 9: Chapter 2. Cash Register Characteristics
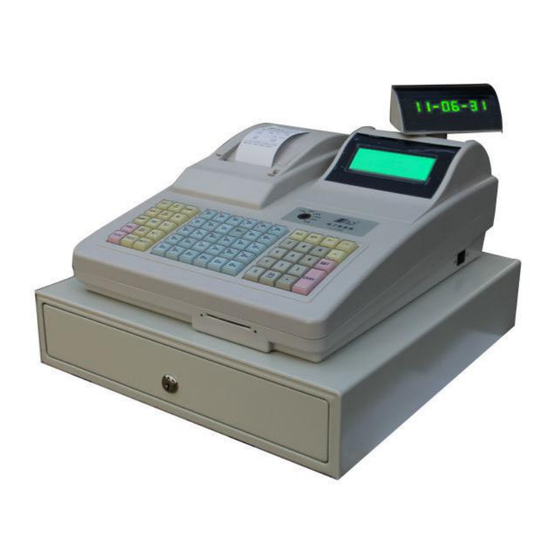
Chapter 2. Cash Register Characteristics B serial machines have two models: LF100 and LF500. The battery function is optional. 2.1 Parts of ECR - LF100 -LF500... -
Page 10: Mode Switch
Reads sales data in memory and clears the data. PROGRAM Use this mode for cash register programming. MANAGER Use this mode for Manager control operation. 2.1.2 Display Model Operator Display Customer Display LF100 128*64 LCD 8 digits LED LF500 192*64 LCD 8 digits LED 2.1.3 Cash drawer The cash drawer can open automatically whenever you finalize a registration. -
Page 11: Interface
For further operating instructions please see Chapter 8 Communication Port. Note: Check COM1 set for LF100 COM port. Port Name Function Description Connect to cash drawer. -
Page 12: Chapter 3. System Management
Chapter 3. System Management 3.1 System Initialization (Advanced setup) Warning: System Initialization will clear all programmed data and reports. Please backup all the useful information before initialization. Turn the mode switch to P position → Advanced management → press【SBT】 → Initialize →【CASH】to confirm. Note: Please do the system initialization every time when upgrade the system. -
Page 13: Chapter4. System Setup
Chapter4. System Setup 4.1 System Basic setup System Basic setup includes the Date& Time setup, Communication setup, Keyboard function setup, and Operator setup. 4.1.1 Date & Time setup. Operation: P position → System setting→ Date & Time 4.1.2 System Parameter setup. P mode →... - Page 14 5. Min. No. 0000 0000-9999 (the min. serial no. of the receipt) 6. Max.No. 0000 0000-9999 (the max. serial no. of the receipt) A=1, connect with the Guanghua e-scale, model DS-788. A=0, connect with the electronic instrumentation, such as pricing. 7.E-Barcode ABCD A=4, connect with the electronic instrumentation,...
- Page 15 A=2, reset the receipt serial no. after clear the cashier report. A=4, reset the receipt serial no. after clear the e-journal information. D=1, the machine will ask if sure to clear the report after print the single report on Z. D=0, the machine will clear the report automatic after printed the single report on Z.
-
Page 16: Keyboard Function Setup
print the next receipt head auto when the first sale finished, C=0. Printing setup. 20. Print A, printing color setup. ABCD parameter B, the receipt space setup. C, the line space setup. 21. Reprint 00CD Setup the number of the reprint receipt. (1-20) 22. - Page 17 mode, if we press this D1, we sell D1, if press “SHIFT” , then “D1”, means we sell D2. If need to cancel programmed keyboard, press 【CANCEL】→【SBT】 Below is the keyboard function value: Table 4-2 Function Code/Value Function Code/Value Function Code/Value Forbid Forbid Hold...
- Page 18 Table 4-3 Function Function Function1&2 introduction Code/Value Direct PLU Basic info—PLU setting, the PLU code. Basic info—Dept. setting, the department Department code. Payment Basic info—Payment, the payment code. method Basic info—Payment—from “11 Cash in A” to “15 Cash in E” Basic info—Payment—from “21 Cash out A”...
-
Page 19: Clerk Authority Setup
2. Press 【D6】 Name: Dept. No.6 and no.12 means this key has Code: 0001 two function values, the No. 1: 6 department6 and department12. No. 2: 12 3. Check the “RA” function code is 33 from the table 4-2. Input “33”--【SBT】 No.1 No.2 4. -
Page 20: Operator Display Setup
2. Input the operator password “12345678” . Code: 1 Psw: ******** Name: CLERK1 3. Press 【SBT】twice. The machine input operator name. 4. Press 【SBT】to confirm. 5. Press 【SBT】 to choose the operator authority. Press cursor keys to go to the next. CLERK Auth. -
Page 21: Receipt Head And Bottom Setup
Receipt: Receipt head line YOUR RECEIPT = = = = = = = = = = = = = = = = = = = = = = Receipt no. line RECEIPT:000101#0001 CASHIER:1 Cashier date & time info DATE:06/01/2022 TIME:07:02:58 - - - - - - - - - - - - - - - - - - - - - - - - - - - - - NO. - Page 22 height, double width, double height&double width, graphics. Character The max. characters is 32 each line. Info. Example: Setup the receipt head is “ Supermarket”, and double height. Enter in the “Rect. Hdr.& Trl.” 01. YOUR RECEIPT Flag1: R—Header SBT—Confirm 2. Press 【SBT】, then input “Supermarket” →【SBT】 01.
-
Page 23: Sales Receipt Setup
4.3.2 Sales receipt setup. 4.3.2.1 Receipt format setup. 1. P mode System Setting → Rect. Format → 【SBT】 Example: Setup as, print the PLU code, do not print the consecutive no. in the receipt. PLU CODE Consecutive No. Name Separately SBT—Confirm Enter in the “Rect. - Page 24 4. Press 【SBT】to enter in. Print consecutive No.? SBT—Confirm 5. Use the cursor key to choose “No”. Press 【SBT】 to confirm, 【CASH】to return. Note: Can set these functions in the P mode System setting → System Param → 19.Content Please check Table 4-1, system parameter setup. No.19, the receipt content setup.
-
Page 25: Kitchen Printer Setup
3. Use the cursor key to choose “DH”. Then press 【SBT】to confirm. Name Set Settlement Item name SBT—Confirm 4. Press 【SBT】to enter in the Settlement setup. Sett. Fond: Normal SBT—Confirm 5. Use the cursor key to choose “DH&DW”. Press 【 SBT 】 to confirm, and 【CASH】to return. -
Page 26: Sales Setup
COM1/COM2. Setup the system parameters No.13 for COM1 or No.14 for COM2 before use the kitchen printer. For more detail setup, please check “Table 4-1 No.13, COM1 setup” 4.4 Sales setup. Setup the discount rate, service charge, reduction, and report in this part. 1. -
Page 27: Chapter 5. Basic Information
Chapter 5. Basic Information Setup the PLU, Department, Table, Taste, Payment method, Tax, and other name in this part. 5.1 PLU setup 1. Flag1 (EFGHABCD) A=0, attribute controlled by dept; A=8, does not controlled by any other department; A=1, could not sold adding service charge; A=2, Discounting is disabled;... - Page 28 When the cursor is in “Flag1/2”, press【 】to enter in. Example: Program a PLU as, code is 1001, name “beer”, price is 35, income is 25, and it belongs to department 15. Attribute should be, “service charge disabled, and change price temporary disabled”. Stock is 1000. Operations should be, (1) P mode “Basic Info”...
- Page 29 (5) Input 25. Then press【SBT】. Code: 1001 Price 1: 35.00 Price 2: 25.00 Dept.: (6) Input 15. (It means this PLU belongs to dept15). Then press【SBT】. Code: 1001 Flag1: 00000000 Flag2: 00000000 Stock: 0.00 (7) 【 】to enter in the flag1 setup. Add S/C? SBT-Select –〉...
-
Page 30: Modify The Plu Information
(9)【SBT】to choose “N”. Press【CASH】to return. And input stock 1000. Code: 1001 Flag1: 00005000 Flag2: 00000000 Stock:1000 (10)【SBT】, finish to setup this PLU. The machine will show as: Input Code: Note: The PLU information will be saved until finished to setup all the PLU information. -
Page 31: Delete The Plu
5.1.3 Delete the PLU. Operation: In P mode “Basic Info” → “PLU Setting” →【SBT】→ 【CANCEL】 (now under the right of the machine will show “×”) → input the PLU need to delete →【SBT】. 5.2 Department setup. Setup the department as, P mode “Basic Info” → Dept. Setting →【SBT】→ Input the unit price of this department →【SBT】→... - Page 32 (1) In P mode “Basic Info” → Dept. Setting . PLU Setting Dept. Setting Table Setting SBT-Confirm (2) Press【SBT】to enter in. Prc.: 0.00 Flag1: 00000000 Flag2: 00000000 No.: 1 (3) Input 20, and press【SBT】to confirm. Prc.: 20.00 Flag1: 00000000 Flag2: 00000000 No.: 1 (4) Press【SBT】to get to next options.
- Page 33 (6) Press【SBT】to confirm. Prc.: 0.00 Flag1: 00000000 Flag2: 00000000 No.: 2 Note: If the machine shows as step (6), you can setup the next department information, or press 【—】to print the department programming information. Or you can press【CASH】to return. 5.3 Table setup. Setup the table no.
-
Page 34: Taste Setup
(3). Input no. 888 →【SBT】. Table: 888 Name: Table1 Abc: (4). Input “Happy Party” (Press 【00】to change case) Table: Name: Table2 Note: If the machine shows as step 4, here can setup the next table information, or press【—】to print the table programming information. Or press 【CASH】to return. -
Page 35: Tax Setup
Serial Serial Serial Serial Name Name Name Name REFUND RA B PO C REFUND RA C PO D REF No. RA D PO E REFUND TASTE: RA E REFUND PO A REFUND PO B 5.7 Tax setup. Please setup the VAT information firstly. Operations: 1. -
Page 36: Plu With Vat
3.【SBT】→ Please input the VAT name if you want to change the VAT1. Then press【SBT】If not, press【SBT】directly. Name: VAT1 Abc: 4.Program the VAT2 as the above operations. Or press【Cancel】to return. Code: 0002 Rate: 0.00 Name: VAT2 5.7.1 PLU with VAT Each PLU can have one of four taxes and they are calculated by either VAT method or Add-On Tax method. -
Page 37: Plu With Add-On Tax
2. Press【SBT】to choose “Y” →【→】. Tax-on Tax? SBT-Select <– –> 3. Press【→】, and press【SBT】to choose “Y”. Tax rate1? SBT-Select <– –> 4. Press【→】until get to the last option. Press【CASH】to return. Code: 1002 Flag1: 00008041 Flag2: 00000000 Stock: 0.00 5. Input the stock to finish this PLU setting. 5.7.2 PLU with Add-on tax Example: Setup the PLU code is 1003, name “beer”, price 100, link to VAT1. -
Page 38: Department With Tax
Tax included? SBT-Select <– –> 2. Pres【→】, then【SBT】to choose “Y” Tax-on Tax? SBT-Select <– –> 3. Press【→】, and press【SBT】to choose “Y”. Let the PLU link to tax1. Tax rate1? SBT-Select <– –> 4. Press【→】until get to the last option. Press【CASH】to return. Code: 1003 Flag1: 00008081 Flag2: 00000000... -
Page 39: Chapter 6. Sale Operation
Chapter 6. Sale Operation 6.1 Preparation work Make sure all the programming information have been finished. Please check chapter 5 Basic Information setup. 2. Make sure the paper have been installed correctly. 3. Make sure the time and date have been setup. If need to change the time and date, please check “4.1.1 Date&... -
Page 40: Repetition
Operation: Bar Coded PLUs: enter price manually →【NEW PRICE】→ scan the PLU → 【SBT】 Coded PLUs: enter price manually →【NEW PRICE】→ enter PLU code → 【PLU】→【SBT】 6.2.3 Repetition The last registered PLU, including multiplication, can be repeated. Simply press【PLU】key the number of times required immediately after a PLU entry. Operation: Input PLU code →【PLU】→... -
Page 41: Multiplication
4. Press【CASH】 Total: 200.00 Payment: 200.00 Change: 0.00 6.2.4 Multiplication Operation: Bar Coded PLUs: enter the number of items →【QTY】 key → scan the PLU Fast PLUs: enter the number of items →【QTY】 key → fast PLU Coded PLUs: enter the number of items →【QTY】key → input the PLU code →【PLU】key Example: We sell a PLU code is 1001, qty is 5, the customer paid 1000. -
Page 42: Split Pricing
4. Input 1000 →【CASH】 Total: 500.00 Payment: 1000.00 Change: -500.00 6.2.5 Split pricing Operation: Input the qty the customer needs →【QTY】→ input the PLU qty → 【QTY】→ input the PLU barcode →【PLU】 Example: The PLU have been programmed in the ECR with barcode 9610, Unit price is 45 with 10 cartons cigarette. -
Page 43: Department
4. 【SBT】→【CASH】 Total: 22.5 Payment: 22.5 Change: 0.00 6.3 Department 6.3.1 Direct Department Sale Operation: In R mode, press the department keys which have been programmed the department information → 【SBT】 Example: Department 1 has been programmed “drinks”, price is 20.00. And we would like to sell this department directly. -
Page 44: Multiplication
Example: Department 1 has been programmed “drinks”, unit price 20.00. Now change the unit price is 18.00, and the customer paid 50 1. Input 18 →【D1】 Drinks Qty: 1.00 Amount: 18.00 Input: 2. Press【SBT】 Qty: 1.00 Amount: 18.00 Input: 3. Input 50 →【CASH】. Total: 18.00 Payment: 50.00 Change: -32.00... -
Page 45: Reduction, Discount, And Service Charge Function
6.4 Reduction, Discount, and Service charge function 6.4.1 Reduction 1. Do the reduction manual Operation: after sale →【SBT】→ input the price need to reduction →【SBT】 2. Do the reduction auto Setup the System Parameter, No.12. Please check Table 4-1. 6.4.2 Discount There are two ways to make the discount. -
Page 46: Service Charge/Tip Operation
The key operation determines whether the amount is added to the item or subtotal. For discount on item, input the discount rate → 【%-】key immediately after the item is entered. For discount on subtotal, press 【SBT】 before input the discount rate →【%-】 2. -
Page 47: Void/ Cancel Products
Example: 1. Sell a product in Dept 4. Press 100 →【D4】 DEPT4 Qty: 1.00 Amount: 100.00 Input: 2. Change the qty as 5. Press 5 →【VOID】 DEPT4 Qty: 5.00 Amount: 500.00 Input: 3. Then press 【SBT】 →【CASH】 6.5.2 Void/ Cancel Products 1. - Page 48 the settlement, the customer want to cancel the book. 1. Input 1001 →【PLU】 book Qty: 1.00 Amount: 100.00 Input: 2. Input 1003 →【PLU】 beer Qty: 1.00 Amount: 20.00 3.Press【CANCEL】 beer Qty: 1.00 Amount: 20.00 Input: 4.Input 1001 →【PLU】 book Qty: 0.00 Amount: 0.00 Input: 5.
-
Page 49: Refund
6. Press【CASH】 Total: 20.00 Payment: 20.00 Change: 0.00 6.5.3 Refund REFUND key is used to refund a registered item after the transaction has been closed. Note: Please make sure this cashier have the refund permission. Operation: Press REFUND key after entering the data (PLU data, manual price, etc.) →... -
Page 50: Payment Method
6.6 Payment Method The default payment is paid by “CASH”. You can press 【CASH】directly or input the amount which the customer paid +【CASH】. 6.6.1 Cheque/Credit card Payment Operation: 1. Credit card Sell product → press 【CREDIT CARD】→ input the credit card no. manually →... -
Page 51: Stop Printing
transaction has taken place. 2. P/O (Paid Out) Records an amount of money withdrawn from the cash drawer when no customer transaction has taken place. Note: Please note that “R/A” and “P/O” have been programmed in the keyboard. For detail information, please check “4.1.3 Keyboard Function setup”. R/A and P/O can be used by any other payment method. -
Page 52: Hold Bill Function
Note: The max. content of the “Ref. No.” is 18 characters. You can change the “Ref. No.” to other name you want in P mode “Basic Info” → “Other Name” The content of the “Ref. No.” can be sent to kitchen printer. ... -
Page 53: Suspense The Table & Recall It
1. Input the table no. manually. Operation: Note: Make sure the table no. have been setup. In P mode “System Setting” → “System Param.” → 24. Table Set → input the table numbers (The max. is 250. ) → do the machine initialization In R mode, input the table no. -
Page 54: Transferring The Table
1) Input 10 → 【TABLE】. TBALE10 Input: 2) Input 2 (PLU code) →【PLU】 Beer Qty: 1.00 Amount: 35.00 Input: 3) Input 3 (PLU code) →【PLU】 Jerky Qty: 1.00 Amount: 5.00 Input: 4) Press【TABLE】to close this track temporarily. Recall the suspense bill: Input the temporary table no., then press【TABLE】 6.8.3 Transferring the Table The suspense table can be transferred to a new table or a designated table. -
Page 55: Numbers Of Guest
Then will get the receipt: YOUR RECEIPT = = = = = = == = = = == = = = = = == = = TABLE 12 40.00 **TRANSFER TO** TABLE 15 50.00 TOTAL 90.00 6.8.4 Numbers of Guest Here can check how many guests in each table so that it’s better to do the personnel assignment for manager. - Page 56 Make sure the taste information have been setup in the P mode → “Basic Info” → “Taste Setting” Only the taste code can be input after sales. When the 【Taste】function setup as (37 01 02), after sale press no. “10” ...
-
Page 57: Chapter 7. Reports
Chapter 7. Reports Report Introduction X Mode Z Mode Financial report Financial report Department report Department report Cashier report Cashier report PLU report PLU report Table report Table report Period report Refund list Hourly report E-Journal Period report Hourly report Clear stock There are two modes for reports printing: X mode and Z mode. -
Page 58: E-Journal Clear
2. By bill no. The bill no. should be input 4 characters, such as 0001, 0020, etc. Then press【SBT】to look through; 【-】to print; and【CASH】to return. 3. Find all To go to the next by using the cursor keys, press 【SBT】 to look through; 【-】 to print;... -
Page 59: Bar Code Scanner Connection
Note: 1. When use PS/2 bar code scanner, please setup parameter 19, B=1. 2. When LF100 connect the COM port bar code scanner, please setup parameter 13 ABCD, C=1. Then can use. 8.2 E-scale Connection 8.2.1 Bar code Scale 1. -
Page 60: Price Computing Scale
A, is the e-scale type. A=0, price computing scale A=4, weight computing scale CD should be the same as the bar code “xx” 3. Register operation: Input 13-digit bar code manually. Alternatively, scan PLU bar code with the scanner. It is recommended to use the scanner device to improve the efficiency. - Page 61 Note: 1. It is invalid for the cash register that the unit price of the item is input on the scale. 2. Please press 【CLEAR】 key on the cash register if communication or other errors may appear. 3. Please press【CLEAR】key on the scale if the message“Error2002 Entry overflow”...
- Page 62 C is only valid for LF100 model. Explanation C=0 RS232 communication or connect the kitchen printer. C=1 Connect bar code scanner or e-scale. Explanation (Printer model) D=1 Connect with the EPSON TM-300A/TM210, WP-T800, WP-300. D=2 Connect with the POS58. D=3 Connect with the Star SP298.
- Page 63 ◆ Label Header: program the receipt header information. Max. characters is ◆ Label Footer: program the receipt footer information. Max. characters is Note: When the first time to put/ change the printer paper. For example, change 40*30 (mm) paper to 60*40 (mm). Please put the paper firstly, then press the “PAUSE”...
- Page 64 8.5 Connection Cable. 1. ECR (COM1,COM2) and kitchen printer. POS58 TM300/TM210 SP298 BTP2001 TBY210 3 TXD 3RXD 3 RXD 3 RXD 3 RXD 3 RXD 4 DTR 6 DSR 6 DSR 6 DSR 6 DSR 5 GND 7GND 7 GND 7 GND 7 GND 7 GND...
Need help?
Do you have a question about the LF100 and is the answer not in the manual?
Questions and answers
WHAT CAUSE THE LINE ////// IN ELECTRONIC CASH REGISTER BOX
PERUVAI STEEL&TRADING SDN BHD
The line ////// in the CRG LF100 electronic cash register box may be caused by incorrect label printer settings, such as wrong label width, length, offset, or space line configuration. It can also result from improper paper placement or incompatible printer model settings.
This answer is automatically generated