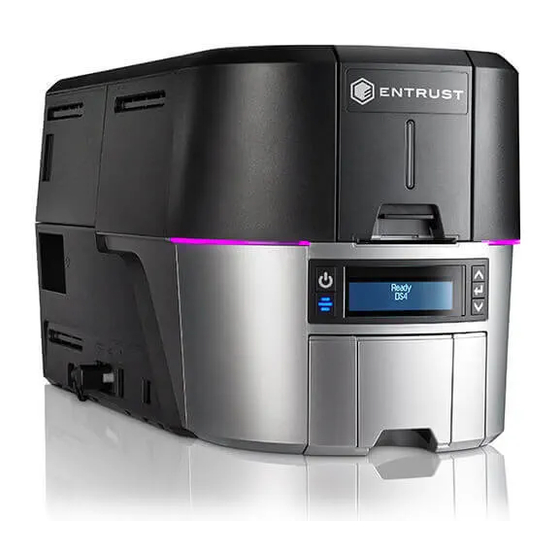
Entrust DS4 User Manual
Rear indent module (rim)
Hide thumbs
Also See for DS4:
- User manual (90 pages) ,
- Installation and administrator's manual (66 pages) ,
- User reference manual (24 pages)
Table of Contents
Advertisement
Quick Links
Advertisement
Table of Contents

Related Manuals for Entrust DS4


Summary of Contents for Entrust DS4
- Page 1 User Guide Rear Indent Module (RIM) November 2021 528265-001, Rev A...
- Page 2 Trademark Acknowledgments Entrust, Sigma and the hexagon design are trademarks, registered trademarks and/or service marks of the Entrust Corporation in the United States and other countries. Datacard is a registered trademark and service mark of Entrust Corporation in the United States and other countries.
- Page 3 Safety The following basic safety tips are given to ensure safe installation, operation and maintenance of Datacard® equipment. • Connect equipment to a grounded power source. Do not defeat or bypass the ground lead. • Place the equipment on a stable surface (table) and ensure floors in the work area are dry and non-slip.
- Page 5 Revision Log Revision Date Description of Changes November 2021 First release of this document...
-
Page 7: Table Of Contents
Sigma DS4 Instant Financial Issuance System ....... . . 5... - Page 8 Chapter 4: Supplies and Parts..........21 Indent Ribbon Cassette .
-
Page 9: Chapter 1: Introduction
Intended Audience The manual is intended for the printer operator who prints cards, loads and replaces supplies, maintains the printer, and performs troubleshooting. Technical Support Use the following to contact Entrust Technical Phone Support. Americas +1 800.328.3996 or +1 952.988.2316... - Page 10 Introduction...
-
Page 11: Chapter 2: About The Rear Indent Module (Rim)
The Rear Indent Module The RIM can be added to the back of a Sigma DS4 Instant Financial Issuance System. It allows you to place indent characters on the front or back of the card. The RIM uses an indent character wheel and an ink ribbon to indent numbers below the surface of the card. -
Page 12: Site Requirements
The external system dimensions are shown in the following illustrations. Rear Indent Module (RIM) 9.5 in 241 mm 8.7 in 8.35 in 221 mm 212 mm RIM with Sigma DS4 Instant Financial Issuance System 9.5 in 241 mm 9.0 in 229 mm 26.1 in 663 mm 8.9 in... -
Page 13: Clearance Requirements
Sigma DS4 Instant Financial Issuance System 17.5 in 444 mm 10.9 in... -
Page 14: About The Rear Indent Module
Electrical Requirements The power supply detects the input voltage and works within the range stated. Electrical Requirements Input Output 100–240V/50–60 Hz/1.6Amp 24V/3.0Amp/72W The RIM power supply is separate from the printer power supply. Refer to your printer’s Installation and Administrator’s Guide for printer electrical ... -
Page 15: Rim Status Light
RIM Status Light The status light shows the status of the RIM: Ready Solid green Busy Blinking green Solid blue Idle/Not ready Error Blinking red Lost communication Solid red with printer Right Side Door Lock Door Lock The door lock secures access to interior of the RIM. Rear Indent Module User’s Guide... -
Page 16: Front And Inside
Front and Inside RIM Supply Connection Cassette Latch Drive Gear Rear Module Data Connection Access Door Connection Guideposts Adapter Plate Access Door The access door provides access to RIM supply cassette and connection latch. RIM Supply Cassette The supply cassette holds the indent ribbon. Adapter Plate The adapter plate allows the RIM to fit against the printer. - Page 17 RIM Configuration Label The RIM configuration label is located inside the RIM on the access door. The configuration label shows the following information: Module name Serial number Configuration Part number Configuration Label Date Option Configuration Code Ribbon Drive R1=Indent Ribbon Required Wheel Option...
-
Page 18: Load The Indent Ribbon Cassette
Load the Indent Ribbon Cassette The RIM ribbon cassette installed. Message 304, RIM supply out, displays on the printer LCD if a cassette is not installed. The ribbon cassette contains a one-time-use roll of indent ribbon. Press the power button to power down the printer. Unlock the RIM and open the side access door. - Page 19 Make sure the supply cassette is secured under the clip when installed. Clip Supply Cassette Close the side access door and lock the RIM. Rear Indent Module User’s Guide...
-
Page 20: Card Design
Card Design Set up your card design using your card production software or another application, such as Microsoft Word. Standard indent position is on the right half of the card (starts 1.8" from left side of card). Standard Indent Position The RIM can indent characters on either the front or back of the card. -
Page 21: Chapter 3: Troubleshooting
Chapter 3: Troubleshooting This chapter provides information to help you identify and fix basic issues that can occur when using the Rear Indent Module (RIM). Clear a Rear Indent Module Card Jam A card jam occurs when the card does not reach the proper position for the next action, such as indenting or ejecting the card. - Page 22 Caution: Do not attempt to connect the RIM at an angle as this can damage the electrical connection. Sigma DS4 Card Printer Plug the power supplies into the printer and RIM. Then, plug the power cords into the facility power source.
-
Page 23: Repair A Broken Indent Ribbon
Repair a Broken Indent Ribbon Do the following to repair a broken indent ribbon in the RIM supply cassette. Unlock and open the RIM access door and remove the supply cassette. Pull out an excess of indent ribbon from both spools of the cassette. Trim the ends of the broken indent ribbon to be square and even. -
Page 24: Rim Messages On The Printer Lcd Panel
RIM Messages on the Printer LCD Panel When an error occurs processing a card, an error message displays on the printer LCD panel. Refer to the printer’s User’s Guide for a list of printer messages. The following messages display on the printer LCD panel when the system has an attached rear indent module. -
Page 25: 301: Rim Not Detected
301: RIM not detected The printer cannot communicate with the RIM. Power off and restart the printer. If the error continues: Power off and unplug the printer and RIM. Remove the RIM from the printer. Reconnect the RIM and printer. Plug in the power cords and restart the printer. -
Page 26: 304: Rim Supply Error
304: RIM supply error A RIM supply problem has occurred or the cassette is out of ribbon. Remove supply cassette and address any issues with the supply or install a new supply cassette. INTS AND Ribbon may be at the end of roll. The cassette is translucent so you can see how much ribbon is left. -
Page 27: 306: Rim Card Jam
306: RIM card jam The card is not in position in the RIM. Power off and unplug the printer and RIM. Remove the RIM supply and the RIM from the printer. Rotate the drive gear to move the card out. Reconnect the RIM and printer, and reinstall the RIM supply. - Page 28 Troubleshooting...
- Page 29 Chapter 4: Supplies and Parts This chapter describes the supplies and replacement parts available for the Rear Indent Module (RIM). Indent Ribbon Cassette The indent ribbon cassette contains a one-time use ribbon. The length of the indent ribbon is 50 ft (15.24 m). Indent character yield per cassette will vary depending on card design elements.
- Page 30 Power Supplies The RIM power supply is rated as follows: Input: 100–240V/50–60 Hz/1.6Amp Output: 24V/3.0Amp/72W The power supply is self-adjusting within the rated input voltage Power Cords The power cord connects the RIM power supply to the facility power. Be sure to use power cords that ground to the facility power source.
Need help?
Do you have a question about the DS4 and is the answer not in the manual?
Questions and answers