Philips HDRW 720/00-02 User Manual
Dvd/hdd recorder
Hide thumbs
Also See for HDRW 720/00-02:
- Operating instructions manual (116 pages) ,
- Quick install manual (17 pages)
Advertisement
Quick Links
Functioning of the device
................................................................................
The remote control
.........................................................................................
Additional TV functions
..................................................................................
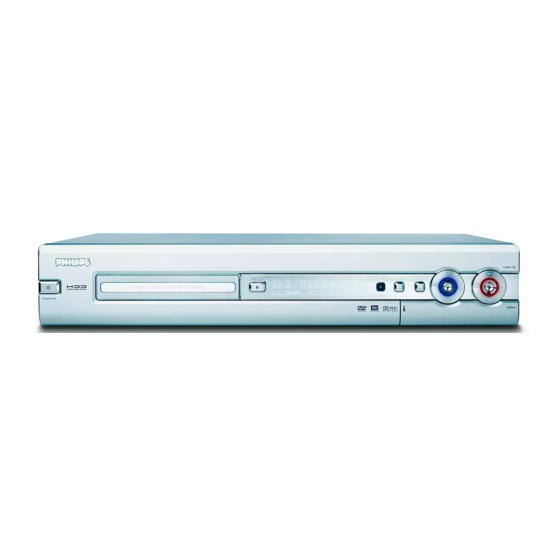
Front of the device
..........................................................................................
Back of the device
............................................................................................
Discs you can use
.............................................................................................
Recording and playback
..................................................................................
Playback only
.....................................................................................................
Regional code
....................................................................................................
Technical data
...................................................................................................
Accessories
........................................................................................................
Important
...........................................................................................................
Important instructions for the HDD
Symbols used in these operating instructions
Cleaning the discs
.............................................................................................
Special functions of your DVD recorder
Preparing the remote control for operation
Using your DVD-Recorder remote control with your TV set
Connecting to the aerial
...............................................................................
Connecting to the TV
...................................................................................
Connection with scart cable
........................................................................
Connection with an S-Video(Y/C)cable
Connection with video (CVBS) cable
Connection with the aerial cable only
Connecting to the mains
..............................................................................
Connecting additional devices to the second scart socket
Connecting a video recorder, DVD player.
Connecting an external receiver
Connecting additional devices only via aerial cable
Connect camcorder to the front sockets
Connecting audio devices to the analogue audio sockets
Connecting audio devices to the digital audio sockets
Initial installation
.............................................................................................
Using a satellite receiver
...............................................................................
Allocating a decoder
......................................................................................
Manual TV channel search
............................................................................
Sorting TV channels automatically (Follow TV)
Automatic TV channel search
Sorting and deleting TV channels manually
Setting the language
.......................................................................................
Setting the time
...............................................................................................
Connection using a component video (Y Pb Pr/YUV) cable (no
progressive scan)
............................................................................................
General information
......................................................................................
Setting up the GUIDE Plus+
®
System
...........................................................
............................................
..................................................
...........................................
....................................................
........................................................
.......................................................
...................
.............................................
................................................................
................................
................................................
....................
..........................
......................................
.....................................................................
..............................................
........................................................
'Setup'
................................................................................................................
Installation of the 'External receiver 1'
1
Finalise set-up
..................................................................................................
2
Using the GUIDE Plus+
4
General
.............................................................................................................
5
The 'Grid' screen
6
The 'Search' screen
The 'Schedule' screen
The 'Info' screen
The 'Editor' screen
The 'Setup' screen
7
7
7
8
8
General
.............................................................................................................
8
The Time shift Buffer
8
Symbols in the 'Time Shift Buffer'
9
Navigation in the time shift buffer
9
Mark TV shows for recording
9
Manual recordings
10
OTR recordings
Direct Record
.................................................................................................
Switching 'Direct Record' on or off
Automatic recording from a satellite receiver (sat recording)
Recording from a video recorder/DVD player
13
Recording from a camera connected to the front sockets
............
13
14
14
14
15
General
.............................................................................................................
15
Programming recordings with the GUIDE Plus+
15
Programming recordings with the ShowView
16
Programming recordings without the ShowView
How to change or delete a programmed recording (TIMER)
Cancel a programmed recording in progress
17
17
17
General
.............................................................................................................
18
Additional playback features
18
Search by time
.................................................................................................
19
Repeat
...............................................................................................................
19
Zoom feature
..................................................................................................
The media browser
Symbols in the 'Media Browser'
Change order for the media browser
Change title settings
20
Edit title
............................................................................................................
22
'Video edit'
.......................................................................................................
Editing recorded titles (name)
Divide title
.......................................................................................................
Delete titles/recordings from the HDD
23
Insert/remove chapter markers
23
Hide chapters (sections)
24
25
26
26
Archiving (storing) titles on a DVD+RW/+R
27
Protect disc against accidental recordings
27
General notes on playback
Switch over to the actual TV channel during playback
29
Inserting a disc
29
......................................................
®
System
...............................................................
............................................................................................
........................................................................................
....................................................................................
.............................................................................................
.........................................................................................
..........................................................................................
.....................................................................................
...............................................................
..............................................................
.....................................................................
..........................................................................................
..............................................................................................
...........................................................
®
..........................................
........................................................................
.......................................................................................
..................................................................
.......................................................
......................................................................................
.....................................................................
...................................................
..................................................................
...............................................................................
..........................................
................................................
...........................................................................
................................................................................................
30
30
32
33
33
34
35
35
36
36
36
37
37
38
38
38
39
39
40
40
............
40
.......................................
41
..................
41
43
®
System
....................
43
System
.........................
44
®
System
...................
45
.............
46
47
48
48
48
48
49
49
49
50
50
51
51
52
52
53
53
54
55
55
56
..........................
56
56
Advertisement

Related Manuals for Philips HDRW 720/00-02


Summary of Contents for Philips HDRW 720/00-02
- Page 1 Important Important instructions for the HDD Symbols used in these operating instructions Cleaning the discs Special functions of your DVD recorder Preparing the remote control for operation Using your DVD-Recorder remote control with your TV set Connecting to the aerial...
- Page 2 Changing the PIN code Symbols in the menu bar Menu bar 1 Menu bar 2 Field for temporary messages Status field Disc type symbols Operating mode symbols The symbols on your DVD recorder display Messages in the DVD recorder display...
- Page 3 Your Philips DVD/HDD recorder mainly consists of the following components: As soon as you turn on the DVD/HDD recorder, it automatically records the current TV channel selected on the DVD/HDD recorder in this temporary storage. As a result, you can 'rewind' to a scene ( D ) or watch a still picture ( PAUSE 9 ), while the current TV show is still being recorded.
- Page 4 TV reception and the signal of the DVD recorder. This, however, functions only if you have connected your TV set to the DVD recorder using a scart cable (socket EXT1 TO TV-I/O ) and your TV set reacts to the switching.
- Page 5 STOP h Stop playback Hold down the button to open and close the disc tray. PAUSE 9 If this button is pressed during playback, the DVD recorder switches to pause. You will see a still picture. If this button is pressed during recording in the 'Camera mode', the DVD recorder switches to pause and inserts a chapter marker.
- Page 6 CHANNEL q To select a higher programme number CHANNEL r To select a lower programme number Additional TV functions for Philips TV-sets if supported from the TV. You need to hold down the • TV button (on the left side).
- Page 7 STANDBY-ON m : To switch device off / on, interrupt a function. TRAY LED : Red light around the disc tray indicates recording on a DVD+RW/+R. OPEN/CLOSE J : Open/close disc tray. GUIDE : Call up/Cancel the GUIDE Plus+ Plus+ ®...
- Page 8 4MAINS Connection to the mains supply (230V/50Hz) ANTENNA IN Connection of the aerial TV OUT Connection of the aerial cable to the TV set EXT2 AUX-I/O Connection of an additional device (satellite receiver, set-top box, video recorder, camcorder, ...). Input for RGB, S-video signals, input/output for CVBS (video) signals EXT1 TO TV-I/O Connection of a TV set.
- Page 9 You can store recordings from the time shift buffer on the built-in HDD and transfer (archive) them later on a DVD+RW/+R disc. Furthermore your Philips DVD Recorder /Hard Disk is a device for recording on DVD+RW/+R Discs and for playing digital video discs see next chapter.
- Page 10 To switch off the DVD recorder completely, you must unplug it from the power supply. AIf you disconnect the DVD recorder from the mains, make sure to take the plug out of the wall socket and not just remove the connector from the 4MAINS socket at the back of the unit.
- Page 11 BMake sure that no objects or liquids enter into the DVD recorder. Do not place vases or the like on the DVD recorder. If you spill liquid into the recorder, immediately disconnect it from the power supply and call after-sales service for advice.
- Page 12 Philips. You can upgrade the software of your DVD-Recorder with a CD-ROM. On the web site http://www.p4c.philips.com under the model number 'HDRW 720/00-02' you will find the data and the upgrade information.
- Page 13 The Philips DVD recorder can play back pre-recorded DVDs and CDs. DVDs recorded using this DVD recorder can be played back on current and future DVD players. Dolby Digital is a standard developed by Dolby Laboratories for transmitting from 1 to 5 full-range channels as well as a low frequency (.1) channel for a total of 5.1 discrete channels.
- Page 14 Enter the serial number here. You will need it for service queries or if your machine is stolen. The serial number (PROD. NO.) is printed on the type plate at the back or bottom. This product complies with the requirements of the following directives and guidelines: 73/23/EWG (Low voltage directive) + 89/336/EWG (EMV-Directive) + 93/68 EWG (CE-Marking).
- Page 15 The remote control and its batteries are packed separately in the original DVD recorder packaging. You must install the batteries in the remote control before use - described in the following section. 1 Take the remote control and the enclosed batteries (2 batteries).
- Page 16 ANTENNA IN socket at the back of the DVD recorder. 3 Insert one end of the supplied aerial cable into the TV OUT socket at the back of the DVD recorder and the other end into the aerial input socket at the back of the TV set.
- Page 17 1 Insert one end of an S-Video(SVHS) cable into the S-VIDEO OUT (Y/C) socket at the back of the DVD recorder and the other end into the S-Video (SVHS) input socket on the TV set (usually labelled 'S-Video in' or 'SVHS in'. See TV operating instructions).
- Page 18 1 Switch on the TV set. 2 Insert one end of the supplied mains cable into the mains socket 4MAINS at the back of the DVD recorder and the other end into the wall socket. The most important features of the DVD recorder will appear in scrolling text on the display.
- Page 19 EXT2 AUX-I/O scart socket with the EXT1 TO TV-I/O scart socket. You will then see the picture from the additional device on your TV set, even if the DVD recorder is switched off. The TV/HDD button on the remote control allows you to switch between playback through the EXT2 AUX-I/O scart socket and playback from the DVD recorder.
- Page 20 (satellite receiver). Consult the instruction manual of the additional device. You must also store this channel on the DVD recorder to be able to record TV programmes from the additional device (satellite receiver). Switch on the additional device during the installation of the DVD recorder.
- Page 21 DVD recorder. These can be used to connect the following: At the back of the DVD recorder there are two digital audio output sockets OPTICAL OUT for an optical cable and COAX OUT for a coaxial cable (Cinch cable).
- Page 22 After successfully connecting your DVD recorder to the TV set and other additional devices as described in the previous chapters, this chapter will show you how to start the initial installation. The DVD recorder automatically seeks and stores all available TV channels.
- Page 23 It can take some time before this screen appears. Please press in the meantime. B After you connect the aerial (or cable TV, satellite receiver, etc.) to the DVD recorder, press OK . The automatic TV channel search starts. ' will appear on the display.
- Page 24 TV channels from a satellite receiver (connected to scart socket EXT2 AUX-I/O ) are received on the DVD recorder on programme number If necessary, use the TUNER button to switch to the internal tuner. Select programme number ' ' with 0 on the remote control and ' with CHANNEL r .
- Page 25 Some TV channels send coded TV signals that can only be viewed properly with a purchased or rented decoder. You can connect such a decoder (descrambler) to your DVD recorder. The following function automatically activates the connected decoder for the TV channel you want to watch.
- Page 26 This function changes the order of the TV channels stored in your DVD recorder to match the order on the TV set. This only works if the DVD recorder ( EXT1 TO TV-I/O socket) and the TV set •) The TV set is switched on, and if necessary, the programme number for the DVD recorder has been selected.
- Page 27 STANDBY m If the channel assignments of your cable or satellite TV provider change or if you are reinstalling the DVD recorder, e.g. after moving house, you can start this procedure again. This will replace the stored TV channels with the new ones.
- Page 28 Subtitle language You have the option of setting one of the displayed languages for the on-screen menu (OSD). However, the DVD recorder display will only display English text regardless of this setting. The language can also be set in the installation menu from the GUIDE Plus+ ®...
- Page 29 (luminance, Y), blue (U, Pb, Cb, B-Y), and red (V, Pr, Cr, R-Y). If you choose this type of connection, the DVD recorder must already be connected and completely installed (initial installation complete).
- Page 30 8 Use an audio (cinch) cable, connect the red/white cinch socket AUDIO OUT L/R at the back of the DVD recorder with the most coloured red/white audio input socket of your TV set (usually labelled 'Audio in' or 'AV in'.
- Page 31 For the GUIDE Plus+ ® System to operate correctly, it is necessary for the DVD recorder to collect the necessary data. The DVD recorder may take up to 24 hours to do this. Please note the following: •) All the TV channels must already have been installed.
- Page 32 OK . 3 Press OK to return to the ' ' screen. Select the country you currently live from the list. The DVD recorder needs this information to load the right channel list. 1 Press OK . 2 Select the country you live in using B or A and confirm with OK .
- Page 33 Browse through the pages of the list using O , N . 8 Press OK . 9 Select the input socket of the DVD recorder to which the receiver is connected. B A D C 0..9 0 Confirm with OK .
- Page 34 GUIDE Plus+ will in the table in the chapter 'The GUIDE Plus+ section 'General information'. Leave the DVD recorder switched on during the night to load the GUIDE Plus+ The information will be available in the next 24 hours. 5 If data are available check in the ' channel which transmits the GUIDE Plus+ right programme number.
- Page 35 GUIDE Plus+ ® System. Using the buttons on the front of the DVD recorder Calling up the GUIDE Plus+ Closing the GUIDE Plus+ Confirm the function: OK button. Red function button: n button.
- Page 36 If GUIDE Plus+ ® information has been loaded, function buttons (colour fields) at the top of the screen indicate that you can perform various actions in the GUIDE Plus+ ® screen. Red, Green, Yellow, Blue whose function depends on the respective menu. Always check the function (description) in the corresponding colour field before pressing a button.
- Page 37 This menu lets you access show listings organised by category. This is an even easier way of searching the show you want to watch. Make your selection from a general category (Movies, Sport, Children's, Series, etc.) and a detailed category (Adventure, Comedy, Drama, etc.) -Movies -Sport, -Children's,...
- Page 38 This screen can be divided in subcategories. These depend on the information provided by the GUIDE Plus+ ® categories available, no data has been provided yet. Try visiting this page later. 1 Press B . Select the corresponding subcategory with B , A . 2 Select from the displayed data with B or A .
- Page 39 As soon as you turn on the DVD recorder, the currently selected TV channel on the DVD-Recorder is recorded in a temporary storage (Time shift Buffer). Recordings in the time shift buffer will be automatically deleted e.g. after 3 hours if the period of the time shift buffer is set to 3 hours (factory setting).
- Page 40 •) The TV set is switched on, and, if necessary, the programme number for the DVD recorder has been selected. •) the DVD recorder is switched to tuner mode (button TUNER ). 1 Press INFO to display the bar of the time shift buffer on the screen.
- Page 41 (1 to 6 hours) expires. - If you switch off the DVD recorder with STANDBY m or select the ' time shift buffer will be deleted.
- Page 42 DVD recorder. If the TV channel can be found, the DVD recorder selects it and starts the recording. If no corresponding TV channel is found in the DVD recorder, an error message appears. Read the next section 'Switching Direct Record on or off' on how to switch Direct Record on or off.
- Page 43 4 Switch on the video recorder/DVD player. In case playback has started automatically, interrupt it with STOP h or PAUSE 9 . 5 Start recording by pressing REC/OTR n on the DVD recorder and playback by pressing PLAY G on the video recorder/DVD player.
- Page 44 5 You can stop the recording using the following buttons: PAUSE 9 The recording will be paused. If you press the button again, the recording will resume. A new chapter is created. STOP h The recording will be interrupted. You can start a new recording by pressing REC/OTR n .
- Page 45 Use 'Programming a recording (TIMER)', to automatically start and stop a recording at a later date. The DVD recorder will switch to the right programme number and begin recording at the correct time. On this DVD recorder you can pre-programme up to 12 recordings within a period of one month.
- Page 46 Thanks to this programming system, you no longer need to tediously enter the date, programme number, start and finish times. All the information needed by the DVD recorder for programming is contained in the ShowView ShowView ®...
- Page 47 •) The TV set is switched on, and, if necessary, the programme number for the DVD recorder has been selected. •) the DVD recorder is switched on. 1 Press TIMER s on the remote control. The ' ' screen appears 2 Press the green button.
- Page 48 •) The TV set is switched on, and, if necessary, the programme number for the DVD recorder has been selected. •) the DVD recorder is switched on. 1 Press TIMER s on the remote control while the DVD recorder is switched on. The '...
- Page 49 3 To end, press TIMER s . A message appears few minutes before the recording is about to start if the DVD-recorder is tuned to a different TV channel as programmed. If you confirm this message the TV channel will be changed and the recording started.
- Page 50 Each recording stored on the HDD is displayed in the media browser with a corresponding index picture. 1 Press BROWSER HDD on the remote control or HDD on the DVD recorder. The Media Browser appears. 2 Select the title you want using B , A on the remote control or DOWN , UP on the device.
- Page 51 The Zoom feature allows you to enlarge the video image and pan through the enlarged image during play back from the HDD or from the time shift buffer. 1 During playback, press PAUSE 9 at the position where you want to enlarge the picture. You will see a still picture.
- Page 52 Your may choose only titles that meet certain criteria for the overview. This order will remain until you exit the media browser. 1 Press BROWSER HDD on the remote control. The Media Browser appears. 2 Press D . The 'Order Menu' appears. 3 Select one of the following options using B or A and confirm with OK .
- Page 53 Use this function to adapt the title (recording) to your personal preferences. 1 Press BROWSER HDD on the remote control. The Media Browser appears. 2 Select the title whose settings you want to change with B , A . Press EDIT . 3 Select one of the displayed functions with B , A and confirm with C to proceed with the changes.
- Page 54 From the GUIDE Plus+ ® data the title (name) of a TV show will be taken automatically (e.g. 'ROCKY'). Otherwise, only the programme number (programme name) and the time will be stored as the name of the recording. The name of the recording can only be changed after the recording has finished.
- Page 55 You can remove titles/recordings from the HDD to use the capacity from the HDD for new recordings. 1 Press BROWSER HDD on the remote control. The Media Browser appears. 2 Select the title/recording you want to delete using A or B 3 Press the red function button (' A note appears if you really want to delete this title.
- Page 56 By default, all chapters are visible. You can hide or unhide certain chapters during playback (e.g. unwanted scenes). In the editing mode, you will recognise a hidden chapter by a grey background and the description of the blue function button: Chapter is visible and can be hidden with the blue button.
- Page 57 You can choose the title of the HDD that you want to transfer on a DVD+RW/+R. The copying process is done at a higher speed than the recording. Therefore, you can transfer an 8-hour recording in ' recording mode on a DVD+RW/+R in just 30 minutes. This time depends on the recording mode used.
- Page 58 You can operate the video recorder using the remote control or the buttons on the front of the DVD recorder. As soon as you turn on the DVD recorder, the currently selected TV channel on the DVD-Recorder is recorded in a temporary storage (Time shift Buffer).
- Page 59 5 To remove the disc, press OPEN/CLOSE J on the front of the DVD recorder. You can also use the DVD recorder to play audio CDs If the TV is on, the audio CD screen appears automatically. During playback, the current track number and its elapsed playing time will show on the TV screen and on the recorder display.
- Page 60 (Super) Video CDs may be equipped with PBC (Play Back Control). This means that special playback functions (menus) can be directly selected. The video CD must be PBC compatible (see CD case). 'PBC' is active in the default settings. 1 Insert a (Super) Video CD. If the 'h' symbol appears in the display, start playback by pressing PLAY G .
- Page 61 DVD's are divided in titles and chapters. During playback, press O to go to the next title. If there are several chapters within a title, the next chapter. Press N to return to the start of the current title/chapter. Press N twice to return to the start of the previous title/chapter.
- Page 62 This feature plays back the first 10 seconds of each chapter (DVD) or track (CD). 1 During playback, press SELECT . Select ' SELECT . After 10 seconds the DVD recorder switches to the next chapter/index. To start playback at the relevant chapter/index press STOP h and then PLAY G .
- Page 63 Many pre-recorded DVD discs have more than one audio language. The language initially selected for playback will be the one you selected when you first set up the DVD recorder. However you can change the audio language of the inserted disc at any time.
- Page 64 When a recording is made to disc, the following additional information is also stored at the beginning of the recording: •) Name of the recording If a name has not been assigned to the TV channel, only the programme number and time are stored as the name •) Length of the recording •) Record type (Quality) •) Date of the recording...
- Page 65 Initially, all the chapters are visible. You can hide chapters for playback (e.g. unwanted scenes) or make them visible again. In editing mode, hidden chapters are shown darker. A chapter always consists of a start marker and an end marker. To hide a certain scene, proceed as follows: 1 Search the beginning of the scene you want to hide.
- Page 66 4 Start the change with OK . ' appears on the TV screen. Once the revision has been completed successfully the DVD recorder reverts to the index overview. You can divide a title into several sections (titles) of any size. Each of these sections (titles) is identified by its own index.
- Page 67 1 If required, press the STOP h button to interrupt playback. 2 Using A or B select the title whose name you want to edit and confirm with C . The menu for editing names appears. 3 Select ' ' using A or B and confirm with C . 4 Using C or D select the position where the letter/number/icon is to be changed/re-entered.
- Page 68 You can erase specific recordings from a disc. Please note: If there is an ' ' between titles, this space can not be used from this DVD-Recorder. Each recording from the HDD to a DVD+RW/+R (archiving) will be added at the end of existing recordings 1 Press the STOP h button or during playback press DISC MENU .
- Page 69 You can delete the character using the red function button. 5 Repeat until you have made the changes you want. 6 Save the new title with OK . ' appears on the TV screen for confirmation. 7 To end, press D . If one or more titles have been edited a DVD player may still display the original titles.
- Page 70 The 'Disc Manager' is an integrated database in the DVD recorder that remembers all recordings on DVD+RW/+R discs made by this DVD recorder. This gives you a complete overview of your entire video collection at the touch of a button. The Disc Manager gives you quick and easy access to every recording .
- Page 71 3 Select the title that you want to play back with B or A . 4 Confirm with OK . The DVD recorder will jump to the start of the selected recording. You can easily search for the title of a recording stored in the Disc Manager.
- Page 72 'Lang I' or 'Lang II' in the display also indicates whether a TV show is broadcast in two languages. This setting only affects playback through the internal tuner of the DVD recorder. The setting for the programmed recording (Timer) will not be affected.
- Page 73 In this menu, you can select one of the following functions for recording: Select from the settings displayed the record mode (picture quality of the recording). M1, M2x, M3,... M8. For recordings on a DVD+RW/+R (archiving function) always the recording mode used for the recording on the HDD will be taken. Observe the maximum possible recording time on a DVD+RW/+R.
- Page 74 If a recording starts while the DVD recorder is switched off, the TV channel currently selected on the TV set will be compared with the TV channels stored in the DVD recorder. - If the TV channel is found, recording will start.
- Page 75 Please observe that for selection of function in this menu the Time shift Buffer will be flushed. If the 'Time Shift Buffer ' contains important recordings, save them with the REC/OTR n button first. Read additional information about the 'Time Shift Buffer' in the chapter 'The Time Shift Buffer'.
- Page 76 7 Close the menu item with D . You can select the following functions in this menu: The picture signal from your DVD recorder can be set to match your TV set: for a widescreen picture with black bars at the top and bottom for a full-height picture with the sides trimmed.
- Page 77 You can select one of the following settings for devices that are connected to the analogue audio output (): For devices without DolbySurround or TruSurround. Use this setting if the DVD recorder is only connected to a stereo TV set. Dolby Digital and MPEG-2 multi-channel are mixed down to a Dolby Surround-compatible two-channel output signal.
- Page 78 The OSD information is switched off. It is displayed on the screen. You can switch off the clock display on your DVD recorder to save energy. Programmed recordings will be carried out despite of this. In addition, you can have the most important features of your DVD recorder appear in scrolling text in the display (demo).
- Page 79 In this menu, you can make changes that relate to the disc: Please read the next chapter 'Access control (child lock)'. If playback of a pre-recorded DVD video disc or video CD is interrupted (using STOP h or OPEN/CLOSE J ), playback will resume where it stopped after you reinsert the disc.
- Page 80 •) The TV set is switched on, and if necessary, the programme number for the DVD recorder has been selected. •) the DVD recorder is switched on. 1 Press TUNER and then SYSTEM MENU on the remote control. If playback from a disc starts automatically, remove the disc (button OPEN/CLOSE J ).
- Page 81 •) The TV set is switched on, and if necessary, the programme number for the DVD recorder has been selected. •) the DVD recorder is switched on. 1 Press DISC MENU and then SYSTEM MENU on the remote control.
- Page 82 •) The TV set is switched on, and if necessary, the programme number for the DVD recorder has been selected. •) the DVD recorder is switched on. 1 Press the TUNER and then the SYSTEM MENU button on the remote control.
- Page 83 During playback of a disc, the status field shows the current operating mode (status) of the DVD recorder and the type of disc inserted. This display can be switched off.
- Page 84 A disc has not been inserted for recording. If a disc has been inserted, it cannot be read. Information about the inserted DVD is displayed on the screen The DVD recorder is processing the changes to make the disc DVD compatible The entire DVD+RW is being erased The DVD+RW/+R inserted is either new or has been completely erased (no recordings).
- Page 85 HDD: within a title 500, on the HDD 1000 (spreaded over the whole HDD) The disc/HDD is full. There is no space for new recordings A disc with PAL recordings has been inserted. The machine is trying to record an NTSC signal. Insert a new disc or one that contains NTSC recordings.
- Page 86 SOLUTION Please read paragraph 'Initial Installation' in the chapter 'Installing your DVD Recorder'. If you have any problems using this DVD recorder, the reason may be one of the following. You can also call the The telephone numbers can be found on the back of this instruction manual.
- Page 87 PROBLEM SOLUTION BROWSER HDD Press SYSTEM MENU while the (Super) Video-CD is inserted . ' using D or C . Select ' ' using B or A and confirm with C . Select line ' ' using B or A . Select ' ' in line ' Confirm with OK and end with SYSTEM MENU .
- Page 88 PROBLEM SOLUTION GUIDE/TV Press GUIDE/TV . Press A . ' with C . Select ' Select the TV channel using B or A . Press C to go to the right tile. In case you can receive the selected channel only via an external receiver, press the red button to select the corresponding source.
- Page 89 Hold down 5 on the remote control until the tray closes. The disc will be read (' appears on the display) and the DVD recorder will start the repair process. This may take up to four times as much time as the recording, in which the error occurred.
- Page 90 PROBLEM SOLUTION Open the disc tray with OPEN/CLOSE J . Insert the defect DVD+R but Hold down 4 on the remote control until the tray closes. ' appears in the display. Finalising begins. This may take up to three minutes. If finalising has been successful, the index screen will appear.
- Page 91 If the regional codes differ between the player and the disc, playback is not possible. The regional code of the DVD recorder is shown on the type plate at the back or bottom. Some TV programmes transmit an extra audio signal in stereo in addition to the normal audio signal (2-channel sound).
- Page 92 Colortyme 004, 006, 114, 130, 134, Action Admiral 093, 134, 209, 262, 306, Condor Aiko 013, 246, 248, 250, 255, 266 Contec Akai 002, 113, 114, 140, 216, 246, 248, 250, 255, 266, 285, 292, Contec Cony 305, 324, 332 Contec/Cony Akura 217, 222, 246, 250, 266...
- Page 93 306, 308, 311, 313, 324, 325 MGA 004, 005, 006, 015, 047, 114, Minerva 208, 240, 242, 254, 256, 264, 311, 324, 325 Philips 000, 003, 004, 006, 008, 009, Minoka 234, 250 Mission Mitsubishi 004, 005, 006, 015, 047,...
- Page 94 279, 283, 285, 287, 292, Vortec 309, 313, 324, 330, 332 Voxson Univox Wards Video Concepts VideoSystem Vidikron Vision 209, 250, 256, 306 Watson 250, 266, 288, 289 Watt Radio Wega 001, 004, 005, 006, 015, Weltblick 016, 023, 032, 037, 041, White Westinghouse113, 120, 144, 042, 045, 049, 051, 111, 113, 120, 122, 123, 131,...
- Page 95 Hard Disc recording: 80 Gb HDD Playback: PAL/NTSC Recording: PAL/NTSC Internal tuner: PAL/SECAM Playback Recording DVD+RW • • DVD+R • • DVD-R/-RW, video mode • DVD-Video • Video CD, Super VCD • Audio CD • MP3 CD • CD-R/RW • Digital compression DVD, SVCD: MPEG2 VCD: MPEG1...
- Page 96 Sandstuveien 70, Philips Austria GmbH PO Box 1, Manglerud Triesterstrasse 64 N-0612 Oslo 1101 Wien Phone: 2274 8250 Tel: 0810 00 12 03 Sinikalliontie 3, Alexanderstrasse 1 02630 Espo 20099 Hamburg Helsinki Tel: 0180-535 6767 puh. (09) 6158 0250 Kollbygatan 7,...
Need help?
Do you have a question about the HDRW 720/00-02 and is the answer not in the manual?
Questions and answers