Table of Contents
Advertisement
Quick Links
Advertisement
Table of Contents

Subscribe to Our Youtube Channel
Related Manuals for Trotec TTK165ECO


Summary of Contents for Trotec TTK165ECO
- Page 1 TTK 165 ECO / TTK 170 ECO / TTK 380 ECO ORIGINAL INSTRUCTIONS DEHUMIDIFIER...
-
Page 2: Table Of Contents
Safety .................. 2 following link: Information about the device.......... 6 Transport and storage............ 7 Assembly and start-up............ 8 TTK 165 ECO Operation ................ 11 Available accessories............ 15 https://hub.trotec.com/?id=40461 Errors and faults.............. 15 Maintenance ................ 17 Technical annex.............. 20 TTK 170 ECO Disposal ................ 28 Declaration of conformity ........... 28 https://hub.trotec.com/?id=40716 Notes regarding the instructions... - Page 3 • Do not use the device in aggressive atmosphere. • Only transport the device in an upright position with an emptied condensation tank or drain hose. • Only put up the device in an upright, stable position on firm ground. •...
- Page 4 Note repaired by specialist companies for cooling and air- Do not remove any safety signs, stickers or labels from conditioning or by Trotec. the device. Keep all safety signs, stickers and labels in Intended use legible condition.
- Page 5 Warning Follow the manual This symbol indicates that the operating manual must Risk of suffocation! be observed. Do not leave the packaging lying around. Children may use it as a dangerous toy. Follow the repair manual Disposal, maintenance and repair work of the Note refrigerant circuit may only be carried out in Do not operate the device without an air filter inserted...
-
Page 6: Information About The Device
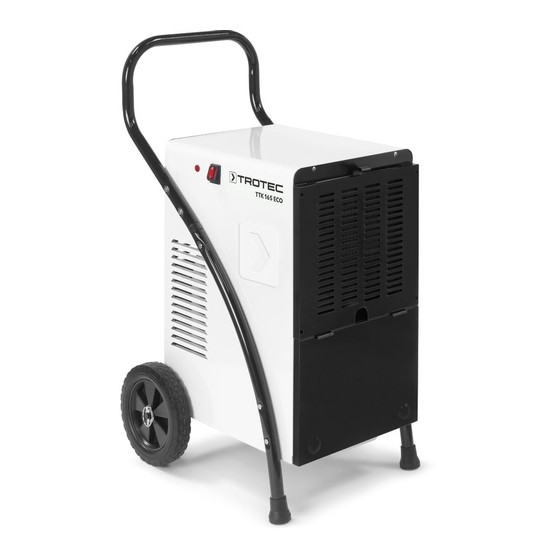
Device depiction Information about the device TTK 165 ECO Device description The device uses the principle of condensation to automatically dehumidify rooms. The fan sucks damp room air through the air inlet, the air filter, the evaporator and to the condenser located behind it. The air is cooled at the cold evaporator until it is below the dew point. -
Page 7: Transport And Storage
TTK 380 ECO Transport and storage Note If you store or transport the device improperly, the device may be damaged. Note the information regarding transport and storage of the device. Transport Please note that additional transport regulations might apply to devices containing flammable refrigerants. -
Page 8: Assembly And Start-Up
Unpacking the device Assembly and start-up 1. Open the cardboard box and take the device out. 2. Completely remove the packaging. Scope of delivery 3. Fully unwind the power cable. Make sure that the power TTK 165 ECO / TTK 170 ECO cable is not damaged and that you do not damage it during •... - Page 9 5. Place a second washer (16) in front of the wheel (7). Mounting the wheels TTK 165 ECO / TTK 170 ECO Prior to initial start-up, the wheels and the axle must be attached to the device. To do so, please proceed as follows: ü The device is placed on its front side. 1.
- Page 10 Mounting the transport handle Start-up Prior to initial start-up, the transport handle must be attached to When positioning the device, observe the minimum distance the device. To do so, please proceed as follows: from walls or other objects as described in the chapter Technical annex.
-
Page 11: Operation
Inserting the air filter Operation Note Notes: Do not operate the device without an air filter inserted • Avoid open doors and windows. into the air inlet! • After being switched on, the device operates fully Without the air filter, the inside of the device will be automatically. - Page 12 2. Remove the condensation tank. Switching the device on Once you have completely installed the device as described in the chapter Assembly and start-up, you can switch it on. Press the on/off switch (10). The device starts to dehumidify in continuous operation. Note Only use the device in an upright position, otherwise the compressor could be damaged.
- Page 13 5. Refit the condensation tank into the device. Guide the other TTK 380 ECO hose end to a suitable drain or sufficiently dimensioned ü A suitable hose (diameter: 16 mm) is ready for use. collection container. ü The device is switched off. 1. Open the front cover. 6.
- Page 14 3. Connect the condensation drain hose to the connection 6. Push one end of the hose onto the hose connection on the inside the housing. outside of the housing. 4. Refit the condensation tank into the device. 7. Guide the other hose end to a suitable drain or sufficiently dimensioned collection container.
-
Page 15: Available Accessories
• If necessary, remove the condensation drain hose and any device is not starting, have the electrics checked by a residual fluid from it. specialist company or by Trotec. • Empty the condensation tank, if need be. The device is running, but there is no formation of condensate: •... - Page 16 • From the outside, check the condenser for dirt (see chapter Maintenance). If the condenser is dirty, have it cleaned by a specialist company or by Trotec. • The device might carry out an automatic defrost. During automatic defrost, the device does not dehumidify.
-
Page 17: Maintenance
Maintenance intervals Maintenance Maintenance and care interval before every as needed at least every at least every at least every at least start-up 2 weeks 4 weeks 6 months annually Check air inlet and outlet for dirt and foreign objects and clean if necessary Clean the exterior Visually check the inside of the device for dirt... - Page 18 Warning of electrical voltage Tasks which require the device to be opened must only be carried out by authorised specialist companies or by Trotec. Refrigerant circuit Danger Natural refrigerant propane (R290)! H220 – Extremely flammable gas.
- Page 19 2. Clean the filter using a slightly damp, soft, lint-free cloth. If 2. Empty the condensation tank over a drain or sink. the filter is heavily contaminated, clean it with warm water mixed with a neutral cleaning agent. 3. Rinse the tank with clear water. Clean the tank regularly using a mild cleaning agent (no detergent!).
-
Page 20: Technical Annex
Technical data Technical annex Model TTK 165 ECO TTK 170 ECO TTK 380 ECO Max. dehumidification 52 l / 24 h 52 l / 24 h 80 l / 24 h performance Dehumidification performance 50 l / 24 h 50 l / 24 h 79 l / 24 h @ 30 °C and 80 % RH Air flow rate 350 m 350 m... - Page 21 Wiring diagram TTK 165 ECO Wiring diagram TTK 170 ECO / TTK 380 ECO dehumidifier TTK 165 ECO / TTK 170 ECO / TTK 380 ECO...
- Page 22 Overview of spare parts and spare parts list – TTK 165 ECO Info The position numbers of the spare parts differ from those describing the positions of the components mentioned in these instructions. 20 21 22 23 dehumidifier TTK 165 ECO / TTK 170 ECO / TTK 380 ECO...
- Page 23 No. Spare part No. Spare part No. Spare part Filter PCB board fixing plate Feet cap Front grill Fan bracket 8-inch PU wheel ST4*10 cross self-drilling screw Motor Cotter Water tank Rear plate Wheel axiel Floater switch block-ring Mainboard Compressor feet bolt Floater Fan capacitor Base plate...
- Page 24 Overview of spare parts and spare parts list – TTK 170 ECO Info The position numbers of the spare parts differ from those describing the positions of the components mentioned in these instructions. dehumidifier TTK 165 ECO / TTK 170 ECO / TTK 380 ECO...
- Page 25 No. Spare part No. Spare part No. Spare part Magnet III Reel Capillarity tube Magnet IV Fan bracket High pressure tube Door Fan frame connector Connector Dual hinge Appliance box Low voltage tube Front panel Main board Capacitance hoop Air filter Power cord Capacitance I Heat exchanger...
- Page 26 Overview of spare parts and spare parts list – TTK 380 ECO Info The position numbers of the spare parts differ from those describing the positions of the components mentioned in these instructions. dehumidifier TTK 165 ECO / TTK 170 ECO / TTK 380 ECO...
- Page 27 No. Spare part No. Spare part No. Spare part Filter Drain Rubbert feet Front grill Right-side plate Capacitor cliper Top cover Shaft Compressor capacitor Adhesive to Heat-exchanger Ø6 flat washer Fan capacitor Heat-exchanger set M6*40 screw rod Mainboard Defrost sensor M6 nut Button-type hexagon isolation column...
-
Page 28: Disposal
Declaration of conformity Declaration of conformity in accordance with the EC Machinery Directive 2006/42/EC, Annex II, Part 1, Section A We – Trotec GmbH – declare in sole responsibility that the product designated below was developed, constructed and produced in compliance with the requirements of the EG Radio Equipment Directive in the version 2006/42/EC. - Page 29 Declaration of conformity in accordance with the EC Machinery Directive 2006/42/EC, Annex II, Part 1, Section A We – Trotec GmbH – declare in sole responsibility that the product designated below was developed, constructed and produced in compliance with the requirements of the EC Machinery Directive in the version 2006/42/EC.
- Page 30 Trotec GmbH Grebbener Str. 7 D-52525 Heinsberg +49 2452 962-400 +49 2452 962-200 info@trotec.com www.trotec.com...
Need help?
Do you have a question about the TTK165ECO and is the answer not in the manual?
Questions and answers