Table of Contents
Advertisement
Available languages
Available languages
Quick Links
Cat. No. / No de cat.
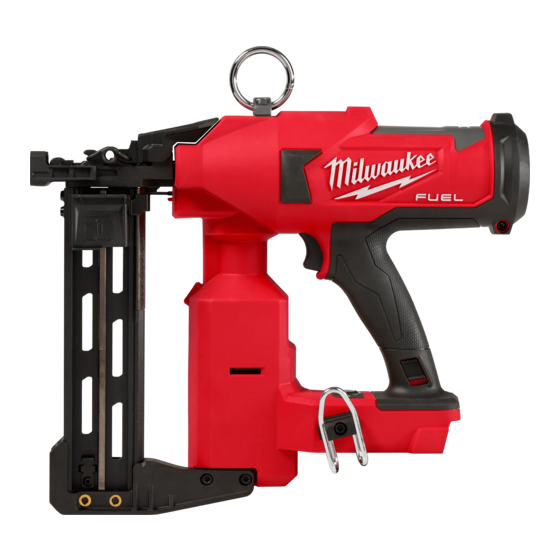
2843-20
M18 FUEL
TM
AGRAFEUSE DE CLÔTURE UTILITAIRE M18 FUEL
GRAPADORA UTILITARIA PARA CERCAS M18 FUEL
WARNING
AVERTISSEMENT
comprendre le manuel.
ADVERTENCIA
UTILITY FENCING STAPLER
To reduce the risk of injury, user must read and understand operator's manual.
Afin de réduire le risque de blessures, l'utilisateur doit lire et bien
Para reducir el riesgo de lesiones, el usuario debe leer y entender el manual.
OPERATOR'S MANUAL
MANUEL de L'UTILISATEUR
MANUAL del OPERADOR
TM
TM
Advertisement
Table of Contents

Related Manuals for Milwaukee 2843-20


Summary of Contents for Milwaukee 2843-20
- Page 1 OPERATOR'S MANUAL MANUEL de L'UTILISATEUR MANUAL del OPERADOR Cat. No. / No de cat. 2843-20 M18 FUEL UTILITY FENCING STAPLER AGRAFEUSE DE CLÔTURE UTILITAIRE M18 FUEL GRAPADORA UTILITARIA PARA CERCAS M18 FUEL WARNING To reduce the risk of injury, user must read and understand operator's manual.
-
Page 2: General Power Tool Safety Warnings
GENERAL POWER TOOL • Dress properly. Do not wear loose clothing or jewelry. Keep your hair and clothing away from SAFETY WARNINGS moving parts. Loose clothes, jewelry or long hair can Read all safety warnings, instruc- WARNING be caught in moving parts. tions, illustrations and specifica- •... -
Page 3: Stapler Safety Warnings
• Have your power tool serviced by a qualified repair your capability; contact Milwaukee Tool or a trained person using only identical replacement parts. This professional for additional information or training. -
Page 4: Functional Description
FUNCTIONAL DESCRIPTION 2. The staples will need to be loaded near the bottom of the magazine and then slide into place over the metallic portion. a. Up to 2 full collations can be loaded in the magazine at a time. 3. -
Page 5: Power Function
4. Turn the depth selector left or right to increase or Power Function decrease the driving depth. 1. Install battery pack. 5. Repeat until desired depth is reached. 2. Press and hold the Power button to turn on the tool (the Power button's green LED ring will light). Clearing a Jammed Staple The Battery LED indicates when the battery level Most jams are caused by a staple or part of a staple... -
Page 6: Maintenance
Return the tool, battery pack, and charger received a sharp blow, been run over, etc. Com- to a MILWAUKEE service facility for repair. After six plete the following checklist IN ORDER. If the tool months to one year, depending on use, return the... -
Page 7: Sécurité Électrique
MILWAUKEE to be defective in material or workman- outil électrique. Ne pas suivre l’ensemble des règles ship for a period of five (5) years** after the date of purchase unless et instructions peut entraîner une électrocution, un... -
Page 8: Utilisation Et Entretien De L'outil Électrique
• Utiliser l’outil électrique, les accessoires, les • Porter l’équipement de protection individuel requis. Toujours porter une protection oculaire. embouts etc. conformément à ces instructions en tenant compte des conditions de travail et de Selon les conditions, porter aussi un masque anti- la tâche à... - Page 9 ; peut être déviée loin de votre cible. veuillez contacter Milwaukee Tool ou un professionnel • Débranchez l'outil de la source d'alimentation formé pour recevoir plus d’information ou formation.
-
Page 10: Description Fonctionnelle
DESCRIPTION FONCTIONNELLE 2. Les agrafes devront être chargées près du bas du magasin, puis glisser en place sur la partie métallique. a. Il sera possible de charger dans le magasin jusqu’à 2 bandes complètes à la fois. 3. Une fois les agrafes dans le magasin, appuyez sur la languette au bas du poussoir d'agrafes pour le libérer de la position verrouillée. -
Page 11: Fonction Marche/Arrêt
Définition de la profondeur d’enfoncement Pour éviter les risques de blessures graves, ne pas essayer d’empêcher le recul en maintenant La profondeur d’enfoncement peut être ajustée en l’outil trop fermement contre la pièce. Garder fonction de la taille de l’agrafe et du matériau de la le visage et le corps à... - Page 12 Complétez la liste de vérification suivante débourrage DANS L’ORDRE. Si l’outil ne fonctionne pas normalement, communiquer immédiatement avec un centre de service MILWAUKEE. Ne jamais pointer l’outil vers soi ni vers qui- conque. 1. Retirer le bloc-piles 2. AVERTISSEMENT! Ne jamais pointer l’outil ni vers soi, ni vers d’autres personnes lors de l’installation...
- Page 13 Veuillez consulter l’ongle « Trouver un centre de service », dans Chaque outil électrique* MILWAUKEE (voir les exceptions ci-dessous) la section « Pièces et service » du site web de MILWAUKEE, à est garanti uniquement à l’acheteur d’origine d’être exempt de tous l’adresse www.milwaukeetool.com, ou composer le 1-800-SAWDUST...
-
Page 14: Seguridad En El Área De Trabajo
ADVERTENCIAS DE SEGURIDAD • Utilice equipo de protección personal. Siempre use protección para los ojos. El equipo de protec- GENERALES PARA LA ción, tal como una máscara contra polvo, calzado HERRAMIENTA ELÉCTRICA antideslizante, casco o protección auditiva, utilizado Lea todas las advertencias de ADVERTENCIA para condiciones adecuadas disminuirá... -
Page 15: Mantenimiento
MANTENIMIENTO • Dé mantenimiento a las herramientas eléctricas y accesorios. Verifique que no haya desalin- • Lleve su herramienta eléctrica a servicio con un eación, amarre de partes móviles, partes rotas técnico calificado que use únicamente piezas o alguna otra condición que pueda afectar el de reemplazo idénticas. -
Page 16: Descripcion Funcional
3. Bloqueo del gatillo o si considera que el trabajo a realizar supera sus 4. Botón de encendido capacidades, comuníquese con Milwaukee Tool o con 5. Gancho un profesional capacitado para recibir capacitación 6. Revista o información adicional. - Page 17 Instalación de grapas Extraiga la batería y los sujetadores antes de abandonar el área de trabajo, moviendo la her- Retire siempre la batería ADVERTENCIA ramienta a otro lugar o entregándosela a otra antes de cambiar o quitar las persona. De no hacerlo, podrían producirse grapas.
- Page 18 NUNCA calce ni frene el me- ADVERTENCIA Percutor Percutor canismo de contacto de la pieza de trabajo durante el funcionamiento de la Pestillo Pestillo herramienta. Nunca intente despejar una pieza atascado atascado de trabajo atascada sujetando el área de des- carga de la herramienta.
- Page 19 Realice la siguiente lista de verifi- de la misma. Acuda siempre a un Centro de cación EN ORDEN. Si la herramienta no funciona Servicio MILWAUKEE para TODAS las reparacio- como debiera, póngase en contacto con un nes. centro de servicio MILWAUKEE inmediatamente.
- Page 20 Al devolver la herramienta eléctrica a un LA GARANTÍA EXPRESA CORRESPONDIENTE SEGÚN LO ARRIBA Centro de Servicio de la fábrica de MILWAUKEE o a una Estación DESCRITO. ALGUNOS ESTADOS NO PERMITEN LIMITACIONES de Servicio Autorizada de MILWAUKEE, se requiere que el flete esté...
Need help?
Do you have a question about the 2843-20 and is the answer not in the manual?
Questions and answers