Subscribe to Our Youtube Channel
Summary of Contents for P.I.T. ONE POWER PTR20H-250A/1
- Page 1 PRODUCT PASSPORT ÏÀÑÏÎÐÒ ÈÇÄÅËÈß USER'S MANUAL ÈÍÑÒÐÓÊÖÈß ÏÎËÜÇÎÂÀÒÅËß CORDLESS TRIMMER АККУМУЛЯТОРНЫЙ ТРИММЕР 20V BATTERY SYSTEM PTR20H-250A/1 PROGRESSIVE INNOVATIONAL TECHNOLOGY...
- Page 2 CORDLESS TRIMMER...
-
Page 3: Technical Data
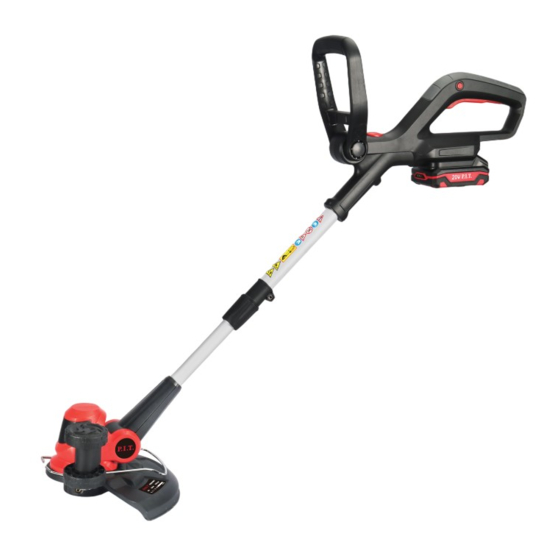
CORDLESS TRIMMER TECHNICAL DATA Model PTR20H-250A/1 Power input Battery type 20V Lithium-ion Battery capacity 2.0Ah Battery / Charger Model PH20-2.0 / PH20-2.4A No-load speed 8500 RPM Cutting diameter 250mm Cutting type Trimmer line Trimmer line diameter 1.2 mm Charger rating 220V~/50Hz,1.0A Weight NOTE. - Page 4 CORDLESS TRIMMER CORDLESS TRIMMER PHYSICAL FORM 1.Main handle 9.Engine 2.Switch trigger 10.Edger wheel 3.Lock-out button 11.Spool with line 4.Adjustable front handle 12.Protective guard 5.Handle blocking button 13.Engine tilt adjustment lock 6.Handle rotation lock button 14.Battery pack 7.Shaft 15.Charger 8.Coupler...
- Page 5 CORDLESS TRIMMER ASSEMBLY INSTRUCTIONS 6.1Install the safety clamp and protective guard. Extend the clamp, place it in the slots on the motor housing, then put on the protective cover and secure it with the bolts included in the kit. 6.2Attach the trimmer handle to the shaft. Push in the lock button and the handle tilt adjustment button.
- Page 6 CORDLESS TRIMMER Hold the lock button and the handle tilt adjustment button, then install the handle. If necessary, adjust the angle of the handle. To do this, press and hold the adjustment button and slide the handle to a goal convenient for you, then release the button.
- Page 7 CORDLESS TRIMMER 6.3 Set the shaft length. Unscrew the coupler and extend the shaft to the desired length. Screw in the coupler by securing the shaft to the desired length. 6.4 Adjust the cutting angle. The cutting angle can be changed from 0 to 90. Press the tilt adjustment lock button and adjust the engine position and release the button.
- Page 8 CORDLESS TRIMMER WARNING Charge the battery at temperatures between 10 and 40°C. Allow the hot bat- tery to cool before charging. 6.6Insert a fully charged battery in the trimmer battery port. To remove the battery, press the battery lock button and remove it from the trimmer. Use the battery charge indicator button on the battery to check the battery charge level.
- Page 9 CORDLESS TRIMMER OPERATING INSTRUCTION Staring/stopping the trimmer Switch on the trimmer by pressing the trigger. Turn on the trimmer without touching the grass so that the engine accelerates. Release the switch trigger to switch off the trimmer - the engine speed will be reduced. The spool will rotate for a few more seconds - wait until it stops completely.
-
Page 10: Maintenance & Service
CORDLESS TRIMMER MAINTENANCE SERVICE WARNING! Disconnect the battery from the trimmer before carrying out any preparatory work for operation, adjustment and maintenance of the trimmer. Cleaning -Clean the trimmer after each use. Remove dirt and grass residues from the trim- mer body. -
Page 11: Shipping And Storage
CORDLESS TRIMMER SHIPPING AND STORAGE -Before shipping the trimmer over long distances ensure that it is securely fastened inside the cargo area. -Store the trimmer in a dry place. -For long-term storage, cover all unpainted metal parts of the trimmer with a thin layer of oil to prevent corrosion. -
Page 12: Malfunction And Troubleshooting
CORDLESS TRIMMER MALFUNCTION AND TROUBLESHOOTING... - Page 13 CORDLESS TRIMMER...
- Page 14 CORDLESS TRIMMER...
- Page 17 АККУМУЛЯТОРНЫЙ ТРИММЕР ÎÁÙÈÅ ÌÅÐÛ ÁÅÇÎÏÀÑÍÎÑÒÈ ÏÐÅÄÓÏÐÅÆÄÅÍÈÅ: íå ïðèñòóïàéòå ê ðàáîòå ñ òðèììåðîì, ïîêà âíèìàòåëüíî íå îçíàêîìèòåñü ñ èçëîæåííûìè â Èíñòðóêöèè ðåêîìåíäàöèÿìè. ÇÀÏÐÅÙÀÅÒÑß ðàáîòàòü ñ òðèììåðîì äåòÿì èëè ëèöàì â óòîìëåííîì èëè áîëåçíåííîì ñîñòîÿíèè, à òàêæå â ñîñòîÿíèè àëêîãîëüíîãî èëè íàðêîòè÷åñêîãî îïüÿíåíèÿ. ÂÍÈÌÀÍÈÅ! Íå...
- Page 18 АККУМУЛЯТОРНЫЙ ТРИММЕР Модель PTR20H-250A/1 PH20-2.0 / PH20-2.4A 8500...
- Page 19 АККУМУЛЯТОРНЫЙ ТРИММЕР...
- Page 20 АККУМУЛЯТОРНЫЙ ТРИММЕР...
- Page 21 АККУМУЛЯТОРНЫЙ ТРИММЕР...
- Page 22 АККУМУЛЯТОРНЫЙ ТРИММЕР...
- Page 23 АККУМУЛЯТОРНЫЙ ТРИММЕР...
- Page 24 АККУМУЛЯТОРНЫЙ ТРИММЕР...
- Page 25 АККУМУЛЯТОРНЫЙ ТРИММЕР...
- Page 26 АККУМУЛЯТОРНЫЙ ТРИММЕР...
- Page 27 АККУМУЛЯТОРНЫЙ ТРИММЕР...
- Page 28 АККУМУЛЯТОРНЫЙ ТРИММЕР...
- Page 29 CORDLESS TRIMMER...
- Page 30 АККУМУЛЯТОРНЫЙ ТРИММЕР...
-
Page 31: Warranty Sheet
АККУМУЛЯТОРНЫЙ ТРИММЕР Ð.I.Ò. WARRANTY SHEET /... - Page 32 АККУМУЛЯТОРНЫЙ ТРИММЕР SCHEME /...


Need help?
Do you have a question about the ONE POWER PTR20H-250A/1 and is the answer not in the manual?
Questions and answers