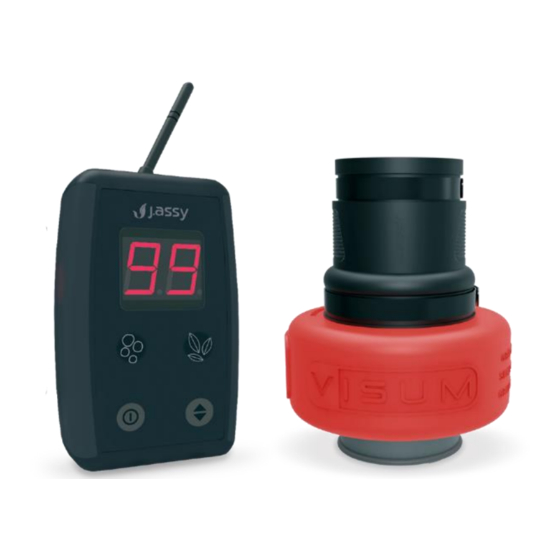
J.ASSY VISUM Operator's Manual
Hide thumbs
Also See for VISUM:
- Operator's manual (22 pages) ,
- Technical manual (13 pages) ,
- Operator's manual (8 pages)
Table of Contents
Advertisement
Quick Links
Advertisement
Table of Contents
Troubleshooting

Related Manuals for J.ASSY VISUM


Summary of Contents for J.ASSY VISUM
- Page 1 OPERATOR’S MANUAL...
- Page 2 VISUM v.4.3 January 2022 This device contains FCC ID 2AD66-RF2401F20 This device complies with Part 15 of the FCC Rules. Operation is subject to the following two conditions: (1) This device may not cause harmful interference, and (2) This device must accept any interference received, including interference that may cause undesired operation.
-
Page 3: Table Of Contents
Table of Contents Specifications ................... 04 Visum Fertilizer ................04 J.Assy Monitor ................04 J.Assy ECU ..................04 Installation Visum ................05 Installation Monitor ................07 Power Connection ................08 Network ID ..................10 Operation .................... 12 Functions description ................14 F1 | Reading sensor status ............ -
Page 4: Specifications
2 Red/Green/Flashing Blue LEDs. Resistant to dust and water splash. Specifications Radiofrequency communication at 2.4GHz. GFSK Modulation. Omni-directional antenna, 5dBi, 50 Ohms, SMA connector. Supply voltage: 10Vdc to 30Vdc. Resistant to dust and water splash. CAN communication, protocol ISO 11783 (ISOBUS) | J.ASSY... -
Page 5: Installation Visum
Installation | Visum TIP: • Do not install the sensor flat. This will cause sensor wake up issues. The sensor is installed between the diffuser/air release and the fertilizer outlet hose: ” ” ” ” Choose the correct inlet and outlet coupler for the hose and diffuser diameters. - Page 6 ATTENTION: • Do not install the sensor upside down. Installation must match the orientation in the pictures below. Flow Direction Flow Direction 1, 75 em - 2, 75 em x 0312 em x 0021 in. | J.ASSY...
-
Page 7: Installation Monitor
The Monitor should be installed with the best possible line of sight to the sensors in order to avoid communication problems. Avoid installing the monitor close to the cab ROPS column. Keep a minimum distance of 12 in. between monitor and column. VISUM... -
Page 8: Power Connection
(not included) will be needed. Cut the power cable excess and mend the wires with manufacturer harness. CONNECTING TO THE TRACTOR BATTERY • Use the included installation kit detailed below. | J.ASSY... - Page 9 • You will find the antenna inside your Monitors box. • Attach it to the back of the Monitor by threading on the connection. Do not “over-tighten”. • Position the antenna so that it is in a vertical orientation. VISUM...
-
Page 10: Network Id
Monitor or can be extract e d thru operation software. The sensor configuration can be done with a Visum Monitor. Check how it can be done in this manual. The following steps must be done: 1. - Page 11 7. Do not mount the monitor in the cab using a large high-powered magnet mounting kit or place a magnet near the monitor as it can cause the monitor to fail. This is the area where you “ADDRESS” the sensor with the magnet that is included with the sensor. VISUM...
-
Page 12: Operation
Operation • The Visum Monitor communicates with the flow sensors, indicating the presence or absence / blockage of flow. • When you turn on the monitor the monitor should display a “00“on display and both LEDs should be OFF, indicating that no sensor has communicated with the monitor. - Page 13 MANEUVER state is typically when you are maneuvering on the headlands making turns or similar maneuvering situations when the fertilizer is not expected to be flowing. It can be detected as MANEUVER state if you turn off one section. VISUM...
-
Page 14: Functions Description
3 Missing sensor is when the monitor does not receive a signal from that sensor for more than 5 minutes. OUTPUT CONDITIONS: The user can cancel the process at any time by pressing for 5 seconds. After listing all sensors, the function automatically returns to the device’s operation screen. | J.ASSY... -
Page 15: F2 | Changing The Monitor Volume
The monitor should show the current brightness level and allow you to change it by clicking When clicking on the user will switch between the available levels and with each change the brightness on the screen will be updated. VISUM... -
Page 16: F4 | Check Sensor Id
When entering the function, the monitor should start the process of requesting a radio ID, asking for the ID every 1 second. In this mode, the user needs to bring the magnet closer to the sensor to perform the reading. | J.ASSY... -
Page 17: F5 | Address Sensors
During addressing, the LEDs should flash in white, while the DISPLAY displays the row number to be addressed statically. In this mode, the user needs to bring the magnet to the sensor in a circular manor to perform the addressing. VISUM... -
Page 18: F6 | Display The Monitor Id
1 second, in the form: OUTPUT CONDITIONS: After presenting the data, the monitor should exit the function. The user can cancel the process at any time by pressing for 5 seconds. The maximum time to remain within this function is 60 seconds. | J.ASSY... -
Page 19: F7 | Customize The Maneuver Beep Time
99 seconds. When the value reaches 99 it should turn to 1 again. To confirm the selected value, press OUTPUT CONDITIONS: After confirming the selected time, the monitor will exit the function. The user can cancel the process at any time by pressing for 5 seconds. VISUM... -
Page 20: Troubleshooting
No antenna is attached to (not shown on F1 list the Monitor. and/or alarm with orange LED). Maneuver state occurs Several sensors informed no during normal operation. flow status. If you need more assistance please contact our technical team to help you. | J.ASSY... - Page 21 Place the monitor in a place with the best line of sight to the sensors. Turn off any high-power radio source near the implement. Check if there is enough flow running on the pipes. Check if there is a section turned off. VISUM...
-
Page 22: Installation Ecu
Installation | ECU Requirements Tractor with ISOBUS Connector (not included) Main ISOBUS cable (not included) Terminator connector RE207311 (not included) J.Assy ISOBUS ECU (inside the box) J.Assy ISOBUS Cable (inside the box) RF antenna (inside the box) | J.ASSY... -
Page 23: Steps
Before starting the installation turn off the tractors ignition and keep it off during the connection procedure. Connect J.Assy cable to the J.Assy ECU Use a ¼” screwdriver to tighten the connector on the ECU box Connect antenna to J.Assy ECU Connect the ECU in your system. - Page 24 J.ASSY CABLE J.ASSY RF ANTENNA ATTENTION: • Don´t forget to plugin the main cable on your tractor. Turn your system on and check to see if the J.Assy application it is loading in your VT | J.ASSY...
-
Page 25: Network Id
5. Fill the address indicator with the number of the implement and row. ATTENTION: Never configure two sensors at the same time, even with two different devices, because the connections may cross each other. TIP: In order to change the address of any sensor, just follow the steps again. VISUM... -
Page 26: Adjusting The Language
Ajusting the language The first time that you open a J.Assy screen you will see a Portuguese version. To change that just follow the steps bellow: 1. J.Assy screen first time that you open your system Access settings When the gear button is select, it will require a password to access the functions. - Page 27 3. Select “Idioma” 4. Select “English” 5. Select “Salvar” 6. Wait while the new language is loaded VISUM...
-
Page 28: Functions Description
Functions description J.ASSY Screen Change the alarm volume (it may present some unexpected behavior in some terminals) Sensor ok – with flow and communicating as expected Sensor presenting failure (absence of flow, presence of blockage or sensor absence) Sensor not enabled (configured for 8 sensors) or sensor inactive (inactive row) Setting button –... -
Page 29: Alarm When In Another Screen
Alarm when in other screen When the customer isn’t using J.Assy screen and an alarm occurs a pop-up will present itself as show Failure alarm It should show the row and the type of alarm in this pop-up. Correction in next version. -
Page 30: Settings
Settings Deactivating a single sensor It is possible to deactivate one (or more) sensors. To do so, follow the steps bellow: 1- Select the desired sensor: 2 - Select the desired type of sensor to disable | J.ASSY... -
Page 31: Access Settings
Access settings When the gear button is selected it will require a password to access these functions. Default Password: 1710 VISUM... -
Page 32: Set Number Of Rows
Set number of rows Enter number of rows and select “SAVE” Add sensors Select the gear button on the screen 1- Select “Add.” | J.ASSY... - Page 33 6 - Repeat the process until all sensors are adressed ATTENTION: If you forget to increase the sensor number, two sensors might be confirmed on the same row. just adress one of them again with the correct row number. VISUM...
-
Page 34: Setting Maneuver Alarm Display
Setting maneuver alarm display In case you want to change how the maneuver alarm displays it is possible using the function presented below | J.ASSY... - Page 35 Check this box maneuver alarm to Check this option if you want the alarm pop-up to dismissed after a defined period of time. VISUM...
-
Page 36: Change Password
Select “SAVE” after changing the desired parameters. Change password Enter the current password Select “OK” | J.ASSY... - Page 37 If the password is correct it will be possible to insert a new password. Press “SAVE” to confirm the change. VISUM...
-
Page 38: Troubleshooting Table
Sensor is not on network. sensor (gray on J.Assy screen or alarm absent). No communication from several sensors Bad network signal. (gray on J.Assy screen or alarm alarm No antenna is attached absent). to the Monitor. Maneuver state occurs during Several sensors informed normal operation.. - Page 39 Check if the cable is intact. Please, contact our technical support for more information Check volume box in J.Assy screen Add sensor to the network. Low battery. End of sensor life. Check if the antenna is properly attached. Try to move obstacles between antenna and sensors.
-
Page 40: Cleaning And Storage
The sensors can be stored as installed on the machine or kept inside during the “off season”. Warranty This product is warranted by J.Assy to be free from defects in material and workmanship for two (2) years from date of purchase of the original purchaser. -
Page 41: Discarding
For repair or replacement, return defective product to the original place of purchase. Discarding Dispose of properly. Recycling electronics conserves natural resources and minimizes the environmental impact of improper disposal. VISUM... - Page 42 www.jassy.ag...
Need help?
Do you have a question about the VISUM and is the answer not in the manual?
Questions and answers