Advertisement
Quick Links
step 2
Follow these
instructions to
add your parts
and accessories.
Things you need to know
• Always read the full instructions prior to installation.
• Consider possible obstructions to your part and accessories,
like hinges inside the cabinet or adjacent cabinet doors
and handles, prior to installation.
• Make sure you leave plumbing and electrical work
to qualified trades people. Never try this yourself.
• Make sure you always use safety gear like a mask, ear muffs
and glasses when using tools.
Hardware included
A
B
L-Irons x 2
runners x 1 pair
G
H
connect strip x 2
wood screws x 16
Tools you will need
To put your kaboodle kitchen accessory together you will need the following tools.
Cordless drill with:
• Number 2 screw tip
• 2mm drill bit
Spirit level
(optional)
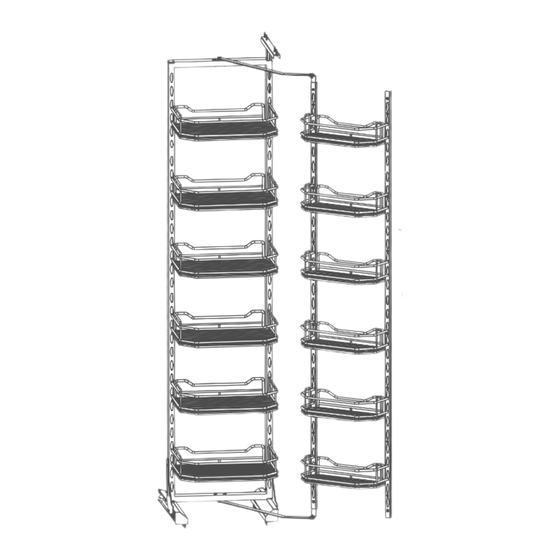
450mm pantry pullout baskets 6 tier
C
L-Bracket x 1
22mm
Tape
measure
Pencil
• This accessory is designed to be installed in cabinets
with either a left hand or right hand opening set up.
• Tip: After marking out the pre-drill holes as per the
instructions, take the part that is to be installed and align
the appropriate holes with the markings to ensure they
match up prior to pre-drilling the holes.
• If you have any questions, contact us on:
Australia: 1800 666 078 Monday to Friday between
8:00am and 6:00pm AEST, New Zealand: 0800 522 663
Monday to Friday between 8:00am and 5:00pm NZST
or email: info@kaboodlegroup.com.au.
D
E
16mm
wood screws x 16
Screw
Safety
driver
gear
F
runner protective
U-Iron x 1
covers x 2
Adjustable
Clamps
square
(optional)
Ver. 9
W-50541
p. 1
Advertisement

Related Manuals for Kaboodle W-50541


Summary of Contents for Kaboodle W-50541
- Page 1 2 22mm connect strip x 2 wood screws x 16 Tools you will need To put your kaboodle kitchen accessory together you will need the following tools. Cordless drill with: • Number 2 screw tip • 2mm drill bit Tape...
- Page 2 Remove the top 2 screws on each L-Iron and attach to the frame. Be sure to screws through the frame to the L-Iron of the runners. Be sure to screw through the runner to the L-Iron as pictured above (ii). as above. W-50541 Ver. 9 p. 2...
-
Page 3: Installing Protective Covers
Loosen the 2 screws at the back of the frame (i). Adjust the Slide the protective covers (F) over the runners below the frame L-Bracket up so the castors are slotted into the U-Iron completely as pictured above. and tighten screws (i). W-50541 W-50541 Ver. 9 p. 3... - Page 4 (ii). W-50541 Ver. 9 p. 4...
- Page 5 4 step 2 surface. If this happens the internal board will be exposed and may swell. Kaboodle cabinets are water resistant but not water proof so any spills should be attended to immediately. Finish off your...
Need help?
Do you have a question about the W-50541 and is the answer not in the manual?
Questions and answers