Table of Contents
Advertisement
Quick Links
Advertisement
Table of Contents

Subscribe to Our Youtube Channel
Related Manuals for Schaeffler SMART Series


Summary of Contents for Schaeffler SMART Series
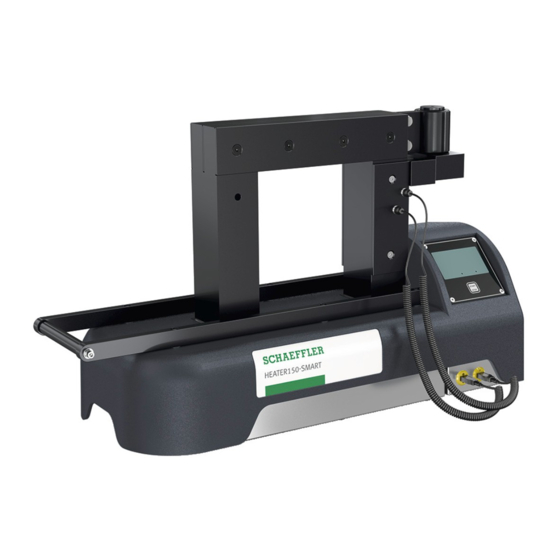
- Page 1 Induction Heaters SMART Series User manual...
- Page 2 Contact Address Schaeffler Technologies AG & Co. KG Georg-Schäfer-Straße 30 97421 Schweinfurt, Germany Tel +49 2407 9149-66 Web www.schaeffler.com/services Mail support.is@schaeffler.com ISO ISO 9001: 2015 Machine ID and See machine plate certification Warning! Read the manual and safety instructions before operating the device ■...
- Page 3 Compared with previous models, further improvements have been made in performance capacity and safety and the part to be heated need no longer be of a minimum mass. In order to ensure durability in demanding industrial operation, the devices are extremely robust and reliable. Schaeffler Technologies...
-
Page 4: Table Of Contents
9.2 Heating in temperature mode ....................32 9.3 Heating in time mode ......................34 9.4 Heating in temperature or time mode ..................35 9.5 Heating in temperature & speed mode ................... 37 9.6 Workpiece installation ......................39 9.7 Error messages ........................39 Schaeffler Technologies... - Page 5 13.2 Technical specifications HEATER400-1600 ................57 13.3 Machine ID and certification ....................58 13.4 Ledges (Yokes) ........................60 13.5 Scope of delivery ........................61 14. Waste disposal .......................... 62 15. Disclaimer ..........................62 16. Certificate of conformity ......................63 Schaeffler Technologies...
-
Page 6: About The User Manual
The illustrations and descriptions cannot be used as grounds for any claims relating to devices that have already been delivered. Schaeffler Technologies AG & Co. KG accepts no liability for any damage or malfunctions if the device or accessories have been modified or used in an incorrect manner. -
Page 7: Safety, Warnings And Potential Hazards
Forbidden for persons with metal implants. Forbidden for magnetically sensitive data media. Read the user manual! Wear heat-resistant gloves! Wear safety shoes! Warning of danger. Electric shock hazard. Warning of magnetic fields. Warning of hot surface. Warning of heavy object. Schaeffler Technologies... -
Page 8: Description Of Potential Hazards
For this reason, persons with passive implants are recommended not to enter the immediate vicinity of the induction heater when it is in operation. Schaeffler Technologies... - Page 9 Caution! Risk of injury during lifting A number of units in the Schaeffler heater range weigh more than 23 kg and may therefore not be lifted by one person alone.
-
Page 10: Safety Measures To Be Taken
■ Never use or store an induction heater in a damp environment. ■ Only use Schaeffler induction heaters indoors. ■ If using a mobile version; always lock the castors when not moving the device. ■ If the heater is equipped with extendable horizontal supports, always secure them with the appropriate locking pin, both in the fully retracted and in the fully extended position. -
Page 11: Safety Provisions
■ Models with a swivel arm are equipped with a safety positioning cam. An induction heater operates by means of a magnetic field. At a distance of 1 metre, the magnetic field has been reduced to such an extent that it is below the applicable standard of 0.5mT. Schaeffler Technologies... -
Page 12: Introduction
Bearings and workpieces can be heated to a maximum temperature of 240ºC (464°F). Schaeffler induction heaters are suitable for continuous use. However, when heating to a temperature of 240°C (464°F), do not so for more than half an hour. -
Page 13: Installation
Put heaters with wheels on the brake to prevent the heaters from moving. ■ A Schaeffler heater is supplied with ledges, 2 temperature sensors, heat-resistant gloves (suitable up to 250°C / 482°F) and acid-free grease. - Page 14 Starting up takes some time. ■ Connect the temperature sensor by inserting the plug into the socket. Make sure that the – and + of the plug correspond to that of the socket. ■ The induction heater is now ready for use. Schaeffler Technologies...
-
Page 15: Explanation Of Display, Buttons And Connections
T2 (green on display) is an additional measurement that can be used to monitor and adjust a temperature difference, ΔT, in a workpiece during heating. USB port for logging purposes (stored heating data). Schaeffler Technologies... -
Page 16: Explanation Of Touchscreen Operating Elements
The most frequently used buttons and how variables can be set are explained below. Start heating process. Stop heating process. To settings menu. To administrator (factory) settings. Not accessible to the end user. Back / previous screen. To next page. To previous page. Schaeffler Technologies... - Page 17 Variables can be set or changed by tapping them. Usually, a selection menu or keypad is then displayed. This principle applies to every screen. With the help of the sliders, elements can be switched on or off. Schaeffler Technologies...
-
Page 18: System Settings
Settings are made by the manufacturer in the Admin settings. These settings are essential for the type of heater and are not at the user level and are therefore not accessible. These settings are protected by a password. Schaeffler Technologies... -
Page 19: Explanation Of System Settings - Screen 1
This does not mean that the heater will always reach this speed. This depends, among other things, on the geometry of the workpiece, the ledge used, etc. 6.3 Explanation of system settings – screen 2 Default Temperature hold: Default temperature hold on or off Schaeffler Technologies... -
Page 20: Explanation Of System Settings - Screen 3
Offset Temperature probe 2: Calibration / correction readout thermocouple 2 Unit: Setting of the temperature measurement in °C or °F. Language: Setting of the language in which the texts on the screen are displayed. Choice of Dutch, English, German and Italian. Schaeffler Technologies... -
Page 21: Explanation Of System Settings - Screen 4
In this screen, the system date and time can be set. Depending on whether you want to use the ΔT functionality, switch on “ΔT enabled”. Only when you switch on “ΔT enabled”, another screen is available in which you can enter the desired settings for this functionality. Schaeffler Technologies... - Page 22 ΔT. ΔT timeout: Time within which a restart must take place after exceeding ΔT. ΔT switch off temperature: The temperature difference between 2 measuring points on a workpiece at which the heating process is stopped. Schaeffler Technologies...
-
Page 23: The Magnetic Temperature Sensor
(in the casing). Make sure that the – and + of the plug correspond to that of the socket. If desired, a second sensor, T2, can be used for additional control or monitoring of a temperature difference, ΔT, between 2 points on the workpiece. Schaeffler Technologies... -
Page 24: Method Of Operation
Damage to the cable can cause electrocution! ■ Never use a metal strap to support workpieces or suspend them in the magnetic field. High currents could start running through the strap, causing it to heat up. Schaeffler Technologies... - Page 25 Horizontal, with workpiece around the ledge around the ledge Large workpieces can be thermally insulated by wrapping them in insulating material, such as a welding blanket. This ensures that the heat stays in the workpiece and does not dissipate. Schaeffler Technologies...
-
Page 26: Heating A Hanging Workpiece
■ Always make sure that the workpiece does not come into contact with the plastic housing of the heater. When the heating is finished, follow the instructions in reverse order. Use heat-resistant gloves to move the heated workpiece. Schaeffler Technologies... -
Page 27: Heating A Horizontal Workpiece
■ Keep to these maximum weights and avoid tilting the heater or damaging the supports, (swivel) ledges or hinge. CAREFUL! ■ Always handle induction ledges with care. They are damaged easily when dropped, knocked against something, etc. Store them immediately after use. Schaeffler Technologies... -
Page 28: Operation
With the temperature & speed mode ■ In the case of controlled heating to the desired temperature, whereby a maximum temperature gradient per time unit can be entered, so the workpiece is heated according to a certain curve. Schaeffler Technologies... -
Page 29: Selecting Heating Modes
The selection made is then displayed under “Mode” and the selection menu disappears from the screen again. More, less or other variable parameters may be displayed, depending on the choice made. Example screen after selecting “Temp & Speed”. Schaeffler Technologies... - Page 30 (temperature or time) is reached or has elapsed. In this mode, one or more temperature sensors have to be used that are positioned on the workpiece to be heated. Schaeffler Technologies...
- Page 31 The gradient can be set in X°C/min. In this mode, one or more temperature sensors have to be used that are positioned on the workpiece to be heated. Schaeffler Technologies...
-
Page 32: Heating In Temperature Mode
■ Press “START”. The heating starts, you will hear a slight humming sound. ■ The display shows the current temperature of the workpiece. ■ If a second sensor is attached to the workpiece, this temperature also appears on the display. Schaeffler Technologies... - Page 33 “STOP”. ■ Each time the induction heater stops, it automatically demagnetises the workpiece. ■ The heating process or thermostat feature can be interrupted by pressing “STOP”. Schaeffler Technologies...
-
Page 34: Heating In Time Mode
NOTE! In time mode, the process does nothing with these temperatures! Only when sensors are connected, the heating process is displayed graphically by pressing the info button . Pressing info again displays additional information from the process. Schaeffler Technologies... -
Page 35: Heating In Temperature Or Time Mode
Press “STOP” to switch off the beep. ■ Position the workpiece and sensor (according to 9.4 Heating in chapters 7 & 8.) temperature or time mode ■ Switch on the heater and select the temperature or time mode if necessary. Schaeffler Technologies... - Page 36 ■ Press “START”. The heating starts, you will hear a slight humming sound. ■ The display shows the temperature and the time left until process completion. By pressing the info button , the heating process is displayed graphically. Pressing info again displays additional information from the process. Schaeffler Technologies...
-
Page 37: Heating In Temperature & Speed Mode
By pressing the info button , the heating process is displayed graphically. The white dotted line indicates the gradient at which the process is set. Pressing info again displays additional information from the process. Schaeffler Technologies... - Page 38 “STOP”. ■ Each time the induction heater stops, it automatically demagnetises the workpiece. ■ The heating process or thermostat feature can be interrupted by pressing the “STOP” button. Schaeffler Technologies...
-
Page 39: Workpiece Installation
The ambient temperature is lower Switch off the device and wait below -10°C” than -10°C. until the ambient temperature has risen above -10°C (14°F). If the temperature is within the limit and the error still occurs, please contact your supplier. Schaeffler Technologies... - Page 40 “A coil voltage peak was detected, A voltage peak has been detected Switch off the device and wait a Attention: the ledge has not been exceeding 500V few seconds before switching it on demagnetized!” again. Schaeffler Technologies...
-
Page 41: Log Functionality
If this functionality is activated, a menu appears each time the “start” button is pressed in which data has to be entered. Only then can heating actually be started. Pressing “START” displays the following screen: Tap the item to be changed/entered. A keypad is displayed. Schaeffler Technologies... - Page 42 The system date and time are also included. When the process has been completed, an overview screen with all the heating data is displayed. Schaeffler Technologies...
- Page 43 It is not necessary to export the log files immediately after each heating cycle. The files are stored on the heater and can be selected from a list at a later stage to view and/or export them to a USB data carrier. See section 10.5. Schaeffler Technologies...
-
Page 44: Access To The Log Files
Select the log you want to view by pressing it. 10.3 Alarms By pressing “Alarms” an overview will be displayed of alarms that have occurred. Use the arrow keys to select which alarm you want to view and then press “View”. Schaeffler Technologies... -
Page 45: Last Crash
To do so, press “Export”. When the file has been exported successfully, this will appear on the screen. Tap “OK”, the message disappears from the screen. Press “Back / Previous screen” once more to return to the previous screen. Schaeffler Technologies... -
Page 46: Heating Logs
To do so, press “Export”. If the file has been exported successfully, a message appears indicating that the export was successful. Press “OK” to clear the message from the screen. Press “Back / Previous screen” to return to the previous screen. Schaeffler Technologies... - Page 47 A confirmation screen appears. If you press “NO”, you return to the list of log files. If you press “YES”, a confirmation screen appears confirming that the file has been deleted. Press “OK” to return to the list of log files. Schaeffler Technologies...
-
Page 48: Other Functionalities
(T hold hysteresis), which can be set in the system settings as described in section 6.4. The temperature set here is the temperature to which a workpiece may drop before the heater switches on again automatically. Schaeffler Technologies... - Page 49 The time is entered in mm:ss and can be set between 00:01 and 99:00. After adjusting the time, press “Back / Previous screen” to return. According to the above settings, the workpiece is heated to 80°C and then kept at 80°C for 2 minutes. Schaeffler Technologies...
- Page 50 As soon as this time has elapsed, the heater displays a message indicating that the “temp hold” functionality has elapsed. Press “OK” to leave this screen. The final screen of the heating process is now displayed. Schaeffler Technologies...
-
Page 51: Δt Functionality
The difference between these two temperatures is calculated continuously. If the difference is larger than the temperature set under “ΔT switch off”, the heating process switches off or pauses. When the process is paused, the screen indicates “ΔT pause”. Schaeffler Technologies... - Page 52 “ΔT switch on”. This must be achieved within the “ΔT timeout” time. If this is not the case, the error message “ΔT timeout” is displayed, which can be reset by pressing “Clear”. Schaeffler Technologies...
-
Page 53: Target Functionality
By pressing the set value, a keypad is displayed on which the new value can be entered. After entering the value, press “OK” to return to the heating screen. Only this cycle is then heated to the new “target”. Schaeffler Technologies... -
Page 54: Cleaning, Maintenance And Troubleshooting
4. Switch on the heater by pressing “start”. The ledge now sets itself. If necessary, a dead blow (plastic) hammer may be used. 5. When noise reduces, then tighten all bolts and switch off the heater. Schaeffler Technologies... - Page 55 ■ Carrying out the right maintenance and following the instructions is important. ■ Contact your supplier if in doubt about the correct functioning of the device. ■ Repairs must be carried out by the manufacturer or a specialist approved by the manufacturer. Schaeffler Technologies...
-
Page 56: Technical Specifications
240°C / 464°F Max. bearing weight kg Max. OD Ø mm A Space between poles mm B Pole height mm C Pole surface mm D 40x50 50x50 70x80 70x80 Dimensions mm (LxWxH) 600x226x272 702x256x392 788x315x456 788x315x456 HEATER50 - 150 Schaeffler Technologies... -
Page 57: Technical Specifications Heater400-1600
1150 1700 Space between poles mm B Pole height mm C Pole surface mm D 80x100 90x110 180x180 230x230 1080x650x955 1520x750x1415 Dimensions mm (LxWxH) 1214x560x990 1344x560x990 1080x650x1025* 1520x750x1485* *Height with optional wheels HEATER400 - 600 HEATER800 - 1600 Schaeffler Technologies... -
Page 58: Machine Id And Certification
ELECTRICAL SAFETY LR1601 * Devices with suffix “US”: QPS certified versions for US and Canada are according to USA C22.2 No. 88-19 - Industrial Heating Equipment and UL 499, 14 th Ed. (Nov 7, 2014) - Electric Heating Appliances Schaeffler Technologies... - Page 59 ELECTRICAL SAFETY LR1601 * Devices with suffix “US”: QPS certified versions for US and Canada are according to USA C22.2 No. 88-19 - Industrial Heating Equipment and UL 499, 14 th Ed. (Nov 7, 2014) - Electric Heating Appliances Schaeffler Technologies...
-
Page 60: Ledges (Yokes)
(mm) delivery ✓ HEATER200.YOKE-15 10x10x350 0,27 ✓ HEATER200.YOKE-20 14x14x350 0,51 ✓ HEATER200.YOKE-30 20x20x350 1,06 ✓ HEATER200.YOKE-45 30x30x350 3,67 ✓ HEATER200.YOKE-60 40x40x350 5,51 HEATER200.YOKE-68 50x50x350 7,79 ✓ HEATER200.YOKE-85 60x60x350 10,69 ✓ HEATER200.YOKE-100 70x70x350 14,01 ✓ HEATER200.YOKE-110 70x80x350 15,90 ✓ Schaeffler Technologies... -
Page 61: Scope Of Delivery
80x80x1140 56,76 ✓ HEATER1600.YOKE-145 100x100x1140 88,69 ✓ HEATER1600.YOKE-215 150x150x1140 199,56 ✓ 13.5 Scope of delivery Scope of delivery HEATER-SMART Temperature sensor 2 pc. ✓ Heat protection gloves (up to 250°C) Acid-free grease ✓ Printed manual (English, German) ✓ Schaeffler Technologies... -
Page 62: Waste Disposal
The manufacturer and/or supplier cannot be held liable for any damage to workpieces or consequential damage resulting from incorrect use of the device or damage to workpieces and any consequential damage resulting from a defect in the device. Schaeffler Technologies... -
Page 63: Certificate Of Conformity
■ EN 55011 ■ EN 61000-3-2 ■ EN 61000-3-3 EMC Immunity ■ EN 61000-6-2 Name and address of the Schaeffler Technologies AG & Co. KG authorized person for the Georg-Schäfer-Straße 30 technical documentation: D-97421 Schweinfurt H. van Essen Place, Date:... - Page 64 This publication supersedes all deviating informa- tion from older publications. Printing, including support.is@schaeffler.com excerpts, is only permitted with our approval. © Schaeffler Technologies AG & Co. KG Phone +49 2407 9149-66 BA75 HEATER-SMART / 01 / en-GB / DE / 2021-11...
Need help?
Do you have a question about the SMART Series and is the answer not in the manual?
Questions and answers