Table of Contents
Advertisement
Quick Links
Advertisement
Table of Contents

Subscribe to Our Youtube Channel
Related Manuals for Merging ANUBIS


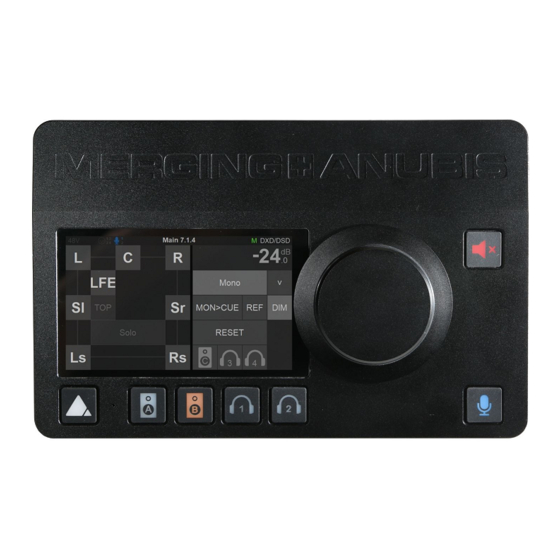
Summary of Contents for Merging ANUBIS
- Page 1 ANUBIS COMMENTARY UNIT MISSION APPENDIX 21.04.2022...
-
Page 2: Table Of Contents
PREAMPS ..............................16 EFFECTS PROCESSING ..........................17 PHYSICAL BUTTONS ..........................18 WEB INTERFACE ............................19 Tablets Remote Access - Using the Anubis IP Address ..............23 I/O CONNECTIONS ............................24 I/O Connectivity to a Computer ....................... 26 SETTINGS ................................ 27 REST API ................................ -
Page 3: Commentary Unit Mission Appendix
MISSION APPENDIX This appendix comes as a supplement to the Anubis User Manual and is intended to take you through the ANUBIS+COMMENTARY UNIT mission in detail. We encourage you to first familiarize yourself with MERGING+ANUBIS User Manual prior to reading this appendix. -
Page 4: Switching On Merging+Anubis
Pressed = ON Released = OFF The Anubis Soft buttons will light up orange when the unit initiates the boot-up sequence, the TFT display will follow soon after. During this time the unit will perform a series of self-test and initialization routines. -
Page 5: Add Products And Features With Mlm
Some specific Products (Missions or Features) will require a valid License Activation key prior to operations. Contact your Merging Local Sales Partners to purchased or get trial activation key. Once you have received your key code enter this one into your Anubis from the Merging License Manager. - Page 6 4. This will open the Merging License Manager from which you can enter the activation key of the Product feature you wish to activate. In the example here we will activate the Commentary Unit. 5. Enter the received key code you have received for the Product Feature. It should look as such...
-
Page 7: Commentary Unit Mission Launch
The Anubis Home page provides access to the Settings and Preamps pages and the Logs (messages). The Anubis Home page can, at all times, be accessed by a long press on the Anubis Home button. When in the Commentary Unit Mission, a long press on the Anubis Home button first displays a menu allowing access to the Home section or the Settings directly. - Page 8 This Guide focuses on the Commentary Unit Mission. If you do not see the Commentary Unit Mission icon, make sure you are on the latest Anubis Firmware (1.3.0b and above required) and you entered the Commentary Unit Mission license, please see the MLM section above.
-
Page 9: The Commentary Unit Mission
Intercoms, Programs, Sidetones controls, and Mute, Talkback and On-Air buttons. The mission can also be controlled either by the local Touch Display of the ANUBIS unit, a remote Web Interface, GPI/O commands and a Web Sockets based REST API. -
Page 10: Mission Schematic
MISSION SCHEMATIC Below an overview of the Mission signal flow in the schematic for your reference when reading this manual. MONITORING 1 MONITORING 2 ON AIR 1 ON AIR 2 ON AIR MIX TALKBACK A TALKBACK B TALKBACK C TALKBACK D SIDE DYN SIDE DYN SIDE EQ... -
Page 11: Commentators
▪ Commentator 1: o Is always Enabled and Visible on the ANUBIS touch screen. o Can use Mic 1 (default) or Built-in Mic as input for On-Air, Talkback and Sidetone. o Selection of Mic 1 or Built-In Mic input is performed in the Commentary >... -
Page 12: Monitoring
Gain Level of each of the above parameters is accessible by a short touch on its rotary control and turning the main ANUBIS wheel or operating the displayed popup window. By default, the maximum level of these controls is 0dB, the option of setting the maximum level to 6dB or 12dB is available in the Monitoring section in the settings. -
Page 13: On-Air
ON-AIR Each Commentator can be set to On-Air mode by pressing its own dedicated On-Air button. When enabled its Mic input is then sent to both its dedicated On-Air output and to the On Air ▪ Mix output where both commentators are mixed together. (See Mission Schematic above). ▪... -
Page 14: Talkback
TALKBACK The Commentary Unit offers 4 channels of Talkback named A, B, C, D. ▪ Each Commentator can talk to any of the 4 channels by pressing the dedicated Talk buttons. When any of the Talk buttons are enabled, the commentator is removed from the On-Air and On Air Mix outputs. -
Page 15: Mute
MUTE Each Commentator has a Mute button that removes him from the On-Air and On-Air Mix outputs when pressed. The Mute button can be set to Latch or Press/Release (default for Mute) in the Commentary > ▪ Commentator 1/2 > LATCH section in the settings. The Mute button can be locked depending on the relevance to each of the commentators in ▪... -
Page 16: Preamps
PREAMPS The preamps for the Mic 1, Mic 2 and Built-In Mic inputs can be adjusted in the preamp settings. ▪ The preamp settings are accessible in the Home button menu Preamp settings ▪ Please find additional information about Preamps in the Music Mission Appendix. -
Page 17: Effects Processing
EFFECTS PROCESSING Each Commentator can both have: o a 4 bands parametric EQ and a full Dynamics section o on both their Mic and Sidetone path separately Each effect setting is accessible from the Home button menu ▪ 4 band parametric EQ ▪... -
Page 18: Physical Buttons
PHYSICAL BUTTONS The ANUBIS unit physical buttons can be mapped to any of the On-Air, Mute or Talkback functions for the commentator. The mapping can be changed in the Buttons section in the settings. ▪ The default mapping is: o Home (long push): Menu (can’t be remapped) -
Page 19: Web Interface
WEB INTERFACE The Commentary Unit Web Interface can be accessed on any Web Browser by: Typing the IP Address of the ANUBIS unit in the URL bar (please find additional information ▪ about access with an IP address on the next section Tablet Remote Access below) ▪... - Page 20 Web Interface menu: Advanced remote control: While the Commentary Unit Web Interface exactly mimics the ANUBIS unit touch screen, it can bypass the hiding of rotaries and buttons and display all controls for easy configuration of the unit remotely by a system administrator.
- Page 21 Preamps: Preamps settings can be accessed on the Web Interface through the Web Interface menu: Effects processing: Effects processing parameters can be accessed on the Web Interface through the Web Interface menu:...
- Page 22 Settings: All Commentary Unit settings can be accessed on the Web Interface through the Web Interface menu:...
-
Page 23: Tablets Remote Access - Using The Anubis Ip Address
Tablets Remote Access - Using the Anubis IP Address Connect your Anubis to your network while making sure that it has a direct connection to a Wi-Fi Access Point. Find the Anubis IP address under Settings > General into the Network IP address entry... -
Page 24: I/O Connections
I/O CONNECTIONS The Commentary Unit Mission is a network audio dedicated mission. All I/O connections and routing, even internally, are patched using ANEMAN. Please find a summary of the available Inputs and Outputs of the Mission in the schematic below: MONITORING 1 MONITORING 2 ON AIR 1... - Page 25 I/O Connection example: In the example below: o The two Monitoring outputs are patched to the internal Headphone 1 and 2, as default o Talkback 1 & 2 and On-Air 1 & 2 are sending to a connected computer on the network o Intercom 1 &...
-
Page 26: I/O Connectivity To A Computer
I/O Connectivity to a Computer Anubis being a network audio interface, users wishing to use ANUBIS with a system application running on a computer, such as a DAW, will first need to establish the I/O network stream connections between ANUBIS and their system’s Merging Driver. -
Page 27: Settings
SETTINGS The Commentary Unit Mission Settings are accessible through a long push on the Home button then selecting the Settings menu. o The General Section offers general settings such as sampling rate, clocking, network settings, etc… Details on this section can be found in the Music Mission or Monitoring Mission Appendixes. - Page 28 o The Monitoring Section allows configuring various monitoring options: ▪ REF Level ▪ DIM Level Monitoring, Sidetones, Intercoms and Programs Maximum Level on the user ▪ interface rotaries Programs Dimming ▪ • This allows choosing when a Program is dimmed if the dimming occurs on both Ears, only the Left Ear or only the Right Ear.
- Page 29 I/O. Details on this section can be found in the Music Mission or Monitoring Mission Appendixes. o The Buttons Section allows for mapping the ANUBIS unit physical buttons to the Commentators On-Air, Mute and Talkback functionalities. Please find detail about this section in the PHYSICAL BUTTONS paragraph above.
-
Page 30: Rest Api
REST API ANUBIS offers a REST API through Web Sockets or CometD for bidirectional remote control. The entire user interface functionalities as well as additional “hidden” features, for instance Program Dimming, are accessible through this API, for a deeper integration with broadcast orchestrators or consoles. -
Page 31: Identify Me - Device Location
2. Once the advanced pages are open go to the top right of the page 3. Check the Identify Me box 4. This will identify the Anubis and make the Anubis Home button blink and display a dialog. on the TFT. -
Page 32: Troubleshooting
TROUBLESHOOTING In progress. PROBLEM POSSIBLE CAUSE SOLUTION Anubis... -
Page 33: For More Information
FOR MORE INFORMATION MERGING+ANUBIS WEBSITE https://www.merging.com/anubis MUSIC+MISSION https://confluence.merging.com/pages/viewpage.action?pageId=86212659 MERGING+ANUBIS Knowledge Database, FAQs and Tutorials https://confluence.merging.com/display/publicdoc/MERGING+ANUBIS MERGING+ANUBIS Downloads https://www.merging.com/anubis/download MERGING+ANUBIS USE CASES https://confluence.merging.com/pages/viewpage.action?pageId=60031175 MERGING SUPPORT support@merging.com MERGING YouTube CHANNEL https://www.youtube.com/channel/UCR5q_dlb9dYnXTrVDWMshgw...
Need help?
Do you have a question about the ANUBIS and is the answer not in the manual?
Questions and answers