
Related Manuals for HESHBON HL-32X


Summary of Contents for HESHBON HL-32X
- Page 1 HESHBON SCISSORS LIFT Installation/Operation & Maintenance Manual HL-32X Please read this manual before you get started. You must read and understand the precautions for safety to protect your safety and any damage to your property.
- Page 2 Don’t use the car lift in a potentially explosive atmosphere. ANY PART OF THIS PRINT MUST NOT BE REPRODUCED IN ANY FORM WITHOUT PERMISSION. THIS PRINT IS SUBJECT TO CHANGE WITHOUT NOTICE. NO. 32X081101A ⓒ Copyright Heshbon Co.,Ltd. MIT Design Group 2008 All rights reserved.
-
Page 3: Table Of Contents
TABLE OF CONTENTS Introduction Features and characteristics Part’s name Control pannel Specification Caution Sticker layout Safety Danger/warning/caution Installaion procedures Check list before installing Place of installation - lay out Check of anything is missing Installation procedures Operation Check points before operation Operation Proper car lift method (the weight setting) Maintenance... -
Page 4: Introduction
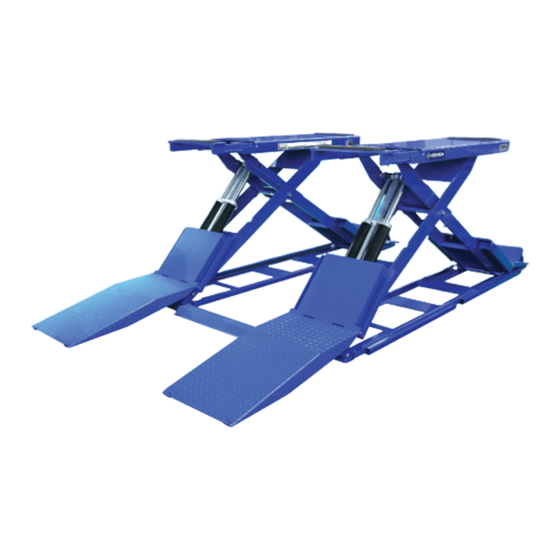
Introduction Features and characteristics Introduction Slide Realization of the Min. height 140mm Application of DU bearing Dual hydraulic cylinder synchronization system Onground and inground are freely available ■ Realization of the lower ground lift ▶Cars are entered easily and minimize lift drop accident from minimum height 140mm realization. - Page 5 Introduction ■ Double high-pressure seals ▶Powerfull hydraulic cylinder with double u-packing seals. Introduction ■High performed upper roller ▶DU bearing in roller for reduces noise and durability. ■ Onground and inground are freely available ▶As workshop situation, freely change types. ■ Slide of platform ▶Slide bar is applied to the platform for van or longer vehicle.
-
Page 6: Part's Name
Introduction Names of each part are described Extension ▶Platform extension for safety to various length Introduction car. Platform ▶Adjustable lift platform Main cylinder ▶Operates the platform of the main lift. Base ▶Adjustable lift base. Command Box Remote ▶Control panel controller (Option) Power centre ▶Single-phase plug... - Page 7 Introduction Main no. 1 link ▶Ascents and descents the main platform. Main no. 2 link ▶Ascents and descents the main platform. See page “PARTS LIST”...
-
Page 8: Control Pannel
Introduction Control panel Introduction (1) Power Lamp (2) Descent button (3) Power Cam switch (4) Ascent button (1) Power Lamp (2) Descent button - Descends the main platform (3) Power Cam Switch - Supply or isolate the power of the lift. (4) Ascent button - Ascends the main platform... -
Page 9: Specification
Introduction Specification Model Name HL-32X Capacity 3,000 Kg Used Hydraulic Pressure 250 Kgf/㎠ Introduction 1,953 mm Overall Max.Height 140 mm Min.Runways Height 1,813 mm Stroke Approx. 55 ~ 65 sec Lifting Time Approx . 50 ~ 65 sec. Lowering Time Standard Motor 1ph 2.5HP 220V 60Hz / 3ph 2HP 220,380V 60Hz... -
Page 10: Caution Sticker Layout
Introduction Caution Sticker layout Caution/Warning/Danger Introduction... - Page 11 Heshbon Lift Introduction Capacity Heshbon symbol Hand&Foot Warning Heshbon logo...
-
Page 12: Safety
Safety to the manuals of Information to use the equipment Heshbon Co., Ltd. efficiently. Precautions or check points for the use of the equipment. Please refer to the page Do not come... - Page 13 Precautions for safety Warning while operating Before lowering When the vehicle Do not lift a Allow no the lift, check is lifted, do not vehicle using unauthorized that there are rock it as this one pair of arms persons in the work area.
-
Page 14: Installaion Procedures
Installation site To ensure that the Skilled engineers Please contact anchor is secure, of Heshbon or its Heshbon the hole for an sale representative head office or anchor bolt must agency shall install... -
Page 15: Place Of Installation (Layout)
Installation Place of installation (Layout) Checkpoints before selecting the place of installation ① Distance from the wall or any fixed object ② Drive-on direction ③ Position of power post and slave posts ④ Ceiling height Installation... -
Page 16: Check Of Anything Is Missing
Installation Check if anything is missing ■ Check the items of HL-32X HL-32X (Ground type) 1. Main body 2. Control panel : 1ea 3. Entrance plate at front side (Ground type) : 2ea 4. Entrance plate at rear side (Ground type) : 2ea 5. -
Page 17: Installation Procedures
Installation Installation procedures ■ Landing down the product at the place to be installed ▶Place the lift main body at the place to be installed referring to layout document. ▶Fixing the product after checking the caution notes. In case of the In case of the forklift use crane use... - Page 18 Installation ■Connection of oil pressure hose ▶Connect oil pressure hose by referring oil pressure line diagram. (Refer to part list oil pressure circuit) Installation...
-
Page 19: Operation
Operation Check points before operation Before loading the lift, check the following points. ■ Test operation ▶Operate ascent and descent 2~3 times under no load condition. ■ Switch operation ▶Check that the ascent and descent push buttons are working correctly. ■... -
Page 20: Operation
Installation Operation Prior to use Check that the platforms are parked at floor level by using the descent button. Check that the auxiliary lift is at the down position. Prior to vehicle entry Check that the position of the righthand (movable) platform is suitable for the majority of the vehicles to be lifted. -
Page 21: Proper Car Lift Method (The Weight Setting)
Installation Proper car lift method (the weight setting) ■ Proper weight setting method(3-ton standard) ▶Using the proper car weight setting method, lift would be maintained safely. This guide follows the Europe CE standards Entering from the front side ▶Set the weight front/rear platform, each ratio 3:2 3/5 region is 1800kg, 2/5 region is 1200kg, total 3000kg setting is... - Page 22 Installation MEMO Installation...
-
Page 23: Maintenance
Maintenance Equipment maintenance and service ■ Lubrication ▶Grease or oil should be applied ▶Periodic grease and oil every 2 or 3 months to the parts shown injection maintain the product to below. be safe. Injecting grease ▶Inject enough grease at shaft of auxiliary lift and roller. - Page 24 Maintenance ■ Auxiliary lift platform extensions ▶Check that the rear extensions can be adjusted throughout the full length of their travel without obstruction. Check that the stop bolts at full travel are in place and are tight. Check the surfaces of the extension arms for wear.
- Page 25 Remove the seal and adjust the pressure with a screwdriver. This should be done while pressing the ascent button at the same time and with the lift loaded with the full rated capacity. Proper pressure by model HL-32X - 250 Kgf/㎠...
- Page 26 Maintenance Oil change Oil should be changed 3 months after installation and thereafter annually. Oil change procedure ① Remove the cover of the hydraulic unit. ② Remove the oil filter cap and dipstick. Carefully remove the oil drain plug and allow the oil to discharge into a suitable container.
-
Page 27: Trouble Shooting
Maintenance TROUBLE SHOOTING Maintenance... -
Page 28: Check List And Periodic Maintenance
Maintenance Check list and periodic maintenance Maintenance... -
Page 29: Part List
PART LIST HL-32X Version 1- 11.2008 This installation manual is prepared as of November 2008. This manual is subject to change without prior notice if the lift specificaion is changed. - Page 30 Platform / Link...
- Page 31 Base...
- Page 32 Cylinder...
- Page 33 Control Panel...
- Page 34 Hydraulic Circuit...
- Page 35 Electric Circuit...
- Page 36 HESHBON CO.,LTD. 410-2 Hanjin-Ri,Dangjin-Gun Chungnam, Korea 343-823 TEL: 82-41-351-3570 FAX: 82-41-351-3535 http://www.heshbon.com E-mail: heshbon@heshbon.com...
Need help?
Do you have a question about the HL-32X and is the answer not in the manual?
Questions and answers