
Related Manuals for KUKEN EASYCLEAN 6000

Summary of Contents for KUKEN EASYCLEAN 6000
- Page 1 M U L T I F U N C T I O N 6000 MANUAL ASPIRADORA FREGONA ROBOT MULTIFUNCIÓN INALÁMBRICO DE USUARIO...
- Page 3 Cambia la forma de cuidar tu hogar...
- Page 4 kuken...
- Page 5 INDICE EASYCLEAN 6000 EASYCLEAN 6000 ASPIRADORA FREGONA ROBOT MULTIFUNCIÓN INALÁMBRICO ES ESPAÑOL ..................6-15 EN ENGLISH ..................3-13 PT PORTUGUÊS ................3-13 FR FRANÇAIS ..................3-13 IT ITALIANO ..................3-13 DE DEUTSCH ...................3-13...
-
Page 6: Instrucciones De Seguridad
ESPAÑOL BIENVENIDO Muchas gracias por elegir nuestro robot de cocina. Antes de utilizar el aparato, y para garantizar un uso correcto, lea atentamente estas instrucciones. Las precauciones de seguridad incluidas en el presente documento reducen el riesgo de sufrir una descarga eléctrica, lesiones e incluso la muerte cuando se respetan estrictamente. -
Page 7: Lista De Piezas
SPECIFICACIONES Tamaño de la unidad principal 290 * 250 * 1150 mm 290 * 250 * 1150 mm Peso neto 4,30 kg 4,30 kg Entrada 30 V, 0,8 A 30 V, 0,8 A El consumo de energía 150W 150W Tipo de Batería Batería de iones de litio Batería de iones de litio Capacidad de la batería... -
Page 8: Vista Frontal
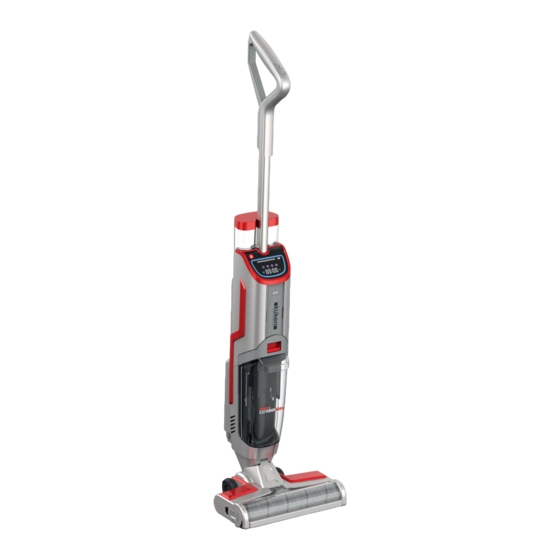
COMPONENTES VISTA FRONTAL 1. Botón interruptor 2. Modo Eco/Max 3. Botón de pulverización 4. Mango del cuerpo 5. Tanque de agua limpia 6. Botón de autolimpieza 7. Pantalla digital 8. Pulsador opción de voz 9. Botón de liberación del tanque 10. -
Page 9: Estación De Carga
COMPONENTES BASE DEL CEPILLO 1. Ranura de la batería 2. Bloqueo del cepillo 3. Sensor infrarojo 4. Rueda de desplazamiento 5. Lámpara UV-C 6. Rueda de desplazamiento pequeña 7. Rasqueta TANQUE DE AGUA LIMPIA 8. Tapón 9. Válvula ESTACIÓN DE CARGA 10. -
Page 10: Pantalla Digital
PANTALLA DIGITAL ICONO FUNCIÓN El indicador se iluminará en blanco cuando EasyClean EasyClean esté en Modo Eco El indicador se iluminará en blanco cuando EasyClean EasyClean esté en modo Max. Muestra el tiempo de trabajo desde “encender” hasta “ahora” El indicador se iluminará en blanco cuando la lámpara UV esté funcionando. El indicador parpadeará... -
Page 11: Montaje
MONTAJE 1. Saque el mango, el cuerpo principal, la batería de iones de litio, el tanque de agua limpia, el tanque de agua sucia y el juego de cepillo, estación de carga, bandeja de secado, y herramienta de limpieza del paquete. 2. - Page 12 LLENADO DEL DEPÓSITO DE LIMPIEZA 1. El tanque de agua de limpieza está ubicado en la parte posterior del cuerpo principal, use sus dedos para agarrar la parte superior del depósito de agua y tirar de él hacia arriba para retirarlo (figura 6). 2.
- Page 13 LLENADO DEL DEPÓSITO DE LIMPIEZA 1.Revise el mango, el tanque de agua limpia, el tanque de agua sucia, el paquete de baterías de iones de litio,el cepillo giratorio, asegúrese de que todos estén instalados correctamente y firmemente. 2. Presione el botón de interruptor en el mango para encender EasyClean EasyClean.
-
Page 14: Cuidado Y Mantenimiento
AUTO - LIMPIEZA EasyClean EasyClean puede limpiar el cepillo giratorio y la tubería automáticamente en la base autolimpiante: 1) Asegúrese de que haya suficiente agua limpia en el tanque, vacíelo de agua sucia antes de la autolimpieza. 2) Coloque EasyClean en la estación de carga (figura 12), enchufe bien la fuente de alimentación. 3) Presione el botón de autolimpieza (figura 13), el indicador parpadeará... -
Page 15: Solución De Problemas
Limpieza / Reemplazo Parte Frecuencia de limpieza / reemplazo recomendado Tanque de agua limpia Limpieza después de cada uso. Tanque de agua sucia Limpieza después de cada uso. HEPA Limpieza después de cada uso. / Reemplazo cada 3-6 meses Filtro Limpieza después de cada uso. - Page 16 Problemas Posibles razones Soluciones • Quite el tanque de agua limpia, luego inicie EasyClean y rocíe el spray, gire EasyClean apagado hasta drenar la La pantalla indicadora del tanque de tubería. Luego presione el “Botón de in- • Sin calibrar. agua limpia da incorrecto terruptor”...
- Page 17 Códigos Posibles razones Soluciones de error FF:04 Reemplace la batería. Reemplace la batería. FF:05 El voltaje de la batería es demasiado bajo. Verifique la conexión o reemplace la batería. FF:06 Sobretensión diferencial en la batería. Reemplace la batería. Use la limpiadora cuando la temperatura se vuelva FF:07 La temperatura de descarga es demasiado alta.
- Page 18 Contenido de sustancias peligrosas Componen- Compo- Componente Carcasa de Partes de Cables Adaptador nentes de plástico metal electróni- caucho • • • • • • • Polibromado Éteres de difenilo (PBDE) • • • • • • • Bis (2-etilhexilo) Ftalato (DEHP) •...
-
Page 19: Security Instructions
ENGLISH WELCOME Thank you very much for choosing our food processor. Before using the appliance, and to ensure correct use, read these instructions carefully. The death precautions in this document reduce the risk of electric shock, injury, and even death when strictly adhered to. Keep this manual in a safe place for reference. -
Page 20: Parts List
SPECIFICACIONES Main unit size 290 * 250 * 1150 mm 290 * 250 * 1150 mm Net weight 4,30 kg 4,30 kg Entry 30 V, 0,8 A 30 V, 0,8 A Power consumption 150W 150W Battery Type Lithium ion battery Lithium ion battery Battery capacity 2600 mAh... -
Page 21: Front View
COMPONENTS FRONT VIEW 1. Switch button 2. Eco / Max mode 3. Spray button 4. Body handle 5. Clean water tank 6. Self-cleaning button 7. Digital display 8. Voice switch 9. Tank release button 10. Dirty water tank 11. Li-ion battery pack 12. -
Page 22: Clean Water Tank
COMPONENTS BRUSH BASE 1. Battery slot 2. Brush lock 3. Infrared sensor 4. Scroll wheel 5. UV-C lamp 6. Small scroll wheel 7. Scraper CLEAN WATER TANK 8. Plug 9. Valve LOADING STATION 10. Tray 11. DC power socket... -
Page 23: Digital Screen
DIGITAL SCREEN ICON FUNCTION The indicator will light white when EasyClean is in Eco Mode The indicator will light white when EasyClean is in Max mode. Displays the working time from "turn on" to "now" The indicator will light white when the UV lamp is working. The indicator will flash RED slowly when the clean water tank is low on water, please fill it with clean water. - Page 24 MOUNTING 1. Take the handle, main body, lithium ion battery, clean water tank, dirty water tank, and brush set, charging station, drying tray, and cleaning tool from the package. 2. Insert the handle until you hear a click (figure 1). 3.
- Page 25 FILLING THE CLEANING TANK 1. The cleaning water tank is located at the rear of the main body, use your fingers to grasp the top of the water tank and pull it up to remove it (figure 6). 2. Unscrew the water cap counterclockwise as shown below and add a little water, then screw and insert the clean water tank into the EasyClean (figure 7).
- Page 26 FILLING THE CLEANING TANK 1.Check the handle, clean water tank, dirty water tank, lithium-ion battery pack, rotating brush, make sure they are all installed correctly and firmly. 2. Press the switch button on the handle to turn on EasyClean. Press the maximum mode button to change the suction power (figure 10).
-
Page 27: Self-Cleaning
SELF-CLEANING EasyClean can clean the rotating brush and tubing automatically on the self-cleaning base: 1) Make sure there is enough clean water in the tank, empty it of dirty water before self-cleaning. 2) Place EasyClean on the charging station (figure 12), plug in the power supply tightly. 3) Press the self-cleaning button (figure 13), the indicator will flash white slowly, self-cleaning will start. - Page 28 Cleaning / Replacement Part Recommended cleaning / replacement frequency Clean water tank Cleaning after each use. Dirty water tank Cleaning after each use. HEPA Cleaning after each use. / Replacement every 3-6 months Filter Cleaning after each use. Strainer Cleaning after each use. Brush coverage Cleaning after each use.
- Page 29 Problems Possible reasons Solutions • Remove the clean water tank, then start EasyClean and spray the spray, turn EasyClean off until the pipe is Clean Water Tank Indicator Display Is • Not calibrated. drained. Then press the “Switch Button” Incorrect and “Eco / Max Button”...
- Page 30 Codes of Possible reasons Soluciones mistake FF:05 The battery voltage is too low. Check the connection or replace the battery. FF:06 Differential overvoltage in the battery. Replace the battery. FF:07 The discharge temperature is too high. Use the cleaner when the temperature becomes normal. FF:08 The charging temperature is too high.
- Page 31 Content of hazardous substances Electronic rubber Component Plastic Metal Cables Adapter Compo- compo- housing parts nents nents • • • • • • • Bis (2-ethylhexyl) Phthalate • • • • • • • Butyl benzyl Phthalate (BBP) • • •...
-
Page 32: Instruções De Segurança
PORTUGUÊS RECEBER Muito obrigado por escolher nosso processador de alimentos. Antes de utilizar o aparelho, e para garantir uma utilização correta, leia atentamente estas instruções. As precauções de morte neste documento reduzem o risco de choque elétrico, ferimentos e até morte quando estritamente cumpri- das. -
Page 33: Especificaciones
ESPECIFICACIONES Tamanho da unidade principal 290 * 250 * 1150 mm 290 * 250 * 1150 mm Peso líquido 4,30 kg 4,30 kg Entrada 30 V, 0,8 A 30 V, 0,8 A Consumo de energia 150W 150W Bateria tipo Bateria de íon de lítio Bateria de íon de lítio Capacidade da bateria 2600 mAh... -
Page 34: Vista Traseira
COMPONENTES VISTA FRONTAL 1. Botão de mudança 2. Modo Eco / Max 3. Botão de spray 4. Pega do corpo 5. Tanque de água limpa 6. Botão de autolimpeza 7. Display digital 8. Mudança de voz 9. Botão de liberação do tanque 10. -
Page 35: Estação De Carregamento
COMPONENTES BASE DE ESCOVA 1. Slot de bateria 2. Trava de escova 3. Sensor infravermelho 4. Roda de rolagem 5. Lâmpada UV-C 6. Roda de rolagem pequena 7. Raspador TANQUE DE ÁGUA LIMPA 8. Plug 9. Válvula ESTAÇÃO DE CARREGAMENTO 10. - Page 36 TELA DIGITAL ÍCONE FUNÇÃO O indicador acenderá em branco quando EasyClean estiver no modo Eco O indicador ficará branco quando o EasyClean estiver no modo Máx. Exibe o tempo de trabalho de "ligar" a "agora" O indicador acenderá em branco quando a lâmpada UV estiver funcionando. O indicador piscará...
- Page 37 MONTAGEM 1. Retire a alça, corpo principal, bateria de íon de lítio, tanque de água limpa, tanque de água suja e conjunto de escovas, estação de carga, bandeja de secagem e ferramenta de limpeza da embalagem. 2. Insira a alça até ouvir um clique (figura 1). 3.
- Page 38 ENCHENDO O TANQUE DE LIMPEZA 1. O tanque de água de limpeza está localizado na parte traseira do corpo principal, use os dedos para agarrar a parte superior do tanque de água e puxe-o para removê-lo (figura 6). 2. Desaperte a tampa da água no sentido anti-horário conforme mostrado abaixo e adicione um pouco de água, em seguida, rosqueie e insira o tanque de água limpa no EasyClean (figura 7).
- Page 39 ENCHENDO O TANQUE DE LIMPEZA 1. Verifique a alça, o tanque de água limpa, o tanque de água suja, a bateria de íons de lítio, a escova rotativa e certifique-se de que todos estão instalados corretamente e com firmeza. 2. Pressione o botão do interruptor na alça para ligar o EasyClean. Pressione o botão de modo máximo para alterar a potência de sucção (figura 10).
-
Page 40: Cuidado E Manutenção
AUTO-LIMPEZA O EasyClean pode limpar a escova giratória e a tubulação automaticamente na base autolimpante: 1) Certifique-se de que há água limpa suficiente no tanque, esvazie a água suja antes da autolimpeza. 2) Coloque o EasyClean na estação de carga (figura 10), conecte a fonte de alimentação firmemente. 3) Pressione o botão de autolimpeza (figura 11), o indicador piscará... - Page 41 PORTUGUÊS Limpeza / Substituição Parte Frequência de limpeza / substituição recomendada Tanque de água limpa Limpeza após cada uso. Tanque de água suja Limpeza após cada uso. HEPA Limpeza após cada uso. / Substituição a cada 3-6 meses Filtro Limpeza após cada uso. Filtro Limpeza após cada uso.
- Page 42 PORTUGUÊS Problemas Possíveis razões Soluções • Remova o tanque de água limpa, inicie o EasyClean e pulverize o spray, desligue o EasyClean até que o tubo seja drenado. A exibição do indicador do tanque de • Não calibrado. Em seguida, pressione o “Botão Alternar” água limpa está...
- Page 43 PORTUGUÊS Códigos Razões possíveis Soluções de erro FF:05 A voltagem da bateria está muito baixa. Verifique a conexão ou substitua a bateria. FF:06 Sobretensão diferencial na bateria. Substitua a bateria. FF:07 A temperatura de descarga está muito alta. Use o limpador quando a temperatura voltar ao normal. FF:08 A temperatura de carregamento está...
- Page 44 PORTUGUÊS Conteúdo de substância perigosa Compo- Compo- Componente Caixa de Partes de Cables Adaptador nentes nentes de plástico metal eletrônicos borracha • • • • • • • Butil benzil Ftalato (BBP) • • • • • • • Dibutil ftalato(- DBP) •...
-
Page 45: Istruzioni Di Sicurezza
ITALIANO RICEVERE Grazie mille per aver scelto il nostro robot da cucina. Prima di utilizzare il dispositivo e per garantire un uso corretto, leggere attenta- mente queste istruzioni. Le precauzioni contro la morte in questo documento riducono il rischio di scosse elettriche, lesioni e persino la morte se strettamente osservate. -
Page 46: Elenco Pezzi
ESPECIFICACIONES Dimensioni unità principale 290 * 250 * 1150 mm 290 * 250 * 1150 mm Peso netto 4,30 kg 4,30 kg Ingresso 30 V, 0,8 A 30 V, 0,8 A Consumo energetico 150W 150W Tipo di batteria Batteria Batteria agli ioni di litio Batteria agli ioni di litio Capacità... -
Page 47: Vista Frontale
COMPONENTI VISTA FRONTALE 1. Pulsante Shift 2. Modalità Eco / Max 3. Pulsante Spray 4. Maniglia del corpo 5. Serbatoio dell’acqua pulita 6. Pulsante autopulente 7. Display digitale 8. Cambio di voce 9. Pulsante di rilascio del serbatoio 10. Serbatoio dell’acqua sporco 11. -
Page 48: Stazione Di Ricarica
COMPONENTI BASE A PENNELLO 1. Slot per batteria 2. Blocco spazzole 3. Sensore a infrarossi 4. Rotella di scorrimento 5. Lampada UV-C 6. Rotellina di scorrimento piccola 7. Raschietto SERBATOIO ACQUA PULITA 8. Tappo 9. Valvola STAZIONE DI RICARICA 10. Vassoio 11. -
Page 49: Schermo Digitale
SCHERMO DIGITALE ICONA OCCUPAZIONE L'indicatore si illuminerà di bianco quando EasyClean è in modalità Eco L'indicatore sarà bianco quando EasyClean è in modalità Max. Visualizza il "collegamento" all'orario di lavoro "adesso" L'indicatore si illuminerà di bianco quando la lampada UV è in funzione. L'indicatore lampeggia in ROSSO lentamente quando il serbatoio dell'acqua pulita è... - Page 50 MONTAGGIO 1. Rimuovere la maniglia, il corpo principale, la batteria agli ioni di litio, il serbatoio dell’acqua pulita, il serbatoio dell’acqua sporca e il set di spazzole, la stazione di ricarica, il vassoio di asciugatura e lo strumento di pulizia dalla confezione. 2.
- Page 51 RIEMPIMENTO DEL SERBATOIO DI PULIZIA 1. Il serbatoio dell’acqua di pulizia si trova nella parte posteriore del corpo principale, utilizzare le dita per afferrare la parte superiore del serbatoio dell’acqua ed estrarlo per rimuoverlo (figura 6). 2. Svitare il coperchio dell’acqua in senso antiorario come mostrato di seguito e aggiungere un po ‘d’acqua, quindi avvitare e inserire il serbatoio dell’acqua pulita in EasyClean (figura 7).
- Page 52 RIEMPIMENTO DEL SERBATOIO DI PULIZIA 1. Controllare la maniglia, il serbatoio dell’acqua pulita, il serbatoio dell’acqua sporca, la batteria agli ioni di litio, la spazzola rotante e assicurarsi che siano installati correttamente e saldamente. 2. Premere il pulsante dell’interruttore sull’impugnatura per accendere EasyClean. Premere il pulsante della modalità massima per modificare la potenza di aspirazione (figura 10).
-
Page 53: Cura E Manutenzione
AUTOPULENTE EasyClean può pulire automaticamente la spazzola rotante e il tubo sulla base autopulente: 1) Assicurarsi che ci sia abbastanza acqua pulita nel serbatoio, svuotare l’acqua sporca prima dell’autopulizia. 2) Posizionare EasyClean nella stazione di ricarica (figura 10), collegare saldamente l’alimentatore. 3) Premere il pulsante di autopulizia (figura 11), l’indicatore lampeggerà... - Page 54 Limpieza / Reemplazo Parte Frequenza di sostituzione / pulizia consigliata dalla Serbatoio dell'acqua pulita Pulizia dopo ogni utilizzo. Serbatoio dell'acqua sporco Pulizia dopo ogni utilizzo. HEPA Pulizia dopo ogni utilizzo. / Sostituzione ogni 3-6 mesi Filtro Pulizia dopo ogni utilizzo. Filtro Pulizia dopo ogni utilizzo.
- Page 55 I problemi Possibili ragioni Soluzioni • Rimuovere il serbatoio dell’acqua pulita, quindi avviare EasyClean e spruz- zare lo spray, spegnere EasyClean fino La visualizzazione dell'indicatore a quando il tubo non è drenato. Quindi del serbatoio dell'acqua pulita non è • Non calibrato. premere il “pulsante di commutazione”...
- Page 56 Codici di Possibili ragioni Soluzioni errore FF:04 Sostituisci la batteria. Sostituisci la batteria. FF:05 La tensione della batteria è troppo bassa. Verificare il collegamento o sostituire la batteria. FF:06 Sovratensione differenziale nella batteria. Sostituisci la batteria. Utilizzare il detergente quando la temperatura diventa FF:07 La temperatura di scarico è...
- Page 57 Contenuto di sostanze pericolose Compo- Componente Guscio di Parti Componenti Cavi Adattatore nenti in plastica metalliche elettronici gomma • • • • • • • Bis (2-etilhexilo) Ftalato (DEHP) • • • • • • • Butilbenzile Ftalato (BBP) • •...
-
Page 58: Herzlich Willkommen
DEUTSCH HERZLICH WILLKOMMEN Vielen Dank, dass Sie sich für unsere Küchenmaschine entschieden haben. Lesen Sie diese Anweisungen sorgfältig durch, bevor Sie das Gerät verwenden und die korrekte Verwendung sicherstellen. Die Sicherheitsvorkehrungen in diesem Dokument verringern das Risiko von Stromschlägen, Verletzungen und sogar zum Tod, wenn sie strikt eingehalten werden. -
Page 59: Spezifikationen
SPEZIFIKATIONEN Größe der Haupteinheit 290 * 250 * 1150 mm 290 * 250 * 1150 mm Nettogewicht 4,30 kg 4,30 kg Eingang 30 V, 0,8 A 30 V, 0,8 A Leistungsaufnahme 150W 150W Batterietyp Lithium-Ionen-Batterie Lithium-Ionen-Batterie Batteriekapazität 2600 mAh 2600 mAh Batteriespannung 25,9 V 25,9 V... - Page 60 KOMPONENTEN VORDERANSICHT 1. Taste wechseln 2. Eco / Max-Modus 3. Sprühknopf 4. Körpergriff 5. Wassertank reinigen 6. Selbstreinigungstaste 7. Digitalanzeige 8. Sprachschalter 9. Tankentriegelungsknopf 10. Schmutzwassertank 11. Li-Ionen-Akku 12. Batterieentriegelungsknopf 13. Bürstenschutz RÜCKANSICHT 14. Rohr 15. Rohrfreigabeloch 16. Unterstützung 17. Li-Ionen-Akku 18.
- Page 61 KOMPONENTEN Bürstenbasis 1. Batteriefach 2. Bürstenschloss 3. Infrarotsensor 4. Scrollrad 5. UV-C-Lampe 6. Kleines Scrollrad 7. Schaber SAUBERER WASSERTANK 8. Stecker 9. Ventil LADESTATION 10. Fach 11. Gleichstromsteckdose...
- Page 62 DIGITALBILDSCHIRM SYMBOL FUNKTION Die Anzeige leuchtet weiß, wenn sich EasyClean im Eco-Modus befindet Die Anzeige leuchtet weiß, wenn sich EasyClean im Max-Modus befindet. Zeigt die Arbeitszeit von "Einschalten" bis "Jetzt" an. Die Anzeige leuchtet weiß, wenn die UV-Lampe arbeitet. Die Anzeige blinkt langsam ROT, wenn der Reinwassertank fast leer ist. Füllen Sie ihn mit sauberem Wasser.
-
Page 63: Montage
MONTAGE 1. Nehmen Sie den Griff, den Hauptkörper, den Lithium-Ionen-Akku, den Reinwassertank, den Schmutzwassertank und das Bürstenset, die Ladestation, die Trockenschale und das Reinigungswerkzeug aus der Verpackung. 2. Setzen Sie den Griff ein, bis Sie ein Klicken hören (Abbildung 1). 3. - Page 64 FÜLLEN DES REINIGUNGSTANKS 1. Der Reinigungswassertank befindet sich auf der Rückseite des Hauptkörpers. Greifen Sie mit den Fingern nach der Oberseite des Wassertanks und ziehen Sie ihn nach oben, um ihn zu entfernen (Abbildung 6). 2. Schrauben Sie die Wasserkappe wie unten gezeigt gegen den Uhrzeigersinn ab und geben Sie etwas Wasser hinzu. Schrauben Sie dann den Reinwassertank auf und setzen Sie ihn in den EasyClean ein (Abbildung 7).
- Page 65 FÜLLEN DES REINIGUNGSTANKS 1.Überprüfen Sie den Griff, den Reinwassertank, den Schmutzwassertank, den Lithium-Ionen-Akku und die rotierende Bürste und stellen Sie sicher, dass alle richtig und fest installiert sind. 2. Drücken Sie die Schaltertaste am Griff, um EasyClean einzuschalten. Drücken Sie die Maximalmodus-Taste, um die Saugleistung zu ändern (Abbildung 10).
-
Page 66: Pflege Und Wartung
SELBSTREINIGUNG EasyClean kann die rotierende Bürste und den Schlauch automatisch auf der selbstreinigenden Basis reinigen: 1) Stellen Sie sicher, dass sich genügend sauberes Wasser im Tank befindet, und leeren Sie ihn vor der Selbstreinigung von schmutzi- gem Wasser. 2) Setzen Sie EasyClean auf die Ladestation (Abbildung 10) und schließen Sie das Netzteil fest an. 3) Drücken Sie die Selbstreinigungstaste (Abbildung 11). - Page 67 Reinigung / Austausch Teil Empfohlene Reinigungs- / Austauschhäufigkeit Wassertank reinigen Reinigung nach jedem Gebrauch. Schmutzwassertank Reinigung nach jedem Gebrauch. HEPA Reinigung nach jedem Gebrauch. / Austausch alle 3-6 Monate Filter Reinigung nach jedem Gebrauch. Sieb Reinigung nach jedem Gebrauch. Pinselabdeckung Reinigung nach jedem Gebrauch.
- Page 68 Probleme Mögliche Gründe Lösungen • Entfernen Sie den Reinwassertank, starten Sie EasyClean und sprühen Sie das Spray. Schalten Sie EasyClean aus, Anzeige der Anzeige für sauberen bis das Rohr entleert ist. Drücken Sie • Nicht kalibriert. Wassertank ist falsch dann 5 Sekunden lang die Schaltertaste und die Eco / Max-Taste, bis die Digita- lanzeige zweimal blinkt, und überprüfen Sie sie dann erneut.
- Page 69 Fehlerco- Mögliche Gründe Lösungen FF:03 NTC Unterbrechung / Kurzschluss. Ersetzen Sie die Batterie. FF:04 Ersetzen Sie die Batterie. Ersetzen Sie die Batterie. Überprüfen Sie die Verbindung oder tauschen Sie die FF:05 Die Batteriespannung ist zu niedrig. Batterie aus. FF:06 Differenzielle Überspannung in der Batterie. Ersetzen Sie die Batterie.
- Page 70 Gefahrstoffgehalt Gummi- Komponente Kunststo- Elektronis- Kabel Metallteile Adapter kompo- ffschale che Bauteile nenten Polybromierte • • • • • • • Diphenylether (PBDE) • • • • • • • Bis (2-ethylhexyl) Phthalat (DEHP) • • • • • • •...
- Page 71 Alfa Dyser, S.L. Pol. Ind. Anoia C/Cooperativa nº2 08635. Sant Esteve Sesrovires (Barcelona) España · B-60163441 T. 937831011 · F. 937838487 www.alfadyser.com · alfa@alfadyser.com...
Need help?
Do you have a question about the EASYCLEAN 6000 and is the answer not in the manual?
Questions and answers