Table of Contents
Advertisement
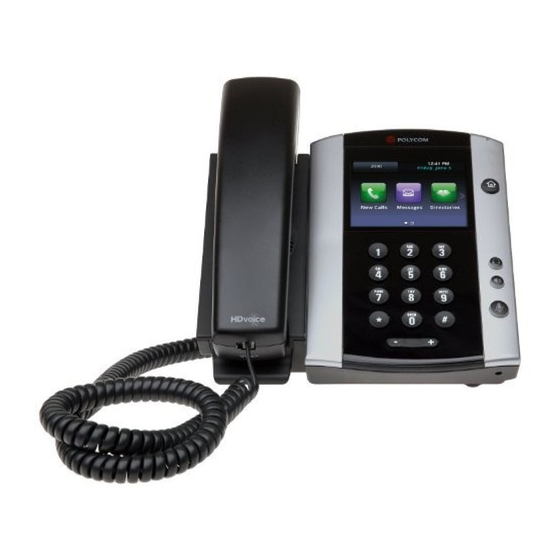
Polycom VVX 501 and VVX 601 – User Guide
What you need to know:
Learn the basics of using your Polycom VVX 501/601 desk phone.
Introduction
The following topics will help you with common questions related to using your Polycom
phone. Please note: The examples and screenshots below are using the VVX 501 model;
however, the instructions for performing the tasks are the same across both the VVX 501
and VVX 601 model phones.
Touchscreen
1. The touchscreen navigation is based on touch. To select an item, tap it. You can
perform the functions that appear on the screen.
2. The buttons on the bottom of the screen are referred to as Softkeys. Their functions
are context sensitive, which means that their functions change depending upon your
current menu. For example, if you are conferencing, the screen displays functions
related to the Conference function.
Advertisement
Table of Contents

Related Manuals for Polycom VVX 501


Summary of Contents for Polycom VVX 501
- Page 1 The following topics will help you with common questions related to using your Polycom phone. Please note: The examples and screenshots below are using the VVX 501 model; however, the instructions for performing the tasks are the same across both the VVX 501 and VVX 601 model phones.
-
Page 2: Feature Keys
Lines View and Home View Lines View – The lines view is your phone’s default display. This view displays your phone lines along with their corresponding buttons as well as your speed dial favorites. Home View – The home view is displayed when you press the Home key. From here, you can initiate new calls, and access your messages, directories, settings and applications. -
Page 3: Placing And Receiving Calls
Headset Key – This key enables you to place and receive calls through a headset. The key glows green when an analog headset is activated. The key glows blue when a USB or Bluetooth headset is activated. Speakerphone Key – This key is used to place and receive calls using the speakerphone. - Page 4 Depending on your preference, there are multiple ways to answer an incoming call. Choose one of the following: 1. 1. To answer a call with your Handset, simply lift the receiver. 2. To answer a call via speakerphone, press the Speakerphone feature key. 3.
-
Page 5: Hold And Resume
1. Tap the Answer softkey on the screen. Your first call will automatically be placed on hold. 2. To retrieve your first call, from the lines view, tap the call to highlight it, then tap the Resume softkey. Hold and Resume To put an active call on hold, select the Hold softkey. -
Page 6: Call Transfer
Call Transfer Blind Transfer A Blind (or unannounced) Transfer takes place when you transfer a call to someone else without announcing the call first. To conduct a Blind Transfer, choose one of the following methods: Method 1: 1. While on an active call, select Transfer. 2. - Page 7 Method 2: 1. Press and hold Transfer, which selects blind transfer. Click image for large view 2. Enter the destination to which you wish to transfer the call. 3. Then tap the Dial icon.
-
Page 8: Consulted Transfer
Consulted Transfer A Consulted (or announced) Transfer is performed when you announce the call to the recipient prior to transferring the call. To conduct a Consulted Transfer, follow these steps: 1. While on an active call, select Transfer. 2. Enter the destination to which you wish to transfer the call. 3. -
Page 9: Do Not Disturb
2. 2. Enter the second number and tap the Dial icon. 3. When the second party answers, select the Conference softkey to connect the calls. Do Not Disturb The Do Not Disturb Feature is used to send all incoming calls to voicemail. To enable Do Not Disturb, select the DND softkey. -
Page 10: Call Forwarding
Once Do Not Disturb is enabled, calls will not ring your phone until it is disabled. To disable this feature, repeat the previous steps. Note: The Do Not Disturb softkey may work differently depending on how your extension has been configured by your administrator. For instance, in some cases, when you enable DND, it will impact inbound calls to not only your desk phone, but also your other connected devices. -
Page 11: Call History
3. When prompted, dial the extension number against which you wish to park the call followed by the pound (#) key, or simply dial the pound (#) key to park the call against your own number. To retrieve a parked call, follow these steps: 1. - Page 12 Monitoring The Monitoring feature allows you to monitor if another user is on or off the phone. If this feature has been assigned to you, you will see the name, or names, of users you can monitor next to the line keys on your phone. If a monitored user is on the phone, you will see a red notification icon next to that person’s name.
- Page 13 How Do I Add a Contact to My Personal Directory? You can add a personal contact to your directory through the End User Portal. To do this, follow these steps: 1. Navigate to the End User portal from your browser window. Proceed to enter your Username and Password into the corresponding fields.
- Page 14 3. Click Save. Voicemail Setting Up Voicemail – To set up your Voicemail for the first time, follow these steps: 1. From the main screen, tap the Voicemail Message icon. 2. Enter your default password, followed by the pound (#) key.The system will ask you to enter your new passcode.
- Page 15 3. Enter your voicemail passcode followed by the pound (#) key. 4. Follow the audio prompts to retrieve your voicemail messages. Note: If you forget your voicemail passcode, please contact your system administrator to have it reset. 16/18...
Need help?
Do you have a question about the VVX 501 and is the answer not in the manual?
Questions and answers