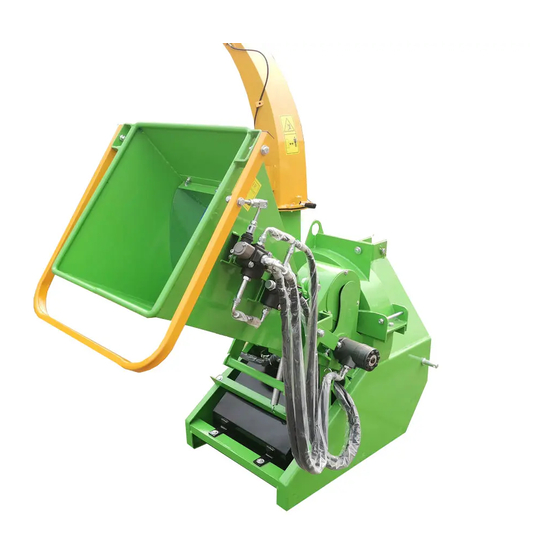
Victory BX510H Operator's Manual
Woodchipper with hydraulic infeed system
Hide thumbs
Also See for BX510H:
- Assembly & operating instructions (45 pages) ,
- Operator's manual (56 pages)

Subscribe to Our Youtube Channel
Related Manuals for Victory BX510H


Summary of Contents for Victory BX510H
- Page 1 Operator's Manual BX510H WOODCHIPPER With Hydraulic Infeed System VERSION 2.0 - EN 2022...
- Page 2 No part of this documentation may be reproduced in any form without the written permission of Victory Tractor Implements. History of changes: Operator’s Manual Date: Chapters: Description: Version: V1.0 2021 First edition. V2.0 May 2022 Editorial update. Layout update. Operator’s Manual Victory BX510H - Page 2 of 74 - Version 2.0...
-
Page 3: Table Of Contents
Practice Safe Maintenance ..................15 3.6.5 Prepare For Emergencies ................... 15 Safety and Health measures when using Hydraulic fluid ..........15 Driveline Safety ........................15 3.8.1 Driveline Safety Checklist ..................16 Operator’s Manual Victory BX510H - Page 3 of 74 - Version 2.0... - Page 4 Not Allowed Use ........................ 17 3.10 Safety Decals and Markings on the BX510H ..............18 3.11 Calamities .......................... 20 ASSEMBLY INSTRUCTIONS ......................21 Assembly Info: ........................22 Instructions before starting the Woodchipper ..............28 OPERATION ..........................31 Human ..........................31 Operator ..........................
- Page 5 Torque Specifications ......................70 FLYWHEEL KNIFE CARE ......................71 12.1 How long will my Woodchipper Knives last? ..............71 VICTORY TRACTOR IMPLEMENTS WARRANTY ............... 72 SPECIFICATIONS, FEATURES, PERFORMANCE ................ 73 Operator’s Manual Victory BX510H - Page 5 of 74 -...
-
Page 6: Preface
5½ x 10” capacity. The BX510H is used on smaller sub-compact tractors with as little as 15 hp. at the PTO, such as BX series Kubotas, John Deere 1000 series, New Holland, Massy Ferguson GC series, Mahindra Max series, and more. -
Page 7: Introduction
(562) 534-8182. Victory has trained technicians, spare parts and equipment needed to service the device. The parts on your machine are specially designed; replace these parts always with genuine Victory parts. Please reference your order number or serial number when calling. -
Page 8: Introduction
INTRODUCTION About This Manual This Operator’s manual belongs to the owner of the Victory BX510H woodchipper. Read this Operator’s Manual before operating the BX510H • Pay special attention to safety precautions presented in this manual, as they prevent accidents causing machine damage, human injury, or death. -
Page 9: Safety Warning Messages In This Manual
Safety Warning Messages in this Manual Read this manual carefully before using the BX510H to understand how to use it correctly. After reading, store the manual in a safe place, easily accessible for everyone working with the machine. Incorrect handling of the equipment could result in personal injury or physical damage. -
Page 10: Intended Use
Intended Use The BX510H is intended to be used as a woodchipper for tree branches max 5” thick and other pruning waste. Unintended Use Unintentional use is any other use than described under 'Intended use.' Intended Operating Conditions Ambient temperature: 0°... -
Page 11: Safety Information
Do not remove the brought warning stickers or markings. Always clean the machine properly and keep the workplace free of dirt and obstacles. Always ensure sufficient ambient lighting. Operator’s Manual Victory BX510H - Page 11 of 74 - Version 2.0... -
Page 12: Personal Protective Equipment
Always use tools that are in a good state of repair. Ensure that you know how to use the tools before carrying out any work. ONLY use replacement parts from the same brand as the relevant part. Operator’s Manual Victory BX510H - Page 12 of 74 - Version 2.0... -
Page 13: Additional Safety Rules For Woodchippers
Ensure the PTO shaft does not come apart or bottom out during the normal lifting range. Operator’s Manual Victory BX510H - Page 13 of 74 -... -
Page 14: More Safety Tips For Safe Operation
Transport Machinery Safely Comply with state and local laws. The maximum transport speed for any Victory implement is twenty mph on paved surfaces and ten mph maximum on an unpaved surface. Do not exceed. Never travel at a speed that does not allow adequate control of steering and stopping. -
Page 15: Practice Safe Maintenance
The checklist below relates to the driveline of agricultural implements, general safety literature, and the standards published by the American Society of Agricultural Engineers. Operator’s Manual Victory BX510H - Page 15 of 74 - Version 2.0... -
Page 16: Driveline Safety Checklist
The PTO master shield, integral driveline shield, and input connection shield should offer an interactive guarding system. Provide instructions by labels or manuals. Use the implement only with the tractor’s PTO master shield. Operator’s Manual Victory BX510H - Page 16 of 74 - Version 2.0... -
Page 17: Not Allowed Use
Please contact us if you have any questions about your driveline applications. Not Allowed Use It is not allowed to use the BX510H other than for woodchipper activities. Operator’s Manual Victory BX510H - Page 17 of 74 -... -
Page 18: Safety Decals And Markings On The Bx510H
Read and follow their directions. Keep all safety decals clean and legible. Replace all damaged or missing decals or labels. To order new ones, call Victory Tractor Implements. Some new equipment installed during repair requires safety labels to be affixed to the replaced component as specified. - Page 19 WARNING FOR HIGH-PRESSURE HYDRAULIC FLUID. WARNING decal MAX. OPERATING PTO SHAFT SPEED 540 rpm. DANGER decal ROTATING KNIFE BLADES. Keep Hands and Feet away. WARNING decal EMERGENCY STOP. Operator’s Manual Victory BX510H - Page 19 of 74 - Version 2.0...
-
Page 20: Calamities
Concerning this woodchipper, calamities arise when unauthorized persons use the machine. Never lend the woodchipper without the Operator's manual. Ensure that people always read and understand the manual content before use. Operator’s Manual Victory BX510H - Page 20 of 74 - Version 2.0... -
Page 21: Assembly Instructions
ASSEMBLY INSTRUCTIONS The BX510H as it comes packed Width: 45” Depth: 36” Height: 48” You must set up your woodchipper before installation. Please follow the steps on the following pages for a smooth 30-minute setup/assembly. W A R N I N G ! •... -
Page 22: Assembly Info
STEP 2: Remove the lock pin that secures the infeed hopper. Fold the infeed hopper down. Operator’s Manual Victory BX510H - Page 22 of 74 - Version 2.0... - Page 23 (2) to enable mounting of the feed roller spring. STEP 5: Install the spring as shown. Close the over-center clamp and secure it with the R-shaped cotter pin. Operator’s Manual Victory BX510H - Page 23 of 74 - Version 2.0...
- Page 24 STEP 8: Lift the chipper out of the shipping crate base, and position the device onto a level surface. NOTE: Save the frame for future use during transport. Operator’s Manual Victory BX510H - Page 24 of 74 - Version 2.0...
- Page 25 Raise the woodchipper so that the shaft of the woodchipper and the shaft of the tractor are horizontally aligned. Measure to determine the correct length of the PTO shaft. Operator’s Manual Victory BX510H - Page 25 of 74 - Version 2.0...
- Page 26 • Ensure that the grease nipples are screwed in tightly. Occasionally, dried paint may cover the end of the fitting on the shaft. Remove this by scraping the paint off with a knife before injecting grease into these nipples. Operator’s Manual Victory BX510H - Page 26 of 74 - Version 2.0...
- Page 27 STEP 14: The PTO shaft has two chains on the shield. Secure the chain to the tractor and implement. This will prevent the shield from spinning during operation. Operator’s Manual Victory BX510H - Page 27 of 74 - Version 2.0...
-
Page 28: Instructions Before Starting The Woodchipper
Move the lever into the remaining positions, and run it for 2-3 minutes each. When you notice that the feed rollers change direction when the safety bar is pushed forward or pulled backward, the system is purged. Operator’s Manual Victory BX510H - Page 28 of 74 - Version 2.0... - Page 29 N O T I C E : • The setup is now complete. You must read and understand all operating instructions before using the chipper. Operator’s Manual Victory BX510H - Page 29 of 74 - Version 2.0...
- Page 30 Operator’s Manual Victory BX510H - Page 30 of 74 - Version 2.0...
-
Page 31: Operation
OPERATION The features of the BX510H are described in this Chapter to ensure that you can use it to its full potential. The operation procedures ensure that every operator uses the BX510H correctly. Following these procedures will extend the life of the BX510H, creating a safe operating environment. -
Page 32: Operator
Operator Every well-skilled technical person can act as an operator. For safely using the BX510H, the operator must have the following specific professional knowledge: General knowledge of industrial safety procedures. General knowledge of operating and functioning farm machinery. Basic knowledge and skills regarding woodchipping machinery. -
Page 33: Operating The Safety Handle
This will prevent the feed rollers from pulling material in. Operator’s Manual Victory BX510H - Page 33 of 74 -... - Page 34 When operating the woodchipper, ensure you are standing in the safe OPERATOR ZONE. You must stay in the safe operating area when the woodchipper runs. Never place any part of your body into a position that causes an unsafe working condition. Operator’s Manual Victory BX510H - Page 34 of 74 - Version 2.0...
-
Page 35: Pto Shaft Sizing Instructions
Your PTO shaft comes with a chain on the shield. Secure the chain to the tractor and the implement. This will prevent the protection from spinning during operation. Operator’s Manual Victory BX510H - Page 35 of 74 - Version 2.0... -
Page 36: Shortening The Pto Shaft Length
Cut off the outer shield at the mark. Cut the same amount off the outer shaft (‘Y1’ dimension). Remove all burrs. Check the PTO shaft’s EXTENDED LENGTH as described in the next step. 5.7.1 Checking the PTO Shaft’s Extended Length Operator’s Manual Victory BX510H - Page 36 of 74 - Version 2.0... -
Page 37: Checking The Pto Shaft's Interference
Move the drawbar ahead, aside, or remove it if required. Set the tractor’s 3-Point hitch lift height to keep the PTO shaft from exceeding the maximum allowable length and 25° up or down. Operator’s Manual Victory BX510H - Page 37 of 74 - Version 2.0... -
Page 38: Adjusting The Discharge Chute
Unlock handle (1) to turn the discharge chute in the desired position is reached. 5.7.5 Aligning the Discharge Deflector direction Move handle (2) until the desired position from the discharge deflector is Operator’s Manual Victory BX510H - Page 38 of 74 - Version 2.0... -
Page 39: Hydraulics & Lubrication
Bearing Lubrication Guide; Based on Environmental Conditions There are many questions when it comes to greasing bearings. All Victory tractor implements are equipped with factory lubricated bearings so that 33% of the race is full of grease; this allows for operation at all speed ranges. -
Page 40: Other Activities
500-hour intervals. OTHER ACTIVITIES Order Parts Contact Victory Tractor Implements to order spare parts. When ordering spare parts, you must always have the following information: Machine name. - Page 41 Wear heavy leather gloves and use extreme caution when working around the knives. Close the cover and secure it with the retaining bolt. Re-attach the PTO shaft. Operator’s Manual Victory BX510H - Page 41 of 74 - Version 2.0...
-
Page 42: Maintenance Adjustment And Repair
MAINTENANCE ADJUSTMENT AND REPAIR This manual describes periodic maintenance that the owner can do. However, any care that requires special tools or technical experience should be left to Victory authorized service technicians. Only qualified service personnel can carry out activities other than operating activities. -
Page 43: Preventive Maintenance
To avoid skipping certain parts, a good practice is to follow the direction of the oil. Starting at the reservoir. Regular Maintenance List Operator’s Manual Victory BX510H - Page 43 of 74 - Version 2.0... -
Page 44: General Troubleshooting
This section can help the operator when a problem arises. It gives basic guidelines if something on the woodchipper is not working correctly. If the procedures in this section do not solve the problem, the owner should contact the Victory Service department for assistance. Problem:... -
Page 45: Changing The Oil Filter
Remove the hydraulic line from the tank. STEP 2: Remove three screws that secure the filter assembly. STEP 3: Remove the filter assembly and replace the oil filter. Operator’s Manual Victory BX510H - Page 45 of 74 - Version 2.0... -
Page 46: Flywheel Knives And Bed Knife Changing/Adjusting
• Use extreme caution when working in the flywheel area. Avoid contact with the flywheel knives. The knives are incredibly sharp. • Wear heavy leather gloves. 8.5.1 Flywheel Knives Changing/Adjusting STEP 1: Detach the PTO shaft from the woodchipper. Operator’s Manual Victory BX510H - Page 46 of 74 - Version 2.0... - Page 47 Fully open the coer as shown. STEP 5: Insert and secure the lock pin as shown to prevent the flywheel from rotating while you are working on the knives. Operator’s Manual Victory BX510H - Page 47 of 74 - Version 2.0...
- Page 48 90 degrees, and reinstall the lock pin for the next knife. Repeat this until all knives are replaced. NOTE: Always use new M10 nuts with a Nylon lock for the knives. Operator’s Manual Victory BX510H - Page 48 of 74 - Version 2.0...
- Page 49 If you need to adjust the gap, refer to bed knife changing/adjusting in this Chapter: 8.5.2. Rotate the flywheel by hand for two or three revolutions to ensure no interference issues. Operator’s Manual Victory BX510H - Page 49 of 74 - Version 2.0...
-
Page 50: Bed Knife Changing/Adjusting
Now that the knife cover is open, you can start the adjust or replace procedure for the bed knife. STEP 1: Release the spring at the front side of the infeed bin. STEP 2: Remove the infeed bin lock pin out of the lower hole. Operator’s Manual Victory BX510H - Page 50 of 74 - Version 2.0... - Page 51 In the raised position, insert the locking pin in the upper hole. Secure the pin with the R-shaped cotter pin for safety. STEP 5: Raise the infeed roller. Operator’s Manual Victory BX510H - Page 51 of 74 - Version 2.0...
- Page 52 Allen key bit socket fits appropriately. If not, you may strip the heads out. Remove the three nuts on the underside of the bed and take out the bed knife. Operator’s Manual Victory BX510H - Page 52 of 74 - Version 2.0...
- Page 53 40 lbs/ft torque. DO NOT over-torque the bolts; knife breakage can occur. STEP 12: Check for correct clearance and adjust again if necessary STEP 13: Operator’s Manual Victory BX510H - Page 53 of 74 - Version 2.0...
-
Page 54: Transport, Storage, And Environment
Store an unused woodchipper in a lockable indoor area, frost-free, clean, dry, non-humid, and out of the reach of children and unauthorized persons. Decommissioning and Environment 9.2.1 Decommissioning Requirements The machine is clean. Ensure that all liquid systems are empty. Operator’s Manual Victory BX510H - Page 54 of 74 - Version 2.0... -
Page 55: Environment
For the reliable operation of a tool, it is essential that wearing parts are of high quality. It is also helpful that a service organization responds to failure situations and unexpected material needs. Wear parts are permanently excluded from the warranty. Operator’s Manual Victory BX510H - Page 55 of 74 - Version 2.0... - Page 56 Wearing parts for the woodchipper: Knives Oil filter. Knives set; Flywheel knives, Bed knife, and fasteners set. Oil filter. NOTE: Always use new nuts with nylon locking when replacing knives. Operator’s Manual Victory BX510H - Page 56 of 74 - Version 2.0...
-
Page 57: Exploded View Drawings
11 EXPLODED VIEW DRAWINGS VICTORY BX510H Exploded View; All Parts Operator’s Manual Victory BX510H - Page 57 of 74 - Version 2.0... - Page 58 See Infeed Roller Expl. view Roller bracket arm components M6x1.0x12 SHCS M6x1.0x12 Socket head cap screw T4S-28 PTO Driveshaft (T4S-28” collapsed length) N.A. TM-1-44 Tachometer mounting plate Zip-2 mm Cable zip tie Operator’s Manual Victory BX510H - Page 58 of 74 - Version 2.0...
- Page 59 VICTORY BX510H Exploded View; Flywheel with Knifes Pos.: Part number: Description: M12x1.75 NYLOCK Nut M12x1.75 zinc, Nylon lock M10x1.5 NYLOCK Nut M10x1.5 Nylon lock M10 FW M10 Flat washer, zinc TM-2-4 Chipper flywheel, without knives. TMCR-12 Knife Chipper flywheel knife M10x1.50x35 FHCS FT...
- Page 60 VICTORY BX510H Exploded View; Infeed Hopper Operator’s Manual Victory BX510H - Page 60 of 74 - Version 2.0...
- Page 61 M5 Flat washer zinc RP-3.5x75 R-shaped cotter pin (3.5x75 mm OAL) M5x0.80 NYLOCK M5x0.80 Nut, Nylon lock zinc TM-3-36 Spring hook TM-3-37 Tension spring 4-30-220 TM-3-38 Pressure compensating flow control valve Operator’s Manual Victory BX510H - Page 61 of 74 - Version 2.0...
- Page 62 VICTORY BX510H Exploded View; Discharge Chute Operator’s Manual Victory BX510H - Page 62 of 74 - Version 2.0...
- Page 63 TM-4-11 Chute retainer plate-1 M6-1.0 NYLOCK M6x1.0 Nylon lock nut TM-4-13 Chute retainer plate-2 TM-4-14 Chute rotator lock lever M6-1.0x25 HHCS M6x1.0x25 Hex head cap screw GR8.8 zinc Operator’s Manual Victory BX510H - Page 63 of 74 - Version 2.0...
- Page 64 VICTORY BX510H Exploded View; Hydraulic Tank Pos.: Part number: Description: TM-5-1 Hydraulic oil tank TM-5-2 Rubber gasket TM-5-3 Tank filler-breather assembly 9500-08 Bonded seal (3/4” ID- 1-1/16” OD) WMBH-TM-2-51 Hex oil tank drain plug (M16-1.5) TM-5-6 Filter flange M22x1.5-FLT Suction filter (M22x1.50)
- Page 65 VICTORY BX510H Exploded View; Hydraulic Pump Pos.: Part number: Description: TM-6-1 Pump (Hydraulic system overview) TM-6-2 Pump outer mounting bracket TM-6-3 Rubber cushions BS-.815 Bonded seal (13/16” ID- 1-1/4” OD) 9500-08 Bonded seal (3/4” ID- 1-1/16” OD) 6400L-10-10 Fitting long (6400L-10 JIC-10 ORB)
- Page 66 VICTORY BX510H Exploded View; Infeed Roller Arm Pos.: Part number: Description: TM-7-1 Infeed roller safety shield (Left) TM-7-2 infeed roller swing arm weldment (Left) UCFL204-20 Bearing UCFLU204 (20 mm) M10x1.5 NYLOCK M10-1.5 Nut, Nylon lock M10 FW M10 Flat washer zinc M10x1.5x40 HHCS...
- Page 67 VICTORY BX510H Exploded View; Hydraulic Infeed Motor Pos.: Part number: Description: TM-8-1 Infeed roller safety shield (Right) TM-8-2 infeed roller swing arm weldment (Right) See Hydraulic syst. Expl. view Hydraulic infeed motor M12x1.75x45 HHCS FT M12x1.75x 45 Hex head cap screw GR8.8 zinc...
- Page 68 VICTORY BX510H Exploded View; Hydraulic System Operator’s Manual Victory BX510H - Page 68 of 74 - Version 2.0...
- Page 69 Bonded seal 18 mm TM-9-17 Hose -6 JIC (90 deg)-18 mm banjo (47” OAL) TM-5-1 Hydraulic oil tank (see Hydraulic tank Expl. view) TM-9-19 Pressure compensating flow control valve Operator’s Manual Victory BX510H - Page 69 of 74 - Version 2.0...
-
Page 70: Torque Specifications
Tighten all bolts to the torques specified unless otherwise noted. Check the tightness of bolts periodically, using this bolt torque chart as a guide. Replace fasteners with the same length and grade of bolt. Operator’s Manual Victory BX510H - Page 70 of 74 - Version 2.0... -
Page 71: Flywheel Knife Care
12 FLYWHEEL KNIFE CARE 12.1 How long will my Woodchipper Knives last? We get asked this question very often. Victory woodchippers are equipped with knives made from very high-quality tool steel. All woodchipper knives will be dull over time and require sharpening or replacing. -
Page 72: Victory Tractor Implements Warranty
This Warranty does not apply to any part or product that, in Victory’s judgment shall have been misused or damaged by an accident or lack of regular maintenance or care or which has been repaired or altered in a way that adversely affects its performance or reliability, or which has been used for a purpose for which the product is not designed. -
Page 73: Specifications, Features, Performance
15W40 Engine oil. Discharge chute: 270 degrees rotatable. Chute deflector: Adjustable. Input bin, hopper: Foldable for repair and storage. Hydraulic hoses: Nylon wrapped for safety. Tested: According to ISO 2006/42/EC. Operator’s Manual Victory BX510H - Page 73 of 74 - Version 2.0... - Page 74 The large opening of the infeed chute (26ʺ x 34ʺ) allows for reliable and professional wood chipping without concerns. The compact BX510H is suitable for your small to mid-sized tractors between 18 to 50 HP, utilizing your CAT I 3-Point Hitch.
Need help?
Do you have a question about the BX510H and is the answer not in the manual?
Questions and answers