Table of Contents
Advertisement
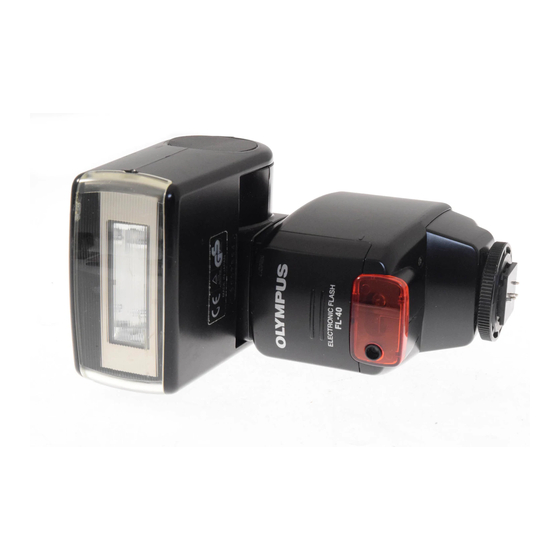
ELECTRONIC FLASH
FL-40
取扱説明書
■ このたびは、 オ リ ンパス フラ ッ シュFL-40をお買い上げいただき、 あ り がと う
ご ざいます。
■ ご使用前にこの説明書をお読み く だ さい。
Instructions
■ Before using your flash, read this maual carefully to ensure correct
use.
Instructions
■ Avant d'utiliser votre flash, veuillez lire attentivement ce manuel, de
manière à obtenir les meilleurs résultats possibles.
Bedienungsanleitung
■ Machen Sie sich bitte vor Gebrauch des Blitzgeräts mit dem Inhalt
dieser Bedienungsanleitung vertraut, damit stets eine sachgemäße
Handhabung garantiert ist.
Instrucciones
■ Antes de emplear el flash, lea este manual detalladamente para
asegurar el uso correcto.
JAPANESE
ENGLISH
FRANÇAIS
DEUTSCH
ESPANÕL
CHINESE
Advertisement
Table of Contents

Related Manuals for Olympus CAMEDIA FL-40


Summary of Contents for Olympus CAMEDIA FL-40
- Page 1 ELECTRONIC FLASH FL-40 取扱説明書 ■ このたびは、 オ リ ンパス フラ ッ シュFL-40をお買い上げいただき、 あ り がと う ご ざいます。 ■ ご使用前にこの説明書をお読み く だ さい。 Instructions ■ Before using your flash, read this maual carefully to ensure correct use. Instructions ■ Avant d’utiliser votre flash, veuillez lire attentivement ce manuel, de manière à...
- Page 2 CAUTION: TO REDUCE THE RISK OF ELECTRIC SHOCK, DO NOT REMOVE COVER (OR BACK) NO USER-SERVICEABLE PARTS INSIDE REFER SERVICING TO QUALIFIED OLYMPUS SERVICE PERSONNEL The lightning flash with the arrowhead symbol, within an equilateral triangle, is intended to alert the user to the presence of uninsulated “dangerous voltage“...
- Page 3 b) If the product has been exposed to rain or water. c) If the product does not operate normally by following the operating instructions. Adjust only those controls that are covered by the operating instructions as an improper adjustment of other controls may result in damage and will often require extensive work by a qualified technician to restore the product to its normal operation.
- Page 4 FOR SAFE USE Thank you for purchasing the Olympus external flash for digital still camera. Before you start to use your new flash, please read these instructions carefully to obtain optimum performance and a longer service life from the unit.
- Page 5 CAREFULLY TO AVOID BEING BURNED. CONTACT YOUR NEAREST OLYMPUS SERVICE CENTER IMMEDIATELY. THIS PRODUCT IS SPECIFICALLY DESIGNED FOR CAMERAS MANUFACTURED BY OLYMPUS. IF THE FLASH IS MOUNTED ON CAMERAS MADE BY MANUFACTURERS OTHER THAN OLYMPUS, THE CAMERA AND THE FLASH WOULDN'T WORK OR, AT THE WORST , WOULD BE DAMAGED.
- Page 6 Do not touch the flash when it is hot. BATTERY HANDLING This flash uses four AA alkaline batteries, AA nickel metal hydride batteries or AA NiCd batteries. (Olympus brand AA nickel metal hydride batteries are recommended.) Do not use AA manganese batteries or AA lithium batteries. Besides shortening battery life, manganese batteries may overheat and damage the camera.
-
Page 7: Table Of Contents
CONTENTS IMPORTANT SAFETY INSTRUCTIONS ... 5 Check the Contents of the Carton ... 47 Names of Parts ... 48 Names of Control panel ... 49 Loading Batteries ... 49 Turn the Power ON to Check the Battery ... 50 Turn the Power OFF after Checking the Battery ... 50 Mounting the Flash on the Camera ... -
Page 8: Names Of Parts
Names of Parts Photoelectric sensor window Mounting foot Control panel GNo/ISO up/down buttons FNo up/down buttons ON/OFF switch BACKLIGHT button : This button turns the control panel's backlight ON/OFF, so it can be seen in dark places. CHARGED lamp / TEST button : As a test button, this button lets you fire the flash at any time, not just when taking pictures. -
Page 9: Names Of Control Panel
Names of Control panel 2nd - CURTAIN SYNCLO Guide No./ISO MEMO • Slide the ON/OFF switch to Onside with the BACKLIGHT button held down to switch the unit of focal range between m and ft. Loading Batteries Batteries must be loaded into the flash before the flash can be mounted on the camera. -
Page 10: Turn The Power On To Check The Battery
Turn the Power ON to Check the Battery Load batteries into the flash before attempting to turn the power ON. As soon as power is turned ON, the flash automatically performs a battery check and starts charging the flash. Set the ON/OFF switch to the ON side. Check that the CHARGED lamp is lit. -
Page 11: Mounting The Flash On The Camera
Mounting the Flash on the Camera Before mounting the flash on the camera, turn OFF power to both the flash and the camera. They can be damaged if the flash is mounted when they are turned ON. The flash can be mounted as follows. Make sure the flash head is folded downward with the flashtube facing forward. -
Page 12: Detaching The Flash From The Camera
Detaching the Flash from the Camera Before detaching the flash from the camera, turn OFF power to both the flash and the camera. It can cause serious damage. Turn the mounting foot in the opposite direction of "<–LOCK" until it turns no more. -
Page 13: Taking Pictures In The Camera's P, A Or S Shooting Modes
Taking Pictures in the Camera's P, A or S Shooting Modes The camera has three shooting modes in the P (program) mode, A (aperture) mode and S (shutter) mode. You can take pictures in any of these modes using this flash instead of the camera's built-in flash. Check that the camera's built-in flash is stowed away (OFF). -
Page 14: Bouncing Light
Taking Pictures with Both the FL-40 and the Camera's Built-in Flash Pictures can be taken using both the FL-40 and the camera's built-in flash. This technique is a good way to improve lighting. For example, you can use this flash to bounce light off an object while using the built-in flash to catch the subject's pupils. - Page 15 Check that the CHARGED lamp is lit. If the CHARGED lamp is out, the flash is not yet fully charged for firing. Press the shutter release button down all the way. MEMO • The best recommended angle for bouncing light is 60˚. •...
-
Page 16: Flash Synchronization
Flash Synchronization When taking a flash-lit picture of people against a nightscape, it is likely that the background comes out underexposed. Even dark backgrounds can be illuminated by using flash synchronization. Set the camera's mode dial to "S (Shutter speed)" or "M (Manual)", and the shutter to a slow speed. -
Page 17: 2Nd Curtain Synchronization
2nd Curtain Synchronization In 2nd curtain synchronization, the flash is fired at the end of a slow shutter. If done - for example - when taking a picture of a moving vehicle, the lights from the tail lamps are drawn behind the car. Set the camera to the 2nd curtain synchronization mode. -
Page 18: Taking Pictures In The Manual Flash Mode
Taking Pictures in the MANUAL Flash Mode You can take flash-lit pictures at a shutter speed and aperture you set yourself. Set the camera's mode dial to "M (Manual)". Press the flash's MODE button until "MANUAL" appears on the flash's control panel. Check the focal distance at the best exposure is displayed on the flash's control panel. -
Page 19: Taking Pictures With Digital Cameras Without Communication Capabilities
Taking Pictures with Digital Cameras without Communication Capabilities The regular AUTO and MANUAL flash modes can be used with digital cameras which are not capable of data communications. Taking Pictures in the Regular AUTO Flash Mode Exposure can be set automatically by inputting the sensitivity of CCD (digital camera) and lens F-No. -
Page 20: Taking Pictures In The Manual Flash Mode
Taking Pictures in the MANUAL Flash Mode You can manually set the illumination for your pictures. Press the flash's MODE button until "MANUAL" appears on the flash's control panel. Set the illumination from the GNO/ISO up/down buttons. Setting is possible in 1/4 EV steps. Setting Illuminating Angle Manually The illuminating angle of the flash can be set manually. -
Page 21: Wide Panel
Wide Panel The flash can be dispersed across a wider-than-usual angle by mounting the wide panel on the flash and setting up the flash as follows. It covers a field angle of 21 mm lens. Illuminating angle: 70 vertical, 86 horizontal (Converted into 35 mm film camera angle). -
Page 22: Focal Distance And Aperture In The Manual Flash Mode
Focal Distance and Aperture in the MANUAL Flash Mode CCD Sensitivity W / T G No. WIDE PANEL* WIDE TELE WIDE PANEL* WIDE TELE Aperture = GN x CCD Sensitivity *With the bundled Wide Panel Available Combinations of CCD Sensitivity and Aperture CCD Sensitivity ○:... -
Page 23: Q & A
Q & A Can I take pictures using other external flashes together with this flash? No. The best you can do is dual flash photography with this flash and the camera's built-in flash. When is the auto check feature (TEST button) useful? When using bounced lighting or a flash converter. -
Page 24: Specifications
Specifications Type Extension flash for digital still cameras Guide numbers Set automatically as follows. TELE zoom: 40 WIDE zoom: 26 In wide-angle flash: 18 Illumination angle Set automatically as follows. WIDE zoom: 58˚ vertical, 70˚ horizontal TELE zoom: 28˚ vertical, 34˚ horizontal In wide panel: 70˚... - Page 25 San-Ei Building, 22-2, Nishi Shinjuku 1-chome, Shinjuku-ku, Tokyo, Japan. Tel. 03-3340-2026 Two Corporate Center Drive, Melville, NY 11747-3157, U.S.A. Tel. 516-844-5000 OLYMPUS OPTICAL CO. (EUROPA) GMBH. (Premises/Goods delivery) Wendenstraße 14-16, 20097 Hamburg, Germany. Tel. 040-237730 (Letters) Postfach 10 49 08, 20034 Hamburg, Germany.
Need help?
Do you have a question about the CAMEDIA FL-40 and is the answer not in the manual?
Questions and answers