Table of Contents
Advertisement
Quick Links
Advertisement
Table of Contents

Related Manuals for Teradek MDR-X


Summary of Contents for Teradek MDR-X
- Page 1 MDR-X Quick Start Guide...
- Page 2 TABLE OF CONTENTS Physical Properties ......2 Power and Connect ......3 Pair MDR-X and Controller ....3 Camera Run/Stop ......... 4 AUX Port Modes ........5 MDR-X Menu Operation ...... 6 MDR-X Status LEDs ......6...
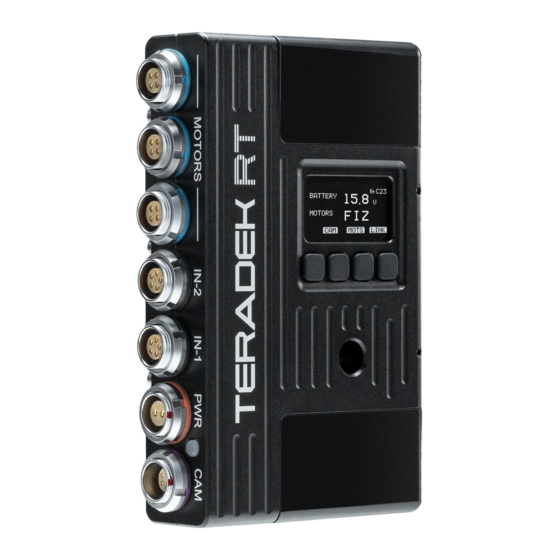
- Page 3 Menu buttons COMPATIBLE DEVICES To take advantage of the features and functionality that MDR-X has to offer, you will need to pair the receiver with a compatible Teradek RT controller and configure up to three Teradek RT motors. MK 3.1...
- Page 4 Navigate to WIRELESS>FIND RECV to scan for active receivers and automatically pair. The LED on the controller and receiver will turn green once paired. Wireless Pairing via MDR-X Press the MENU button on MDR-X, then navigate to WIRELESS>CHANNEL. Select the same channel number as the controller to begin pairing.
- Page 5 NOTE: If using a RED camera, the camera serial communication setting must be set to RCP (Redlink Command Protocol) for the unit to operate. Connect a camera cable from the CAM port on the MDR-X to the camera, then navigate to MENU>CAMERA to indicate which camera you have connected.
- Page 6 Navigate to RX CONFIG, and select the corresponding mode for the device (Wired, Knob, or Rocker). MDR-X STATUS LEDS The MDR-X’s status LED indicates when the system is ON and provides the system’s current status during operation. • OFF - Unit is powered off •...
- Page 7 (MODE) or class (AXIS) to the receiver’s auxiliary port(s) Teradek regularly releases new firmware versions to improve performance, add new features, or to fix vulnerabilities. Visit https://www.teradek.com to update your device with the latest firmware. NEED MORE HELP? SUPPORT: http://support.teradek.com →...
- Page 8 © 2019 Teradek, LLC. All rights reserved. v 1.0...
Need help?
Do you have a question about the MDR-X and is the answer not in the manual?
Questions and answers