ADJ FOG FURY JETT PRO User Manual
Hide thumbs
Also See for FOG FURY JETT PRO:
- User instructions (7 pages) ,
- User instructions (12 pages)
Table of Contents
Advertisement
Advertisement
Table of Contents

Related Manuals for ADJ FOG FURY JETT PRO


Summary of Contents for ADJ FOG FURY JETT PRO
- Page 1 FOG FURY JETT FOG FURY JETT User Manual Rev 03/23/2022...
- Page 2 Products, LLC brands and product names are trademarks or registered trademarks of their respective companies. ADJ Products, LLC and all affiliated companies hereby disclaim any and all liabilities for property, equipment, building, and electrical damages, injuries to any persons, and direct or indirect economic...
- Page 3 Congratulations, you have just purchased one of the most reliable fog machines on the market today! The Fog Fury Jett Pro commercial fog machine has been designed to perform reliably for years when the guidelines in this booklet are followed. Please read and understand the instructions in this manual carefully and thoroughly before attempting to operate this unit.
-
Page 4: Safety Precautions
SAFETY PRECAUTIONS • Be sure to save the packing carton in the unlikely event that the unit needs to be shipped back for service. • Do not spill water or other liquids into or on to your device. • Be sure that all the fog fluid is kept inside the fluid reservoir. •... - Page 5 DMX INFORMATION Power Supply: Before plugging your unit in, check that the voltage of the power outlet matches the required voltage for your device, which is available in a 120-V and 230-V versions. Because line volt- age may vary from venue to venue, you should be sure your unit voltage matches the wall outlet volt- age before attempting to operate you fixture.
-
Page 6: Dmx Setup
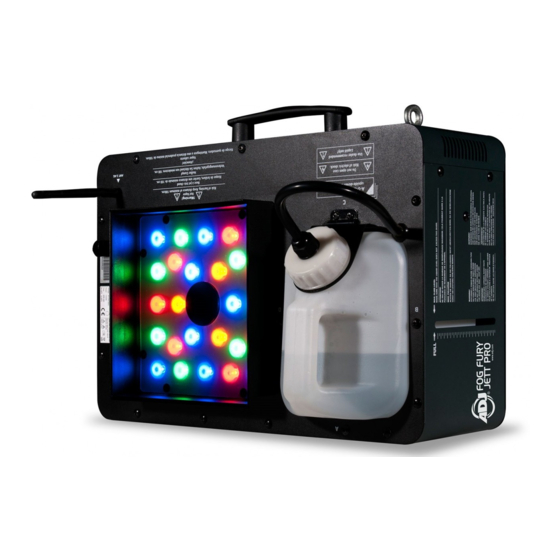
XLR connector of the last unit in your daisy chain to terminate the line. Using a cable terminator (ADJ part number Z-DMX/T) will decrease the chances of erratic behavior. 5-Pin XLR DMX Connectors. Some manufacturers use 5-pin DMX-512 data cables for DATA trans- mission in place of 3-pin. - Page 7 OVERVIEW 8.8.8.8. MENU ENTER A. 28 LEDs N. DMX 3 pin XLR Output B. Handle O. Control Socket Connection C. Fog Fluid Tank P. Electric Power Cord D. Tank Fixed Ring Q. Breaker E. Safety Loop R. Visible Fog Fluid Level Indicator F.
- Page 8 2. Be sure to remove all the packing material, paying special attention to the area around the nozzle. 3. Set the fog machine on a flat dry surface and fill the fog fluid reservoir with ADJ brand fog juice. Place the feeder tube with the filler deep inside the reservoir and tighten the cap.
-
Page 9: System Menu
SYSTEM MENU LoFF No light rnd2 Random LED color macro 2 Enter CH. A r nd1 Random LED color macro 1 cL.29 4 LED color macro 2 9 When in any color Up/Down ● ● ● submenu, after 4 cL.01 LED color macro 1 seconds of no operation, CH.A, CH.b, CH.c,... - Page 10 SYSTEM MENU dX - DMX Address Setting. 1. Press the MENU button until “dX” is displayed. “X” represents the currently selected DMX chan- nel mode. There are 5 selectable DMX channel modes. See the DMX Traits section of this man- ual for detailed information.
-
Page 11: Dmx Mode
DMX MODE Operating through a DMX controller gives the user the freedom to create custom programs tailored to their own individual needs. This unit has 5 DMX channel modes: 1, 2, 3, 7, & 9 channel modes. Please refer to the DMX Traits section of this manual for detailed information. This function will allow you to control the fixture’s individual traits with a standard DMX 512 controller. -
Page 12: Wireless Remote Operation
2. Set the Wireless address using the dip switches on the rear of the the unit. The address must match the address set on the WiFly Transceiver. 3. Apply power to the ADJ WiFly Transceiver. Please note that the fixture must be set up first before power is applied to the WiFly Transceiver. -
Page 13: Dmx Traits
DMX TRAITS CHANNEL FUNCTION VALUES Fog and Random Color Change 000 - 031 032 - 255 Max Fog and Random Color Change 000 - 031 032 - 255 Max Fog Color Macros, see Color Macros Chart section of this 000 - 255 manual Red, 0% to 100% 000 - 255... - Page 14 COLOR MACROS CHART RGBA COLOR INTENSITY COLOR NO. DMX VALUES GREEN1 BLUE AMBER GREEN2 000 - 007 CL.01 008 - 015 CL.02 016 - 023 CL.03 024 - 031 CL.04 032 - 039 CL.05 040 - 047 CL.06 048 - 055 CL.07 056 - 063 CL.08...
-
Page 15: Truss Mounting
TRUSS MOUNTING The unit can be mounted in three different orientations: right side up on the floor, sideways with the handle facing up, or suspended upside down from trussing. When suspending the machine upside down, the tank should be removed and switched to the bot- tom of the unit so that the tank will remain upright. - Page 16 TRUSS MOUNTING C-clamp Safety Cable Safety Cable 比例 1.000 Screw two clamps rated for 15-kg rated or more to the bottom of the unit using an M10 screw. The clamp holes are located on each side of the unit. Attach the eyehole screw to the side of the base and pull the safety-cable through the eyehole screw and over the trussing system or a safe fixation spot.
- Page 17 TRUSS MOUNTING HANDLE ORIENTED UPWARDS Screw two clamps rated for 15-kg rated or more to the bottom of the unit using an M10 screw. The clamp holes are located on each side of the unit. Attach the eyehole screw to the side of the base and pull the safety-cable through the eyehole screw and over the trussing system or a safe fixation spot.
-
Page 18: Warranty Registration
Check the fluid level, the external fuse, and remote connection, and be sure the wall outlet is sending power. If all of these factors do not appear to be the cause of the problem, then the unit will likely require service. Please contact ADJ Products, LLC. -
Page 19: Warranty
WARRANTY A. ADJ Products, LLC hereby warrants, to the original purchaser, ADJ Products, LLC products to be free of manufacturing defects in material and workmanship for a prescribed period from the date of purchase (see specific warranty period on reverse). This warranty shall be valid only if the product is purchased within the United States of America, including possessions and territories. -
Page 20: Specifications
SPECIFICATIONS Model: Fog Fury Jett Pro Voltage*: 120V or 230V, 50/60Hz LEDs: 28 x 3-Watt LEDs (6 red, 7 green, 6 blue, 3 amber, 6 UV) Heater: 1450W Power Consumption: 1550W Weight: 21 Lbs / 9.5 Kgs Dimensions: 16.5” x 12.5” x 8”...
Need help?
Do you have a question about the FOG FURY JETT PRO and is the answer not in the manual?
Questions and answers