Advertisement
Quick Links
Advertisement

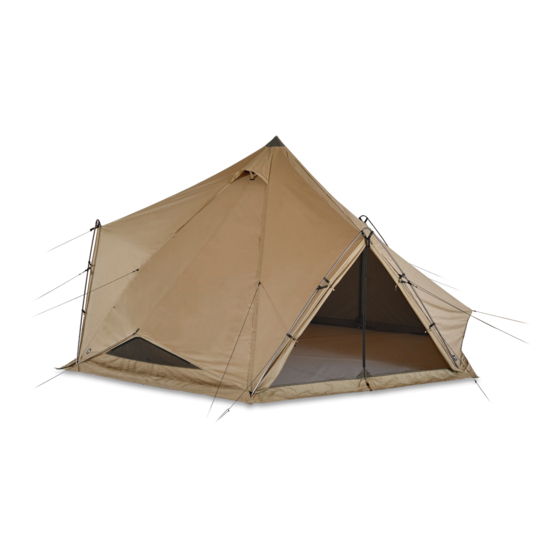
Summary of Contents for ZANE ARTS ZEKU-L
- Page 1 P S - 0 0 4 / Z E K U - L M A N U A L - V e r 2 . 0 1...
- Page 2 ■ ITEMS INCLUDED Please check the contents of the set before fully opening the tent. If you find something missing, please contact the store where you purchased it or us directly. Extension frame Living sheet ×1 × 3 Tent body ×1 Center pole ×1 Carry bag ×1 Pole case ×1...
- Page 3 ■ ABOUT THIS PRODUCT Please take some time to understand the characteristics of this product before using it. Pegs not include Pegs not include, please prepare the following recommended pegs and the required number of pegs in advance. 【 Recommend Required Number 】...
- Page 4 Waterproofing performance is reduced The surface is treated with silicone water repellent, but after use, the water repellent performance will deteriorate and rain will eventually penetrate the fabric. Please note that the water repellency cannot be maintained long term. Waterproof performance of the back side is not affected, so even if water repellency deteriorates, there is no issue using it as it is.
- Page 5 Use of a wood stove is absolutely prohibited. Chemically treated fibers are used in the fabric of this product. Chemically treated fibers may liquefy when burned, the liquefied fabric may stick to skin and cause serious burns. Never bring fire close to tents, shelters or tarps.
- Page 6 ■ PRECAUTIONS FOR SETUP AND USE Be sure to read and understand the following contents before use to prevent harm to the user and others, and damage to property. INDICATES CONTENT THAT MAY RESULT IN DEATH OR SERIOUS INJURY. DANGER ● ...
- Page 7 INDICATES CONTENT THAT MAY CAUSE INJURIES OR PROPERTY DAMAGE. WARNING ● Not for permanent use. If this product is set up permanently, it will deteriorate and be damaged in a short period of time due to the effects of ultraviolet rays and other elements. ●...
- Page 8 ● When extending poles or frames, make sure each section is inserted securely. Assembling the product incorrectly can lead to damage. ● When handling poles or frames, be careful not to hit or damage something around you and pay attention to your surroundings.
- Page 9 ■ PRECAUTIONS FOR TEARDOWN AND AFTER USE CARE Be sure to read and understand the following contents before use to prevent harm to the user and others, and damage to property. INDICATES CONTENT THAT MAY CAUSE MINOR INJURIES OR PROPERTY DAMAGE. WARNING ●...
- Page 10 ● When folding a frame or pole with a built-in cord (cord), begin folding from the center, this will reduce the wear on the bungee cord by not applying extra tension to the cord. ● After use, clean the fabric and allow it to dry thoroughly before storing.
- Page 11 ■ SETUP PROCEDURES Set up according to the numerical order. 【 Prepare in Advance 】 ※ Ready Pegs and Hammer Recommend TO-518 / GRART STAKE 18 × 3 Required number TO-528 / GRART STAKE 28 × 18 ※ Close all zippers Drive base pegs into the ground and insert the...
- Page 12 1 DRIVE BASE PEGS INTO THE GROUND AND INSERT THE CENTER POLE. A : Make a rectangle by driving four Pegs (GRART STAKE 28) through gray ropes in the corners attached to the gray building tape (webbing). ※ Due to manufacturing, the position between the main unit and the building tape (webbing) may not match the figure.
- Page 13 2 DRIVE BASE PEGS INTO THE GROUND AND INSERT THE CENTER POLE. B: Stand the center pole in the room and push up into the apex. C: Drive Y-Pegs into the remaining two corners to complete the hexagon. Peg (GRART STAKE 28) 45˚...
- Page 14 INSTALLATION OF EXTENSION FRAME A: Insert corner clip into the frame. B: Attach the upper buckle (2 places). C: Attach hooks (4 places). ※ There are 3 places to install the extension frame. CAUTION! Two upper buckles are fixed to the thick part of the frame Fixed Adjustment Hook ×...
- Page 15 DRIVE PEGS AND ATTACH ROPES A: Install 3.5m ropes (15 places). Rope setting B: Install 2.5m ropes (9 places). Mounting loop E: Drive the Pegs (GRART STAKE 28) into ground (12 locations). F: Drive the Pegs (GRART STAKE 18) into ground (3 locations). Tensioner Drive pegs Drive pegs into...
- Page 16 INSTALLATION OF LIVING SHEET The logo is the reference point Fix the 4 corners Reinforced part Fix the remaining corner Pole A: Slide the end of the pole diagonally B : Pull the sheet out C : Place the end of the pole on reinforced part of the living sheet.
- Page 17 ■ WARRANTY AND REPAIR If you find any defects in the product, please contact the store where you purchased it or us directly. We will replace or repair any item found to have a manufacturing defect free of charge. We will repair products with damage caused by wear and aging at a reasonable price.


Need help?
Do you have a question about the ZEKU-L and is the answer not in the manual?
Questions and answers